Contour wood carving, being a type of geometric carving, requires some experience. Without habit, it is difficult to cut absolutely straight lines without nicks and chips. A not very complex technique is combined with maximum detail, resulting in beautiful carved products.
Example of contour wood carving
Wood carving is the act of cutting and trimming wood material. As a result, ready-made contour drawings emerge from under the carver’s knife. The outlines of objects, landscape compositions, and flower collages are embodied mainly in wooden panels.
How is the process of working with wood carried out? How do you get beautiful pictures? All work on a piece of wood, which later becomes a work of art, can be divided into stages:
- Initially, select an image.
- The drawing is translated into .
- They make it from a stencil.
- Wood carving is carried out.
- The finished panel is sanded, polished, and varnished.
Wood carving requires special skill, the sketches of which involve the execution of a complex pattern.
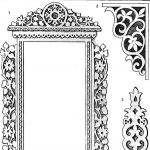
 A selection of sketches for contour wood carving
 Each drawn line must be smooth and clear. For drawings in a particular case, the master decides how deep the lines should be cut. The expressiveness of the image on the tree depends on this.
Using the technique of contour wood carving, boxes, crosses and other products are made where it is necessary to reproduce the outlines of flowers, animals, and people. The work is carried out both on natural wood and on tinted wood, as well as on plywood.
Operating technique
Wood carving techniques are divided into cutting lines and curls. The lines are first cut, then trimmed. In this case, a special sharp knife is used - a joint. The knife blade should be positioned towards the work at a slight angle from a vertical position. This is how the cutting is done.
Read also
How to make wood carving with your own hands
 Example of contour carving technique
 Then the tilt is made in the opposite direction. The cut part of the tree is trimmed. When cutting contour grooves, the jamb is clamped in a fist, and the movement of the blade is directed with the other hand. During the pruning process, it is important that even strips of wood emerge from under the knife. If you end up with sawdust, uneven stripes, there won’t be beautiful lines.
Wood carving for the purpose of cutting out curls and rounded lines involves the use of various chisels. But experienced craftsmen can cut sinuous contour patterns using only one joint.
The technique for cutting curls and small circles is as follows.
 Wood carving technique
 The chisel is held in the fist, making a slight tilt towards the center of the circle. The blade is deepened into the wood a few centimeters, after which the board is turned in a circle along the axis. Then they make the cut. Rotation along the axis with cutting off the cut piece of wood is also carried out. Then the radius is increased if necessary.
Flat and rounded chisels are used for wood carving. An experienced craftsman, knowing the purpose of each, can cut out the most intricate patterns. The pinnacle of craftsmanship is contour carving with a pillow. The resulting pattern in the center looks as if raised above the rest of it. In reality, only the depth of the grooves differs. It can be made larger in the center, smaller at the edges.
Wooden patterns on plywood
Carving on plywood is somewhat different from carving on wood. Working with the material involves performing several techniques. These include:
- performing contour cutting;
- carving;
- openwork carving;
- combined thread.
Using the sawing method, outline images of animals, human figures, and flowers are cut out. As a result, a convex image is formed on a flat background. Contour carving involves cutting out complex designs by cutting and trimming. The result is an exquisite relief pattern.
Openwork carving involves cutting through the details of the design. The pattern made using this technique is the most labor-intensive and beautiful. The product resembles airy lace. Combined contour carving combines 2 or more techniques at once.
Artistic wood carving always looks very impressive. Most people have no idea how such products can be made. It seems that this requires enormous physical strength, and in addition, artistic taste and education. However, cutting out a beautiful ornament is not as difficult as it seems, you just need to learn a little technique and, as they say, get better at it. We will show popular drawings for learning wood carving techniques that will be useful for beginners and masters!
It's no secret that for manual creative work it is necessary not only to master the skills of this art, but also to have inspiration, desire and, of course, time. In order for all these parameters to come together, the master can use drawings to study simple wood carving. Not only drawings help to generate an idea, but also photographs of the work of other craftsmen.
There are sketches for different types of wood carving, and here you can find a suitable sketch for yourself completely free of charge.
We analyze drawings for wood carving: sketches for geometry
Drawings for geometric carving are well suited for beginning craftsmen. This is an easy and effective type of wood carving. To do this, you just need to determine for yourself which areas are convex and which are concave, in which case the correct picture on the tree will come out.
Boards in geometric and flat-relief techniques.
Stencil.

Stencils can be changed - for example, reducing the number of elements, or, conversely, adding details for a more interesting result.
Stencils for slotted carving.There are other types of artistic carving. One of the simple cutting techniques, provided you have the right tool, such as a router, is slotting. It is also called openwork because the finished product, made precisely and accurately, looks like lace. It has no background - it is cut out of the pattern. Hence the name. To practice this type of wood carving, you need to have a steady hand and cut clearly along the contour of the stencil. A contrasting color of fabric or foil is placed under a product made using this technique with a router or jigsaw. The photo shows examples of finished work, as well as sketches suitable for this technique.

Contour carving is different in that a contour pattern is cut out on the wood. You can make a lot of different paintings using this technique; it is not necessary to take a ready-made stencil for carving. To decorate a nursery, you can outline the coloring book and use it as a sketch. Also, if you don’t know how to draw, you can take any sketch made in pencil and transfer it to wood. This technique produces good images of animals, birds, as well as landscapes and still lifes. The images clearly show examples of what can be carved on wood using this technique.

Black varnish carving is a type of contour carving, where a light contour is cut out on painted wood.
Examples and stencils for flat-relief wood carving.This type is different in that the drawing is above the background. In this case, the pattern has the same height. The background can be textured or smooth. The edges of the cut out pattern are usually rolled over, that is, it is carefully sanded so that they are smooth, as if oval. This technique requires a little more skill than others, but the products made this way look amazing. The photo shows examples and sketches for carving in this style.

Drawings for boxes can be distinguished as a special type. They can be made using various techniques: slotted carving, placing a base of fabric, foil or noble types of wood of a suitable color under the design; flat carving, which includes geometric and contour, or another subspecies. It differs in that indentations of the same depth are made in a flat background. In the case of geometric techniques, the recesses, as a rule, have the shape of triangles or quadrangles. In addition, there is also a staple carving, which is also a type of flat carving and is well suited for decorating boxes. In the images you can see boxes made in various styles.
You can make so many decorative items and useful little things from carved wood and plywood that it is stupid to limit the scope of the work. In fact, it can be absolutely anything that your imagination can handle: boxes, covers for decorative and collectible books, lampshades, panels, shutters, furniture elements, trim, cornices... But the most attractive thing about creating exclusive works is that anyone can do them willing, if he puts in a certain amount of effort.
Wood carving: photographs, drawings and sketches
The main key to success in creating interesting things with slotted carvings is the choice of pattern. It is he who conveys the overall concept and sets the aesthetic tone for the entire product.
The easiest way for beginners is to make geometric patterns, as in the photo.


Carved designs of floral and animal themes are classic ornaments for any field of application.


Inscriptions are a modern version of the use of wood and plywood carvings. At the same time, you are unlikely to be able to find drawings and sketches on the Internet - they will have to be compiled purely individually according to personal requirements for sizes, fonts, and words.

Stencils for slotted threads
However, unlike cut-out inscriptions on plywood, drawings with plant, animal and fantasy themes can be found on the Internet. So feel free to choose the stencils you like for your album, and you’ll have plenty of ideas for creativity for a long time!
The simplest sketches are suitable both for training at the very beginning of product manufacturing, and can become individual elements of a complex design. For example, this is how carved houses are decorated.


More complex templates will require some skill and patience, but the results are worth it. Such pictures can serve as an independent product, even as a gift.


Entire compositions with an idea and meaning usually serve either as a separate work or form the basis of a work.


Tools for slotted carving: jigsaw or router
However, choosing a design is only a third of the success. Another important aspect that must be considered before starting the work itself. Namely, the choice of tool that will be used to carve wood or plywood.
Depends on the equipment:
- how thin the thread will be;
- complexity of pictures;
- cutting speed;
- accuracy of work.
Therefore, it is important to evaluate all the pros, cons, capabilities and limitations of each of the traditional sawing tools:
A jigsaw is a device for shaped cutting of parts. Working with a hand tool is quite labor-intensive, but it allows you to cut very accurately according to the drawing. Power tools allow you to quickly produce shaped plywood products, but require caution.

A milling cutter is a tool thanks to which flat-relief slotted threads acquire a thinner and more complete appearance. It is with its help that you can round edges, remove chips, make valances, and carry out the most complex cutting.

Theoretically, a milling cutter can do the same work as a jigsaw, and even more, but in fact, such handling of the tool is fraught with its rapid failure and frequent replacement of the frieze.
Materials for slotting threads
In most cases, plywood is chosen for this type of work - it is uniformly thin, has a pleasant color and structure, and does not suffer from further use or storage, unlike solid wood. It is the choice of material that becomes the third pillar of successful work.
The modern market is replete with different types of materials, so it’s easy to get confused. For this work you should choose:
- FC plywood - harmless to humans and the environment, durable, easy to cut, practical;
- FB plywood is also safe for humans, but resistant to aggressive environments, since it undergoes special processing and receives a protective coating, which is why it can cost an order of magnitude more.
Note! Under no circumstances choose FSF class plywood for interior work - it is treated with carcinogenic preservatives and is only suitable for use outdoors - they are excellent for lining a bathhouse or a house outside.
Photos of carved wooden houses
For Russia, slotted carving is of particular importance as a decoration for building facades. Since ancient times, ornaments carved on birch bark and other similar materials have been decorating huts, bathhouses, and churches, as photographs colorfully demonstrate.


Video of wood milling with a hand router
If you have just decided to try your hand at curly slotted carving, it would be a good idea to watch a video with a master class. It will help you better understand how drawings are created and how such home beauty appears.
Making an icon case
05.02.2019, 09:14
Making a table of contents with wood carvings for an icon case
In a similar way, the table of contents (top) for the icon cases in the photo below were made.
To enlarge the image, click on it with the mouse.
First, a sketch of the table of contents in real size is drawn on paper, in accordance with the size and proportions of the future icon case. It is determined where the wood carving will be located, and the sketch of the carving itself is first drawn.
Then the drawing is transferred to a sheet of fiberboard or plywood and carefully, as accurately as possible, cut out with a jigsaw at low speed, without turning on the pendulum stroke. Fine tooth file (I use BOCH T101 AO or Gepard T101 AO files)
Thus, we made a template according to which, using a router, we will make the very top (crown, table of contents) of the icon case.
In the photo below there are two ready-made templates: the first from fiberboard is the table of contents wall, the background on which the wood carving will be attached. The second plywood template is the cornice, the arched frieze of the icon case, it will be made of wood.
All bends, curves, and template lines are carefully sanded with sandpaper. The appearance of the finished table of contents of the icon case in the future depends on how symmetrical, even and neat our template will be.
The following photos are a template for the lower and upper parts of the icon case
We place the fiberboard template on a sheet of plywood and trace it with a pencil.
After this, we cut out with a jigsaw close to the drawn line, but without touching the line itself.
We screw the template into the plywood blank.
Using a router and a straight copy cutter with a bearing, we go around the workpiece along the contour.
The bearing on the cutter moves along the edge of the template, and the cutter removes excess material from the workpiece.
In this case, the workpiece exactly copies the profile of the template.
We also outline the arched cornice with a pencil on a wooden board.
Cut with a jigsaw, roughly, without touching the line.
We attach the template to the workpiece and repeat the previous operations.
We attach the template using self-tapping screws to the back side of the part, not to the front side - so that no traces of the self-tapping screws are visible on the finished element.
Although if you make a mistake, putty will help.
We repeat the same thing when making an element for the lower part of the icon case.
Using an edge molding cutter, select the desired profile from the front side of the cornice.
Then select a shallow (5-8mm) groove inside the cornice.
We connect the cornice with the wall of the table of contents.
You can immediately glue two parts together and then paint them together, but I find it more convenient to varnish and tint these two elements separately.
View from the front and back.
Sketch, wood carving template
Overhead thread for icon case
25.01.2019, 06:50
Making carved decor for the table of contents of a floor icon case.
The top (or table of contents, crown) of the floor icon case is an arch with applied wood carvings.
Inside the arch there will be an Orthodox eight-pointed cross with carved decor.
First, we draw the arch itself on a scale of 1:1 and then the cross around which our wood carving will be placed.
Initially, the sketch is drawn “by hand”; the accuracy of the lines and the smoothness of the curves do not play a significant role at this stage. The main thing is to arrange the pattern evenly around the cross, observing the general proportions, to create a logical and complete design of the floral ornament.
After that, using patterns, we align the hand-drawn lines, achieving smooth transitions, roundness of curls, and adding small details to the sketch.
We draw, as usual, only one left part of the pattern - the right one will be strictly symmetrical to it.
In order to understand what the finished carving will look like, you can attach a mirror along the vertical line (running along the cross). The right side of the carving sketch will be reflected in the mirror, that is, the entire pattern as a whole will become visible to us.
With a pencil I shade out those parts of the sketch that will be cut with straight chisels. Unshaded areas - semicircular incisors.
Some craftsmen cut out the sketch and glue it onto a piece of wood. Then, along the lines of the sketch, using a jigsaw, unnecessary parts of the pattern are removed and cut with cutters directly on the paper and on the workpiece at the same time.
With this method, the sketch template is not saved, and if you later need to make exactly the same decor, you have to re-create the drawing.
I do it differently: I laminate the sketch drawing with simple transparent tape on both sides. I then carefully cut it out using the cutters to create a carving template that can be used over and over again. You can call it a stencil.
I attach the template to the workpiece and trace it with a sharpened pencil or pen. Using a jigsaw, I remove everything unnecessary and get a blank for carving. Externally, this is a house slotted carving, but we still have to work on itcutters and chisels. In order for me to understand where, what and with what to cut, I transfer the sketch drawing onto the wooden part. Also with the help of patterns.
After processing with cutters, the finished decor is manually sanded with fine sandpaper.
We use sandpaper to remove scorch marks from the jigsaw file, and smooth out uneven surfaces after work with chisels.
By turning the thread over, you can trim the reverse side of the pattern with cutters in some places. In this way we will, as it were, lift and separate our carved decor from the background to which it will be attached.
In the following photos, the wood carving is coated with clear varnish.
The wooden board for the workpiece was glued from different plots - this can be seen from the different colors of the boards. In this case, this is not important - the finished carved decor will be painted with gold paint.
The varnish acts as a primer and several coats will give a smooth surface before coating with gold.
Wood carving on the icon case painted “gold”.
Floor-standing icon case with wood carvings
Wood carving, sketches, photos
14.09.2018, 04:29
Transferring a wood carving sketch onto a linden board using a template
If the overhead thread is symmetrical in the horizontal or vertical plane, then only half of the sketch (template) is drawn
"Spruce and Drill" - handmade wood carving workshop in Belarus
Decorative panel, for church furniture
12.09.2018, 06:50
We make panels only from wood: ash, oak, birch, alder. Most often, of course, from linden.
If necessary, we will do the finishing: tinting with stain or stain, varnishing.
All wood carvings are carved only by hand.
A drawing, sketch, sketch of a carved ornament is discussed in advance. As are the sizes.
Carved panels can be used as overlay wood carvings for church furniture, for example, for a floor icon case or a church iconostasis.
Carved panel for a wooden altar
08.09.2018, 07:57
Hand-carved decorative wood panel
At the first stage of work on the panel, a wooden panel made from identical linden slats (lamellas) is glued together.
A sketch for wood carving is marked on the shield and all unnecessary parts of the ornament are removed using an electric jigsaw. The result is a slotted or through saw thread.
A decorative panel can become an element of a furniture facade
In our case, wood carvings (carved panels) were made for the door of a wooden altar in an Orthodox church.
You can order production from us and buy an altar with a canopy, in the form of a floor-standing icon case.
06.09.2018, 07:36
Wood carving - from sketch to finished product
Creating a sketch or drawing is the first step in making carved decor.
The sketch is drawn on a scale of 1:1.
This takes into account not only the external, aesthetic appearance of the future product, but also the capabilities of the carver, his skill, the availability of the necessary cutters, the complexity and size of the carved decor.
To enlarge the picture, click on it with the mouse.
The next step, after creating a wood carving sketch, is to laminate it (for example, with ordinary transparent tape) and cut out a template along the contour of the drawing.
With this method, the thread template can be used repeatedly if several carved patterns are to be cut.
Just trace the template along the contours with a pencil.
The next step is cutting out the slotted pattern with a jigsaw.
We remove everything unnecessary, leaving what we will work with with cutters.
In principle, this is already the so-called house carving.
A simple incised overlay wood carving used for home decoration.
Using patterns or “by hand,” we apply cutting lines and designs to the workpiece.
After working with cutters, sanding, tinting and painting, you get this kind of wooden carved decor.
This applied cross with a carved pattern was cut out for a church lectern made in our workshop.
You can see his photo and description in the "Analoi" section.
When copying images and reprinting an article, a link to the site is required!
21.05.2016, 07:50
Wood carving for the front part of a church lectern.
Step-by-step production.
Transferring a drawing or sketch to the board.
You can transfer the pattern to the workpiece using a carbon copy or using a cut out template.
With the second method, a template once made and cut out, for example, from thick cardboard, can be used many times if you need to make many identical products.
The finished slotted pattern is processed with cutters and chisels of various shapes.
At the final stage, the wood carving is sanded with fine-grained sandpaper before painting or coating with oil, wax, or stain.
Wood carving for mirror
26.03.2016, 09:19
Sketching a carved pattern
Transferring the design to a linden board and cutting out the outline with a jigsaw
Finished work... Then sanding, tinting, painting...
A short video of a master class on making a carved frame for a mirror or picture
There is a legend among local residents that tells why the village has such a name: they say that once upon a time a small unknown village burned down near Slonim. Two residents of this village - two brothers who bore the surname Krakot - descended along the Jordanka River to these places. The first brother settled in the upper reaches of the Jordan River, and the other went down the river. The place where the elder brother settled was called Great Krakotka, and where is the youngest - Malaya Krakotka. Today, these two Krakotkas are still located next to each other....
Here's another story from that time
One day they decided to involve the boyars living in Velikaya Krakotka in the ordinary daily work that the peasants did. The boyars then began to resist, saying that digging the earth and hauling hay were duties and activities for peasants. And theirs, the boyars' business, is military service. We got offended and went to the capital - Warsaw, to the king himself ZhigimontVase.
He listened to the boyars and said that no one would do this to them again and gave them a paper in which it was written that the boyars should not be involved in any other work other than military service. The kings did not give offense to their subjects and tried to adhere to ancient laws.
After three sections of the Polish-Lithuanian Commonwealth, Krakotka ended up in the Russian Empire in the Slonim povet. There is evidence that in 1798 there were 31 men living in the village. The fact is that before this there was a liberation uprising under the command Tadeusha Kosciuszko.
In the 18th century, our country was almost entirely Uniate. Uniates lived then and in Great Krakotka, and Little Krakotka, behind which there has long been a Uniate cemetery.
At the Krakotki cemetery
Attractions
The village is famous for its natural monuments.
On the very outskirts of the village is the Republican Geological Geomorphological Natural Monument "Krakotskaya ridge". Scientists say that it appeared 220 thousand years ago during the Ice Age! Such ridges, they say, appeared from sand, stones, in the openings of water streams in ice cracks.
The famous Krakota boulder
When the ice melted, a man came here.
On the outskirts of Krakotka, in the forest, there is a very beautiful juniper grove. If someone has been to Crimea, then he has seen such juniper groves. Such groves are rare in Belarus.
On the outskirts of the juniper grove, an ancient cemetery has been preserved, along which stones are scattered. The fact is that according to local ritual, when they buried someone who took his own life, a stone was placed above the head and at the feet, where a wooden cross was also placed. It is believed that when the day of judgment comes and everyone goes to God’s judgment, it will be easier for him to get up holding the cross. Now these stones have been destroyed because the cemetery was plowed up and planted there.
About the holy healing spring
In the village there is a holy spring with healing water, which has been known since ancient times.
There is a local legend about the krinichka.
They say that this land once belonged to Mr. Skurat, who had a daughter, she had very poor eyesight. One day an old man came to the village and stopped near a mountain from which water flowed.
The elder drank this water, rinsed his face, and immediately his eyes began to see better. He came to the village, told the people about it, who told everything to Pan Skurat. Pan began to take this water and treat his daughter, rubbing her eyes - the girl was cured. Then Pan Skurat dug a well on the mountain and from that time on this little spring began to be called Pan Skurat's spring.
Now the krinichka is consecrated in honor Forerunner and Baptist of the Lord John. They say that on holidays the water here is drawn to the bottom, but it quickly fills up. Water helps against eye and stomach diseases. There are examples of people being cured with this water. But it is known that water helps those who believe.
The Holy Krinichka is located near a river with the interesting name Jordanka. It was deeper and wider until land reclamation was carried out. And when the reclamation was carried out, it became a small stream. The name of the river is mysterious. Legend says that once in these places they killed a man who called himself Jordanas. Or maybe there is a connection between the Jordan River and the famous Jordan River, in which John the Baptist baptized Jesus Christ?
Water blessing prayers are held here, with special solemnity - on the day of the Nativity of John the Baptist (July 7). Water from this source is taken not only by local residents, but also by pilgrims and travelers from near and far abroad.
Famous personalities of Great Krakotka
In the part of the village that was formerly called Malaya Krakotka, Ivan Solomevich, a Belarusian literary critic, folklorist, bibliographer, translator, and encyclopedist, was born.
He signed his works with the pseudonym Krakotsky or Yan Solomevich.
The writer was born in Malaya Krakotka, and went to school in Velikaya.
By the way, the famous Belarusian Grigory Okulevich was born in Great Krakotka. During the occupation in Polotsk, he was an active figure in the Belarusian national liberation movement. He was also one of the organizers of the BKRG and TBS. When the Poles began to hunt Okulevich, he was forced to emigrate to Canada to avoid arrest. But he did not abandon his Belarusian activities there, and together with his friends he created the first Russian newspaper in Canada, which had its own Belarusian page in the Belarusian language. And when World War II began, Grigory Okulevich volunteered for the war. After the war, he became the chief secretary of the Russians in Canada Federation in Canada, and later became the editor-in-chief of an emigrant newspaper. In Canada, Okulevich wrote and published two books: “50 years of the Belarusian Republic” and “Russians in Canada.”
In Great Krakotka, Grigory Okulevich and his friends created a Belarusian library on the basis of the TBS and named it in honor of Yanka Kupala. But the Poles didn’t like everything that was Belarusian, they didn’t like the local Belarusian movement, so the Poles closed the library. All Belarusian books were taken out of the library. Only in 1939 was the Belarusian library of Yanka Kupala renewed in the village.
The Second World War began and the library was destroyed, but in 1946 the Yanka Kupala Library in Velikaya Krakotka was born for the third time. Yanka Kupala’s wife, Vlada Frantsevna Lutsevich, corresponded with this library.
Yakub Kolas, Arkady Kuleshov, Kondrat Krapiva, Ivan Shamyakin, Mikhail Lynkov sent books with their autographs to the library. In 1970, a new library named after Yanka Kupala was built in the village, but today it no longer exists. Pavel Tavlay, the father of the famous Belarusian poet Valentin Tavlay, took an active part in the construction of Yanka Kupala.
Tavlay began writing poetry at an early age. When he studied at the Slonim Teachers' Seminary, during the census he registered as a Belarusian, but wrote Belarusian as his native language, for which he was expelled from the seminary. 2014 marked the 100th anniversary of the birth of the poet Valentin Tavlay. He suffered for 7 years in Polish prisons for his Belarusian activities, but, fortunately, he did not fall under Soviet repression and did not rot in Stalin’s camps; he died of natural causes in 1947. His fellow countryman, the Belarusian poet Mikola Arochka, wrote a lot about Valentin Tavlaya, researched his work, and dedicated many poems to him.
Mikhail was born in a neighboring village, but he loved to come to Velikaya Krakotka, he loved these places. The village is proud of its fellow countryman-poet.
The Great Patriotic War
In 1941, a strong battle took place near Velikaya Krakotka. On the German side, Gulden's regiment fought here against the Red Army. 160 German soldiers died here and were buried on a mountain near the church. And in 1944, when the Germans were retreating, they dug up the remains of each of their dead soldiers, put them in new coffins and took them to Germany.
Today no one can say how many Red Army soldiers died. Only 1,600 soldiers were captured; they were marched through the streets of the village. In the middle of the village of Velikaya Krakotka, 17 known and 338 unknown Red Army soldiers were buried in a mass grave in the middle of the village. And how many of them still lie buried in craters and trenches?
A house was recently built in the village and the remains of 4 more Red Army soldiers were found. They were taken to a mass grave and buried there.
On the outskirts of the village and in the forests, even now, amateurs studying the history of the Great Patriotic War, the history of the Great Krakotka, find objects from those times, testifying to strong, bloody battles.
One of the old finds, a cross was found on the road leading to the temple in Malaya Krakotka
Search at the monastery lake (formerly Lake Shkolnoye)
Solidus 1663. A lot was found along the road near the temple in Malaya Krakotka
ring
10 pfenings
Program "Amateur's Journey" and "Hope for the Village"
An interesting and educational BT program has finally visited our village!
Velikaya Krakotka is rich in interesting sights and people.
The story about them and much more is in the video report offered to you.


Wood has always been considered a good material for exterior and interior decoration. Therefore, today wood carvings, photographs, drawings and sketches are used to create an improved interior. Following this direction, they decorate furniture sets and interiors using the latest technology, techniques and elements that make it possible to obtain products with excellent appearance and quality, as well as having high artistic value.
Wood is a fairly light material that can be easily processed and has been used since ancient times in decorating palaces, temples, and houses. Craftsmen from all over the world eagerly apply designs for wood carving, using natural materials in their work to create a unique stylistic image in the interior of the house.

Relief carving is a rather labor-intensive type of carving.
For decor from wooden elements using carvings use different woods:
- Linden. A very soft material for carving, from which you can make small products in the form of photo frames, various boxes, and household utensils with patterns. They simply attract attention. This material is perfect for learning wood carving, as it has a soft, pliable wood structure and a beautiful cut color.
- Birch. It is an excellent raw material for obtaining dazzling applied decor or creating excellent souvenirs.
- Nut. Hard material, very good in processing and polishing. A wide range from small products and furniture decor to a variety of sculptural compositions.
- Pear. Unique material, almost does not crack. Used to create exclusive decorations and souvenirs.
- Alder. It is considered an aristocratic tree. The wood has a variety of colors from rich red and purple to black. This often replaces valuable tree species.
- Pine, yew, spruce, cedar. These types of tree species are used to form massive carved sculptures, platbands, which are used in the design of cornices and home decoration.

Carving is used to decorate the outside of the house thanks to different ornaments and figures.
Variety of types of wood carvings
In the modern world, more than one type of manual wood processing technology can be used. Of these, you can focus on the following methods:
- Through thread. It is characterized by the complete removal of wood shavings from the boundaries of the design. There is a simple look and an openwork one with different heights and edges. Thanks to this technique, frames, overlays, doors, and decorative elements are made. If you want to carve wood in an oriental style, then a jigsaw will come to the rescue.
- Thread with flat notches. It is characterized by the presence of a flat surface into which thread elements are deepened. There are several subtypes of carving - contour, when, thanks to grooves of a semicircular or triangular section, patterns are obtained on a flat surface; stapled, when the pattern is made from semicircular notches; geometric, when several types of elements are used for the design - pegs and a triangular pyramid recessed in the middle. The patterns are made with a wood carving knife - a jamb. In this case, you get a variety of figures in the form of rhombuses, chains, and honeycombs. Black varnish carving is also performed, when the front side is covered with black paint or varnish, and then grooves are cut out.
- Relief carving. The elements are placed at the same level with the front surface or higher. This is a rather labor-intensive type of carving. Thanks to this type, images of coats of arms, various ornaments, and emblems are created. Subsequently, the image is completed by the play of light and shadow.
- Carving for home decoration. They are used to decorate the outside of the house thanks to the different ornaments and figures that are located on the back of the wooden elements. They decorate cornices, porch posts, and balusters.
A wood carving stencil always comes to the aid of a craftsman. In this difficult task, he is always an indispensable assistant.
Types of stencils
Stencils for wood carving are used to perform rather difficult and painstaking work, which will then decorate the house. Divided into the following types:
- stencils intended for strip ornaments, platbands, pilasters;
- stencils for carved boards - depict ornaments;
- stencils for brackets, rosettes, balusters and the like.
What stencil is preferred for wood carving?
To select suitable stencils you need to follow several rules:
- you need to choose a stencil that you can work with, especially if this is done for the first time, do not think that this is an easy job - you can ruin the material;
- for cut wood carvings, you need to choose only the types of stencils that correspond to it, while trying to transfer the design more accurately and not go beyond its boundaries, otherwise the work will be sloppy.

You need to choose a stencil that you can work with
What parameters should you use to choose a template for wood carving?
Firstly, for large wooden elements it is necessary to choose large stencils, otherwise the elements will be small and will not be visible. But for boxes and frames they choose more complex patterns.
For different carving techniques, the proper patterns and templates for wood carving are selected:
- Slotted carving requires templates and stencils of proper quality and fast work. After the drawing has been transferred, those areas that turn out to be through will need to be shaded.
- Geometric technique is the basis of wood carving. When a sketch is selected, it is applied to a wooden panel.
- Sculptural or relief carving is more labor-intensive and requires certain skills from the master. First, the sketch is made on paper, but if it is a three-dimensional craft, then it is necessary to create a figure from a plastic material, for example, clay.


