
Landscaping is an exciting and creative process that allows you to reveal the potential of the master. Starting with small and simple forms, many craftsmen immerse themselves in the atmosphere of creating original exhibits for their site for a long time. An accessible and indispensable assistant is most often improvised materials that have fulfilled their original mission.
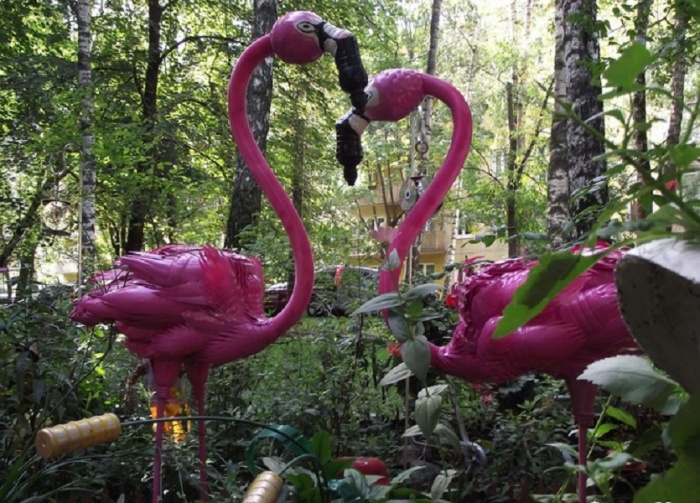
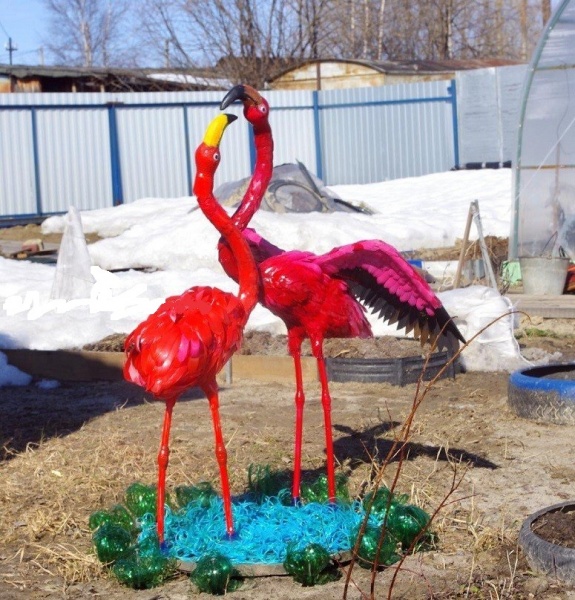
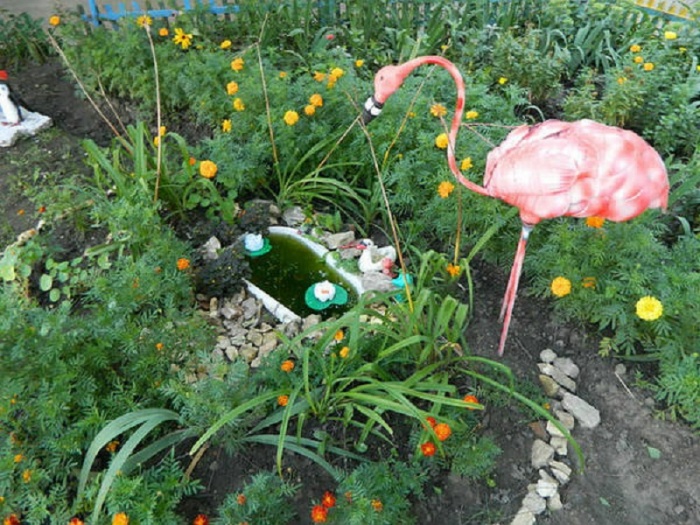
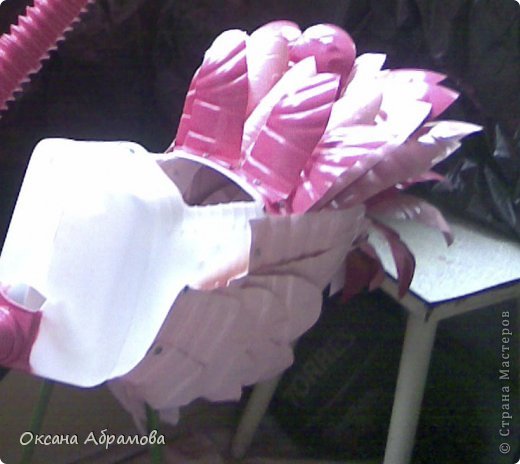
bright representative landscape design will become a flamingo plastic bottles, the manufacturing process of which will be described in detail. An exotic bird will successfully cope with the role of an exquisite decor and give the master the legal right to be proud of his work.
Preparatory activities
Despite the simple source materials, a little preliminary preparation is still required before starting to create. On hand should be:
- The main container for the flamingo frame. It is optimal to find a 10 liter plastic canister in which the hole is located on the side. In the absence of such a container, a 5-liter plastic bottle is suitable.
- Bottles of 5 liters in the amount of 9 pieces. Of these, flamingo feathers will form.
- The function of the legs will be performed by a PVC pipe 2.2 m long.
- The neck is finished with a corrugated pipe about 0.6 m long.
- The head is cut out of foam, the approximate size of a piece is 15x20 cm.
- Self-tapping screws and thin wire for connecting parts.
- Acrylic paint and brushes for finishing decoration.
Comment! It is recommended to wash all plastic bottles thoroughly; for this, the containers are soaked in a warm soapy solution for 1-1.5 hours. This will make it easier to remove labels and adhesive residue.
If you do not pay due attention to this stage, bottled flamingos will quickly lose their original attractiveness due to contamination of unwashed areas. A solution of washing powder is also capable of degreasing plastic bottles. The procedure will ensure high-quality distribution of paint when decorating flamingos.
creative process
The creation of flamingos belongs to the works of medium complexity. Compared to other plastic bottle feathers, there is less hassle with cutting and attaching feathers due to their large sizes. But you still have to work hard.
Flamingo plastic bottles master class:
The formation of flamingos begins with the body. A hole is cut out on the lid, suitable for the diameter of the plastic pipe. On the sides of the container in the lower part are prepared holes for the legs. The result will be a similar blank.
Moving on to flamingo plumage. In addition to five-liter bottles, 2.5-liter plastic containers are suitable for these purposes. This will allow you to cut feathers of different sizes. On the entire container, the neck and bottom are removed, after which the cylinder is cut lengthwise. Pre-prepared paper sketches in several variations are capable of speeding up the cutting process. The more elements are available, the more effective the final result of the flamingo will appear. The blanks are painted before fastening to the body, because on the finished bird it will not be possible to fully decorate all parts of the parts.
Feathers of different sizes are sorted into packages, such a measure will prevent confusion when fixing elements on a plastic frame. Flamingo plumage is carried out in several ways:
- If a dense canister is used for the body, I cut out the details with a leg. Then, cuts are made on the canister according to the number of feathers, into which the blank is then inserted.
- When using a large plastic bottle for the frame, the elements are attached with a wire, while holes are prepared on them with an awl.
- Alternatively, a furniture stapler will help fix the details on the flamingo.
The practicality of one or another method is determined based on the materials and stiffness of the bottles used for the body and feathers.
For the neck of a flamingo, a piece of 0.6 m is cut off from a 2.2 m plastic pipe. Further actions:
- The blank is bent in a shape imitating the throat of a graceful bird.
- The pipe is masked with corrugated material.
- One end of the plastic pipe is passed into the neck of the plastic bottle, which acts as the body.
- The end is fixed with screws and glue.
- The neck of the flamingo also needs to be dyed to match the original.
Making a head will require painstaking work. But even here there is an opportunity to show the creative potential and skill of the master. Flamingo head shaping options:
- The body of a plastic bird can be crowned with a piece of plaster.
- It is easier and more affordable to make a foam blank.
- Those who know the art of woodworking are also given the chance to demonstrate their art.
- Plastic bottle compact dimensions, processed with polyurethane foam, can be an excellent basis for cutting out the head.
Comment! If the flamingo part is made of foam, it should be plastered and sanded to form a smooth surface before the next stage of decoration. In principle, grinding is required for any material.
Coloring acrylic paints for outdoor work - the final touch of the design of the flamingo head, which is based on a plastic bottle. You can highlight the eyes with paints or glue special blanks.
We turn to the manufacture of legs for flamingo plastic bottles with our hands:
- To keep the bird stable, a sheet of metal stand is useful.
- Small pieces of pipes are welded onto it, the diameter of which is slightly larger than the plastic legs of a flamingo.
- The PVC pipe is shaped like a horseshoe, the distance between the edges should correspond to the size of the bottle from which the body of the bird is made.
- A plastic pipe is threaded through the holes in the body and fixed in the stand.
When the entire frame is assembled, they move on to attaching the plumage. Work begins with the tail, the elements are fixed in a checkerboard pattern. In order for the outlines of the flamingo to match the original, the bird will need wings. To do this, a frame is cut out of the chain-link mesh, on which feathers are attached. Installation of the frame with plumage on the body is carried out with self-tapping screws.
Depending on the desired end result, the neck can also be decorated with small plumage elements from plastic bottles.
The creative process of making an attractive exotic bird can be considered complete. Impromptu based on the proposed master class is only welcome.
MK Flamingo from plastic bottles
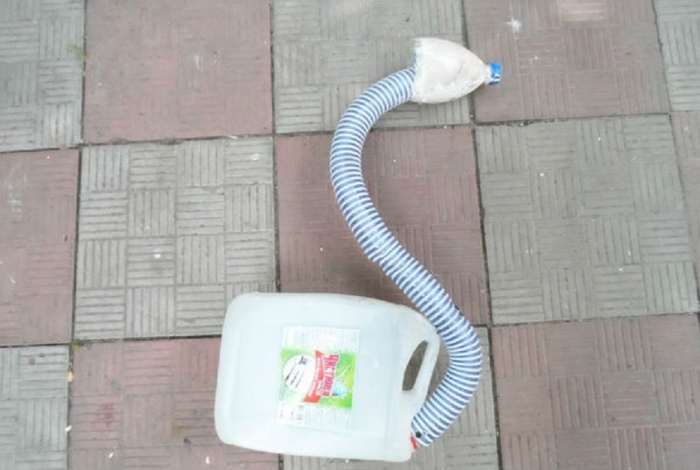
For the preparation, I used a 5 liter canister of liquid soap, a metal-plastic tube, which is now sold in any hardware store, self-tapping screws.
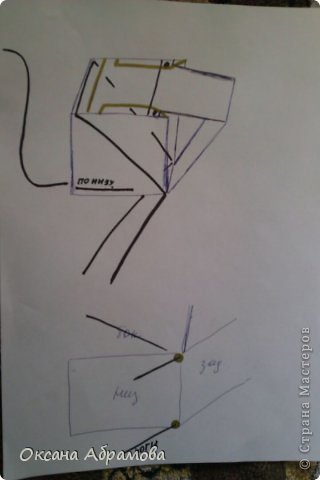
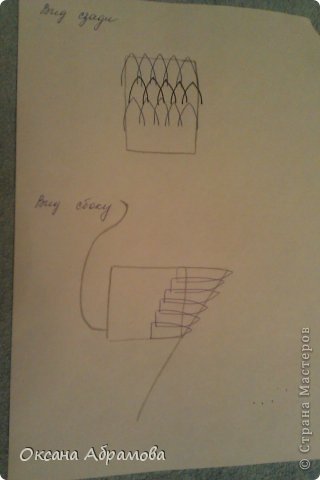
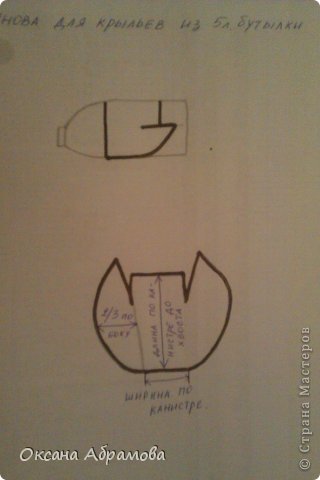
1) cut the canister, as shown in the diagram in red, the neck remains at the bottom (where the tube for the neck shape passes). We leave about 3 cm from the edge, in order to attach the wings later. We push back, not reaching the edge of 3-5 cm. On the sides we attach to the canister with self-tapping screws.
2) We bend the metal-plastic pipe for the legs (shown in black), wind it through the top. The lower figure shows that the legs pass into the resulting hole between the bottom of the canister and the pushed back wall. We fasten to the canister using self-tapping screws (2 on the top and one on each side). Leg length is approximately 62-65 cm.
3) We bend the metal-plastic pipe for the neck (shown in black), pass it through the neck of the canister and fasten it in two places along the bottom of the canister to self-tapping screws. Neck length approximately 60 cm.
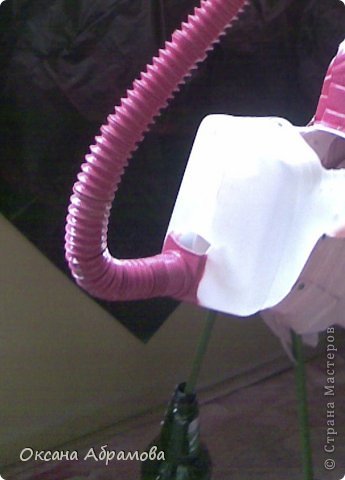
We put on a corrugated sleeve (you can also buy it at a hardware store) around your neck and fasten it (you can insert it into the neck or glue
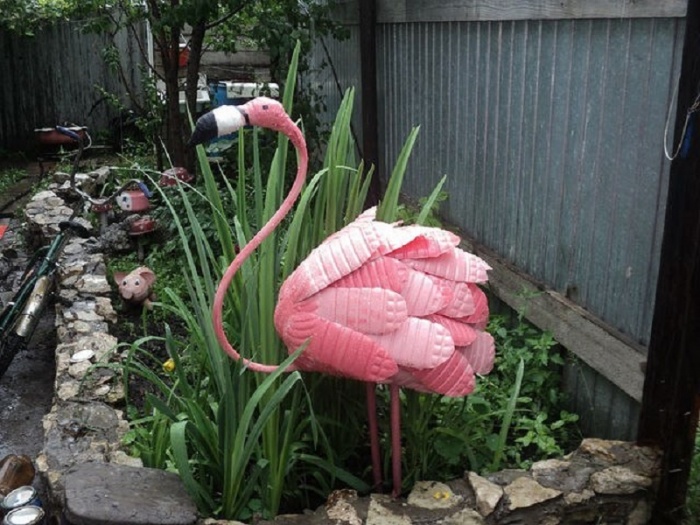
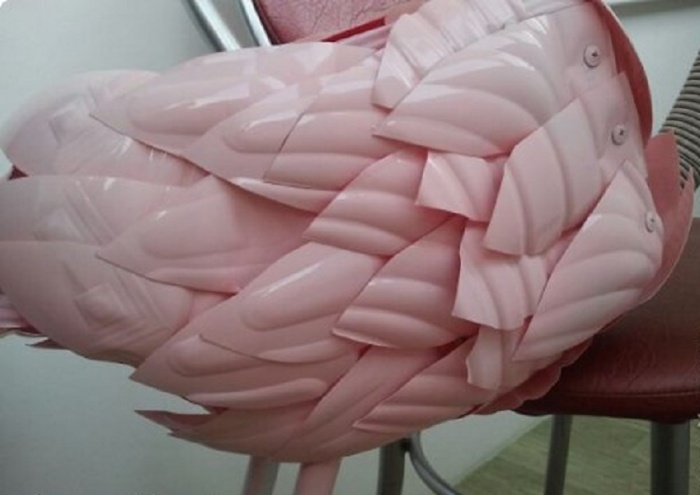
For feathers, cut 5l. bottles into 8 equal parts. Feathers can be halved for the body. We try to close in a checkerboard pattern (it looks prettier this way).
1) close at the back, to the feet
2) close the open space on the side with long feathers, then (you can use halves) close in a circle. Be careful: the feathers should be laid symmetrically on both sides, leaving the back open!
3) Before closing is more difficult. I cut the top from 5l. camomile-shaped bottles and began to fasten from the junction of the neck with the canister.
Pay attention to the fact that the screws are always covered with the next feather.
Feathers for the body I painted separately. Then she covered the body with a bag and painted the head and neck with a different color, but you can first attach everything, and then paint everything together (torso, neck and head - it will be even easier). It depends on your imagination.
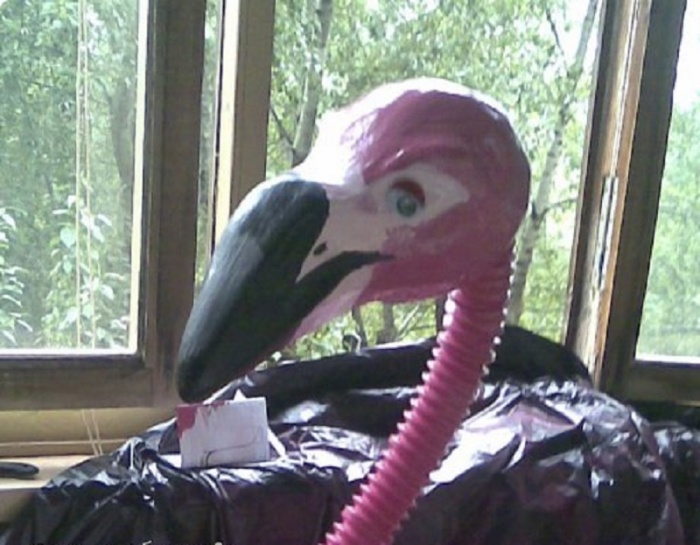
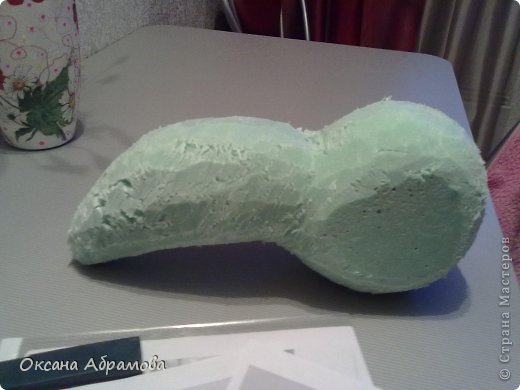
Preparing the head:
1) we apply a drawing to the foam (100 mm high) you saw how it is done in MK Filin
2) we start to cut (it is better to use a clerical knife), we form the head, then the shape of the nose, do not forget to leave a hump.
3) Finishing with fine sandpaper
4) We process with any putty (I use acrylic), dry for at least a day
5) We skin with a fine sandpaper until smooth and coat with ordinary PVA glue, dry.
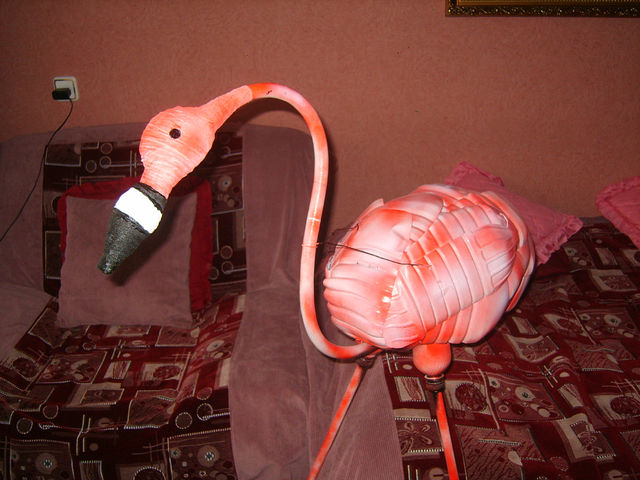
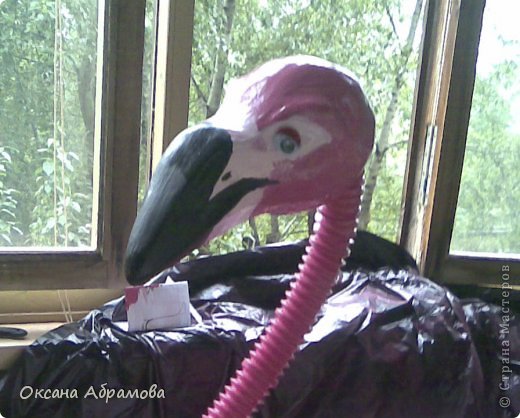
After drying, we attach to the neck (we sit on the glue, which is made on water based, as others corrode the foam) onto the metal-plastic pipe and carefully glue the corrugation on top. You can paint everything (so far only one pink color).
I paint all my products with spray paints, they give a good, even coating.
I painted the head with ordinary acrylic paints, eyes are sold in any Fabric store.
Feathers for the tail and for the wings, I painted separately, because they are of different colors. for the tail, the entire length of the bottle, and for the wings, about two-thirds. collected them in a checkerboard pattern, some, for splendor, even folded.
I made the basis for the wings from 5l. bottles (shown in the diagram). Feathers to it I fastened to the wire.
1) close the back
2) wings,
FROM inside also don't forget to attach the feathers around the edge to cover the visible areas when they are attached
Before the wings (near the neck) you need to finish with a bend (inward) to make it beautiful.
QUOTE THE AUTHOR!!!
I want to introduce you to the process of making this beautiful "Flamingo". Since this was my first work, there are practically no photos left, I will try to explain in detail with the help of descriptions and diagrams.
For the preparation, I used a 5 liter canister of liquid soap, a metal-plastic tube, which is now sold in any hardware store, self-tapping screws.
1) cut the canister, as shown in the diagram in red, the neck remains at the bottom (where the tube for the neck shape passes). We leave about 3 cm from the edge, in order to attach the wings later. We push back, not reaching the edge of 3-5 cm. On the sides we attach to the canister with self-tapping screws.
2) We bend the metal-plastic pipe for the legs (shown in black), wind it through the top. The lower figure shows that the legs pass into the resulting hole between the bottom of the canister and the pushed back wall. We fasten to the canister using self-tapping screws (2 on the top and one on each side). Leg length is approximately 62-65 cm.
3) We bend the metal-plastic pipe for the neck (shown in black), pass it through the neck of the canister and fasten it in two places along the bottom of the canister to self-tapping screws. Neck length approximately 60 cm.
We put on a corrugated sleeve (you can also buy it at a hardware store) around your neck and fasten it (you can insert it into the neck or glue
For feathers, cut 5l. bottles into 8 equal parts. Feathers can be halved for the body. We try to close in a checkerboard pattern (it looks prettier this way).
1) close at the back, to the feet
2) close the open space on the side with long feathers, then (you can use halves) close in a circle. Be careful: the feathers should be laid symmetrically on both sides, leaving the back open!
3) Before closing is more difficult. I cut the top from 5l. camomile-shaped bottles and began to fasten from the junction of the neck with the canister.
Pay attention to the fact that the screws are always covered with the next feather.
Feathers for the body I painted separately. Then she covered the body with a bag and painted the head and neck with a different color, but you can first attach everything, and then paint everything together (torso, neck and head - it will be even easier). It depends on your imagination.

Preparing the head:
1) we apply a drawing to the foam (100 mm high) you saw how it is done in MK Filin
2) we start to cut (it is better to use a clerical knife), we form the head, then the shape of the nose, do not forget to leave a hump.
3) Finishing with fine sandpaper
4) We process with any putty (I use acrylic), dry for at least a day
5) We skin with a fine sandpaper until smooth and coat with ordinary PVA glue, dry.
After drying, we attach to the neck (we sit on glue, which is made on a water basis, because others corrode the foam plastic) on a metal-plastic pipe and carefully glue the corrugation on top. You can paint everything (so far only one pink color).
I paint all my products with spray paints, they give a good, even coating.
I painted the head with ordinary acrylic paints, the eyes are sold in any Fabric store.
I made a stand from a piece of asphalt (the road was being repaired near our house, and I stole it from there).
Varnish the finished bird, I use a glossy yacht varnish.
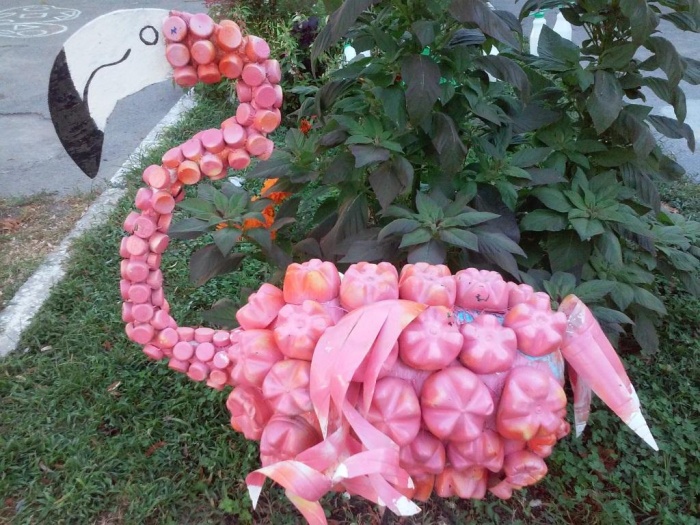
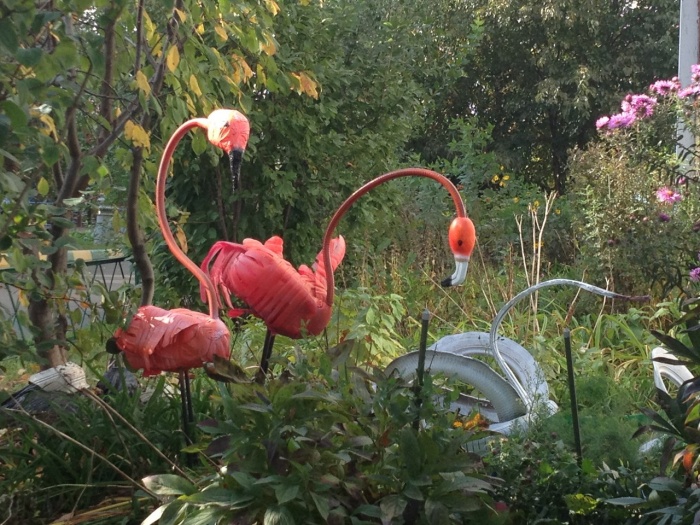
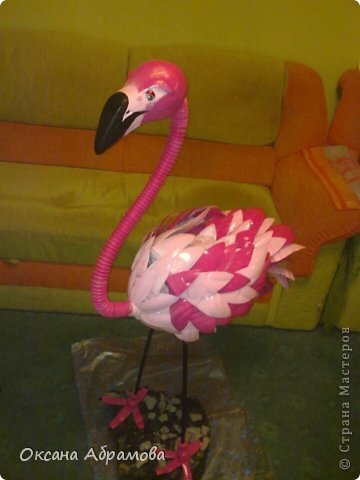
This is such a beautiful bird!
I want to introduce you to the process of making this beautiful "Flamingo".
Since this was my first work, there are practically no photos left, I will try to explain in detail with the help of descriptions and diagrams.
2.
For the preparation, I used a 5 liter canister of liquid soap, a metal-plastic tube, which is now sold in any hardware store, self-tapping screws.
1) cut the canister, as shown in the diagram in red, the neck remains at the bottom (where the tube for the neck shape passes). We leave about 3 cm from the edge, in order to attach the wings later. We push back, not reaching the edge of 3-5 cm. On the sides we attach to the canister with self-tapping screws.
2) We bend the metal-plastic pipe for the legs (shown in black), wind it through the top. The lower figure shows that the legs pass into the resulting hole between the bottom of the canister and the pushed back wall. We fasten to the canister using self-tapping screws (2 on the top and one on each side). Leg length is approximately 62-65 cm.
3) We bend the metal-plastic pipe for the neck (shown in black), pass it through the neck of the canister and fasten it in two places along the bottom of the canister to self-tapping screws. Neck length approximately 60 cm.
3.
We put on a corrugated sleeve (you can also buy it at a hardware store) around your neck and fasten it (you can insert it into the neck or glue
4.
For feathers, cut 5l. bottles into 8 equal parts. Feathers can be halved for the body. We try to close in a checkerboard pattern (it looks prettier this way).
1) close at the back, to the feet
2) close the open space on the side with long feathers, then (you can use halves) close in a circle. Be careful: the feathers should be laid symmetrically on both sides, leaving the back open!
3) Before closing is more difficult. I cut the top from 5l. camomile-shaped bottles and began to fasten from the junction of the neck with the canister.
Pay attention to the fact that the screws are always covered with the next feather.
5.
Feathers for the body I painted separately. Then she covered the body with a bag and painted the head and neck with a different color, but you can first attach everything, and then paint everything together (torso, neck and head - it will be even easier). It depends on your imagination.
6.
Preparing the head:
1) we apply a drawing to the foam (100 mm high) you saw how it is done in MK Filin
2) we start to cut (it is better to use a clerical knife), we form the head, then the shape of the nose, do not forget to leave a hump.
3) Finishing with fine sandpaper
4) We process with any putty (I use acrylic), dry for at least a day
5) We skin with a fine sandpaper until smooth and coat with ordinary PVA glue, dry.
7.
After drying, we attach to the neck (we sit on glue, which is made on a water basis, because others corrode the foam plastic) on a metal-plastic pipe and carefully glue the corrugation on top. You can paint everything (so far only one pink color).
I paint all my products with spray paints, they give a good, even coating.
I painted the head with ordinary acrylic paints, the eyes are sold in any Fabric store.
8.
Feathers for the tail and for the wings, I painted separately, because they are of different colors. for the tail, the entire length of the bottle, and for the wings, about two-thirds. collected them in a checkerboard pattern, some, for splendor, even folded.
9.
I made the basis for the wings from 5l. bottles (shown in the diagram). Feathers to it I fastened to the wire.
1) close the back
2) wings,
On the inside, too, don't forget to attach the feathers around the edge to cover the visible areas when they are attached.
Before the wings (near the neck) you need to finish with a bend (inward) to make it beautiful.
10.
We attach the wings to the self-tapping screws to the canister, we also fix the wings (closer to the back) with self-tapping screws so that they do not come off in the wind. We cut out the paws from bottles with a long neck (for example, from Sagittarius beer 1.5 liters). We paint separately and put on the legs (it is better if you glue them, you can use a glue gun).
I made a stand from a piece of asphalt (the road was being repaired near our house, and I stole it from there).
Varnish the finished bird, I use a glossy yacht varnish.
This is such a beautiful bird!
Simple crafts for the garden from plastic bottles - garden bird figurines.
Flamingos can be made very quickly if you have:
- several large 5 liter plastic bottles;
- 3 metal rods;
- a piece of hose;
- pink paint. You can mix red and white paint to get the right shade.
How to prepare plastic bottles
First, we make the body of the craft for the garden from one plastic bottle. In principle, you don’t need to do anything special with the bootle itself. Unless you pierce the lid and fix a strong metal rod in it, bending it like a flamingo's neck. And in one side of the bottle, make holes for the legs of the bird.
Other bottles must first be painted with pink paint (preferably acrylic) - from them you will cut bird feathers, and when garden figurine flamingos from plastic bottles will be collected, it will not be possible to paint over the lush plumage of crafts for the garden well.
How to make flamingo plumage
There are two options for creating plastic.
First option:
- Cut large feathers from painted plastic bottles. You will need a lot of feathers - you will have to lime 6-7 bottles for a flamingo figurine.
- Make frequent cuts in the bottle along the width of the feathers. There should be a lot of cuts so that the plumage of the flamingo is thick, and they need to be made so that the plastic feather can barely be pressed into the slot (to keep it better).
Second option:
- Cut off the bottom and neck of the bottle.
- Cut the center of the bottle lengthwise and unfold.
- From one edge of the resulting plastic strip, we cut out feathers, making roundings (about a third of the height).
- We make several (5-6) such stripes with feathers.
- We attach the strip to the bootle base (flamingo body) with wire.
- It's over easy way make bird plumage strips easier to fasten than each feather individually.
Making the head, neck and legs of a flamingo
You need to put a hose on a metal rod. The head of a flamingo from plastic bottles (with an impressive beak) can be carved from a piece of wood, molded from cement mortar, putty or putty - there are many options, choose what is easier for you. Neck, head paint.
Flamingo legs are also made from metal rods, fastening them to the bottom of the bottle.
The height of the craft for the garden - a pink flamingo made of plastic bottles - should be a little more than a meter, real flamingos are on average 1.3-1.5 m tall.


