In this article we will tell you how to make a beautiful bird from plasticine with your own hands. You will need modeling compound in different colors, a modeling surface, stacks and patience.
The simplest bird made of plasticine
If you sculpt with a child or have never touched plasticine in your hands, then it is better to start with simple models:
- Take modeling clay in blue, yellow and white. First, form two balls from the blue mixture. Make a head from one, and form a torso from the other.
- Stick the head to the body.
- Caulk the seams.
- Then roll one small ball and two large ones from the yellow mass.
- Form an elongated beak from a small ball, and teardrop-shaped wings from large ones.
- Also roll two small balls from a white piece of plasticine. Flatten them and make eyes by sticking them to the head.
- Form pupils from the blue or black mass.
- Attach the beak to the head and wings to the body of the bird.
Ready! Now you know how to make a bird from plasticine.
More complex model
If you are no longer a beginner in modeling, then you can try yourself in creating more complex crafts.
Prepare plasticine in black, orange, blue, red, yellow, orange, brown and green. Now let's start sculpting:
- First, form a body with a head from the black mass.
- Then form a beak and breast from the yellow mass.
- Attach the beak to the head.
- Please note that the breast should be thin. Carefully stick it to the body under the beak.
- Make the bird's eyes from blue and black plasticine.
- Make two thin short sausages from yellow and stick them above the eyes.
- Decorate the beak with blue, red, green and orange plasticine as shown in the photo in the article. And make thin black sausages from black plasticine and also stick them on the beak.
- To make the legs, roll six orange balls. Form a droplet from each, and then connect them together in threes. Got legs!
- Stick them to the body of the plasticine bird.
Place the bird on a branch
Now we need to make a twig and leaves. To do this, take the brown mass and roll it into a sausage. Use a stack to create a texture reminiscent of tree bark. You need three or four balls of green plasticine, which you need to shape into droplets and then flatten. Draw veins on the leaves in a stack. Stick the leaves to the branch, and the bird itself to the leaves. Ready!
We sculpt birds from plasticine: panels
If you want to create another mass for modeling, then you first need to find a suitable base. Cardboard, glass or canvas on cardboard are suitable for this work. If you are using glass, first make a drawing on paper and then place it under the glass. This way you can lay out the picture more accurately.
Let's get started:
- First make a blue background. You can immediately sculpt clouds from white plasticine.
- Then, from the green mass for modeling, roll a lot of thin sausages, from which you lay out the grass. Make reeds from brown plasticine. If desired, you can also make a river from the blue mass.
After this, proceed to creating the bird itself from plasticine:
- Take the light gray modeling mixture and roll it out into a thin layer. Using a stick or a knife, cut out the body of a heron without legs and beak.
- Stick the torso to the panel.
- Then mold the legs and beak from orange plasticine. Use a stack to create the texture of the skin on the legs and the mouth on the beak.
- Roll a lot of small balls from black, blue, white and light gray plasticine. Then flatten each ball. The resulting parts will make excellent feathers. And from the black modeling mass make a tuft and an eye.
If you wish, you can use not only plasticine for modeling, but also polymer clay, mastic, salt dough, and self-hardening mass.
Summary of a modeling lesson in the senior group “Wintering Birds”.
Borodina Tatyana Gennadievna, teacher of the senior group, Moscow State Budgetary Educational Institution “School No. 285 named after V.A. Molodtsova."Purpose of work: The summary is intended for teachers of older groups and parents.
Program content:
Target: Creation of birds: sparrow, tit and bullfinch from plasticine.
Visual tasks:
- Teach children to sculpt birds: sparrow, bullfinch, tit. Convey their structure: body, head, paws, tail; and pose: standing, flying, pecking.
- Learn to complement the work with details, by molding wings, eyes and beak.
- Continue to learn how to sculpt large birds. Select plasticine according to the color of the birds.
Technical tasks:
- Reinforce familiar sculpting techniques. Sculpt birds in a constructive way.
- Smooth out the bonding points with your fingers. Make a tail by pulling it out. Apply wings. Make eyes and beak by molding.
- Continue learning to work with plasticine. Divide the plasticine into equal parts.
Educational tasks:
- Cultivate the desire to achieve the desired result.
- Continue to cultivate accuracy when working with plasticine. Independence in conveying movements in sculpting.
- Continue to develop the ability to listen and hear the teacher. Interest in sculpting birds. Be happy with the result obtained.
Material: a box of plasticine, a stack, a paper napkin, a board, bird toys and pictures: a bullfinch, a tit and a sparrow, a cassette with bird voices.
Preliminary work:
Examining sparrows and tits on the site. Conversation.
Carrying out the game "Birds".
Drawing fairy birds.
Making bird feeders together with parents.
Progress of the lesson
Organizing time- Guys, guess the riddles:
-In a gray feather coat
And in the cold he is a hero,
Jumps, frolics on the fly,
Not an eagle, but still a bird
- That's right sparrow, a bird we watched on the property.

- White cheeks,
Blue bird,
Sharp beak -
She's not big.
Yellow breast -
- Who are these guys?
- Right, titmouse.

-Where are you from, where are you from?
Came to us
Red-breasted?
- I flew all over Siberia.
- What is your name?
- That's right, guys, this is bullfinch.

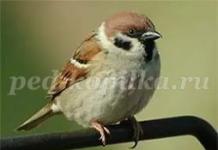
Let's take a look at our birds. I will explain to you how to sculpt birds using the example of a sparrow. And you blind any bird.
- Look at this sparrow. What parts does a sparrow consist of?
(Showing the body of the head, tail and paws).
- What is the shape of the body and head?
- The body is round, slightly elongated, the head is round.
- What else does a sparrow have?
- Beak, eyes and wings.
- When do sparrows have wings?
- In flight.
- What color and size are a sparrow’s eyes?
- Small and black.
- What beak?
- Small, yellowish-brown.
- What color is the sparrow itself?
- Brown in color, and the wings are gray.
- Guys, in what position can you depict a sparrow?
- How a sparrow flies, stands or pecks.
- Let's remember how to sculpt birds.
- Take plasticine and divide it into 2 unequal parts.
- From one part we make the body and then draw out the tail, and from the other we make the head and paws into a stand. We glue the head and paws to the body. Smooth out the attachment points with your fingers. We make the wings, beak and eyes with moldings.
- Guys, I suggest you make your own birds: sparrows, tits and bullfinches.
- Let's make birds in different poses. Some people have a sparrow standing or flying, a bullfinch pecking. To make it more fun for you, I will turn on the music and you will hear the birds singing.


Children's works


Individual work:
I remind children that they need to work with plasticine carefully and wipe their hands on a napkin. I teach how to properly divide plasticine into parts. I remind you how to roll out plasticine. I remind you of sculpting methods. I show individual sculpting techniques individually. I encourage children's independent creativity.
Analysis of children's works:
- What wonderful and beautiful sparrows, tits and bullfinches we got.
- Let's admire our birds. Oh, look at this sparrow in flight, and this tit is pecking, and this bullfinch is standing.
- Guys, find me the most beautiful sparrow. The biggest one. A sparrow that pecks. A sparrow that flies.
(the same is done with other birds).
- Guys, you are all great to me. Everyone tried their best and did a great job.
- The lesson is over.
The animated series “The Return of the Prodigal Parrot,” which first appeared on television screens back in 1984, continues to delight adults and children today, giving a lot of positive emotions with each new viewing. A funny plot and cheerful characters make this cartoon bright and memorable, and many people even have figurines in their homes in the form of its main character, the cheerful parrot Kesha.
If you or your child like this animated film, then you can try to make a figurine of its main character with your own hands, which can complement the interior of any room in your home, adding a note of positivity and good mood to it. Making such a craft will take very little time, and it will turn out bright and cheerful.
For sculpting you will need:
- plasticine of appropriate colors;
- a plastic stack with which small elements of the craft will be “registered”;
- plastic board or sheet of paper;
- some free time.
So, how to make a parrot from plasticine? Our simple step-by-step instructions will help you with this.
PHOTO step by step. How to make a parrot
Let's start sculpting a cartoon parrot by making its head, for which we take pink plasticine and give it a round shape. Then, from the yellow modeling mass, we will make two halves of the bird’s beak, giving them the appropriate shape. We will attach the beak in the middle of the head, and on both sides of it we will place large oval white eyes with yellow pupils and black “crystals”.

We will make a parrot's crest from blue or green modeling mass. To do this, we will fashion several thin sausages of short length and sharpen one of their edges, and then attach them to the top of the head in the shape of a palm tree.

We mold the body of the cartoon bird from purple plasticine, giving it an oval shape. After this, we attach the white plumage of the parrot to the top of the body, for which we form a flat rectangular strip of white plasticine, and then tear one of its edges with a plastic stack. We attach the body to the head, not forgetting to strengthen the connection with a match or toothpick.


After this, using a stack, we form feathers on the lower blue part of the wings, the tips of which we decorate with small black “feathers”.

Attach the wings to the body.

To make the craft stable, we will attach the parrot’s legs to the body using toothpick halves or matches. To do this, we make two small ovals from purple plasticine, pierce them with a toothpick and attach them to the lower part of the body, not forgetting to leave a little toothpick for attaching the lower part of the leg.

We make the lower part of the legs from yellow plasticine with three outstretched toes facing in different directions.

All that remains is to make a tail for the parrot, which will consist of three green “feathers” with purple tips.


In addition, if desired, you can make a model of a radio telephone from red plasticine for the parrot and insert it into one of the bird’s hands, making the craft even more original.

That's all. Now you know how to make a parrot from plasticine, and you can make such a craft yourself or with your baby easily and quickly.
VIDEO Lesson - modeling a parrot from plasticine
Plasticine parrot updated: April 30, 2019 by: Vitaliy R
Children cannot remain focused on one subject or activity for a long time; this is dictated by the characteristics of their psyche. If we are talking about plasticine, then the complexity of the craft should be directly related to the age characteristics of the child.
At the very beginning, one-year-old babies can try to sculpt very simple shapes. For example, balls and sausages. When a child turns 3 years old, he will show more interest in such creativity. At this age, a developing personality can already be shown a master class on sculpting any animal or bird. It is interesting to sculpt from plasticine if there is an adult nearby who shows, encourages and at the same time tells interesting stories about the sculpted character.
Although the ostrich is an inconspicuous bird that does not fly, this bird arouses genuine curiosity. He has long legs, small wings, and also hides his head in the sand at the slightest danger. Not all parents have the opportunity to show their offspring a real ostrich farm, but photographs of this bird are available to everyone. It can be molded from ordinary plasticine.
Ostrich bird made of plasticine - master class:
1. Make a large drop from black plasticine. Use wire to stabilize your legs and neck.
 2. Place yellow plasticine on the neck, insert one end into the front of the body, and place a small round head made of yellow plasticine on the other.
 3. At the junction of the body and neck, make a border of white feathers. Add a beak and two eyes to the front part.
 4. To create wings, you can use multi-colored plasticine and cotton wool. Connect the small cakes together, then apply a sticker. Make a small tail.
 5. Attach the wings and tail to the body.
 6. Make a tuft out of cotton wool. Using brown plasticine and the remaining wire, mold the legs and insert them into the lower part of the body.
The plasticine ostrich bird is ready!
More plasticine birds for children:


Angry Birds is one of the most popular arcade games for mobile platforms in the history of smartphones and tablets. Appearing for the first time back in 2009 for iOS, this arcade game won the hearts of a huge number of owners of Apple mobile devices within just a few months, which became the reason for its spread to other operating systems.
To date, more than twenty modifications of Angry Birds have been developed, each of which has its own unique features and an entire army of fans. Moreover, in 2016, a full-length animated film was made based on the game, which grossed more than $200 million, which once again confirmed the highest popularity of the franchise around the world.

And it is not at all surprising that today there are a huge number of Angry Birds toys on sale, as well as clothes, accessories and other products not only for children, but also for adult products with the brand logo and images of various arcade characters. In addition, many handicraft lovers make their own crafts in the form of figurines of funny cartoon birds.
Various materials are suitable for making Angry Birds figurines, one of which is plasticine, among the main advantages of which it is worth noting:
- flexibility for detailed processing;
- the ability to manufacture complex geometric shapes;
- widest range of colors;
- relative ease of use.
Angry Birds crafts can be made not only independently, but also together with your baby. They are not very difficult to implement, although they contain some small elements.
PHOTO step by step - How to make Angry Birds from plasticine
Let's start making Angry Birds with our own hands with a mandatory attribute of this game - a slingshot, with the help of which the birds attack the settlements of evil pigs. We will make the base for the slingshot from brown plasticine, and the role of an elastic band will be played by a black material rolled out well into a ribbon.

Note that Angry Birds can be sculpted using two methods:
- by first making round blanks of the appropriate colors for each character;
- by sculpting each bird from start to finish.
Today we use the second method.
First, let's sculpt a figurine of the green bird Hal. First, we will sculpt a blank for the bird in the form of a green ball, and then, using white material, we will make the bases for the eyes and chest of the bird.

Above the eyes we will attach thin black eyebrows.

We attach small black pupils in the middle of the eyes.

We complement the image of the bird with an orange beak, in which we make a cut using a regular plastic stack, as well as a black crest.

Using the same scheme, we sculpt figurines of the remaining birds, not forgetting to take into account their unique features:
- The red bird Mat has side-by-side eyes and merging eyebrows, as well as a red crest;
- The black Bomb bird should be larger than all the others in size;
- Jake the bluebird is the smallest with funny bulging eyes;
- Chuck - a yellow bird with a triangular body with narrow eyes;
- The white Matilda bird has an oval body shape with yellow spots on the sides and a black crest.


