
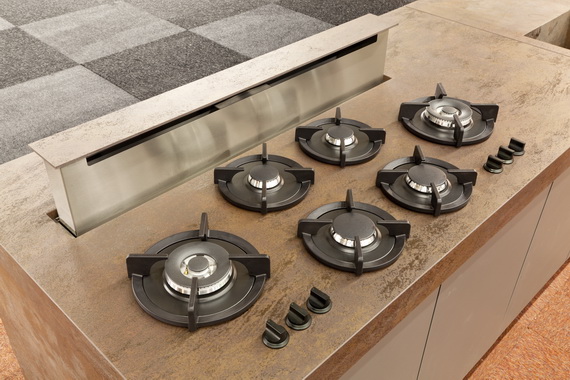
Thinking about self-manufacturing kitchen furniture? Then it's time for you to find out that making it is only half the battle, and the second half of this business is to complete the furniture with all kinds of equipment. These are built-in washing machines and dishwashers, and a sink, and an oven, and, of course, a hob, which will be discussed in this article. Together with the website, we will deal with the question of how to install the hob with our own hands and how to connect it to the home gas pipeline and electrical wiring.
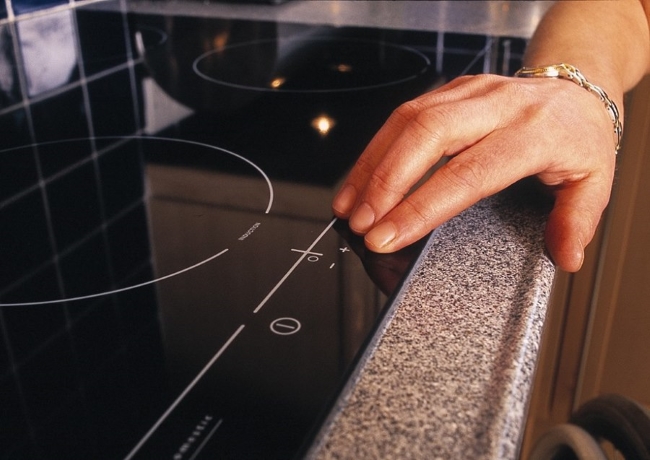
Mounting the hob photo
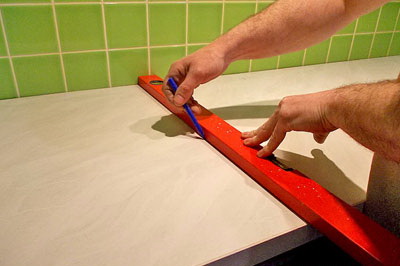
Installing the hob: marking the installation site
Markup is perhaps the most milestone works related to the installation of the hob with your own hands, which, oddly enough, has the most nuances. Judge for yourself - the whole appearance kitchens. This is just the case in which an error of one centimeter can be irreparable - you always need to remember the cost. Buying a new one is not that cheap. The fact is that the panel itself should fit clearly above the cabinet, and there is practically no margin for width there.
There are two ways to mark the landing hole - you can simply lay it on the tabletop, center it on the eye and circle it with a pencil, or you can go the way of professionals and calculate everything down to the millimeter. Naturally, it is better to choose the second option for resolving the issue, since in this case there is a minimum chance of making a mistake. This is done in the following way.
Now it's up to the small - cut and mount the hob in the hole. We will talk about this further. For those who do not like to read and delve into what is written, we are attaching a video on installing the hob in the countertop.
Installing a gas hob: two ways to cut a hole
You can cut a mounting hole for the hob using three different electric tools - a jigsaw, a drill or a manual milling machine. The most accurate and beautiful cut is obtained using a manual milling cutter, but you don’t even have to ask about its presence in the home workshop of a person not related to construction. Not everyone has a jigsaw either, but at least it is not very expensive, and you can buy it to carry out these works. Well, almost every economic man has a drill. We’ll start with it, but first I’ll warn you about the quality of the hole obtained with the drill - it can be said to be disgusting. Torn edges are quite difficult to seal, but this must be done, and problems will arise in this regard. In principle, they are solvable, but more on that later.
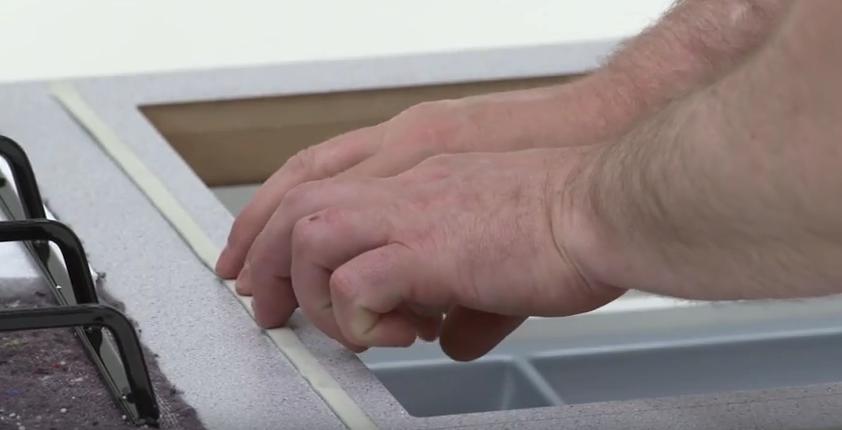
After the hole is ready, it is imperative to waterproof it - if water or even just moisture gets into the end of the countertop, there is a very high probability that the material from which it is made will swell and the countertop will deteriorate. As a rule, the end face of the cutout is treated with silicone. If you cut a hole with a drill, then it will be quite difficult to do it qualitatively - you have to tinker.
Installing an electric hob: mounting and connection
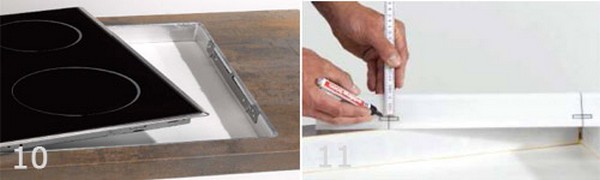
To make it easier to understand how the hob is installed into the hole in the countertop, we will present it as a sequence of work - so to speak, in the form of a small but understandable instruction for installing the hob.
Basically, everything. In exactly the same way, an electric hob is mounted. The only exception is the absence of a gas hose in it. There may, of course, be other nuances - for example, if we talk about a hob-dependent, here the installation process looks a little different. To begin with, and then the panel, which is connected directly to the oven itself.
Basically, everything. Now judge for yourself whether this work is difficult or not. You can deal with it yourself or, perhaps, contact specialists. In general, based on experience, I can say that most people who are wondering how to install the hob with their own hands do this job easily. In fact, it is not complicated, and all that is needed for the successful completion of the case is to clearly observe all the subtleties and nuances.
The cost of installation is 1250 rubles. built-in gas hob includes:
a) Arrival of the master in the city of Moscow within the Moscow Ring Road
b) Installing the gas panel on the finished niche
c) Connecting a flexible hose after the tap and to the panel
d) Installation of the gas hose after the gas supply valve
e) Supply and test all connections for leakage
f) Retest all connections and short instruction for the user
g) Vypel and Additional materials paid separately according to the price list.
2) The cost of installation is 2100 rubles. subject to material includes:
a) Departure of the master in the city of Moscow within the Moscow Ring Road
b) Dielectric rate and setting the dielectric rate
c) Flexible hose 1.5 meters including installation
d) Connecting the hose to the hob and checking the hose for leaks
e) Check all connections, for leaks including burners
f) Test check of all connections and brief instructions for the user
g) Completion of the niche and materials are paid separately according to the price list.
The installation of the hob must be carried out strictly in compliance with the requirements of the hob installation rule in terms of the Manufacturer's recommendations and ensuring the electrical, gas and fire safety of the equipment. Only professionals, thanks to their experience and access to these types of work, are able to appreciate all the nuances and correctly install and connect the hob, ensure high-quality and fast work, and adapt the equipment to the existing conditions.
The installation of a gas hob consists of the following steps: disconnecting the old gas hob (if any), dismantling the excess section of the gas main, and finally connecting the gas hob using a flexible connection.
Installing a built-in hob also requires good grounding. An additional type of work during installation of this type hob is the combination with the dimensions of the kitchen interior.
The installation of an induction hob is due to the peculiarity of this type of panels - it works on the principle of creating a vortex magnetic field using an induction coil. Distinctive feature this type of hobs is the presence of a multifunctional computer. Mechanically, the installation of an induction hob does not differ from a conventional electric hob, the connection of the hob to the mains is identical. But the peculiarity of the electronic filling of the induction surface requires additional control and accuracy of the work.
AT this moment all manufacturers offer almost identical types of surfaces in terms of connection. In this regard, the connection of the Electrolux, Bosch, Zanussi or any other manufacturer's hob is carried out in the same way.
The connection of an independent hob is not carried out through the oven, as is the case with combined appliances, but separately with the implementation of all necessary work. Moreover, if you want to complete the hob with an oven, then the connection of an independent hob is carried out together with the oven.
The gas hob is considered to be connected as a whole if the following work has been carried out:
Prepared holes in the countertop and a niche, if necessary.
Installed dielectric inserts to the valve that shuts off the gas supply.
Bellows hose installed to panel and dielectric insert.
An electrical outlet is connected to a wire for electric ignition, if necessary.
The hob is installed in the worktop, the connections and mounting fasteners are checked.
Testing and consultations on equipment operation were carried out.
Works on drilling holes, sang in the countertop and dismantling of used equipment are estimated separately.
Note!
When ordering, please do not confuse the price of the Integrated connection of the device with the price of Installation for ready-made communications.
The hob allows you to not only cook any dish, but also save space. After all, such equipment has smaller dimensions than large and bulky gas stoves. How to install the hob and oven? Everything is simple. The main thing is to follow the instructions. Everyone is able to cope with such tasks. This does not require expensive equipment, but only the presence of certain tools is important.
What will be required
To embed the hob, you must prepare all the tools in advance. To work, you may need:
- Roulette.
- Electric jigsaw or manual milling cutter.
- Nitrolac or silicone sealant.
- Self-adhesive seal or aluminum tape.
These are the basic materials and tools that may be required during the installation of the hob. The rest depends on the type of technology. Do not forget that the hob can be gas or electric. If you do not have experience in connecting such equipment, then you should contact the experts for help. 
We take measurements
So, how to install the hob in the countertop with your own hands? The instruction says that work should begin with cutting holes for the equipment. To do this, you should know the exact dimensions of the built-in panel. As a rule, all the necessary information is indicated in the instructions. In this case, you do not need to invent anything. If the instruction was lost for any reason, then measurements will have to be taken. This will require a roll. It is recommended to turn the built-in panel over. Then you should measure its length and width exactly along the inner edge.
It is worth noting that the instructions indicate the minimum indent from the edge of the countertop. It is not recommended to reduce it, as this can lead to a bummer. This figure can only be increased. 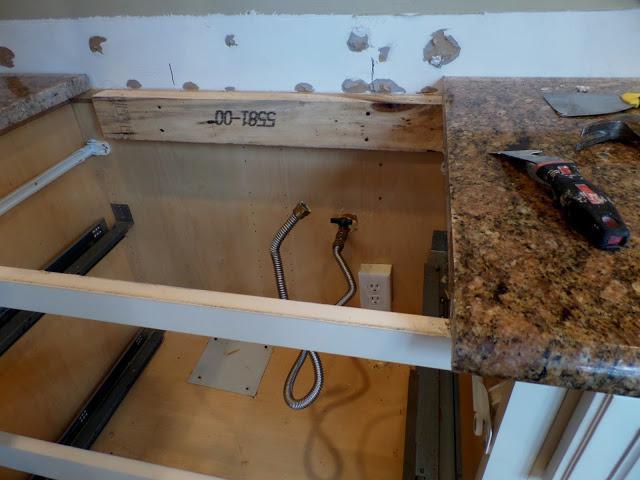
Cutting holes
Since it is impossible to install the hob on the countertop without surface preparation, you will have to make a special hole. It is for this that the dimensions of embedded technology are required. Before starting work, it is recommended to make markings that will correspond to the dimensions of the hob. If the surface of the countertop is dark or the lines are not visible on it, you can use masking tape. It should be glued to the surface and make marks on it.
After preparing the countertop, you can get to work. To begin with, it is recommended to make a hole. It is from him that the cutout will begin. For work it is worth using an electric jigsaw. In this case, the file must have fine teeth and be very sharp. Otherwise, the cut edge may crumble. If there is no jigsaw, then you can use a manual router. The corners should be rounded, and the edge of the cut should be carefully sanded. When the hole is ready, you need to try on the hob. 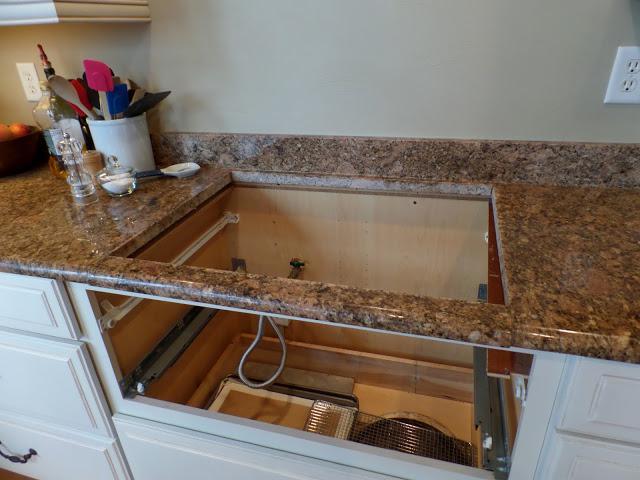
Sealing and sealing
Almost anyone can embed a hob in a countertop. The main thing is to know all the features of the process. When the hole is ready, it is worth carefully processing all sections. To do this, you can use nitrolac or silicone sealant. Such a precautionary measure will protect the surface from premature damage, swelling, wetting and dirt. Self-adhesive sealant can also be used for this purpose. It is also able to protect the countertop. It should be glued on top so that the edges of the countertop lie on it.
Aluminum tape can be used to seal the edge. This material is also able to protect the surface from a sharp temperature drop. The presence of a high-quality sealant will save the countertop and increase its service life. 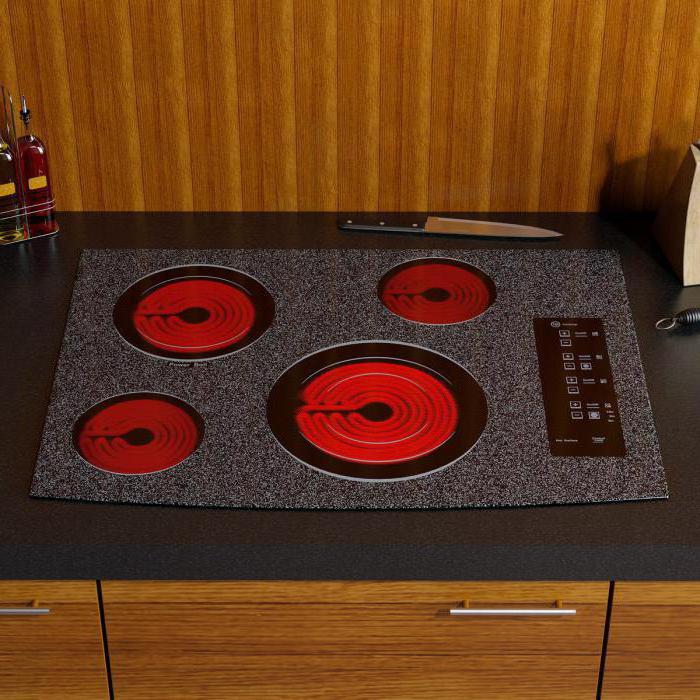
How to connect the electrical panel
So, how to install the hob in the countertop with your own hands? The instruction in this case is simply necessary. Electrical engineering is very popular. Such panels are more convenient. And with good assembly, such equipment rarely fails. If repairs are required, then you can dismantle the panel yourself.
To connect such a technique, you should carefully study the diagram. It is listed on the back of the panel. To connect embedded appliances, turn over and connect. When carrying out work, you should be careful. If connected incorrectly, you will not be able to adjust the heating temperature, as well as the inclusion of the burners.
You can install the hob without using a socket and plug. This is in cases where a separate shield with a cable is provided. Just connect the panel wire. After that, you can turn the panel over, and then insert it into the prepared hole. The equipment is ready to go. Finally, check the hob. To do this, turn it on and heat the water.
How to embed a gas hob
Installing a gas panel is no more difficult than an electric one. The installation process is very simple. First, you should carefully consider the panel. This will allow you to understand how the technique is fixed in the countertop. After installing the hob in the hole, it is necessary to align it and then fix it.
Most often, brackets are used to fix gas equipment from below. They usually come with a panel. After installation, you can connect the cable to the power supply. 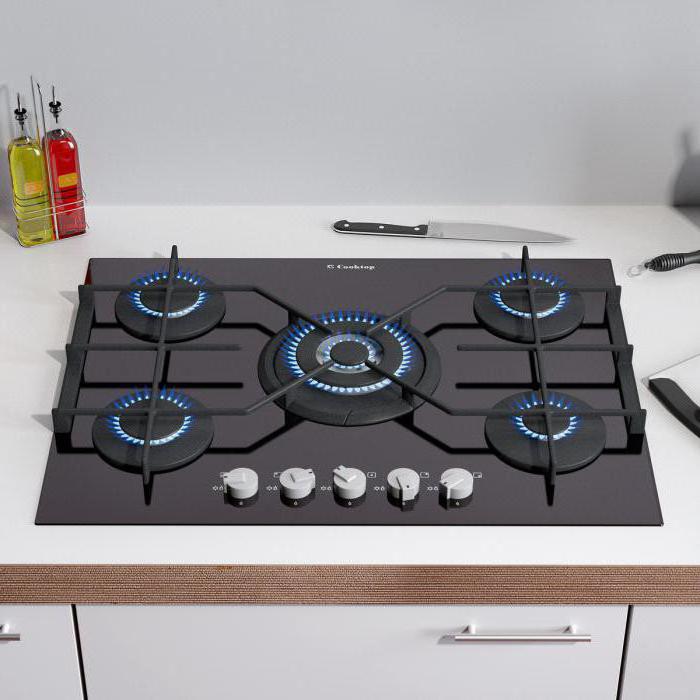
How to check the gas hob
Installing a hob is half the battle. It also needs to be connected. To do this, you just need to know all the safety rules. First of all, you should shut off the gas well, and then connect the hob to the pipe. A flexible hose can be used for this. At the same time, paronite gaskets must be placed in the nut. This is a prerequisite.
After connecting, it is worth checking. To do this, open the gas and light the burners. Now you should inspect the places where the connection with the hose occurs. Possible gas leak. To make sure that it is absent, you should smear the joints with foam. If it continues to bubble, then there is a leak and needs to be repaired. A special gas analyzer can be used to check the connections.
In conclusion
Now you know how to embed the hob in the countertop with your own hands. Before starting work, it is worth evaluating your skills and abilities. If this is not possible for you, then you should seek the help of professionals. However, it is safe to say that the installation process is not very complicated. Practically everyone can cope with such a task. The main thing is to carefully study the instructions and have all the necessary tools at hand. When performing such work, it is recommended to take into account all the nuances and subtleties of the process.
Built-in appliances - a godsend for the kitchen. It is comfortable, practical and always looks attractive. This purchase saves space and is ergonomic. And if you independently install the hob in the countertop, you will also be able to save money on its installation. To do this, you only need to have a certain set of tools and minimal building skills. Our detailed guide will show you how to do the rest.
Preparatory stage
Before installing the hob, make sure that there is enough space for it to be placed. The following values would be ideal:
- above the surface - a gap of 75-80 cm;
- on the sides - 30-50 cm.
The instructions from the manufacturer usually indicate the required thickness of the countertop - usually it is at least 20 mm, for an induction hob this value can be higher - up to 50 mm.
Depending on which surface is being purchased - gas or electric, make sure you have:
- a junction box for connecting to the mains - in case of absence, call professionals to install it;
- gas line - otherwise contact an authorized company to install the gas line.
Before starting work, turn off the power supply or gas supply, clear the surrounding area of unnecessary objects. Now you can proceed with the installation of the hob, starting with the markup.
markup
Do-it-yourself installation of the hob in the countertop begins with one of the most crucial stages - marking. The quality of installation, the attractiveness of the result and practicality depend on the accuracy of the calculations. Usually there is practically no margin in width, so the work requires a scrupulous approach. There may be two:
- household - by eye, when the panel is laid in the middle of the countertop and circled (this method carries the risk of damage to the material);
- professional - requires more time to make calculations, but minimizes errors.
In order to carry out accurate calculations, it is necessary:
- transfer the internal borders of the cabinet on which the installation is planned (you should get a rectangle);
- determine the center of the figure and draw straight lines from it - parallel and perpendicular to the base;
- use the resulting coordinate system to set aside the dimensions of the part to be cut out - to do this, carefully measure the panel, making a small margin (it will allow it to be centered);
- setting aside the dimensions, draw four lines that form an even rectangle - we will cut it out.
After you have made mine calculation and determined the place of the cutout, you can proceed to the next step - directly cutting the countertop.
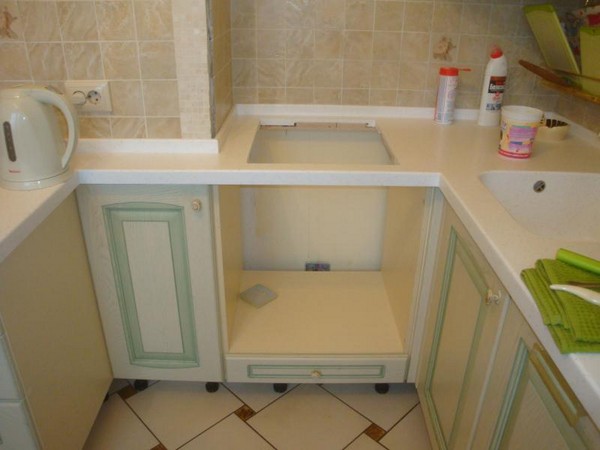
Hole cutting
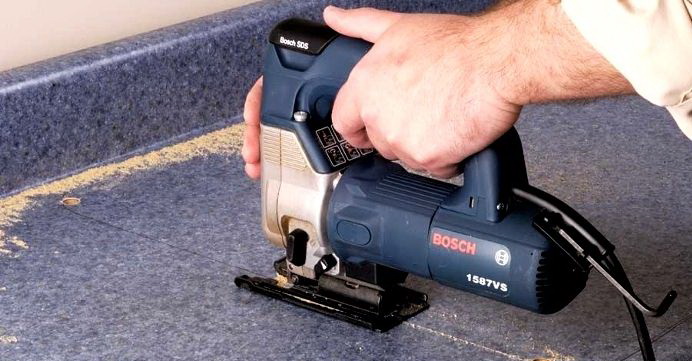
At this stage, we need to prepare a mounting hole in which we will install the hob. For cutting, one of the tools can be used - a drill, a jigsaw or a hand mill.
The latter is more convenient, but it is unlikely that a person who is not professionally associated with furniture can find it at home.
- cut only with inside markings;
- inside the cabinet, place a stool under the countertop - so that the cut out part falls on it without damaging the furniture;
- start work by drilling the first hole, from which you will go further;
For a jigsaw, choose a file with fine teeth so that the cut does not crumble and turns out to be even.
- treat the cuts with silicone sealant or nitro-lacquer - this is necessary to protect the countertop from getting wet and swelling.
For the same purpose, you can use a self-adhesive sealant or aluminum tape.
The result of this step should be an even hole that exactly matches the dimensions of the hob. Now let's look at how to mount it correctly.
Mounting and fastening
When performing installation work, follow the main rule - perform all steps sequentially, in order. Let's consider each of them:
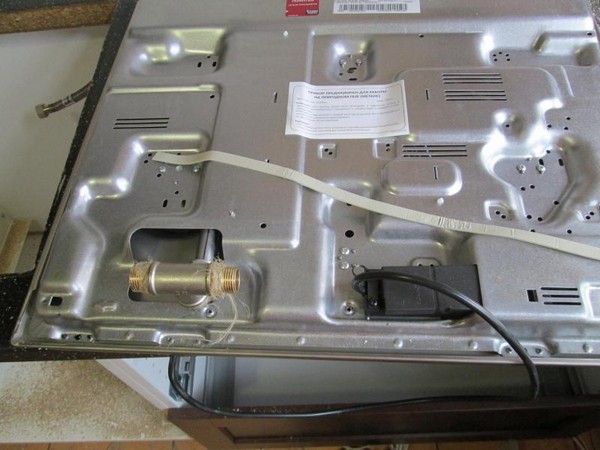
- If a gas hob is to be installed, a gas hose is connected to it. It has a union nut, which is fixed to the threaded pipe located at the bottom.
A paranitic gasket impregnated with grease must be attached to the nut.
- A special sealing tape is wound - often it comes with the panel. An important point is the integrity of the seal, so do not cut it at the corners, but simply make turns, join the ends tightly to prevent gaps.
- The hob is inserted into the machined hole - you need to align it so that it is located strictly in the center. From below, the device is also fixed with self-tapping screws and plates.
Tighten the structure tightly to prevent gaps. This will ensure the safe use of the hob.
Gas
The panel is inserted into the prepared hole, pressed and fixed from the bottom of the table top. We take a sharp knife and carefully cut off the gasket that was squeezed out. Then another part of the hose is connected - from the stove to the stationary gas pipe:
- sealant is applied to the thread of the fitting;
- the hose nut is tightened with a wrench and tightened tightly.
To prevent gas leakage, make sure you finish the thread completely.
In this case, the installation of a shut-off valve is mandatory. All work should be carried out very carefully, as it is associated with gas equipment and refers to hazardous activities. If violations of self-installation are revealed, you will have to pay a fine. And these are only minimal losses associated with incorrect work with gas.
Electrical
It should be connected according to the diagram, which is located on the back of the panel. Consider the standard order of connecting wires:
- black and red - power electricity, connect them to similar wires in the junction box;
- white - neutral, necessary to close the circuit, connected to the corresponding wire in the box;
- green - connected to ground.
When connecting wires to each other, use insulating caps - they will protect against the potential for fire.
Installation should be done carefully so as not to damage the wiring throughout the apartment. If the connection is incorrect, the burners will not be adjusted.
Some models of hobs have a separate wire designed for direct supply of electricity - from the shield. In this case, a socket and plug are not needed, the wire is simply connected to the panel itself. If it is not provided, you must take care of the moisture-proof outlet in advance.
Built-in appliances are convenient, compact and look very stylish. If you have become the proud owner of a gas or electric hob, you will have to figure out the rules for installing it. In the presence of necessary tools and ingenuity to do this will not be difficult. And our useful recommendations let them be at your fingertips during this painstaking work.


