
Bottle decor is an opportunity to give an old and unnecessary thing new life, which can then be used for interior decoration. You can also decorate a bottle of cognac or wine with twine, intended for a gift. This will immediately make your gift original and memorable. Decorate with twine, start bottles of simpler shapes. Once you have experience, you can move on to more complex products.
You will need several meters of twine, glue and a bottle. And you will also need various decorative elements for decoration. Starting to work, first of all, remove the labels from the bottle. To do this, put it for a while in hot water and then easily remove them. Although the labels can not be removed.
Degrease the decorated object with alcohol. If there is no alcohol, you can wash it with any detergent. Then apply glue at the base of the bottle and glue the end of the twine with glue-moment. Brush the PVA glue over the entire surface of the bottle with a brush and start wrapping the bottle with twine. Do this carefully, laying the thread in a circle. Try to ensure that there are no gaps between the threads, between which the bottle will be visible.
After wrapping the bottle, you can decorate the bottom. To do this, cut a circle to fit the bottom of the bottle. Stick twine on it in a circle and glue it to the bottle. If the bottle has a flat bottom, the twine can be glued directly to the bottom of the bottle. If you are not satisfied with the cover, you can paint it acrylic paint or also wrap with thin twine.
How to add decorative elements
After decorating the bottle with twine, think about its decor. The twine material itself is gray and nondescript, but good in its texture. Perfect for decorating country or eco-style products. Therefore, the product will only benefit from additional decor. These can be coffee beans, shells, artificial flowers, textile flowers and bows from the twine itself. If you do not have twine, knitting threads, silk ribbons, raffia can replace it.
To decorate the twine, you can use burlap or linen. Cut off a small piece of burlap. Glue it around the bottle with twine. From satin ribbon twist the rose. Glue the leaves on the burlap first, and then the rose. Tie the neck of the bottle with raffia and twine. Places free from twine can be painted with acrylic paint and coated with acrylic varnish. This must be done before you start decorating the bottle with twine.
How to make a designer item from an ordinary glass bottle? There are many ways. In this master class, I present a method decorating a bottle with twine. It seems to be a rough material - twine, but it gives the bottles a special charm of antiquity, a dacha motif. And most importantly, everyone can make such a vase.
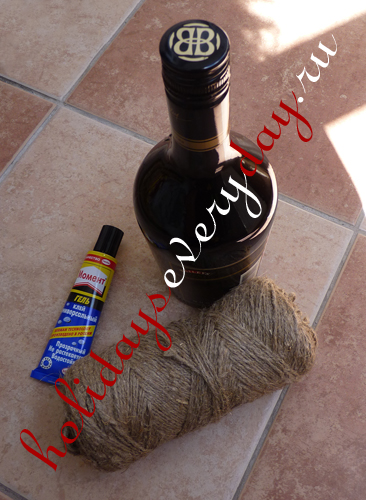
We will need a pretty or not very glass bottle or jar, hemp twine, Moment glue-gel. Available materials, right? If you take a coffee can, you will get a pencil holder, a wine bottle will turn into a vase for flowers or a decor item, etc. In any case, your product will look original.
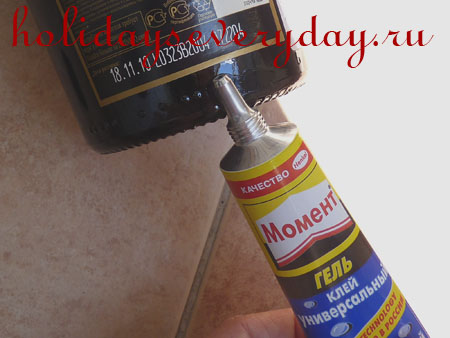
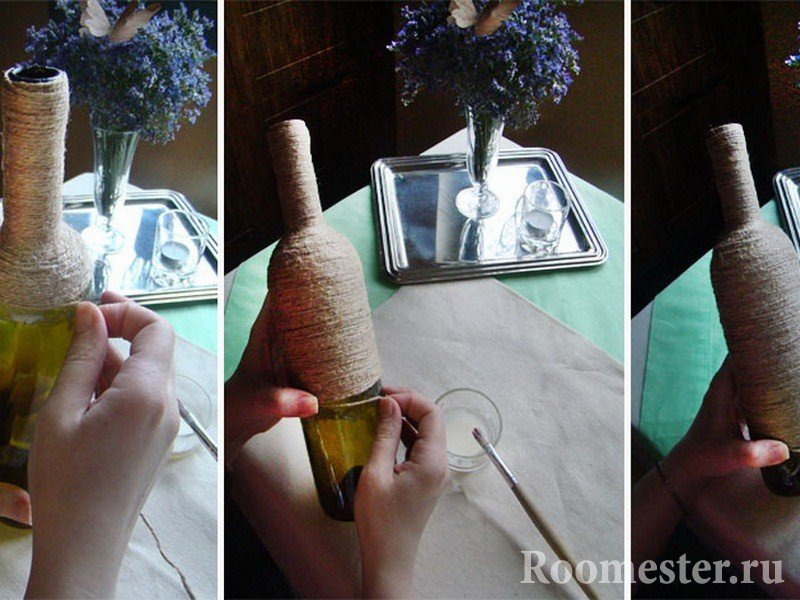
Let's start the process of decorating from the bottom of the bottle. Spread a line near the bottom with a thick layer of glue.
Gently glue one end of the twine, and begin to wind it around the bottle in a spiral, gluing along the very edge.
We continue to twist the twine tightly, adding a drop of glue in 2-3 places of the bottle on each circle.
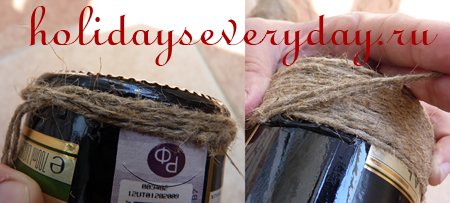
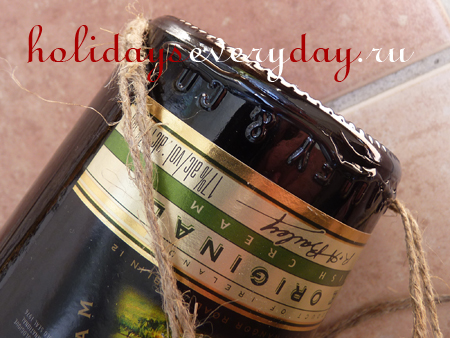
When we reach the narrow part of the bottle, the neck should be coated with glue already on the entire surface, on which the next strip of twine will be glued. Pull the thread so that there are no gaps.
We decorate the neck, tightly wrapping it with a tourniquet. In this case, it is better not to spare the glue so that the tourniquet holds well.
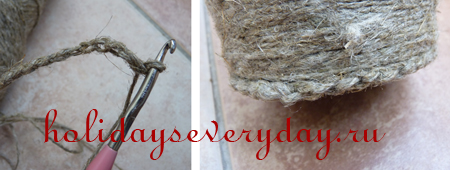
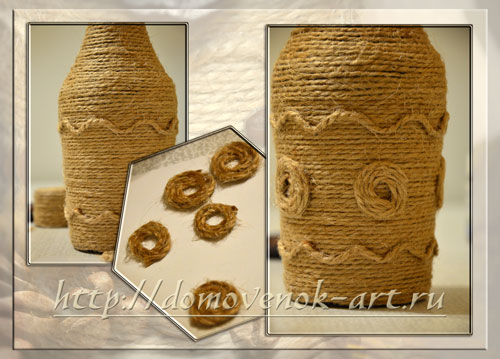
Bottom we will decorate the bottles with a pigtail crocheted from a thread of twine. Take hook number 3 or 4. When knitting a pigtail, try it on the circumference of the bottom of the bottle so that there is no extra tip left or, on the contrary, there is not enough pigtail.
Glue the pigtail along the very edge.
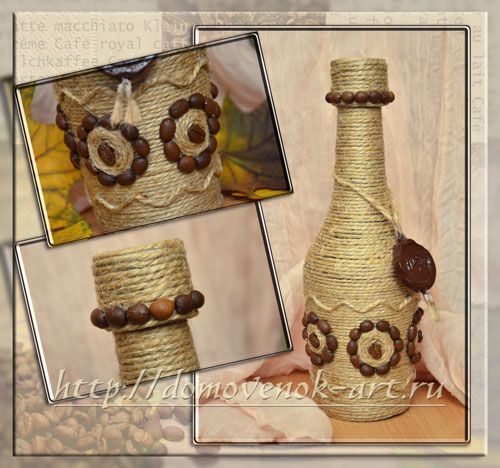
Now decorate the bottle. Here you can show your imagination. I decided to decorate the bottle with curls. She cut off seven identical strips of twine. I twisted each part into a spiral. I glued curlicue spirals to the bottle, and glued a coffee bean to the center of each spiral. I decorated the bottle cap in the same way. I left the bottom of the bottle without decor for stability. But if you wish, you can glue the twine in a spiral to the bottom.
Creative greetings to all! Holidays and more holidays! This is the motto we live with in the second half of February - the beginning of March. We didn’t have time to give our loved ones valentines, when we immediately have to think what to give our man on February 23 (and for someone on his birthday).
In today's tutorial you will see how to quickly make original gift for a man with his own hands. Don't know what to give? A universal option - a bottle of something! But giving just a bottle is rather boring and banal. After all, a gift should be with a soul. So, we need to make a small miracle with our own hands - to decorate the bottle.
There are a lot of ways to decorate a container: this is decoupage, and pasta, and burlap, and much more. I decided to stop at decorating a bottle with twine. I have written many times how much I like this material. It looks chic on, this is an excellent material for weaving small baskets (here, by the way, is a master class on this topic:).
And now, in the piggy bank of using this material, you can add the decoration of bottles with twine. I really like the fact that the design work is quite simple, you don't need to know a lot of subtleties, and the materials are all available. And the result is just wonderful. Well, see for yourself.
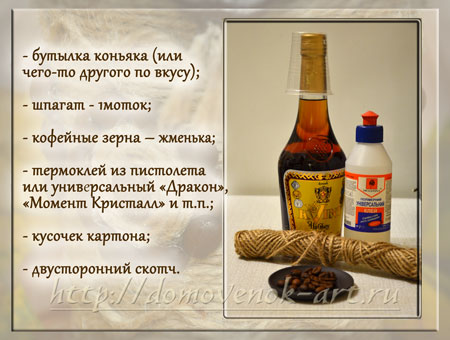
To decorate bottles with twine, we need:
First of all, let's peel off the stickers first. It is not necessary to clean everything to zero, it is enough to tear it off, where it easily leaves.
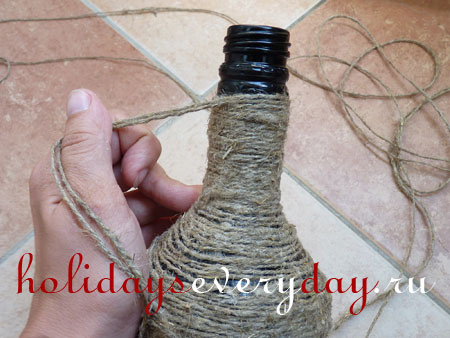
We start decorating the bottle with twine from the bottom. I was lucky, my bottle had a small indentation on the side of the bottom, just what we needed. We glue the tip of the twine in this groove, we bring the thread to the walls.
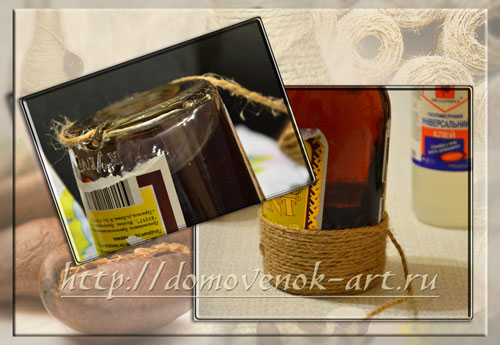
Lubricate the bottom of the bottle with glue and begin to tightly glue the twine in a circle. I do not recommend smearing the entire bottle with glue at once, do it better gradually.
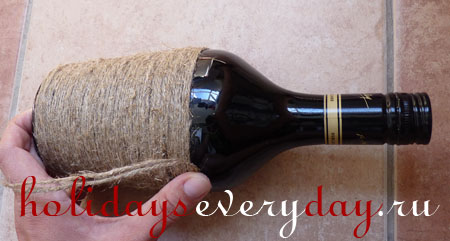
We bring the twine to the top. Here's what we get. I did not decorate the bottle with twine to the very neck, since it is still sealed. Thus, it is necessary to leave room for opening the lid.
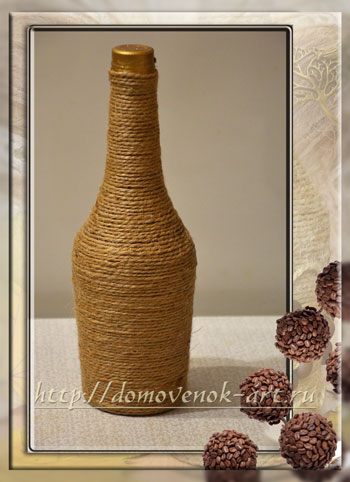
I agree, something needs to be done about the top. I propose to make a small cap - a cap. She will simply put on the bottle from above. The process of creating a cap is very similar to the process of making or
We measure a strip of cardboard with a width of about 3 cm and a length corresponding to the girth of the throat in the place where the twine is wound.
We turn this strip into a ring, I used double-sided tape to fix it. You can also use regular glue.
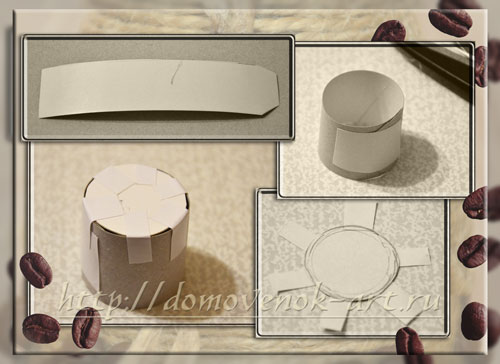
We draw a circle on cardboard with a diameter equal to the diameter of the hole of the resulting cylinder, cut it out. We glue the circle with strips of double-sided tape to our cardboard ring. No tape, use thin paper.
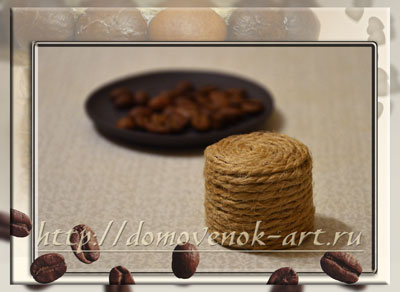
Before proceeding with further work on decorating the bottle cap with twine, we will remove the protective strips from the adhesive tape. And now we apply universal glue first to the center of the cap. Glue the end of the twine. And then in a circle we glue the entire surface of the lid.
How to decorate a bottle decorated with twine
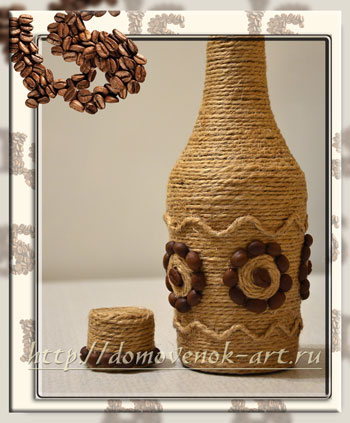
To decorate this bottle with twine, I decided to use coffee beans and, in fact, the twine itself, which began to run out at the most opportune moment. Therefore, I present to you an economy version of decorating a bottle.
First, glue two waves on top and bottom. Then we twist these 5 rings from the twine, naturally with the help of glue.
Slightly dried rings are glued to the bottle with equal pitch.
Now it's the turn of the coffee beans. We place one grain in the center of each ring and several grains of a suitable size around.
In general, this is where my twine ended. Therefore, for the decoration of the lid, I only had coffee beans left.
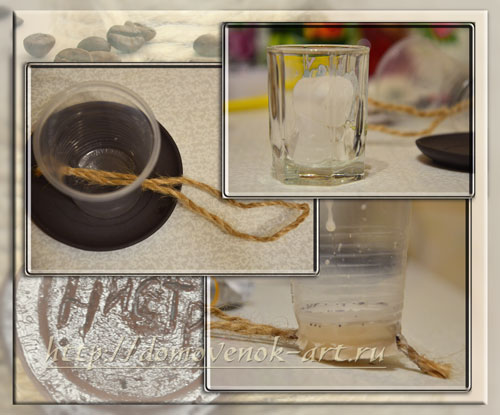
And another little trick: you should still write what kind of drink is inside. Let's make it in the style of a wax seal. For making, we need a candle, a glass, a small piece of twine, as well as brown wax crayon or acrylic paint.
Melt a piece of candle in a water bath. Next, either crumble brown wax crayon into melted paraffin, or leave it as it is.
In the cup we make 2 holes opposite each other, we thread the twine bent in half into them. Pour wax into a glass and put in the refrigerator.
After complete solidification, we tear the glass. With the help of a wooden skewer, we apply the necessary inscriptions. I decided to dwell only on the name of the cognac "Nistru".
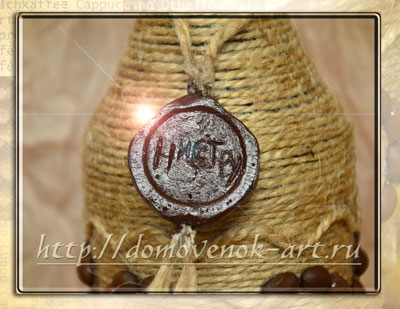
I didn’t have a crayon, so I painted the finished print with brown acrylic paint. We hang it on our bottle. Now the original gift for a man with his own hands is ready! In my opinion, very good and certainly non-standard.
Agree, decorating bottles with twine is not such a difficult and costly task. But how much joy can be delivered by giving such an exclusive! What do you think? Have you ever decorated bottles (and not necessarily with twine)? Share your experience and thoughts in the comments below. And if there are photos of finished bottles, we will be happy to take a look at them.
Merry creativity to you! And come visit for new ideas!

With love, your brownie Elena
Do-it-yourself twine decor is a simple and original technique for transforming old or useless household items into exclusive decor elements. As a rule, all that requires such decor is twine and glue. The rest is up to your imagination. An object decorated with twine can be decorated with lace, beads, sequins, buttons or rhinestones.
Very beautiful, with a touch of ethnic color, bottles decorated with twine look. But you can make an ordinary empty bottle an object of design art using other methods. How to decorate a glass container, what techniques and materials to use? You can find answers to these and other questions in our article.
Bottle decorating is an easy and inexpensive way to spruce up your home with elegant decor items. There are a lot of ideas for decorating bottles of different shapes and configurations. Creating a designer decoration for the interior is incredibly simple. The materials that you will need for this are always easy to find at hand. And such miracle bottles are obtained very beautifully, exclusively. Bottles are decorated using different techniques and materials:
- Decorating with paints;
- Decorating with twine;
- Decor with salt and cereals;
- Use of decoupage technique;
- Decor with fabric and leather;
- Decorating with flowers and fruits;
- Decor with mosaics;
- beading, salt dough, coffee beans, newspapers, magazine clippings.
In fact, almost any material at hand is used to design glass containers. The main thing is to use all your creative potential.
Step-by-step instructions for decorating with twine
Twine is a strong thread made from natural or chemical fibers (or a combination of both). Decorating a bottle with twine is a fairly simple type of needlework. You can buy twine of this kind at any hardware store or shops for hand made craftswomen. A few simple manipulations, a minimum of tools, materials and an ordinary glass container turns into an original gift. It does not lose its practical purpose. Such a decorated vessel is used for various purposes:
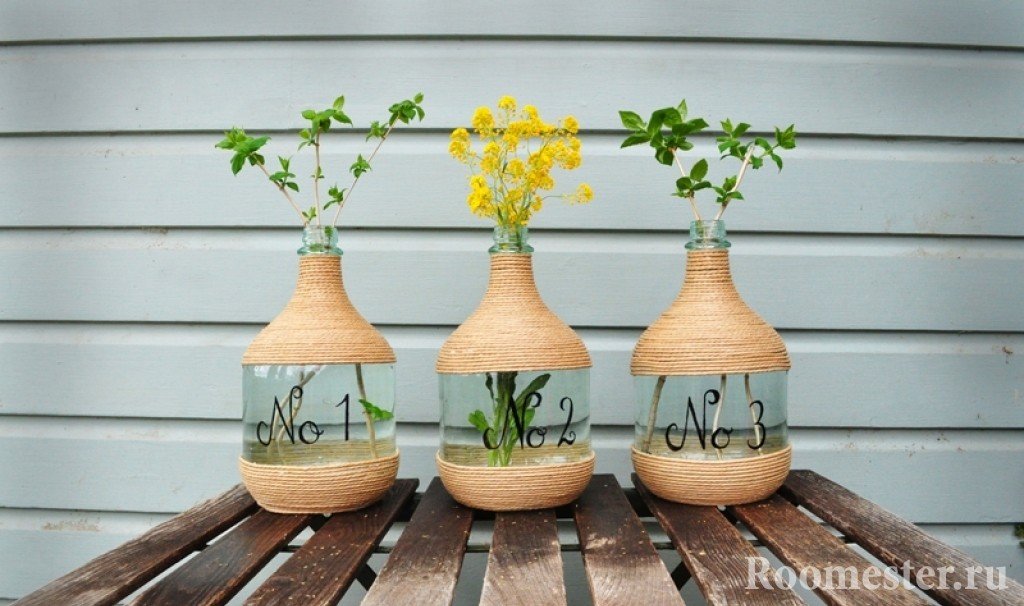
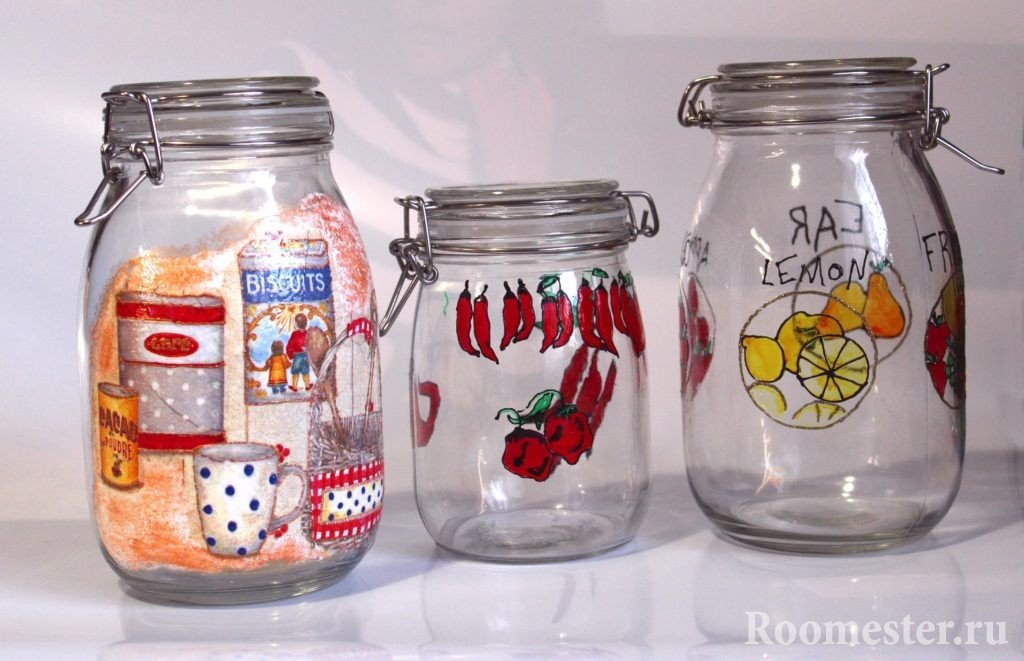
- Container for cereals. The decor of the jar with twine, as well as a tag indicating the name of the products (salt, sugar, rice, buckwheat) is a great idea for decorating kitchen shelves.
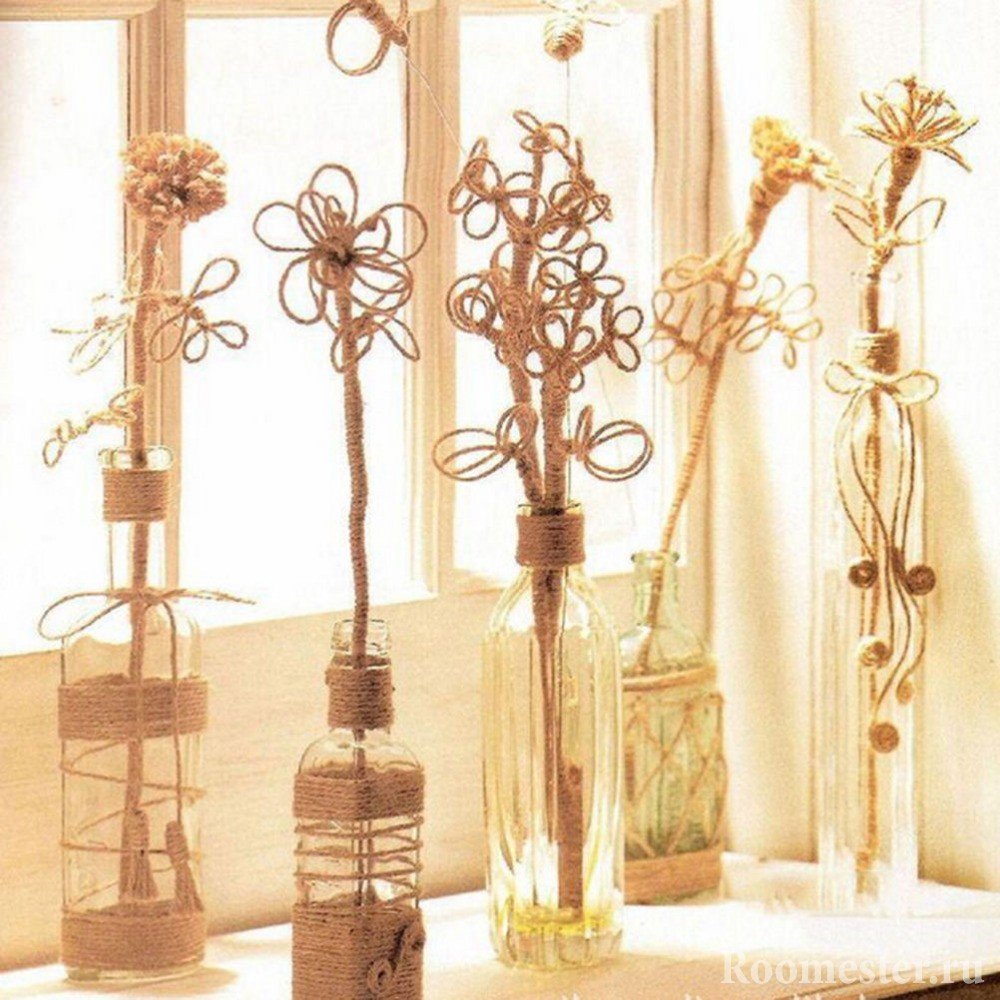
- vase. Simple wild flowers and exquisite roses will look good in handmade flowerpots.
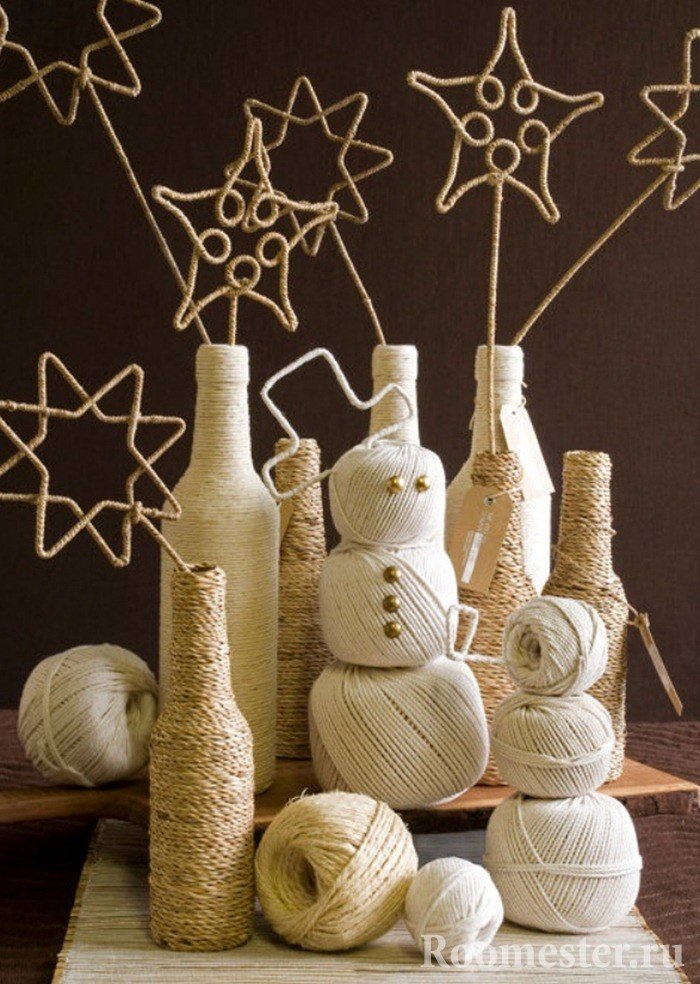
- Interior decor element. Bottles decorated with twine are the best fit for an Eco-style interior. Thanks to the designers who came up with the interior of the premises using natural materials and beautifully played with the idea of exquisite simplicity. It remains for us to supplement their idea with pretty handmade trinkets.
- Nice container for drinks. homemade lemonade, liquid sherbet, juice - all these wonderful drinks will seem even tastier if they are served in a beautiful vessel.
Advice. Not only empty vessels are decorated with twine. A gift in the form of a wine bottle decorated with twine is another option for a festive souvenir.
To decorate bottles with twine with your own hands, you need to stock up on such materials and tools:
- Bottle for decoration;
- A piece of twine;
- Acetone or alcohol;
- Glue "Moment" or thermal glue;
- Scissors;
- Glue gun.
This type of needlework is not difficult. Even a child can do it:
- Wash. You need to start decorating the bottles with twine, after washing them, cleaning the stickers and drying them.
- Degrease. In order for the glue to fit well on the bottle, and the rope on the glue, it is necessary to treat the surface with acetone or alcohol.
- Wrap. This is followed by decorating the bottles with twine.
How to wrap a glass container with twine?
Decorating bottles with twine with your own hands is not done in random order. When “winding” bottles, you need to follow a few rules:
- You need to start from the bottom. Apply glue to it and simply fold the thread with a “snail” from the center to the edges of the bottom. It is necessary to lay the twine tightly, evenly, so that it turns out neatly, it looks beautiful. A thread must also be applied to the edge of the bottom so that the container does not lose stability.
- Then the decor of the bottle continues with twine in the direction from the bottom up to the neck. In this case, the rope should lie parallel to the bottom. If at least one layer "tilts", then the rest will be stacked more crooked each time. Twine decor will be a failed undertaking.
- The neck is wrapped last. The thread must be well fixed so that it does not subsequently unwind. The twine decor is ready.
Advice. Do not glue the entire surface at once. It will be difficult for you to work. It is better to coat the glass with glue in stages, in parts. Then the glue does not dry too quickly, does not stick to your hands.
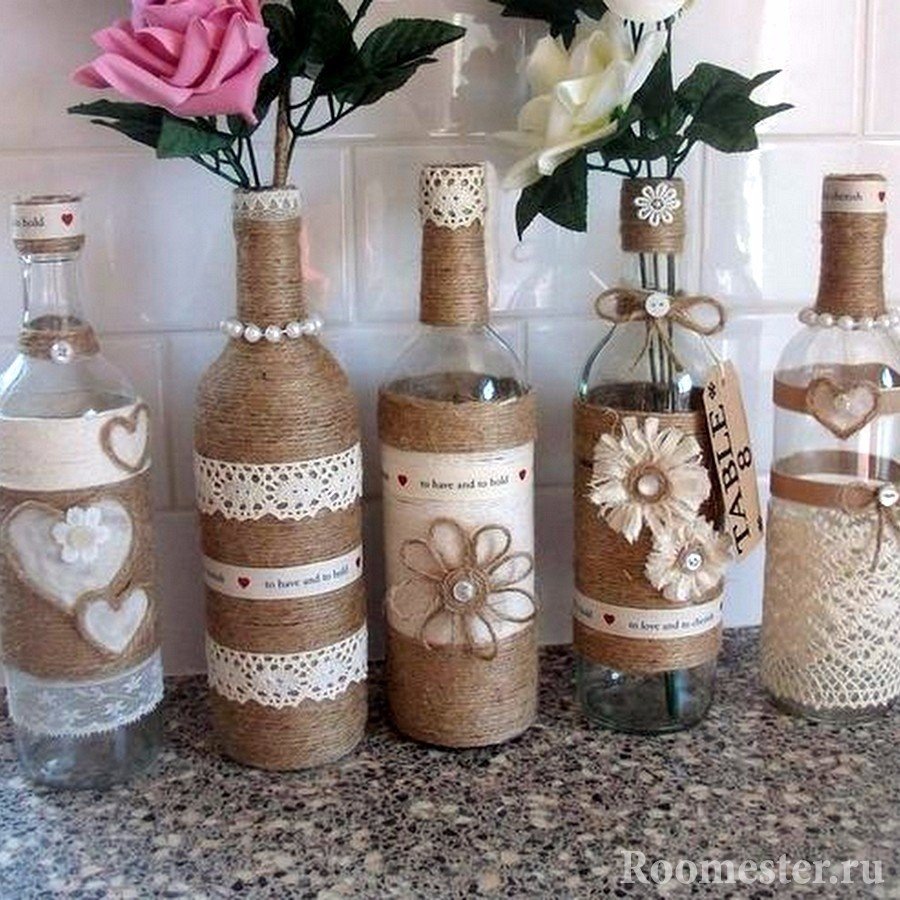
The decor of the container, decorated with twine, can be supplemented with pieces of lace, buttons, fabric flowers. Using glue, twist circles of threads of different colors, glue them to the workpiece. You will have a wonderful vessel for a kitchen in the style of American "country" or French "Provence". Decorating bottles with twine and coffee is another idea for decorating glass containers. Coffee beans are glued on top of the threads. Here you can fully show your creative inclinations. Aromatic grains are simply "scattered" over the surface or glued in the form of an ornament, pattern, composition.
![]()
Decoration of bottles and jars with multi-colored threads and lace
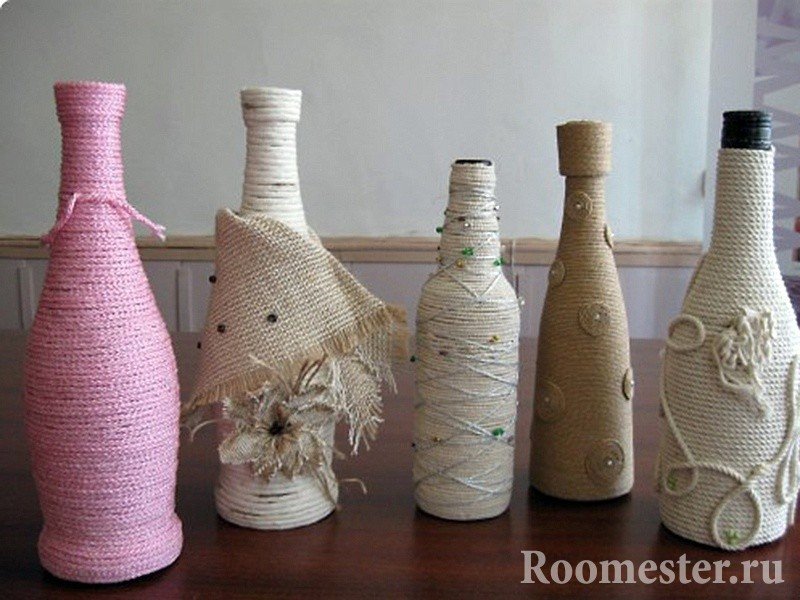
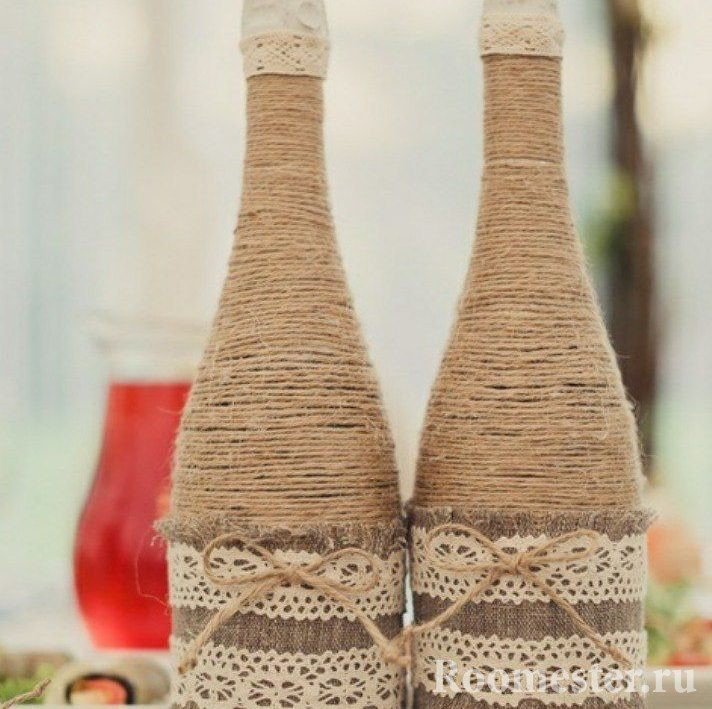
Simple, but beautiful and elegant, do-it-yourself twine decor, complemented by lace, looks. They are glued in a strip or squares over the "winding". You can complicate the decor by gluing lace alternately in stripes, then wrapping it with twine. Or focus on the beauty of glass - wrap only the bottom and 1/3 of the bottom. Glue a lace strip over the wrapped part, tie it with a string of twine, forming a small bow, glue a few beads or a pendant on top.

Decor with twine or twine is not the only design technique. To create a colorful, bright crafts, multi-colored threads are used. Moreover, in this case, freedom is provided in the winding technique. A jar or bottle turns smoothly or randomly, like a ball. For this method, it is better to select threads of different colors. The main thing at the same time is to glue the layers of threads so that they do not lag behind each other.
Bottle decor with twine and salt
Salt is an excellent material for the “creative workshop” of needlewomen. Decorating the bottle with twine and salt is done in two ways:
- Salt decor from the inside;
- Salt decor outside.
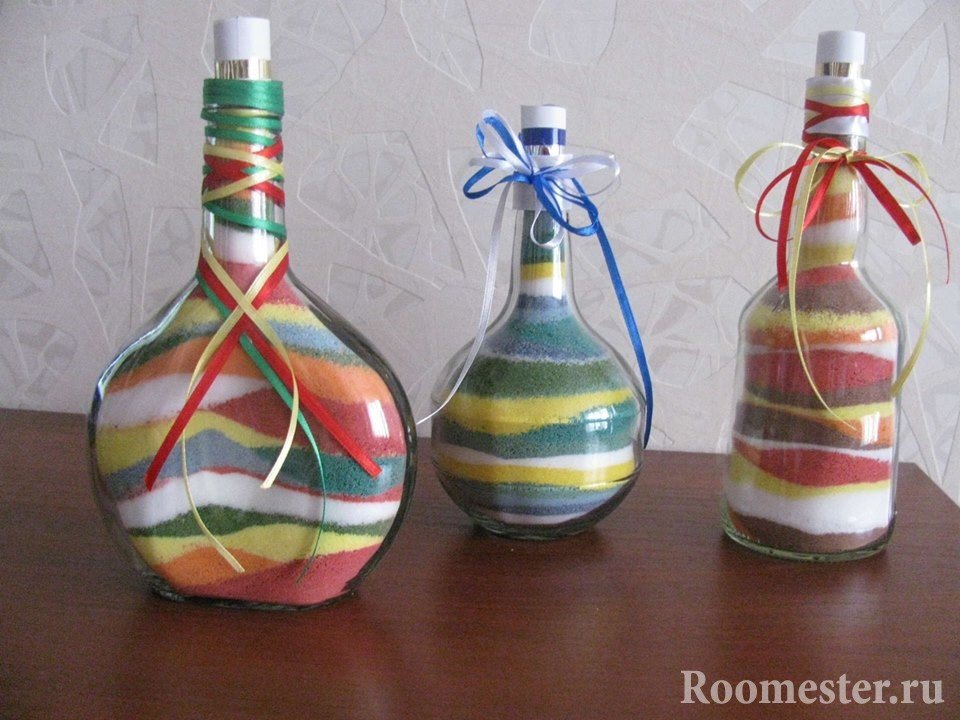
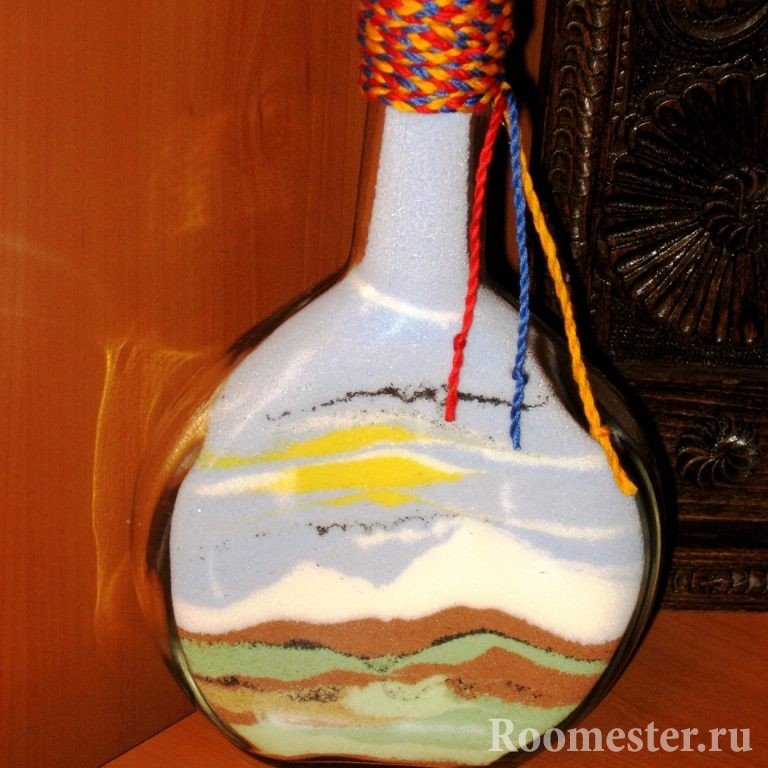
Decorate with salt inside. This simple technique will be loved by kids. It is simple, exciting, develops their creativity, allows you to have fun with your parents. The child will be able to make a colorful gift to friends or relatives.
Materials:
- Beautiful bottle or jar;
- Acetone or alcohol;
- Salt with large crystals;
- Multicolored paints. Gouache or acrylic works best.
The master class is very simple, consists of two stages:
- Step 1. Salt painting.
- Step 2. Formation of layers.
Salt is painted as follows:
- A little salt is poured into the container.
- Paint poured on top desired color. The intensity of the shade can be adjusted by adding or subtracting paint and salt.
- Mix thoroughly so that the salt acquires a uniform color.
- The oven heats up to 100C. A baking sheet with colored salt is placed in it for 1 hour.
- After 60 minutes, the baking sheet is taken out, the salt is kneaded and passed through a sieve.
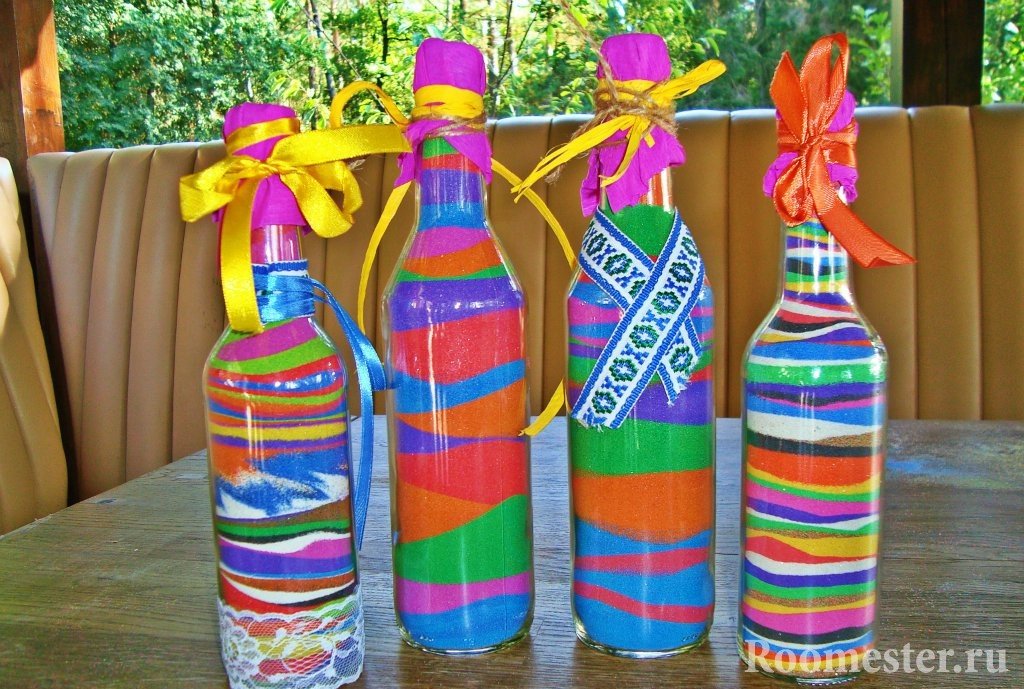
The blank for the first layer is ready. Now you need to make a few more shades of salt using the same technology. Now it's time to start building layers.
Layers are stacked in different thicknesses and colors. Your creative intuition will tell you how to create a beautiful gamma, what should be the levels of the layers. For the convenience of laying out the salt in layers, it is better to use a funnel.
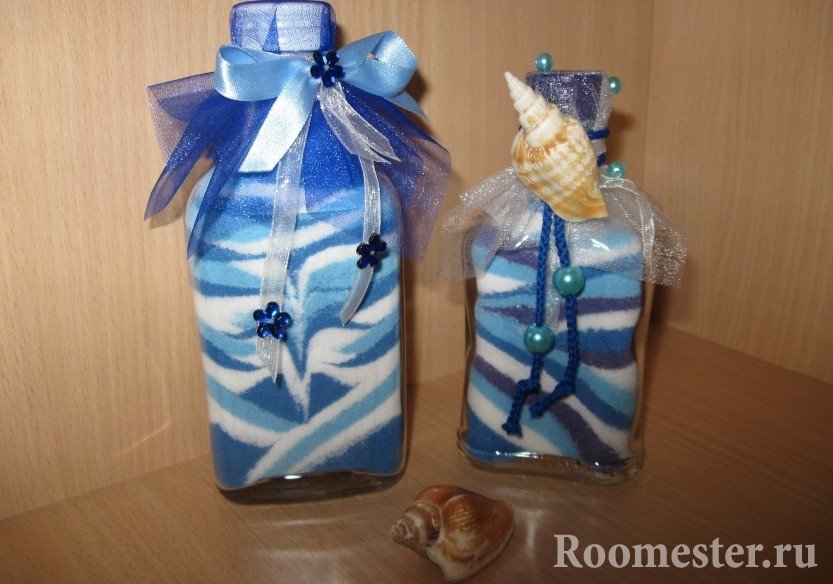
Now it remains only to cork the bottle (jar) with a cork or lid. The original craft is ready.
Advice. The cork and lid can be decorated with a piece of beautiful fabric, coarse burlap, lace, ribbon, foil, decoupage napkin, twine. It all depends on the color palette and design ideas.
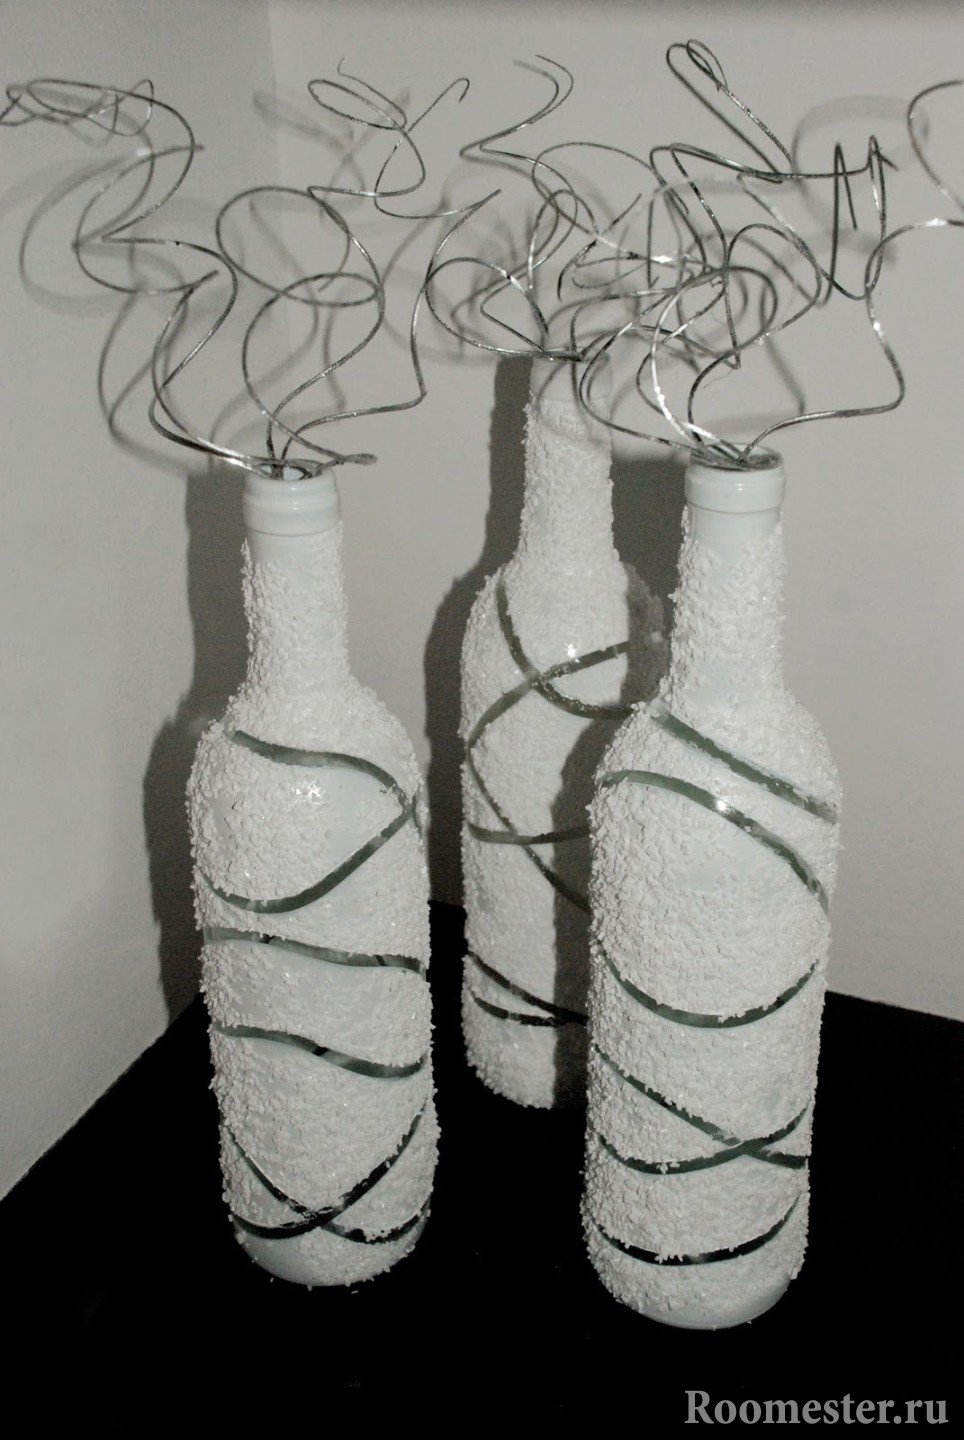
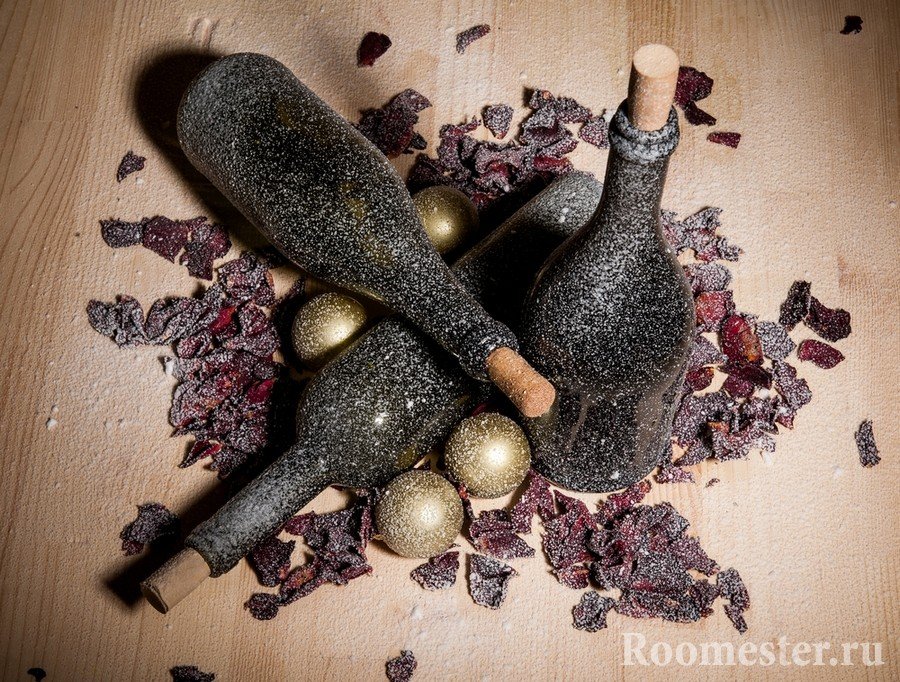
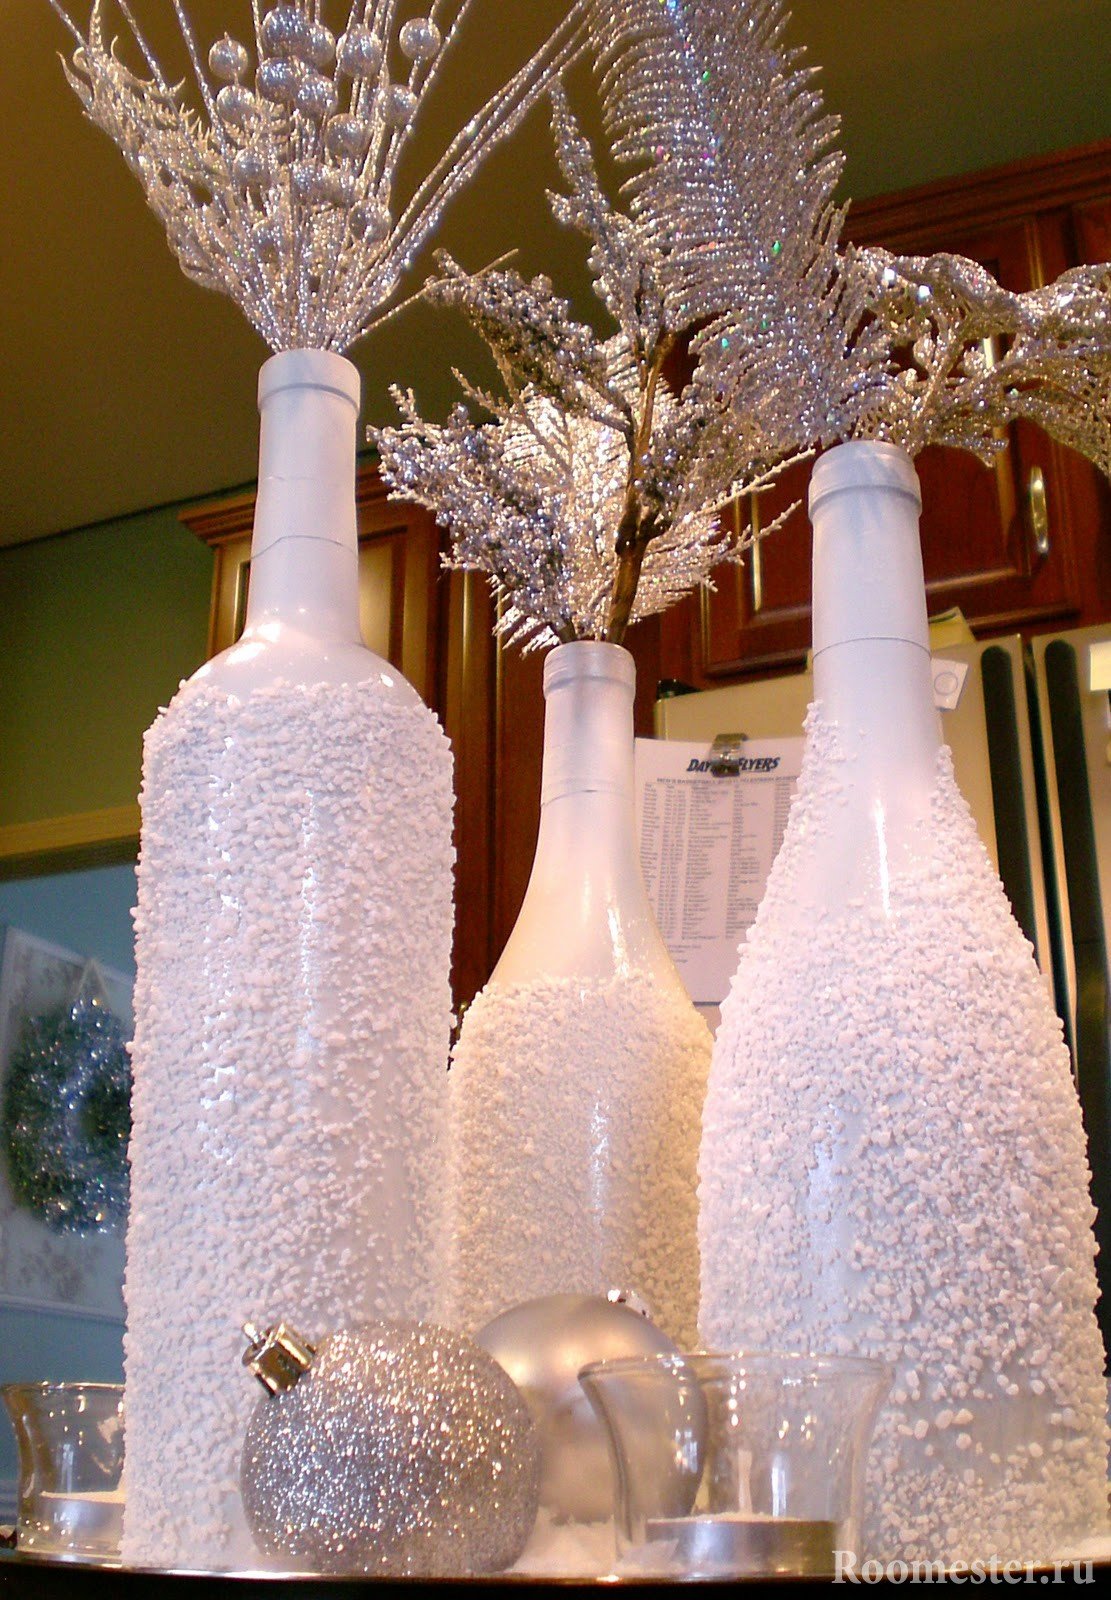
Decorate with salt outside
The decor of the bottle with twine can be complicated if you decorate it with additional salt on the outside. This design is incredibly sophisticated. The effect of white haze, perspiration, frost appears. Dark-colored containers will look best with this decor.
What is needed for this?
- Bottle, jar or other dark glass container;
- Salt;
- PVA glue);
- tassel;
- Leg-split;
- Glue gun;
- Decor elements.
Instruction:
- Step 1. Clean, wash the container. Dry, degrease with acetone (alcohol).
- Step 2. Using a glue gun and twine, decorate the vessel 1⁄2 or 1/3 using the instructions above.
- Step 3. Then, on the surface remaining free of the thread, apply a layer of PVA with a brush. Sprinkling with salt, turn the container in different directions.
This decor will become more sophisticated if you use one more simple trick. This will require additional materials:
- Sponge;
- acrylic paint;
- Elastic band (width - 0.5 cm).
Instruction. The first two steps are the same as the previous instruction. After the bottle is decorated with twine, the container is decorated a little differently:
- The part free from threads is wrapped with an elastic band. The stripes are arranged parallel to each other, intersect, go in a spiral or are placed in arbitrary directions.
- Acrylic paint is applied with a sponge where there are no threads and the bottle is wrapped with rubber. Allow the workpiece to dry completely.
- The surface is treated with PVA glue.
- Sprinkle salt on paper. Roll the bottle in this "powder". Care must be taken to ensure that the layer is uniform.
- When the salt layer dries, the gum will need to be removed.
Advice. Salt can be used not only white, but also multi-colored. If you lay it out in patterns or stripes, then the coating on the bottle will turn out in the form of a beautiful ornament.
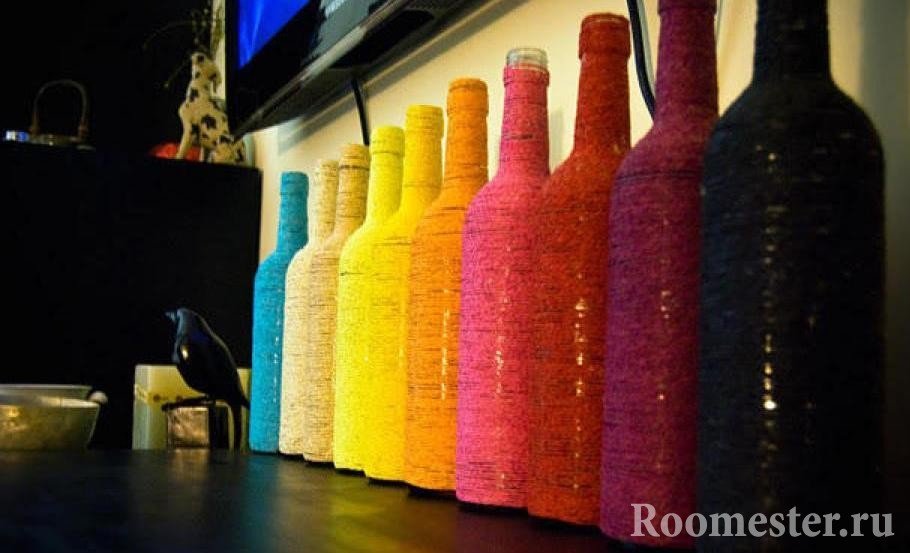
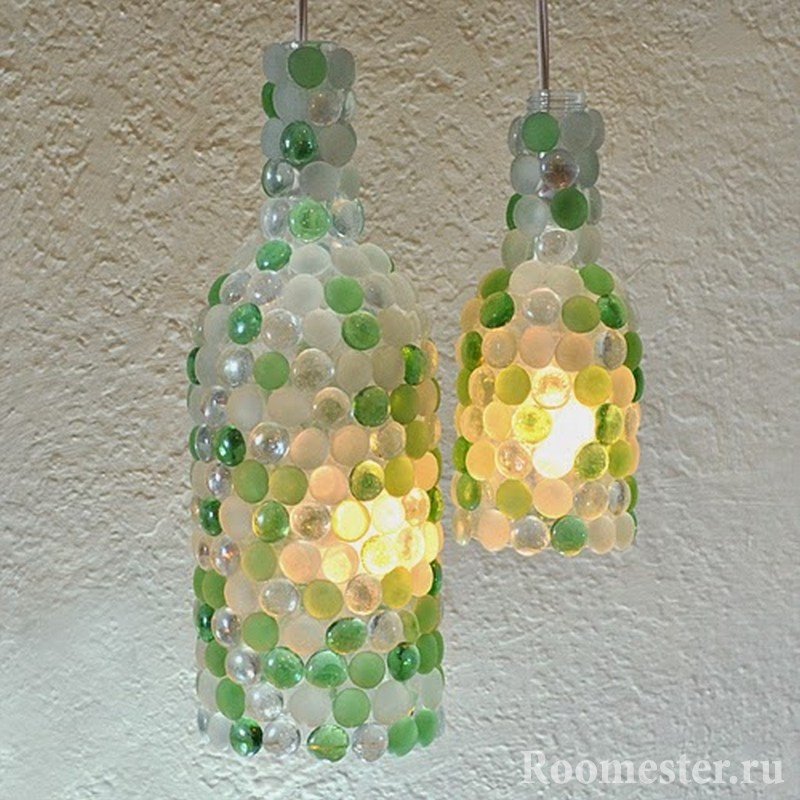
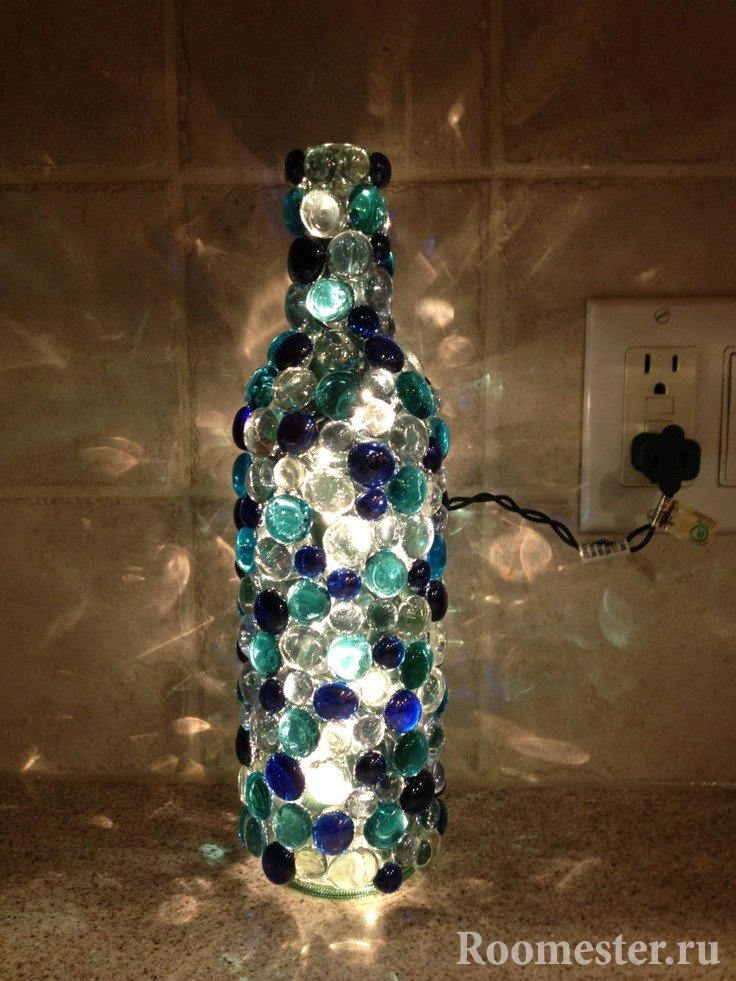
Decorating with crystals - we create a night lamp with our own hands
The idea itself sounds nice, doesn't it? These bottles look incredibly impressive, especially if they are highlighted. Multi-colored highlights, multiplied by crystals, will brighten dull everyday life and create a good mood.
Necessary tools and materials:
- Clean wine bottle.
- Multi-colored crystals or glass beads. Round glass pebbles are suitable, which flower growers use to cover the ground in flowers. You can buy them in many flower shops.
- Sandpaper.
- Drill.
- Glue gun.
- LED Christmas lights-garlands.
The instruction consists of several steps:
- Turn the bottle upside down, fix it in a container of a suitable diameter.
Using a special nozzle, drill a small hole (2.5 cm) in the bottom of the bottle. Through it, LED lights will later fit inside.
Important. If you are not skilled with a drill, ask someone to help or place the lights of the garland inside by passing them through the neck of the container.
- Use sandpaper and a pencil to clean up the cut edges.
- Using a glue gun, glue the crystals starting from the bottom towards the top. If multi-colored beads are used, then you can place them in stripes, patterns, spirals, or in any order.
- When the vessel is decorated, leave it until it is completely dry.
- Place Christmas tree lights inside the container. The lamp is ready. All you need to do is turn it on and feel the wonderful atmosphere that it radiates.
Such a lamp from a bottle will be a creative gift for friends, beautifully illuminate the room with soft light, suitable for any holiday.
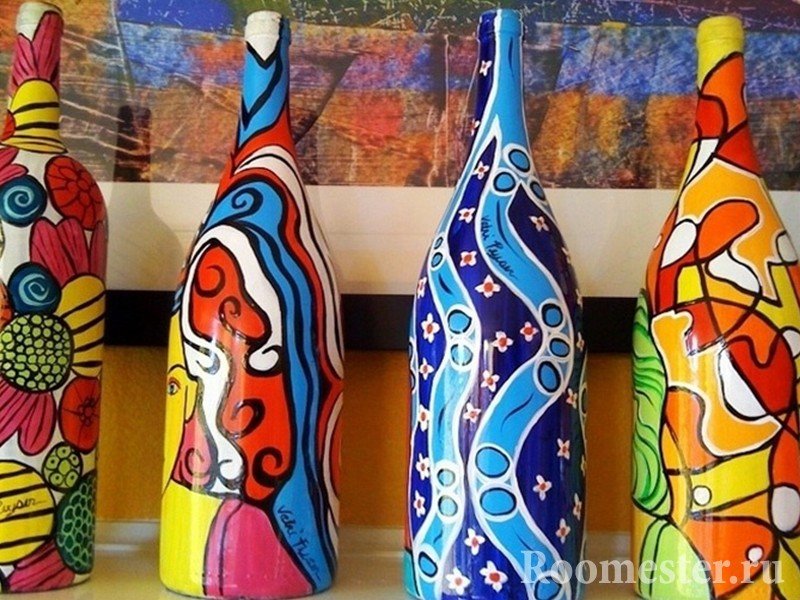
Decorating bottles with paints
One of the most simple ways decor. You just need to paint the bottle according to your taste with the help of paints. Stained glass or acrylic paints are best suited for these purposes. But aerosol cans will also work. After the work is finished, you need to varnish it on top.
There are two types of painting a bottle with paints - inside and outside. We offer several ideas for making crafts using this technique.

Idea #1. Bottle painted on the outside and decorated with a "newspaper tulip"
This is a great opportunity to turn unwanted wine bottles into original vases or decorative items for the kitchen and living room. What do you need for this? The simplest materials that you can find at your fingertips. Moreover, men will also be able to master the master class. Any woman will say thank you if she gets rid of such unnecessary rubbish, turning it into an elegant work of art.
Materials and tools:
- Empty, clean bottles;
- White spray paint (Rust Oleum works well);
- Tulip stencil;
- Newspaper pages or sheets of an old book;
- Glue for decoupage;
- Tassel.
Instruction:
- Step 1. Make sure the bottles are clean and unlabeled. If this is not the case, then wash them thoroughly, remove all paper stickers from the glass. Dry well.
- Step 2: Paint the bottle White color with spray paint and leave it until it is completely dry.
- Step3. Find a tulip stencil online and print the image. You can use any other picture (butterflies or birds, for example). The main thing is that it fits in size.
- Step 4. Take a sheet of an old, unnecessary book or newspaper, magazine. Using a stencil, draw a tulip, cut it out.
- Step 5. Using a brush, apply glue to the "newspaper tulip", stick it to the painted bottle.
- Step 6. Apply glue on top (small layer) to fix it. After the glue dries, there will be no traces left.
Idea No 2. Bottle painted from the inside - "purple lace"
Glass containers look no less beautiful if they are painted with inside. Vase in purple, decorated with a ribbon of lace, will set you in a lyrical mood. A bouquet of lilacs will complete the beauty of the handmade vase.
Materials:
- Bottle (white);
- Purple paint;
- Wide lace ribbon (white, beige, brown - optional).
Instruction:
- Step 1. Thoroughly wash the bottle, remove the label, remove the adhesive under it. Then boil it for 15 minutes.
- Step 2. When the vessel is completely dry, you need to pour paint inside.
- Step 3. The bottle is rotated in different directions, rotated at different angles so that the paint completely covers the inside.
- Step 4. Turn the bottle upside down, place it over a container where excess paint will drain. It is important to fix it well.
- Step 5. After the first coat of paint has dried, you can apply the next or several other layers. Depending on the desired result. When all layers are dry, the craft is ready.
- Step 6. We decorate the resulting blank for the vase from the outside with the help of lace. We measure the segment of the desired length, glue it around the circumference of the bottle. The decor can be supplemented with fabric flowers, ribbons, beads, beads. The flower vase is ready. Such a gift will be exclusive, because it is made by hand.
External painting of glass bottles and jars with acrylic paints
This technique also does not require large investments and does not take much time. The vessel is painted on the outside with acrylic paints using a brush. If not artistic talents, then a stencil is used. External decoration with paints is done as follows:
- The container is pre-washed, degreased.
- A layer of paint is applied with a sponge, usually white.
- On this basis, everything that your heart desires is depicted - patterns, flowers, landscapes, inscriptions, congratulations.
- After the drawing has dried, it needs to be lightly cleaned with fine-grained sandpaper. Then cover with one or more layers of varnish.
Important. You can not apply the next layer of varnish until the previous one has dried.
If a stencil is used for painting, then it is fixed with pieces of adhesive tape on the glass, paint is applied with a brush or sponge. Let it dry, carefully remove the stencil, sand it, and then varnish it.
Bottle decoration - decoupage
Decoupage is a needlework technique that has long been loved all over the world. It looks like an application. It consists in transferring a paper picture to almost any surface. With the help of decoupage, faceless objects become real pieces of art. Old, unnecessary things get a second life. The same reincarnations apply to empty glass containers. Transparent or painted vessels, bottles, decorated with half linen cord, will become much more attractive with decoupage elements.
What do you need to decorate the bottle with decoupage?
- Clean bottle;
- Napkins for decoupage;
- Acetone, alcohol;
- Acrylic paint - the basis for the primer;
- Decoupage glue or PVA;
- Synthetic brushes;
- Multi-colored acrylic paints;
- Lacquer (acrylic);
- Decor elements;
- Small scissors (you can take manicure).
Instruction:
- We prime the surface with acrylic paint using a sponge. This will be the background for the future composition. If you need to make it more saturated, make several layers. Set aside until the final drying of the paint.
- Cut out the picture from the tissue paper. We remove the part from above (the one with the image).
- We put the picture on a dry surface. We cover with decoupage glue with a brush from the center to the edges. It is important to ensure that there are no bubbles under the napkin. If PVA glue is used, it is pre-diluted in equal proportions with water.
- When the picture is dry, apply varnish on top of it. It will protect against damage, as well as exposure to water and moisture. Apply at least 3 layers. Only in this case, such a container will last a long time.
- Crystals, decoupage elements, painting, burlap, jute, twine - ideas for decorating bottles are truly inexhaustible. Using improvised means, craftsmen managed to turn unnecessary glass containers into an extravagant decor element. Now this design reincarnation is within the power of everyone who seeks to make their life cozy and extraordinary.


