
The mistake of many repairmen is the reluctance to putty drywall - only joints are sealed, and everything else is even, and putty, in their opinion, is a cost overrun. A fundamentally wrong approach, which is fraught with a lot of consequences, which we will talk about in this article, and at the same time we will study the correct technology for plasterboard puttying.
Despite the fact that many masters claim the opposite, plasterboard must always be puttied, well, or almost always. The only exception is cases with its pasting of tiles or panels - in all other situations, putty is needed. Ask why, if the gypsum is already even? This is not the point here at all - it is necessary to putty plasterboard surfaces for several reasons. Firstly, to get a solid, without any visible differences in the surface, which is necessary for painting. Secondly, in order to avoid cracking of the seams during the operation of these surfaces. Thirdly, to ensure the necessary surface qualities, this is adhesion to the required degree. Those who have tried to tear off the wallpaper from the non-putty drywall understand what is at stake. So, how to putty drywall? But this will be discussed on this page of the Dream House website.
How to apply putty on drywall photo
How to putty drywall: a properly sealed joint does not crack
This is a very responsible job, especially when it comes to puttying walls for painting. One wrong move - and cracks in the joints of individual sheets of drywall are guaranteed to you. It is for this reason that it is very important to fully comply with technological process. It looks like this.
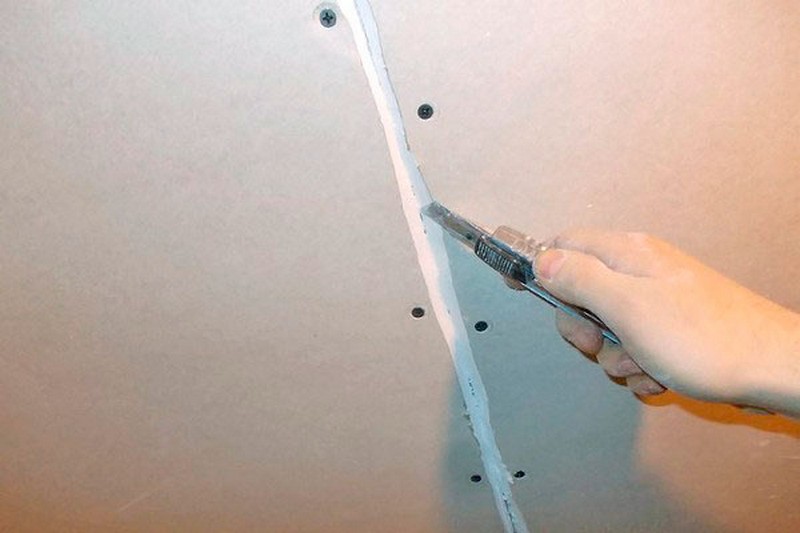
Before the direct process of plasterboard puttying, the sealed joint is processed with a vibration grinder and well primed. In this way, all the influxes that can create problems in the process of solving the question are eliminated, how to apply putty on drywall?
Finishing drywall with putty: how to deal with external and internal corners
Sealing the seams between sheets of drywall is, so to speak, only half the job of preparing drywall for puttying. The second half of this business is the processing of corners - external and internal drywall corner joints are prepared in different ways.

Almost exactly the same is done for the installation of arched counter-shoulders - the only thing that can be added here is to say a few words about its fastening. Some craftsmen fasten it to drywall with a stapler or worse with self-tapping screws - this is fundamentally wrong. In this way, you will never get an even arc - the arched counter-shulz takes its own position. All that is required of you is to press it into the glue or putty and slightly correct it with a spatula. In the sense that when you remove excess glue, he will take the correct position.
Drywall putty technology: application features
Even the most sophisticated pen master will probably not be able to tell how to properly apply putty with a spatula on drywall - this process must be seen and felt. In general, until you try it yourself, you will not understand what it is - in some way this is a creative work that will require you to see all the surface irregularities, which, no matter how strange it may seem to you, are also on drywall. A sign of their presence are traces of a spatula - if you run this tool several times in different directions in the same place and at the same time a kind of sagging remains along the edges of the spatula, then this is an unevenness. It is precisely in the elimination of such influxes that the essence of putty lies - if you draw a spatula in any direction anywhere in the wall and at the same time there will be no
to become traces, then we can argue about the evenness of the surface.

How to putty drywall photo
It is quite difficult to achieve the ideal - you can not try to do it in one go. This technique is not available even to professionals. As a rule, surfaces are puttied in several passes - the more curvatures, the more layers of putty will have to be applied. If we talk exclusively about drywall, then at least two passes will have to be done - it is better to putty the ceiling for painting in three layers. Also, do not apply thick layers of putty - everything needs to be done gradually. The main thing to understand is one simple rule - do not harm yourself. That is, do not apply putty more than necessary - it is much more difficult to putty, and you should not entertain yourself with the thought that humps can be sanded with an abrasive mesh. You can clean off small influxes, but not large bumps.
What else you need to know about the issue of drywall putty is about the tools and the putty itself. With tools, everything is more or less clear - a spatula is used here, and a wide spatula. With a narrow tool, you can only grab a small area of drywall - that is, significant curvature with a small spatula will not work. As for the dry mix itself, as a rule, finishing putty is used to finish drywall - it is a dry mix and not acrylic and other finishing compounds, the purpose of which is to super finely finish the surface before painting. Acrylic putties are suitable for the ceiling, but they will be superfluous on the walls.
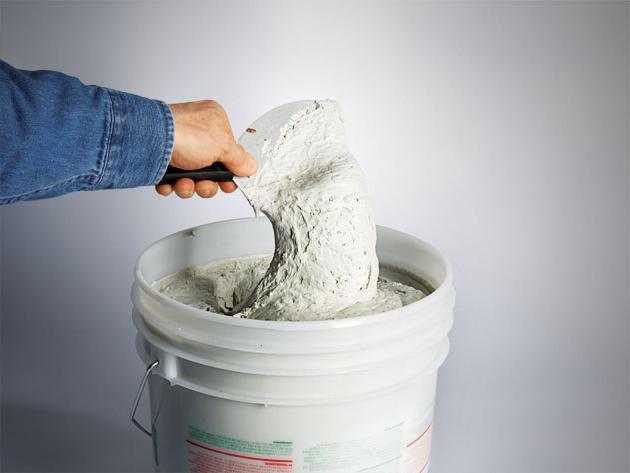
And in conclusion, the topic of how to putty drywall, I will say a few words about the preparation of a dry building mix. This is very important point- improperly prepared putty “draws” (furrows remain after the spatula) and generally does not fit well on the wall surface. The principle of preparing putty is standard - powder is poured into the water and mixed thoroughly, after which the putty is left alone to swell. It should stand for 5-10 minutes, after which again thorough mixing with a construction mixer. After that, you should not add a dry mixture to the putty - there will be lumps. So it is better to determine the density during the first kneading - you need the consistency of thick cream. This is for the first layer - for the second layer, it is better to prepare the putty a little less often. The rule is simple - the thinner the putty layer is applied, the less often you need to knead the mixture.
Inexperienced builders do not know how to putty drywall, and do not even consider the need for such processing. In fact, the walls are covered with putty for various reasons.
The need for the procedure is determined by the following:
- Walls for painting must be prepared with a putty composition to achieve a perfectly flat surface.
- Any seams and unevenness affect the painting and finishing of the wall with other materials such as wallpaper. Surface defect and marriage spoils appearance.
- When sticking wallpaper on a flat wall, subsequent repairs are not accompanied by damage to the GKL. After removing the wallpaper, the base will remain intact and suitable for applying a new finish.
Before plastering the drywall, the joints are trimmed. They are applied with a specialized application based on acrylic. Then the seams are filled, the edge zones and corners are processed.
The time it takes to complete this type of work depends on the type of surface. Walls processed for painting will take up to two days. Puttying drywall on the ceiling is much more difficult. After all, this procedure is accompanied by inconveniences - work at height, the need to constantly keep your head up, fatigue.
Suspended and stacked ceiling structures complicate the process and increase the number of areas that require special treatment. Seams, corner parts and curly-shaped areas that cause inconvenience in handling the tool are subjected to it.
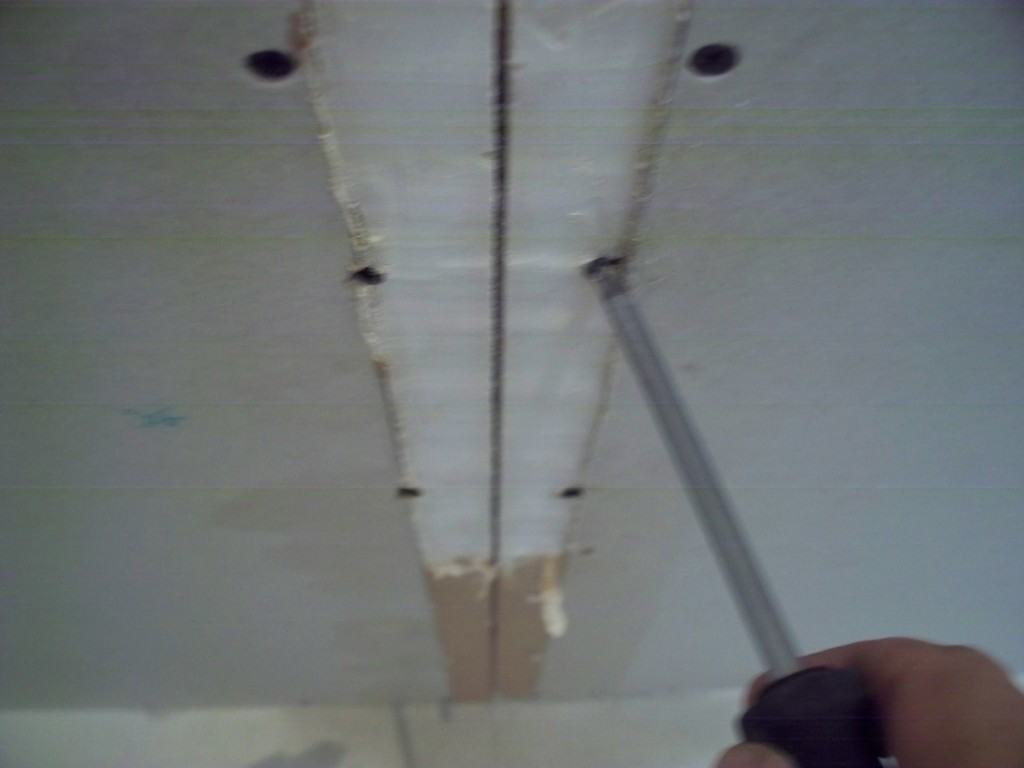
 GKL after sealing the seams
 The choice of GKL for various surfaces
First of all, the answer to the question of which drywall is better lies in the features of the room itself (performance characteristics) and in the surface for which it is supposed to be used.
So, based on manufacturing technology, there is a classification of materials:
- GKL - refers to a standard type of product, correlates with rooms whose humidity level does not exceed 60% (gray-brown sheets), suitable for wall decoration for painting.
- GKLV - moisture resistant products for rooms with a humid environment (more than 60%), have a green color + blue marking.
- GKLO - fire-resistant products based on refractory mineral fibers of red color, able to withstand direct exposure to flame for almost 20 minutes.
- GKLVO - sheets with resistance to moisture and fire, marked in red and painted green.
- GKLU - sheets with a reinforced structure, have an increased strength index, provide excellent sound insulation of the room.
Edge types:
- Direct - it is designed for dry installation and does not need to be processed joints (it is used in the manufacture of multi-layer sheathing as an internal component);
- Rounded - processed by puttying, but does not require the use of reinforced products;
- Thinned - processing consists in applying tape for reinforcement and putty composition;
- Semicircular on the front side - the processing is the same as in the case of the rounded type;
- Semicircular and thinned on the front side - puttied and covered with reinforcing tape.
 Edge types
 Based on this, it becomes clear which drywall is better. The thinned type of edge, as well as the semicircular and thinned on the front side, are the most beneficial, since the seams of such sheets have practically no protrusions that can affect the painting of the wall or finishing with other materials.
Choosing the Right Composition
Working with sides, corners and seams becomes more complicated with a multi-level ceiling structure. In this case, a gypsum mixture is used, with which layers of 0.5 cm thick are applied without fear that it will crack.
Knauf products usually do not cause problems, and the rest of the mixtures require proper handling. They are characterized by fast setting and are sensitive to dirt that may remain inside the container or on the tool.
How to properly putty drywall with Fugenfüller and Uniflot:
- The kneading is done with a spatula. The recommended width of this tool is 10 cm.
- Mixing is done carefully. Lumps must be avoided.
- It is better to do the kneading in small portions.
- After each serving, the mixer and measuring container should be washed well, otherwise the residue will provoke a quick setting.
- A well-thought-out plan of action will save time. Preparation will also not be superfluous - a sickle sticker, installation of a stepladder in the right place.
 Multi-level ceiling after seams
 What putty to putty drywall completely:
- Shitrok - sold in buckets ready-made. The composition is consumed in the calculation of 500g / m2. At high density, dilution with water is acceptable.
- Vetonite is a composition based on binding components of polymeric origin. It remains in working condition throughout the day and is consumed in the amount of 700g / m2.
- Prospectors (finish composition) - at a consumption of 700 g / m2, it is diluted with water. Keeps working capacity about 40 minutes.
- Prospectors (composition based on PVA) - putty is intended for inexperienced performers, does not need kneading and grinding.
Step by step description of the procedure
When decorating walls for painting, the procedure is carried out carefully. To work with corner parts, special corners covered with perforation are designed. They are made from plastic or aluminium.
Complex drywall structures and arches need the use of specialized corners - arched. Due to the plastic from which they are made, such corners are easy to bend and are able to fit evenly into intricate bends.
Drywall plastering technology for external corners:
- Checking the quality of materials - you can not use corners with deformations.
- Cutting corners into pieces with the required length.
- Applying a putty composition to the corner area. The material is applied in the form of a tubercle measuring two to three centimeters without leveling.
- Setting the corner and pressing. As a result of this action, the composition should exit through the perforation.
 Corner installation
 - Smoothing out excess putty with a spatula. The corner should be completely hidden under the composition.
- Drying time - 2-3 hours.
- Re-putty.
Processing of internal corners:
- Gluing the corner with a sickle. It is recommended to stick the tape on each side instead of bending it to avoid wrinkles.
- Applying putty and pressing it firmly with a spatula - the optimal width is 20 cm.
- Sticking sickle.
- Reapply the mixture.
Seam work:
- Sickle sticker.
- Filling with composition of all joints.
- Leveling the mixture with a tool 30 cm wide.
- Drying time.
- Re-filling joints.
- Drying time,
- Application of primer with deep penetration.
The process of complete wall processing can be seen in the video:
To work effectively, you will need several tools with a width of 20 cm, 30 cm or 40 cm. The spatulas are checked for rigidity and the absence of corner bends. This defect is eliminated with sandpaper. Other damage to the instrument is not permitted.
To simplify the grinding process, it is better to apply a large amount of material to the tool. Wave-like movements in different directions will ensure uniform application. For grinding work, a paint grid marked 180-220 is suitable.
Wallpaper as a finish does not require scrupulousness in terms of grinding. Here it is enough to eliminate obvious irregularities. For surfaces to be painted, a long-carrying lamp should be used. This will provide good visibility. Directing the lamp so that the illumination falls at different angles, even the smallest irregularities are noticeable, they are eliminated.
Before the priming stage, you need to get rid of dust. In this case, a wide brush will help. For painting a primer is not needed, it is not even recommended.
In contact with
It is difficult to imagine construction and repair work in which drywall would not be used. It is used to make internal partitions, boxes for water and sewer pipes, multi-level ceilings, arches, and decorative elements in the interior. Sheets of drywall align the walls, significant defects in the ceilings.
Smooth, broken, rounded plasterboard structures should be puttied before painting or wallpapering. How to properly putty drywall without being a finishing master, we will cover in this article.
Tools
For independent work you will need:
- foam rollers and brushes for priming,
- stainless steel spatulas 10, 20 and 40-50 cm wide,
- containers for the mixture and for water,
- sanding grater with attachments for mesh or paper,
- sandpaper or sanding paint mesh,
- mixer attachment for drill,
- construction knife
- rule 1.5-2.0 m long
- respirator, goggles, rubber gloves.
Work materials
- deep penetration soil
- putty,
- sickle or paper perforated tape for seams,
- perforated metal and plastic corners,
- fiberglass,
- glass glue.
putty

Every novice finisher has a question, what is the best way to putty drywall. For work, rough and finishing gypsum, cement or polymer putty is used. On sale there are dry mixes and ready-made solutions.
Attention ! Following the principle: “like connects like”, it is preferable to apply gypsum putties on drywall.
For finishing rooms with high humidity, cement, lime compounds or polymer putty.
For the main finish, the craftsmen use Fugenfüller or cement Hercules gypsum putty, for the top layer - finishing polymer Bergauf or Ceresit.
Surface preparation
The quality of the finish depends on how well the drywall is ready for applying a layer of putty. For this you should:

Padding
The purpose of applying the primer is to create a polymer film that prevents moisture from penetrating deep into and possible peeling of the drywall paper coating, as well as to increase the adhesion of the putty to the base.


Any deep penetration primer can be used, but professionals recommend the Ceresit CT17 primer. It creates a strong film. It is recommended to apply it in 2-3 layers, each next one is applied after the previous one has completely dried.
Solution preparation

Gypsum putty is very demanding on the cleanliness of the container in which the mixture is prepared, and sets quickly enough. The solution should be prepared for 0.5-1 hour of work according to the instructions on the package.
When pouring dry powder into water, add it until dry islands appear on the surface. This indicates that the proportions are met. The mixture must be quickly stirred until a homogeneous composition and the absence of lumps and leave for 5 minutes. Putty should be the density of sour cream. After that, mix again and you can get to work.
Attention ! Mixing the gypsum putty solution after preparation is not recommended.
Preparation of corners and joints
Puttying drywall begins with the preparation of corners and joints. Here you will need a narrow spatula and a small amount of mortar.
What kind of putty putty plasterboard seams? To do this, use the composition of Knauf Fugen. The embroidered seams are filled with a mixture, then strips of a special self-adhesive mesh or perforated paper are glued and smoothed with a spatula. Mesh 5-10 cm wide will provide a strong grip.


After the putty has completely dried, you need to check if the threads of the reinforcing mesh are sticking out, remove them with a knife, carefully cut off the unevenness of the seal with a spatula and prime everything.
Puttying
Puttying plasterboard on the ceiling and walls is done differently depending on the type of final finish. If you plan to stick wallpaper, it will be enough to base and finish a layer of putty. For finishing for painting and Venetian plaster, you will need fiberglass.
How to putty a ceiling

The ceiling can be puttied immediately with finishing putty in 1-2 layers. Work is carried out from any wall in good light.
Important ! If you plan to apply two layers, then they should be applied perpendicular to each other so that the last one is from the window along.
This is done as follows:
A small amount of mortar is placed on a wide spatula and applied to the surface with wide movements from the wall towards itself or from itself. After a sufficient area has been treated, the layer is finally leveled with a rule moistened with water. Masters do not use the rule, but it will come in handy for a novice finisher. So the entire surface is treated.

If dark spots of drywall do not appear from under the layer of dried putty, this can be limited. If the layer turned out to be uneven, you need to apply a second one. To do this, the irregularities are removed with a grinding mesh, the ceiling is primed and puttied again. The dried surface is carefully sanded, dust is removed and primer is applied to it for painting.
How to putty plasterboard under the wallpaper
To make it clear how to properly putty drywall, a video from experienced craftsmen will help you understand all the subtleties.
You will need narrow and wide spatulas. In order for the putty to be of high quality, consider a few subtleties:
- the spatula should not have bent corners, notches and other defects on the working surface;
- in the process of work, it is necessary to ensure that lumps of the dried solution and other solid particles do not fall into the solution and onto the spatula. They will leave streaks on the surface that are difficult to deal with;
- the remains of the solution should be removed from both sides of the surface of the working spatula. The dried solution is better to throw in the trash.
Operating procedure:
- with a narrow spatula, evenly place a small amount of the mixture on the edge of the working surface of the wide spatula,
- starting from the corner, apply it on the wall with wavy movements and carefully level it with the spatula in different directions. You can make semicircular movements, wavy, but not straight. It is better to start application from a clean area, moving to the treated part;
- collect the remaining solution with a narrow spatula and again evenly distribute over the surface of the wide one, adding a fresh portion;
- remove the defects of the dried layer with a sanding grid or sandpaper;
- clean the surface of dust with a large brush or cloth;
- apply primer;
- on the primed surface in the same way, apply a layer of finishing putty, after drying, process with a painting sanding grid with a number of 180-220 in circular motions;
- clean the surface of dust and prime.
How to putty drywall for painting and decorative plaster
When finishing plasterboard walls and ceilings in new brick houses, as well as for painting or decorative Venetian plaster, the surface should be reinforced with thin fiberglass.

It will prevent cracks and other defects. A fiberglass cloth is glued onto a sanded and primed putty layer using PVA glue or for glass wallpaper as follows:
- glue is applied to the wall in an even layer,
- overlap (3-5 cm) fiberglass cloths, trying to ensure that their joints do not fall on the joints of drywall,
- the canvas is carefully leveled with hands and a spatula, removing air from under it,
- after sticking two canvases, the overlap is cut using a construction knife, the excess canvas is removed, the joints are aligned,
- the canvas on top is once again covered with glue and smoothed with a spatula.
A thin layer of finishing putty is applied to the dried glue, carefully leveled and sanded with a paint grid. After grinding and removing dust, the surface is covered with deep penetration primer 1-2 times.
Drywall walls prepared in this way will be even, smooth, ready to be covered with any finishing materials.
Drywall is the most popular and in demand building material, without which it is impossible to do when finishing modern interior. It is a composite raw material in the form of sheets of different lengths. Drywall is an environmentally friendly and safe material, it does not emit toxins, it is non-flammable and fire resistant, it has good soundproofing and thermal insulation qualities. It absorbs moisture when it is in excess and returns it back if the air in the room is dry enough. Thanks to these qualities, drywall is a microclimate regulator, which is especially important for residential premises. All of the above advantages fully explain the great demand for this type of building material.
Application of drywall
Drywall is widely used for the design and decoration of residential premises: it is used for leveling and interior decoration of walls, ceilings, the manufacture of decorative elements, niches and the construction of interior and spatial partitions. It is also used in bathrooms and kitchens due to its waterproof and fireproof properties. The material is in demand because of its versatility and excellent technological properties. Due to the fact that drywall is lightweight, it is always easy to work with it. Plasterboard sheets can be given a different shape, they are easy to finish columns, arches, various transitions and differences from one plane to another.
Basically, the technology for finishing the ceiling is simple, it can be handled without special skills. The main problem when working with drywall is the final finish. This article is about how to putty drywall after it has been mounted on certain surfaces.
Necessary materials and tools that you will need:
Narrow and wide spatula.
Universal primer and container for it.
Wide brush and roller with telescopic handle.
Serpyanka or reinforcing tape.
Finishing putty.
Sandpaper or other abrasive materials.
Screwdriver or Phillips screwdriver.
What you need to know about puttying plasterboard surfaces
Mounting the frame and sheathing it is only part of the matter, a lot depends on whether you know how to properly putty drywall. The main task of putty is to level the surface.
Despite the outwardly smooth sides of drywall sheets, they have places that need to be smoothed out: these are traces of self-tapping screws and sheet joints.

Plasterboard putty
First of all, the entire surface is primed, preferably in two layers. Next, you need to let the primer dry, and at this time you can dilute the dry mixture of putty and mix it thoroughly until a homogeneous mass is formed, a consistency similar to sour cream without lumps and any other foreign inclusions.
Putty can be sold ready-made, this does not need to be diluted. The putty mixture is applied to the surface and leveled with a wide spatula. After drying, a primer is applied to the surface with a roller, and a finishing layer is applied on top.
The last putty is placed as follows: first, two spatulas are taken. On one is our mixture, with the help of the other it is removed in small portions and applied to the surface at an angle so that all irregularities can be rubbed. Excess is removed with an auxiliary tool. And at the end of the putty finish, the drywall surface is cleaned with abrasive materials. Next, the cleaned wall is primed again, and it is ready for final finishing.
Why is drywall plastering necessary?
Before you putty drywall, you need to understand why this is done. If you skip this important process, then the paint consumption will approximately double: you will have to apply not two layers of paint, but all four, since drywall has the ability to absorb moisture.
When pasting surfaces with paper wallpaper, unpleasant situations can also arise. Through a thin layer of paper, the locations of screws, joints and seams will be clearly visible. In addition, when replacing, it will be impossible to remove the old wallpaper, as it will only come off with pieces of drywall. Therefore, it is simply impossible to do without processing these places, and the question of whether it is necessary to putty drywall disappears by itself.

Features of the installation of drywall sheets
At installation work small fragments of the sheet are used, which are attached to the profile frame close to each other. Only in rare cases, whole sheets of drywall are used that do not need to be embroidered.
It is cut with a construction knife along the marked lines. Having cut through on one side, the sheet is broken strictly along the marking line. Then the cardboard is cut from the back. After a cut and a break, the edges of the cut fragment will be uneven. For leveling, a special drywall planer is used. After all the manipulations, you need to make sure that the section of the sheet is suitable in size, and then proceed to its jointing.
Drywall jointing
Drywall jointing is the processing of the edge of the cut fragment at a certain angle (from 30 to 45 degrees). The meaning of this action is to expose the internal gypsum base to expand the places of puttying the joint. After all, if this is not done, then soon cracks will appear in this place, and in general, all surface finishing work will be done in vain. Moreover, cracks are usually visible after finishing - wallpapering or painting.
Methods for sealing drywall joints
Puttying joints and holes from self-tapping screws is a responsible and important matter, therefore it is necessary to ensure high-quality processing of these places. How to putty plasterboard joints? Before you get close to such a task, you should stock up necessary materials and tools. In addition to different sizes of spatulas, abrasive skins and, accordingly, the putty itself, a reinforcing tape is needed.
The first stage of sealing joints and recesses from self-tapping screws begins with the application of a primer layer. The primer reduces the cost of putty materials.
The next stage is the processing of all longitudinal joints and recesses from fasteners. For these purposes, you can use a special or starting putty. Although it doesn’t really matter what it is better to putty on drywall, the main thing is that it be a dry mix from a well-known manufacturer.

Depending on the goal, it is possible to putty from 2 to 4 times, only after each layer it is necessary to apply a primer layer.
Self-tapping screws are closed without the participation of reinforcement, they are simply rubbed with a small spatula flush with the rest of the surface. In no case should the caps of self-tapping screws stick out on the surface, as they will rust even after several layers of paint or putty.
Drywall processing is carried out only after the reinforcing film has completely dried, otherwise cracks may appear. The profile frame must be strong and rigid, otherwise no reinforcement and even the use of the best putty will save the structure from butt cracks.
Preparing plasterboard walls for wallpapering
After the drywall sheets are attached to the wall, it is necessary to prepare these surfaces for further finishing. Next, consider the question of how to putty plasterboard under the wallpaper, because such wall processing allows you to get a high-quality result. This issue should not be ignored, even if the work surfaces will be pasted over with foam in the future. vinyl wallpaper with reinforcing effect.
The walls must be treated with a primer, after hiding all the holes from the screws and seams. After drying, a ready-made putty or a self-prepared solution of water and a dry mixture is applied to the surface with a spatula, then it is leveled. After drying, a primer layer is applied again, and then a finishing putty. At the end, the entire surface is treated with grout abrasive materials and again covered with a primer. In this section, you learned how to putty plasterboard under wallpaper. This can be done on your own, without the involvement of specialists.
Preparing drywall for painting
We have already figured out almost everything about how to putty drywall for painting, since the processes of preparing walls for painting or wallpapering are not much different from each other. Drywall painting involves applying the final layer to the starting putty, and before that, all joints and recesses left by self-tapping screws must be sealed.
The thickness of the finishing layer should be minimal - from 1 to 3 mm. A significant excess of the permissible thickness of the final layer of putty can lead to the formation of small cracks on the surface, which are very noticeable after painting. These are the basic rules regarding how to putty drywall. Observing them, you can get a high-quality surface.

Drywall partitions
Drywall is an excellent material for the construction of various partitions indoors. They have different thicknesses and configurations: they can be straight, wavy, with niches for a wardrobe, etc. For example, a stepped partition is very functional: it simultaneously divides the space and at the same time can carry a decorative function - you can place flower pots on it or collection of figurines or books.
With the help of a partition, you can visually combine the hallway and the living room: the interior will become airier and lighter. With the help of drywall, old walls are leveled and updated, they can be given any shape and relief. Built-in shelving will help to significantly save space, which is very important for a small area of the apartment.
We have reviewed frequently asked questions about how to putty drywall walls above, so you should not repeat yourself. The main thing is to understand why it is necessary to prepare the walls: for wallpapering or just for painting.

Plasterboard ceiling
Plasterboard ceiling is a decoration of every interior. It can be one-, two- and multi-level. The latter is of greater interest for the implementation of design ideas. With the help of drywall, the ceiling can be shaped into an ellipse, a circle, a polyhedron and another, it all depends on the overall style of the room.
Those who already had experience in decorating walls in this way know how to putty a plasterboard ceiling. All materials and tools used are the same. After the puttied ceiling has completely dried, it is necessary to polish it so that there are no streaks left. After you can start coloring.
Puttying drywall is not difficult, the main thing is to adhere to the basic rules and techniques. The use of this material will help to give the walls the desired relief.
Today we will consider in detail how to putty drywall under wallpaper and other materials. This is not such a difficult job and almost anyone can do it with their own hands.
Then the final price of finishing will be much lower. Today we will talk about this topic. There are several rules that must be followed.
Puttying rules
Next, you will be offered instructions for performing this work. Look at the photo and immediately determine the scope of work.
After all, for each material of the base plane there will be its own preparation. Take your time and do everything right.
How to prepare a surface for puttying
Before you start puttying the surface, you will need to decide on the type of surface, gypsum fiber, the manufacturer of these materials, and much more.
The surface should ideally be flat:
- Before you start puttying the GKL, you need to process everything and prepare it in the right way. The surface should be carefully examined not only outside, but also inside. Even self-tapping screws are important. A spatula can be a good reference point for analysis.
- Take the spatula in your hand and run it over the surface. If it does not touch the screws, then everything is fine, the surface is quite even and ready for puttying. If the spatula begins to "cling" the screws, then they must be firmly screwed inward.
- Self-tapping screws should be "drowned" as deep as possible. It also happens that the screws are screwed in too deep - here you also have to work. You need to unscrew them and putty the “holes”. Otherwise, the wallpaper (see) will fall off or lie unevenly.
Attention: If there is a need to screw in new screws, then you can not screw others into the same places. It is necessary to retreat about the holes of the order of one cm and then make a connection.
- Before you putty the surface, it must be properly cleaned. Take a rag and remove dust, dirt, debris, chips. In order for the surface to be best prepared, you will need a primer. In this case, the adhesive characteristics increase, the surface adheres well to the putty.
Attention: Remember that after applying the primer must dry. This will take several days! Only after that you proceed to the next stage of preparation.
- At the joints of the sheets and where the screws are screwed in, it will be necessary to glue a special reinforcing mesh. Then the putty will not crack and fall off.
How to putty drywall corners
Technology must be mastered before you get to work. All joints and seams must be processed in detail. This will prevent cracking and damage to the material.
It is important to know the technology of puttying GKL corners. Otherwise, you will not get what you were looking for. The basic rules for working with drywall will be as follows.
So:
- It is important to remember that this material is very fragile. One careless move and you could damage the surface.
For proper processing of drywall corners, plastic or metal corners are usually purchased (see). They are sold at any hardware or hardware store. Such details help to smooth sharp corners and protect them from damage. - On both sides of the joint, you need to apply an impressive layer of putty and gently press it into the corner. It is important to prepare the corner itself in advance.
Excess putty must be removed, then apply another layer. The final layer will not be very thick, it is important to align it well. Then the putty should dry well.

- If, after the work done, you are not satisfied with the result, then you can apply another layer of putty. It will be called "null".
Attention: The main thing is to align everything well! Puttying internal corners will be easier than external ones. For this you will need a sickle.
Putty plasterboard for wallpapering
In order for the appearance of walls or ceilings to suit you after all the work carried out, it is important to carefully and correctly putty the surface. Preparation before sticking wallpaper rolls will be different from what you do in other cases.
So:
- If the wallpaper is thick, heavy, then the putty mixture should be appropriate. Choose coarse grain options.
Then the surface will not be smooth, but slightly ribbed. This will greatly facilitate future wallpapering. in this case it will not be needed, but you need to even out the flaws on the drywall sheets! - If you are going to glue paper wallpaper (they usually have a thin structure), then putty will appear. All the unevenness of the drywall will immediately come out.
To prevent this from happening, immediately use the finishing version of the putty. Its granular structure will give a smooth surface in the end.

- Some "masters" prefer to putty only the joints of drywall sheets. Don't do it! The entire surface must be puttied.
Otherwise, in the future, after the wallpaper is glued, all the flaws will come out. Puttyed joints will be very visible, both in daylight and in artificial lighting. The middle of the sheets not covered by putty will also be noticeable!
How to putty plasterboard for future painting
This process will be no different from the previous ones described above. It is important to achieve a smooth and even surface, without cracks and grooves.

- All joints, holes, traces of self-tapping screws, irregularities must be puttied and leveled. After painting, any imperfections may be visible. Therefore, it is necessary to treat the surface treatment carefully, to do everything right.
- Putty must be applied in a thin layer, immediately leveled with a spatula, distributed over the entire surface of the drywall sheet.
- It is important to dry everything well! Reinforcing tape is applied to the most problematic areas. It helps prevent cracking of the putty.
- All irregularities and flaws are removed with sandpaper. Sanded, dried the surface (it is better to wait a few days), only then it can be painted.
- If after drying there are large shells, then the material is applied again. This is done until the surface is completely leveled.
Attention: After the surface has completely dried, it will be better to apply a primer on the plane. Then the connection of materials will be of the highest quality
You already know how to putty drywall under drywall wallpaper. It is important to simply make a high-quality and even surface. The video in this article will help you with this.
Only the correct implementation of such repairs helps to achieve an excellent result! Do not save on time and materials.


