
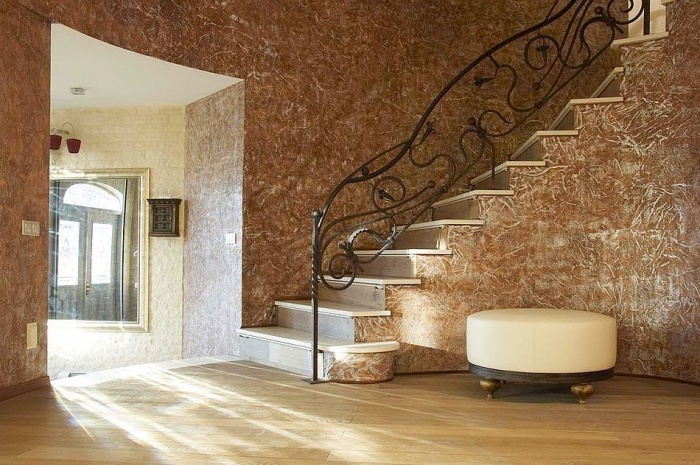
Decorative plaster is a practical wall covering that flawlessly performs its aesthetic functions and is distinguished by sufficient wear resistance. The material is used both for facing transit zones and residential premises. In this article, we will review the basic principles of working with decorative plaster.
It is not surprising that the demand for plastering walls with a decorative composition is increasing, as well as the cost of pro services. But you can do without a specialist: the implementation of this type painting works on forces and homeowners.
Classification by type of binder filler
Before proceeding to the features and nuances of applying a decorative solution, it is useful to determine the type of material. On the market of finishing materials are presented: acrylic, mineral, silicate and silicone plasters.
Acrylic plaster is an elastic, ready-made water-dispersion composition. The decorative coating repels water and is resistant to ultraviolet radiation and pollution.

Mineral plaster is an environmentally friendly material that is recommended for decorating the walls of residential premises. The basis is lime or cement with the addition of solid particles-fillers of mineral origin.
Silicone compound - a paste-like mixture based on silicone resin. The material is not afraid of moisture and temperature fluctuations.
The silicate-based plaster contains liquid glass. This is the reason for the main advantages of the material: resistance to ultraviolet radiation and high humidity, the formation of fungus, high level fire safety.
The advantages of the composition over other finishing materials:
- decorative coating visually eliminates the shortcomings of the base surface;
- visual seamlessness;
- ease of use;
- durability;
- environmental friendliness of the building composition.
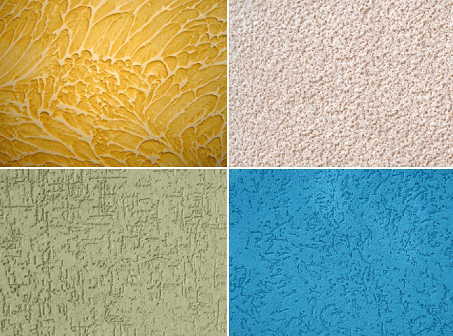
Based on the decorative properties, plasters are divided into: textured, structural and flock.
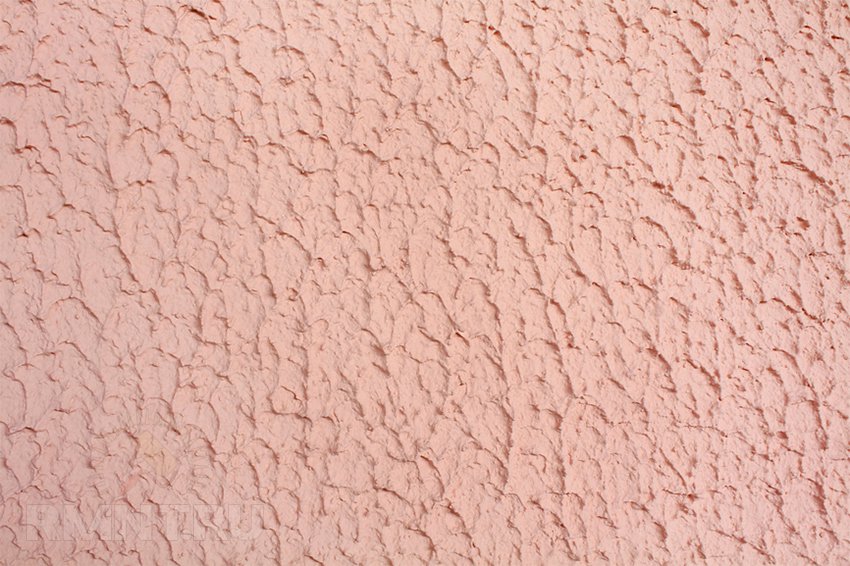
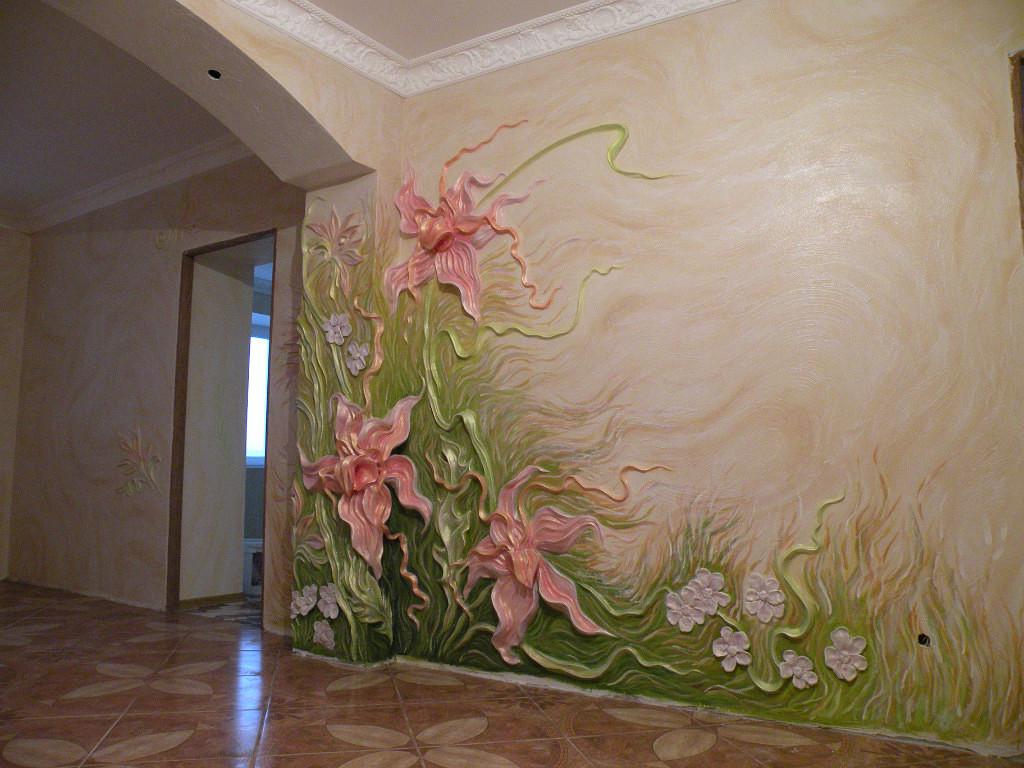
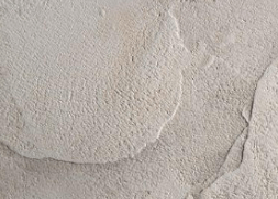
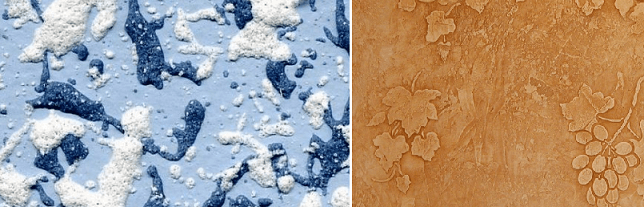
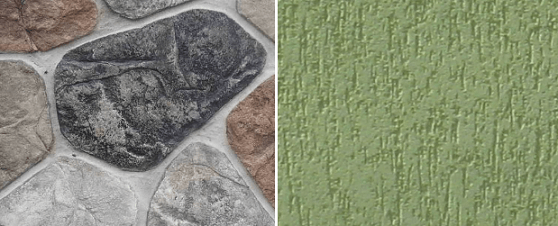
The textured look of the wall decorative coating is used to create an imitation of the surface of stone, wood, velvet and silk. The material has good masking properties (hides surface defects), can be used for wall cladding in wet rooms.
Flock plaster consists of an acrylic base with an admixture of rounded "flakes" of a certain size. Thanks to the use of flock, you can create the effect of "under the skin", imitation of velor or suede fabric. The coating is UV-resistant and does not require additional detergents for cleaning.
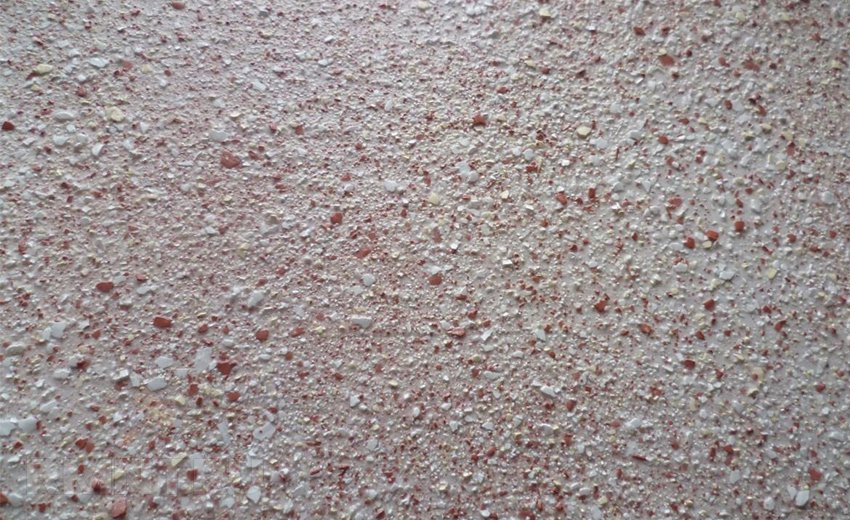
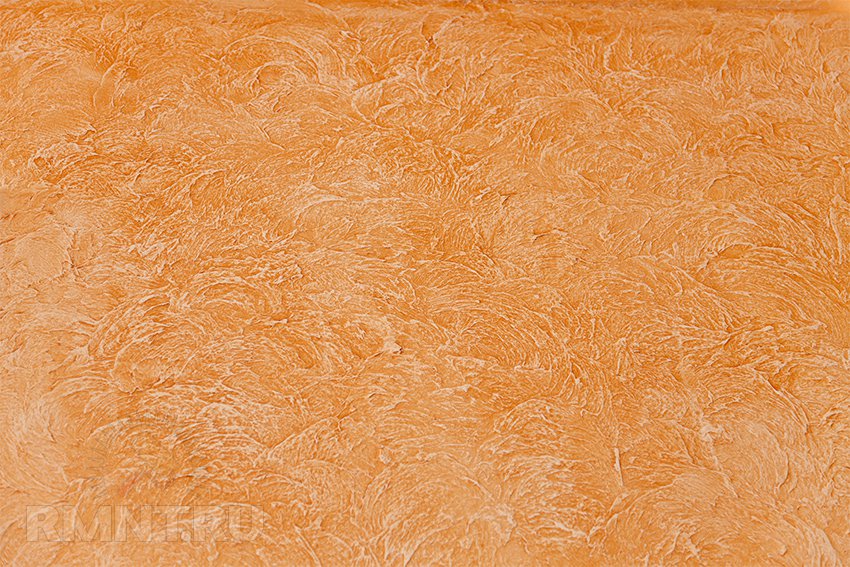
Structural plaster is a granular mass of heterogeneous consistency interspersed with granules of mineral or synthetic origin: stone, quartz, wood fibers, and the like. To create a colored coating, a tint pigment is added to a mixture of dry plaster and water.
Preparatory work
There are three basic stages:
- Foundation preparation.
- Padding.
- Preparation of the building composition and application of decorative plaster.
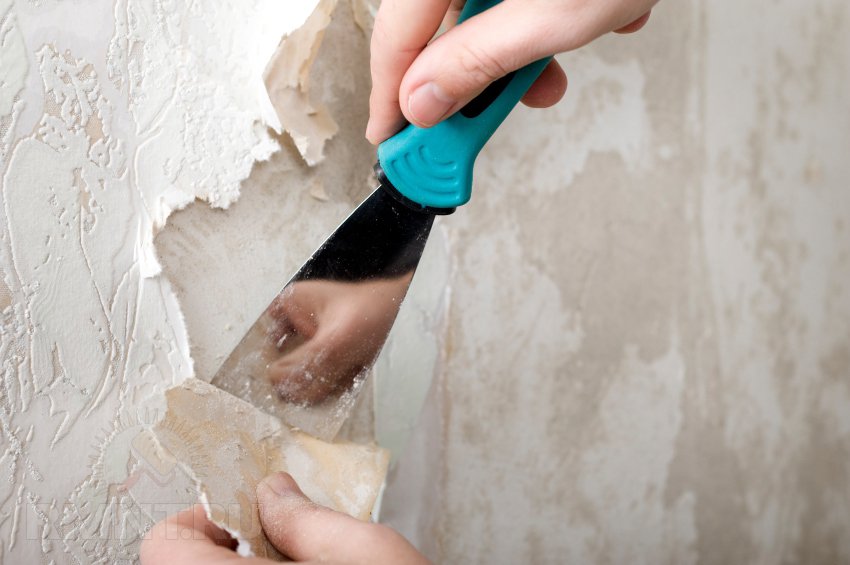
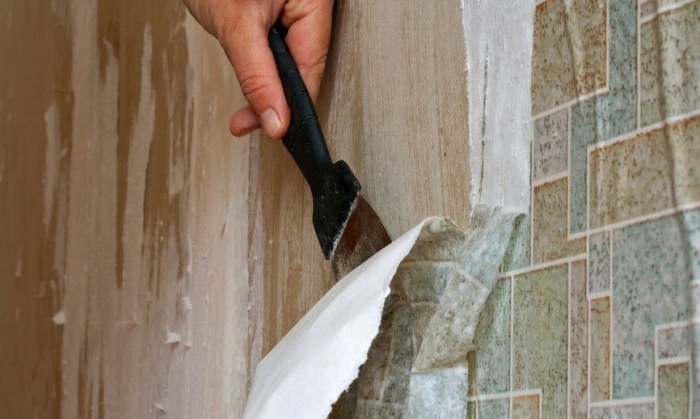
To prepare the base surface, first you need to dismantle the old coating, remove cracks and other defects in the base. Level the walls using cement putty or ready-made mortar.
For good adhesion of the coating to the wall, it is necessary to apply a deep penetration primer with a strengthening effect on the base. If necessary, treat the surface with an antifungal compound.
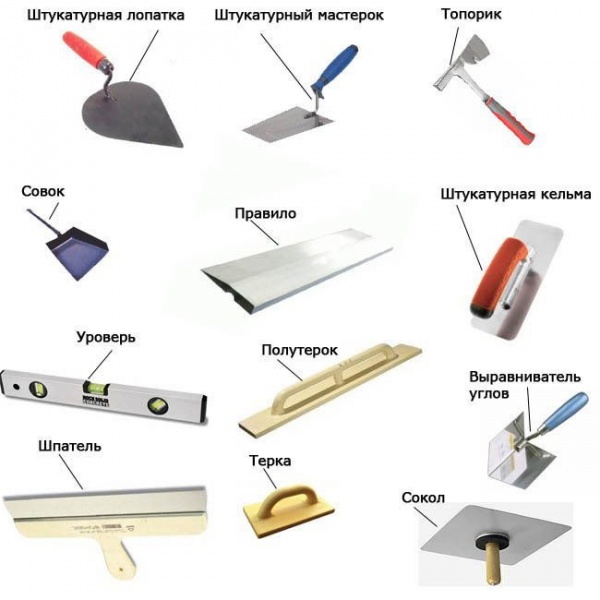
Tools and auxiliary materials
In addition to the tool for plastering walls, you must purchase:
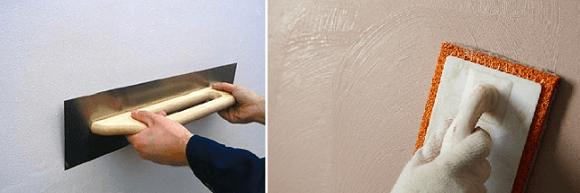
- a rubbing sponge (can be replaced with a kitchen sponge) is used for grouting. The rough side of the foam sponge can be adapted for rough grouting, and the soft side can be used for final grouting;
- construction mixer for mixing decorative plaster;
- tools for leveling and creating a relief surface: plaster trowel, scraper, spatulas, brushes and rollers;
- a container for mixing the solution.
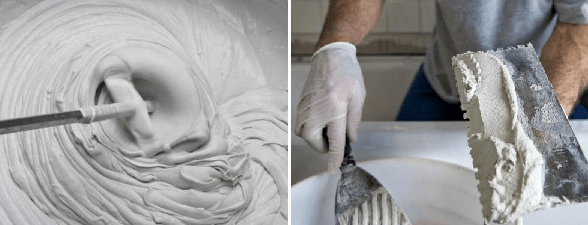
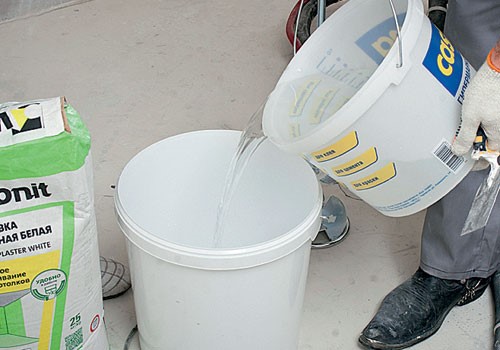
Construction composition preparation
When preparing the mixture, you should strictly follow the manufacturer's instructions, which indicate the amount of dry mixture and water, as well as the sequence and method of mixing them. For mixing, a drill with adjustable speed and a mixing nozzle are used. It is necessary to set the minimum speed for the preparation of a homogeneous mixture.
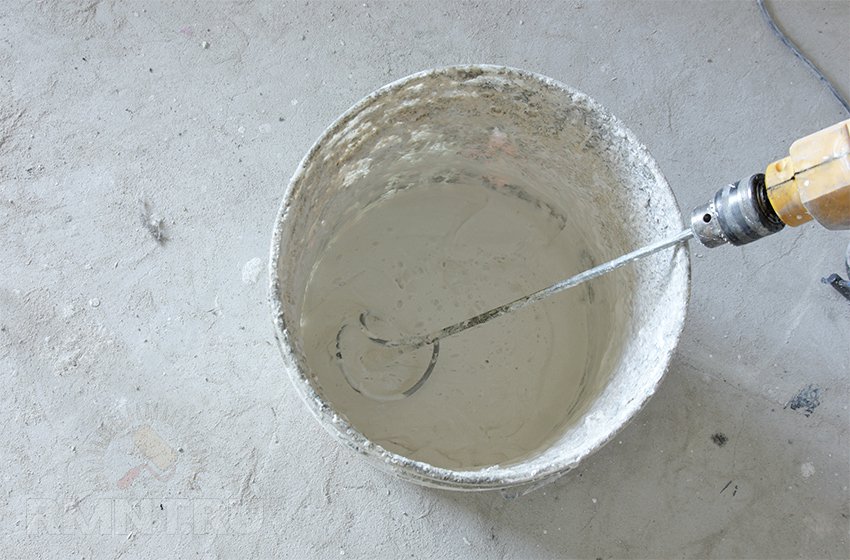
It is important to correctly adjust the consistency by adding water: when applying by spraying, the maximum allowable amount of water is 5%, when applied by hand - 2%. The plaster sets quickly, so it is recommended to knead the composition in small portions.
Technologies for applying decorative plaster
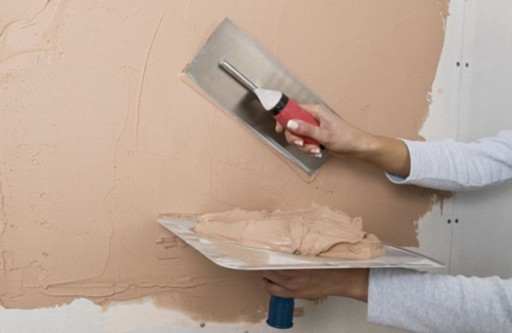
Stretching is a popular way of applying a decorative coating to walls. The solution should be applied with a wide trowel in continuous movements from one corner of the base to the other. The thickness of the layer depends on the thickness of the fraction and varies from 2 to 5-7 mm. It is necessary to smear the building composition evenly over the entire area of the treated area, and apply a decorative coating to the neighboring area "overlapping" by 4-5 cm.
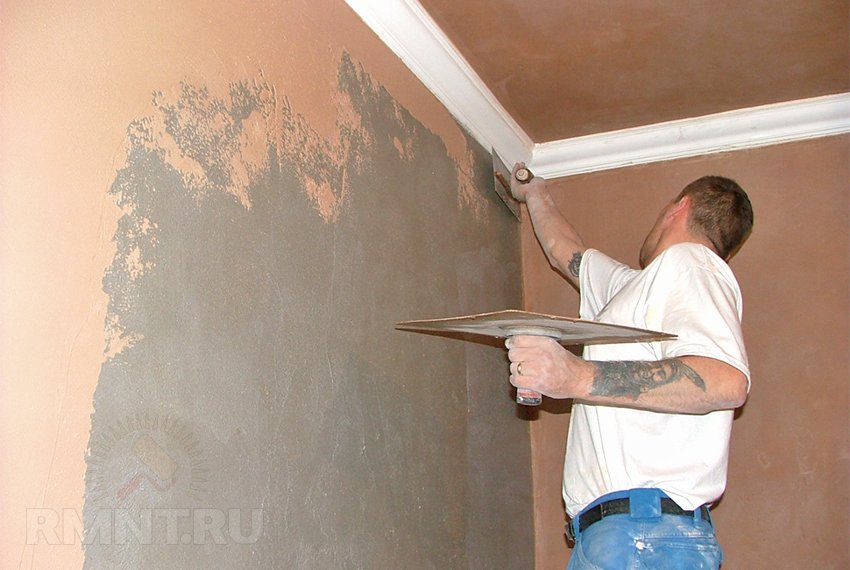
Since the layer of material dries quickly enough, it is recommended to apply decorative plaster together: first, one person covers the walls with a layer of material, and the other, after him, levels the decorative layer to the grain thickness of the fraction.
After applying several base layers decorative plaster, you can start creating artistic effects on a wet surface. We offer you some simple ways.
Surface decoration options:
1. Reception using an artificial sponge consists in light blotting movements. In this case, "spots" form on the wall. For greater effect, they can be painted in several colors.

2. You can get the effect of crumpled paper with a piece of highly absorbent cloth. The material must be crumpled and walked on a wet base with blotting movements.
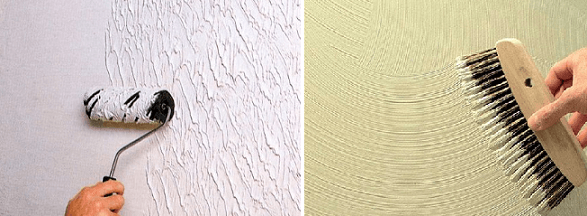
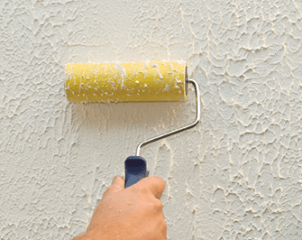
3. Alternatively, you can use special textured rollers, the use of which significantly speeds up the process of decorating the base.
![]()
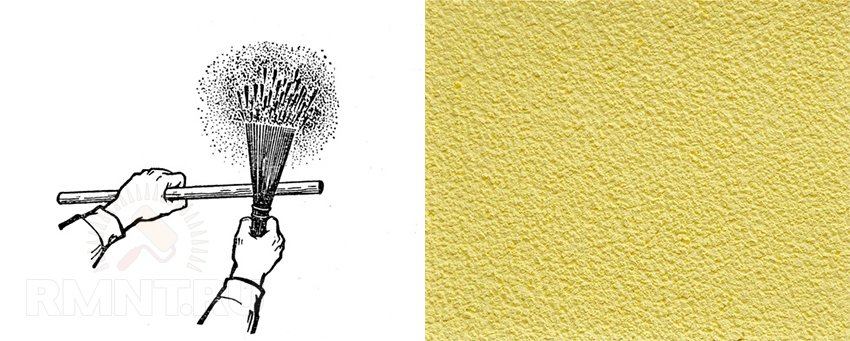
The technique of "spraying" is somewhat more complicated. First you need to apply two or three layers of decorative coating, and then proceed to add volume to the texture. To do this, you need a broom and a stick. Having moistened the broom in the solution, you need to hit it on the stick in such a way that the spray hits the pre-plastered wall. In this case, it is desirable to use one color for the base, and a lighter or darker shade to create the “splash” effect.
After 24-48 hours (after the topcoat has completely dried), it is worth stripping, removing poorly fixed plaster particles, armed with a fine-grained sandpaper.
Coloring the decorative layer
You can start painting the surface only after the decorative surface is completely dry, it will take from 8 to 48 hours.

To paint a surface with a large fraction of the filler, several colors are used. The first - lighter - is applied with a paint roller, the base is allowed to dry completely, and only then the protruding areas of the relief are covered with a more saturated shade. This method allows you to make the walls voluminous and massive, so it should be used only in large rooms.
In order to make the finish coat durable and shiny, the glazing technique is used. Wax was used in the old days, but working with it is very time consuming, so now they use a transparent varnish based on acrylic. It is most convenient to cover the walls with it using a long-haired roller or a wide paint brush.
Wallpaper decorating the walls of the dwelling is no longer relevant. They were replaced by the decoration of the walls of the rooms with decorative plaster - a universal material that combines elements of a building and aesthetic type. With the help of plaster, you can achieve imitation of granite, metal, marble, silk. It allows you to hide the flaws of the walls, does not harm health, and is durable in operation. How to choose the right type with an eye to its features, how is it carried out correctly, how to create the desired texture?
As part of decorative plaster, manufacturers indicate components such as a water base, special fillers, substances for binding mixture elements, types of thickeners, antiseptics, and the like. In addition to the filler, they differ in their composition.
There are the following types of plasters for interior decoration:
- Mineral decorative is sold in dry form and is offered by the manufacturer on the basis of cement. Before use, it will need to be mixed with water with a construction mixer. Suitable for mineral bases. Preliminary application of a quartz primer to the walls is required. After you finish applying such a coating, it should be painted. The price when buying mineral plaster will not seem high to you. Although there are expensive options with marble chips or sparkles.
- Acrylic is a material of synthetic origin. It is based on acrylic resin. Such a wall covering will provide them with a moisture-repellent effect, excellent ductility and other qualities. Please note that the material is poorly resistant to possible ignition. Easy to apply by hand. To work, you only need a roller and a spatula. It is necessary to prepare the base and primer before starting the application. The mixture can be bought ready-made. It should not be stale, as you will be informed by the expiration date on the package.
- Silicone has such qualities as plasticity, durability, the ability to pass steam and many others. Shows property to self-cleaning therefore it can be used also for carrying out external works. Offered by the manufacturer in a rich color scheme and finished form. After its application, painting the walls is not required. The material is easy to use, it is easy to apply with your own hands, even without special skills.
- Silicate is made on the basis of special potash glass. It is more often used for outdoor work. Sometimes used for wall decoration, which we will discuss later. Silicate is capable of releasing substances that are not particularly beneficial to human health into the environment. It is difficult to apply it with your own hands - you need to hurry, because the material quickly hardens on the surface.
 it also differs in the type of finished surface - with imitation of granite, rain, marble chips, etc. There is a division of coating types depending on the type of filler.
Textured plaster is one of the most popular building materials on the modern market. Its advantages include acceptable cost and ease of application.
To create a beautiful pattern on the wall of your room using such a coating, you will not need special tools or knowledge. The filler of this type of plaster can be flax and wood fibers, mica, crumbs of various minerals, small stones. This material has proven itself in the performance of external and internal works. Textured plaster allows you to hide and correct the flaws in the surface of the walls. Make sure it is dry before starting work. Experts recommend treating the surface with the “concrete contact” composition before applying it. ![]()
Structural has in its composition such components - marble, quartz chips, as well as pebbles. The main components of such material are liquid glass and acrylic. It is customary to use to cover the walls in the bathroom, corridor. It is also well suited for outdoor work. The material is appreciated by professionals and those who prefer to do all types of work with their own hands, for moisture resistance, normal carrying of temperature fluctuations, and the ability to withstand shock. To complete the work, you will need a roller, spatula and sprayer.
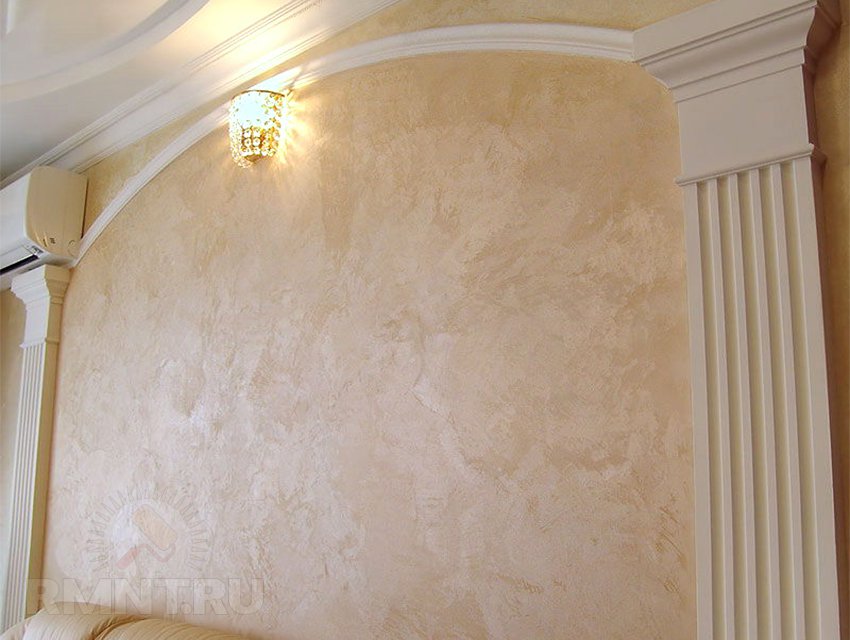
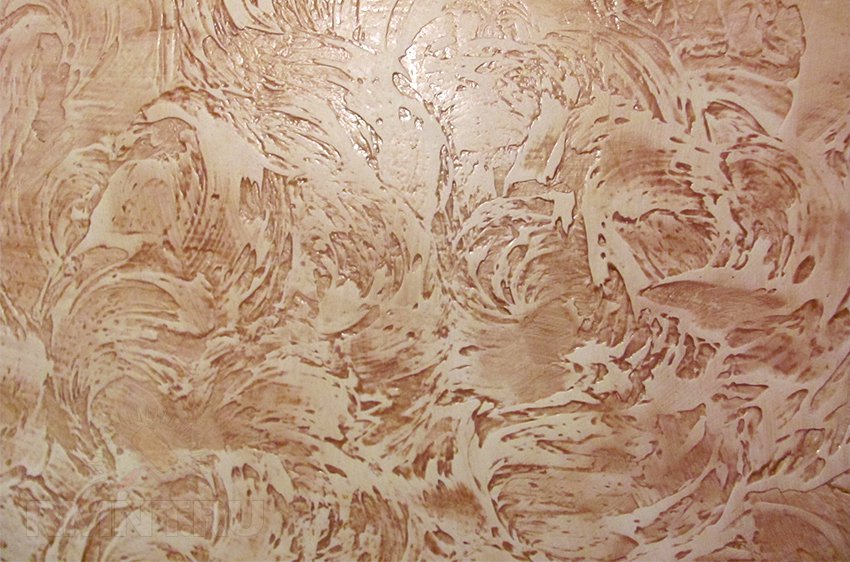
Venetian plaster is the most refined and presentable material for wall decoration. Venetian plaster appeared in ancient Rome and is still at the peak of popularity to this day.  The advantages of Venetian plaster are the high level of strength of the resulting coating, durability during operation. Venetian plaster is always in trend. The technology of applying Venetian plaster to the walls requires a high degree of skill. The result of the appearance of Venetian plaster on the walls of the room will be the creation of a magical fairy-tale interior that will shine before your eyes with many facets.
Venetian plaster is made by manufacturers from marble sand or dust with the addition of an aqueous emulsion and slaked lime. The resulting plastic solution of transparent Venetian plaster is used to decorate walls, carved cornices, columns, structures without joints. The technology of applying Venetian plaster allows you to achieve the visual effect of having a single piece of marble. It is difficult to apply it correctly with your own hands, it is better to invite a professional.
Flock material allows you to create an interesting surface on the walls. The application takes place in several stages - an adhesive base is made, then flocks - insoluble particles of different colors. The final stage of work will be the application of varnish. Most often used for interior than for exterior work. 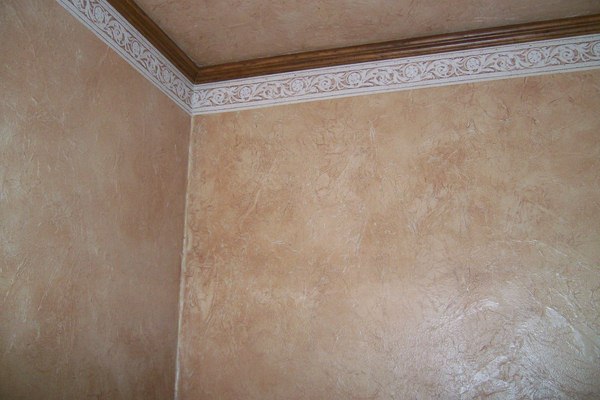
Training
Wall decoration with decorative plaster requires serious preliminary preparation. Each of its stages is very important so that everything goes smoothly in the future. You should pick up such materials and tools - a container for plaster, a piece of soft cloth, a set of spatulas, a trowel (to create the desired relief), special brushes, a sponge (toilet for grouting, coral - to apply a pattern to the surface, horse - for rough grout) , boles, rollers, primer, putty, cement mortar, gloves, stick (mix the plaster solution).
Next comes the choice of plaster. The pigment gives it its characteristic color and can be sold separately. Pigments can be combined by getting desired color. Modeling components and special material fillers will help create a beautiful relief pattern on the walls. It depends on the polymer elements intended for the bonding how durable the coating will be. Before proceeding with the technology of applying plaster, it is imperative to prepare the surface of the walls. The requirements for it are not so difficult. 
From the walls you need to remove the remnants of finishing materials or solutions. The surface is cleaned of dust, it is finished with a primer. Wait a while for the primer to dry properly. Next, close up the existing recesses and cracks. Cement mortar is usually used when large cracks are found. Putty is applied carefully to fill all pores, cracks and recesses. You can easily do it yourself. The surface is coated with cement putty. The layer of this solution is made medium in size. No need to try to get a perfectly flat surface, because after decorating the roughness will disappear.
Next, a layer of plaster is applied. It should be based on expanded vermiculite. Mixtures of this kind are commercially available in dry form. When stirring them before use, look at the packaging for how much water is required. Leave this layer to dry as well. The next step will be the application of a primer that has the ability to penetrate deeply into the surface structure. Do not forget to vacuum the applied primer. If you have made your choice in favor of an exquisite Venetian, then applying this type of plaster does not involve priming the walls. 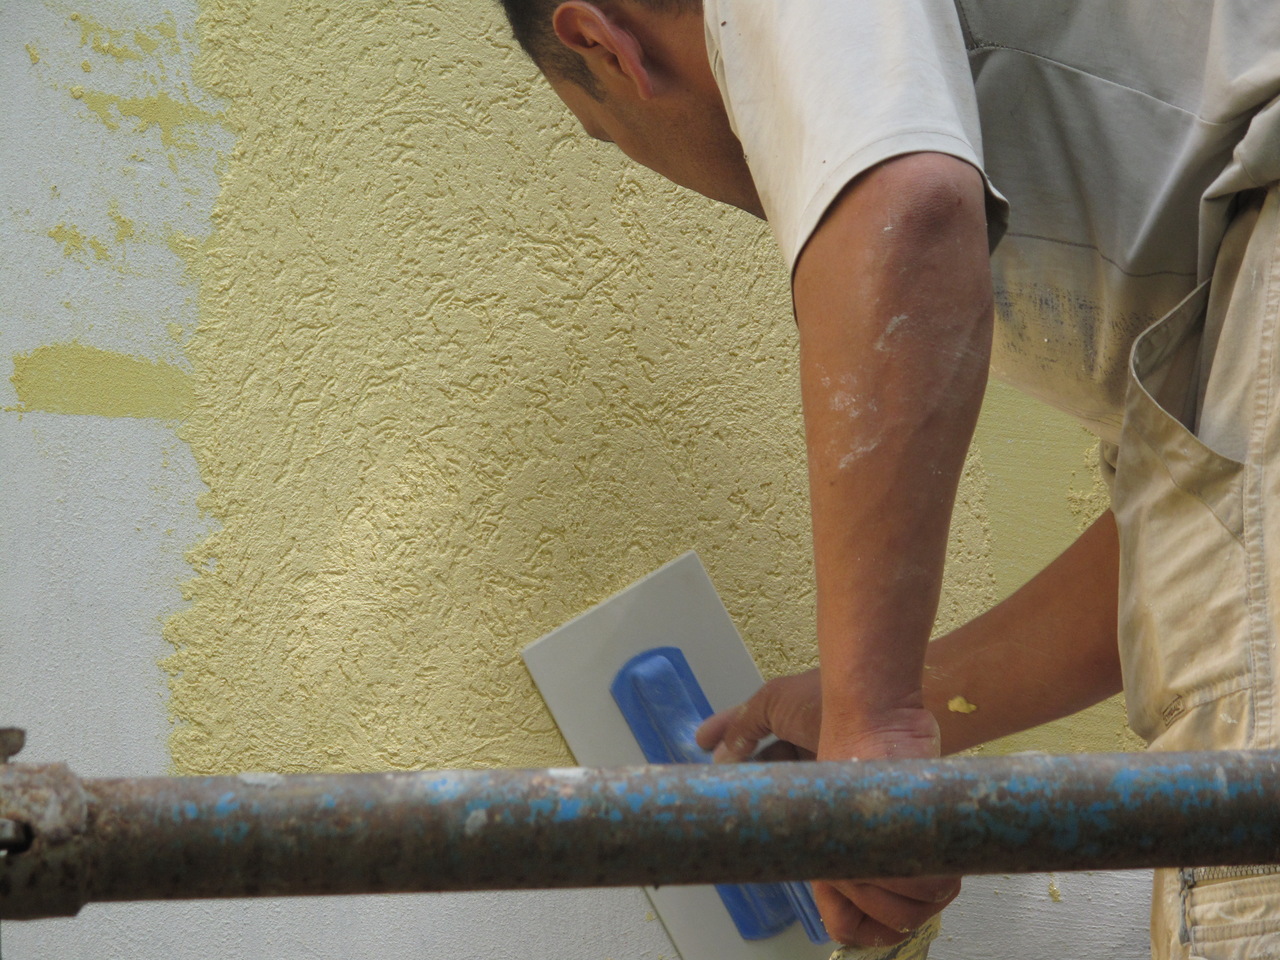
Experts recommend at the stage of carrying out preparatory work use a sand bed. For her, quartz sand is combined with acrylic paint. The resulting composition covers the desired surface in the room. More expensive option called the use of pearl powder for these purposes. It is also able to serve as a solid basis for the further creation of the Venetian relief. When carrying out preparatory work before finishing the walls with your own hands, remember that each of the applied layers needs at least two days for normal drying. In order to prevent the occurrence of cracks, it is advised to use a self-adhesive mesh, called "sickle".
Wall treatment promotes adhesion of the decorative surface. If you prefer a putty that has good absorbent characteristics, you can make the primer layer stronger - a special impregnation will protect it from delamination in the future. The requirements for applying a primer are as follows - the thickness of the resulting layer should not exceed 2 cm. During the grouting with sandpaper, it must be compacted. 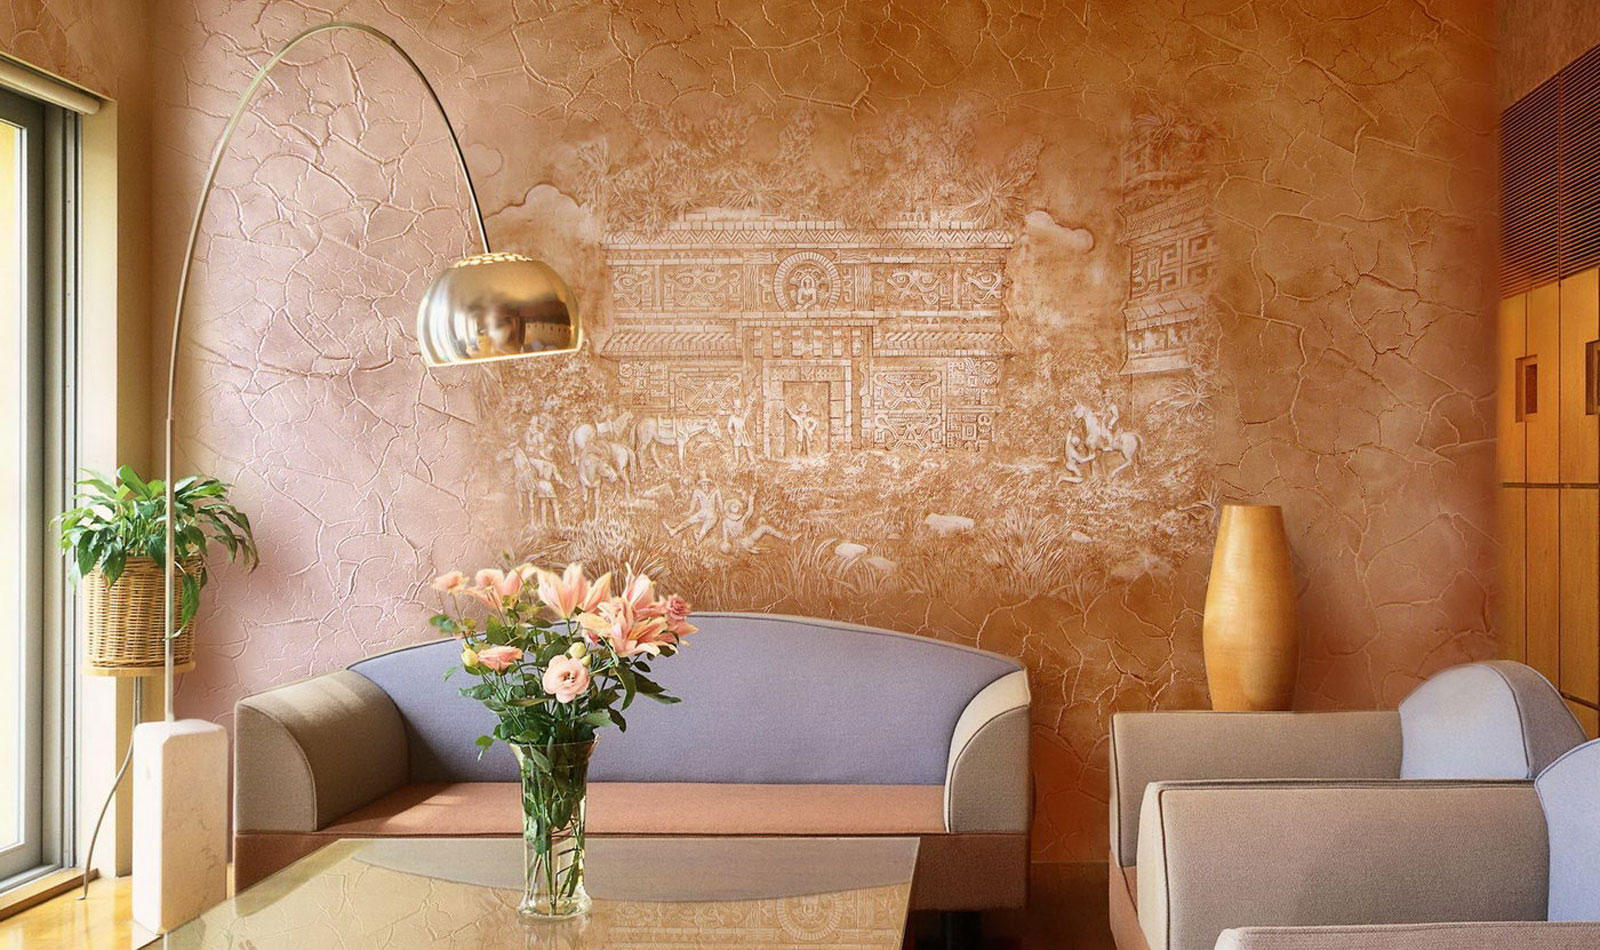 During the week, the surface will have to be moistened regularly. The preparation of walls for plastering is advised to finish with a test check of the surface. Trial application of plaster allows you to check how ready it is for processing. Not far from the corner of the room, a section of the wall is selected, on which a small amount of mortar is applied. This test will allow you to see the quality of the selected material, evaluate the beauty of the texture and the shade of the color scheme. Note how smoothly the transitions that appear between the texture and smooth stripes are.
How to create an invoice
Application can be carried out by spraying, decorating with a trowel, by “hatching-combing”, by stamping with a roller. The spray method is an easy way to create texture. It is done using a broom, mesh or industrial devices. The technique involves spraying the solution in layers. Each of them after application should dry normally.
With the help of ordinary blows of a broom on a stick or through a mesh, the solution is distributed over the surface of the primer. The result is the appearance of a beautiful elegant pattern. The texture depends on how thick the solution is taken. A coarse-grained texture will appear if you spray through a mesh with large compartments, a fine-grained texture will appear as a result of working with a roller. The use of a trowel involves the creation of a non-standard pattern on the primer. First, a cover layer is applied, on which the solution is then placed using a tool with a mixture of longitudinal movements. As a result, you can create a mysterious mysterious drawing.
Decorative plaster for interior decoration walls is now extremely popular. It is widely used in decorating facade surfaces, but we will talk about what to look for when working inside the house. The application of decorative plaster allows you to get a unique design of an ordinary apartment or a country mansion.
You can independently choose any color, texture for any style direction. The surface endures any mechanical stress, and is easy to clean. In addition, it performs a practical function: it softens temperature and humidity changes, and serves as additional sound insulation.
Types of decorative plaster
By chemical composition bases are divided into:
- Acrylic. They retain their original appearance for a long time, but during operation they are easily contaminated.
- Mineral. Moisture is not afraid. They can have a variety of colors. Lacks elasticity.
- silicate. Somewhat more expensive than those named. But durable and flexible. They are easy to care for.
- Silicone. Deserve the highest rating, because. for a long time durable, reliable.
You can make another classification of modern decorative plaster, depending on the variety of its composition and on what effect it gives when applied to the wall:
- Structural. This plaster mass may have some inclusions and additives, for example, granules, small pebbles, wood fibers. They usually have water base, are very plastic, give in to work with any tools. For a non-specialist, they are convenient in that they are sold ready-made, they do not need to be diluted and mixed, adjusting the proportions. On the network you can find many options for how to achieve a unique design with the help of such a composition.
- Textured. The surface can look like wood or crushed paper, repeat the structure of hewn stone. As in structural, various fibers, mica or stone chips can be used. The main ingredient is lime flour or polymer materials, which gives a more pronounced relief that does not crack over time.
- Venetian. Imitates a marble surface. It has a very expensive look, tinted in any color. The basis is also an aqueous emulsion and slaked lime, the use of marble chips gives an imitation of a "pearl" effect. One of the advantages is water resistance, as well as practicality and fire safety. As a rule, a beautiful look is achieved by using two shades.
- Flock. This is an imitation of a woven coating, one of the modern techniques of decorative plaster, which uses silk fibers. The technology used to create an expensive design is complex, consisting of several stages.
What tools are needed?
To get the desired texture, you need to prepare a tool and that's it. necessary materials in advance. You must have a trowel and a rule, several spatulas, a grater, a level and a plumb line. Depending on the effects that you will achieve in the process of work, the set of everything you need may change.
It is possible that a finishing acrylic putty, one or more structural rollers, polyethylene, masking tape, brushes and brushes of certain sizes, regular or coral sponges, a cuvette, cotton rags will be added.
It all depends on what kind of finish you are looking for. If you have never dealt with such an occupation before, study the master class on decorative plaster. Before you begin, prepare a piece of plywood or some other material on which you can practice your hand.
Wall alignment
The application of decorative plaster requires careful preliminary preparation. Walls before work should be thoroughly cleaned of paint and wallpaper, repair all cracks, reveal voids by tapping, remove all old crumbling coating, ideally level all bumps and recesses. If there are large cracks, they must be expanded.
Treat the entire surface with a steel brush, then with a soft brush. You can also vacuum. Acrylic decorative plaster, for example, tends to repeat all the irregularities of the wall. Therefore, it is necessary to achieve a perfectly flat surface. After leveling, the walls are covered with a primer, after which they wait for complete drying.
Application methods
Each type of composition determines the order of work, special tools and methods for applying it to the walls of the house. Types of textures dictate the features of working with a particular type of surface. Do not apply the composition in the middle of the wall. And how to apply decorative plaster correctly?
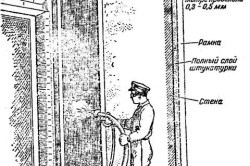
First, it must be thoroughly mixed. Then, using a spatula for decorative plaster, it is applied to the trowel and evenly, from one corner to another, distributed over the entire area. The layer thickness should not exceed 2 cm.
You can also use stamps, for which they use structural rollers for decorative plaster with a wide variety of patterns, metal brushes made of thin wire, trim the surface with a brush or sponge. Such decorative plaster imitates stone.
The spraying technique involves the use of a pin, which is hit with a broom, as a result of which the composition is sprayed onto the wall. In the Italian finish, a second coat is sprayed on top of the leveled first, using a combination of several colors. A similar technology is used in decorative plaster using the "snowball" technique.
"Sgraffito" is a method of covering walls, in which, using rollers for decorative plaster, it is necessary to apply a plaster mixture in several layers. Subsequently, its dried surface is “scratched”, giving an unusual effect.
Types of invoices
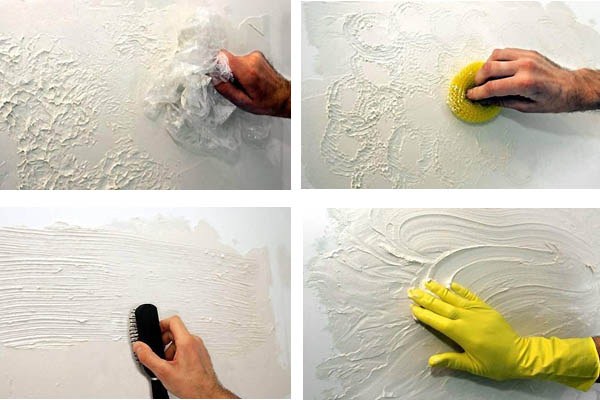
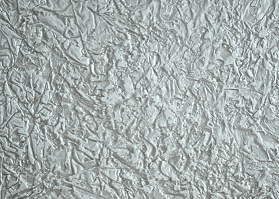
One of the most simple technologies for applying decorative plaster - this is the imposition of a film on it. It should be larger than the wall being decorated in order to create more folds, and this work will be easier for two people to do.
If you decorate the second wall of the house on the same day, then it is better not to adjoin it, so as not to spoil the picture. The film is removed after 15 hours, then you need to let the wall dry. Only after this is the final painting carried out. On a fresh putty surface, the texture can be obtained using the most common tools at hand.
With a roller
Rollers for decorative plaster can be either with a factory nozzle, or made with your own hands from foam rubber, plastic film, rope, rough fabric, fur, etc. Decorative plaster, its wet layer is processed with a roller with a pattern you like. Using a roller, you can achieve a variety of textures and reliefs: under a stone or brickwork, with imitation of wood fibers or mat weaving.
Using a stencil
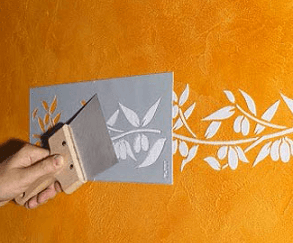
Decorative putty plaster, processed with a stamp ("Africa" or "Safari"), is similar in technique to that obtained using a roller. On the base layer they act with a special tool, get the desired impression, which is then further processed with a flexible stencil, sandpaper, then again with several layers of paint of different colors, using rollers for decorative plaster.
Then the surface is cleaned again, and at the very end it is treated with a special compound. Lacquer for decorative plaster is applied for gloss and wet effect.
With the help of a comb

Perhaps the easiest way to get a decorative plaster finish. A regular soft or stiffer brush creates a relief. The design of this finish can vary, depending on how hard you press the tool, how many different shades of paint are applied.
Application technologies
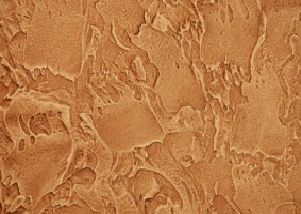
 Imitation of various types of natural texture, the use of various techniques provides a great variety for non-traditional home design. Decorative stone-like plaster looks unusual, with the effect of sand, with imitation of reptile skins, cracks, and other unique patterns. Decorative plaster "rain" is the easiest to perform and has a good decorative look.
Masters each time find new techniques and ways to apply it to create a relief image and a unique design. This can be helped not only by plaster from ordinary putty, various rollers and colors.
Texture "bark beetle"
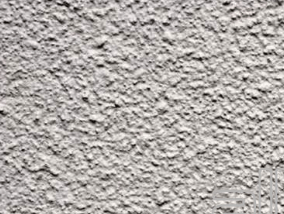
You can achieve an interesting surface pattern not only with the help of tools. Decorative bark beetle plaster resembles the texture of wood eaten by insects, and this effect is given by coating with a special grade of decorative plaster.
Such a finish resists the effects of humidity, temperature changes and impressive mechanical stress so well that it can be used for outdoor work. Decorative bark beetle plaster can be made on a gypsum basis or using acrylic components.
As granules, marble chips are most often used, which gives an imitation of wood eaten by beetles.
Mosaic wall decoration
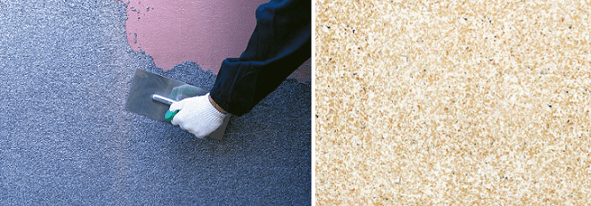
This technique uses a polymer as the base and binder. And the crumb of marble, malachite, granite acts as a filler. The smaller one is used and gives a beautiful effect in decorative plaster for interior work, and the larger one is used outside the house. Mosaic stucco finishing can be used on various coatings, which, thanks to it, can breathe, which prevents the development of mold, fungus, and other microorganisms.
Decorative silk plaster looks very nice, which gives an imitation of a silk surface. If you try to look at the wall from different sides, then thanks to the mother-of-pearl fillers in the composition, you can admire the play of light and the apparent transparency of the walls. The design of the premises finished with its help will please both the owners and guests.
Liquid decorative plaster, or liquid wallpaper, is convenient when used on concave and curved surfaces, contains natural ingredients, cellulose and cotton, is available in liquid or powder form, and is very environmentally friendly.
Decorative paint - wood, stone, leather or velvet and silk effect plaster, playing with rays of light, creates an atmosphere of wealth and luxury.
Self-made mixture
If a desired type decorative putty was not found or not suitable in color, you can make it yourself. Gypsum decorative plaster is taken as a basis. For 6 kg of putty, you need to add 200 g of PVA glue. Water will take about 2 liters. The mass must be mixed well. The mixture should be prepared just enough so that it does not remain and does not freeze.
It will not be possible to reuse it by diluting it with water. Compliance with the correct technology when creating decorative plaster, using exactly the recommended amount of it per m2 is a guarantee that it will serve for a long time, will not crack, and will not suddenly fall off.
The tool must be held gently and confidently, it is not worth working on one zone for a long time, you can lose the desired effect, because. The coating dries very quickly. The joined areas should look like seamless decorative plaster, there should be no visible borders and layers.
Dry decorative plaster is made on a cement basis. According to the recipe, it must be poured into a container with water (not vice versa!), Mix thoroughly, and use immediately after cooking, after 1.5 hours it will already begin to set.
Lime dough is prepared by diluting dry lime with warm water in a ratio of 3:1. Let stand 24 hours.
Some nuances should be taken into account even at the stage of finishing planning
Acrylic plaster, for example, is vapor-tight. Therefore, you need to consider in which rooms (bathroom, kitchen, bedroom) it is permissible to use them, and in which not. The same acrylic contains resins in its composition, which causes combustibility.
Gypsum is supposed to be part of some, but since it hardens very quickly, this is not always convenient in work. But it contributes to porosity and passes steam. Mortars containing cement or lime have high strength, but low elasticity; they can crack when dried and shrink.
The choice in favor of plastering walls is dictated by the simplicity of work and the spectacular end result. Wait for it to dry completely and enjoy the fruits of your labor.
Decorative plaster has been one of the most sought-after materials for do-it-yourself wall decoration for many years. The style, method of application, materials have changed, but the technology has remained the same. The surface is treated with plaster, which not only protects the walls, but also serves as a decorative layer. Thanks to various methods of applying decorative plaster, the room can be processed beyond recognition. The interior of the house can be kept in one style, or you can make it diverse. A feature of the plaster is that it will not be possible to make two identical patterns, so each room will be original and unique. Among other things, the material can be painted in any color you like, there are no restrictions in front of you. And when you get tired of the base color, you can easily change it. One of the advantages of finishing walls with plaster is the ease of use. Even if you are not a professional, our tips will help you do everything yourself.
So, this article is devoted to decorating walls with decorative plaster with your own hands. Detailed information will be made for you step-by-step instruction, additional videos and photos.
A little about decorative plaster
If this is your first time encountering this material, then I immediately want to reassure you - there is nothing complicated and supernatural in it. Usually it is sold in the form of a dry mix, which needs to be prepared in the process, and there is a ready-made plaster. The composition of the material is quite simple: binder, additives and filler. Depending on the type of plaster, the components may be different. Gypsum, lime, polyurethane, acrylic and epoxy resins can be used as a binder. They provide the plasticity of the plaster, which is very important. If we talk about the filler, then it can be colored clinker or white Portland cement, and various colored or pigmented aggregates. Additives are plasticizers and other materials that increase the ability of the plaster to repel moisture. Special solid elements are added to the structural mixtures to form furrows (bark beetle). These are wood fibers, quartz sand, synthetic granules or marble chips. They can be both large fraction and small.
![]()
note! Plaster happens different types. It is used for both interior and exterior walls. It is structural, textured, mineral, Venetian and stone.
Material Advantages
Before plastering the surface, you need to figure out why plaster is better than other materials. Here are the main advantages:
- No professional skills are required to work. To do everything with your own hands, just read the instructions from the manufacturer, take into account our advice, stock up on tools and materials (there are not many of them) and start the task.
- The ability to hide any irregularities and imperfections of the surface. Due to its texture and variety of ornaments, patterns and patterns, even the most curved surfaces will look beautiful, as if it was originally intended. For example, when working with wallpaper, the prepared wall should be perfectly flat. And for plaster, small irregularities, cracks and defects are not a problem. The material will fill all the cavities.
- When the wall is pretreated with a primer, the plaster plays the role of a heat-insulating layer (if it is of the required class).
- Appearance and variety of techniques. The treated surface looks rich, beautiful, original, skillful and attractive. The wall can be made to any taste, according to your desire.
- Ecological purity. This is a very important factor these days. Using decorative plaster, you don’t have to worry about the health of those living in the house. The material does not emit harmful substances and has no smell.
- Durability. Good plaster will serve you for many years. It is resistant to slight mechanical damage, to temperature extremes and aggressive substances.
- Ease of maintenance. Some types can be washed.
As you can see, decorating walls with decorative plaster is a profitable business. All the advantages speak in the direction of this material. Now we will look at what is needed in order to do the work with our own hands. But first, look at the photo. Here you can see different kinds decorative plaster.**
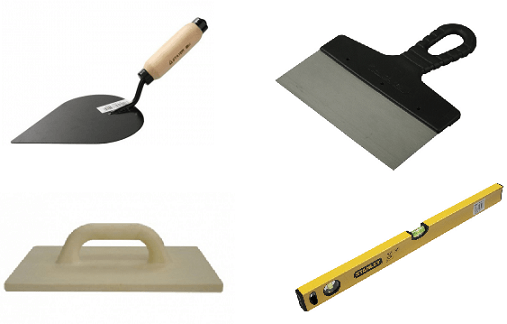
Tools needed for work
We have already mentioned that expensive and specialized tools are not needed here. They are quite simple, affordable and easy to use. What should you have in your arsenal? It all depends on the applied material and the desired texture. But, the standard set is as follows:
- container for the finished mixture (bucket, basin);
- drill with a mixing nozzle;
- a set of spatulas of different sizes;
- trowel, grater, trowel;
- falcon;
- a roller with a bath;
- soft and hard brushes for painting or drawing;
- metal brush to clean the wall.
The photo shows what each of them looks like.
As materials for forming a pattern, you can use a sponge, cellophane, various structural rollers, stencils, even a rubber glove. In this case, you can use your imagination to the fullest, because you can create patterns with anything and anything. When the arsenal is completed, you can start decorating the walls with decorative plaster with your own hands.
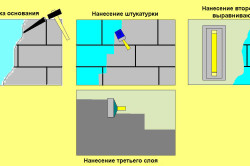
Step 1 - surface preparation
It makes no sense to achieve a perfectly flat area. It is important to follow the basic steps, thanks to which the surface will be ready for processing. The procedure is as follows:
Step 2 - preparing the composition
Once the primer is dry, you're ready to go. The next step is to prepare the plaster mix. Usually on the package there is an instruction from the manufacturer, which indicates the method of preparation and proportions. It's next:
So you can quickly and easily prepare the solution with your own hands in a few minutes.
Advice ! Do not mix too much material. Over time, it will dry out, losing its plasticity. If you are a beginner, then 1 serving should not be large so that you can apply the solution before it dries.
Step 3 - applying decorative plaster
Now everything is ready for surface treatment. Your task is to apply the solution to the wall and form one or another pattern. The technology is:
Since the techniques and subtleties of work differ depending on the material and method of application, we suggest that you familiarize yourself with a series of videos that will describe in detail how you can make various types of decorative plaster with your own hands.
Application of bark beetle:
Applying Venetian Plaster:
Application of Desan Versagel plaster:
Textured roller application:
Application of mineral plaster:
Possible difficulties
If you are working with mineral plaster, you should be aware that it tends to fade under ultraviolet rays or from exposure to precipitation. To avoid this, finished surface must be necessarily covered with several layers of high-quality paint, for example, silicate paint.
When you have applied a thin layer of material, then be prepared for the fact that the base will show through. With coarse-grained plasters, it will be difficult to fix everything. The wall is simply covered with a colored primer, matching the plaster.
Not always the wall will turn out the way you wanted. The reason may be the incorrect application of the composition, the choice of tool, the consistency of the solution. To prevent this from happening, study everything to the smallest detail: the product, the method of its application and the tools for this.
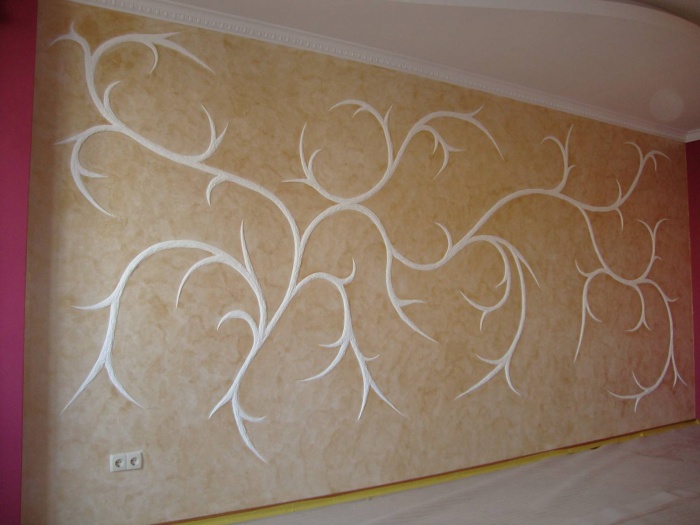
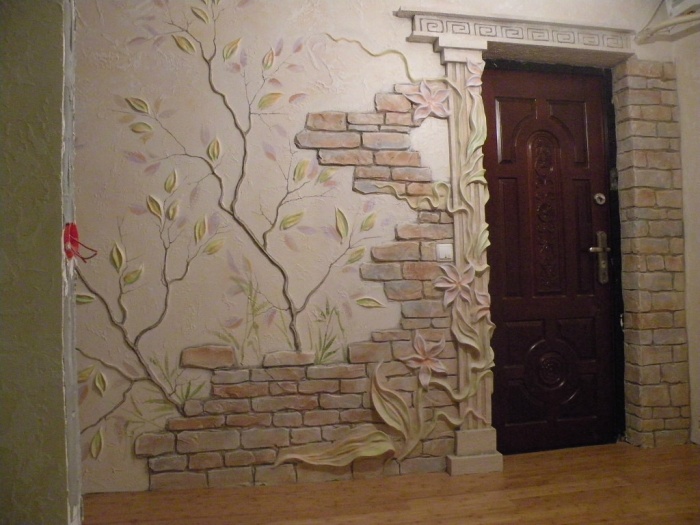
In the end, we invite you to consider photos of different wall finishes with decorative plaster.
- Cladding types
- Wall preparation
- Wall decoration with plaster
- Facing with decorative plaster
Finishing the walls with plaster is the most common way to make the surface more even. Although such work is long, laborious and requires concentration, even a completely inexperienced master can master it. Here the main task is a thorough study of the theory with its further application in practice.
Finishing the walls with plaster is one of the ways to make their surface more even.
Cladding types
There are a great many classifications of plaster, but one of the most common is the specification for the scope. Facing is of the following types:
- Normal.
- Special.
- Decorative.
Plain plaster mix is a semi-finished product that should be brought to readiness before use. Basically, this type is used for wall decoration before painting or wallpapering. Ordinary plaster is simple, high-quality and improved, depending on the quality of the work.

main function special coating is the protection of the walls. It can be a waterproof type of plaster or heat-insulating.
Decorative cladding is used when decorating the interiors of rooms or facades of houses and other buildings. It allows you to make the surface embossed, of different textures or colors. For each of the options there is a separate type of material.
When choosing a plaster, it is very important to determine the type of surface that needs to be finished. After all, brick walls require a large amount of facing mixture. This is the main reason why you should opt for a solution of cement and sand. Concrete walls and other smooth surfaces can be plastered with a mixture of gypsum, after carefully treating them with a primer.
Back to index
Wall preparation
With a simple coating of the surface with a mortar without preliminary preparation of the walls, you will get a not very pleasant sight. Even small waves can spoil all your work. The only option to avoid this is to prepare the surface according to all the rules:
- Leveling the base.
- We prepare the surface for the installation of beacons.
- We produce wall primer.
- Installing beacons.
When leveling the surface, we remove all unnecessary fragments on the walls. This also applies to sagging on brick or concrete, and the old paint coating. It is also recommended to carefully level the seams between the bricks. The next step will be preparations for setting up the beacons. To do this, we drill holes in those corners that are located on top, and screw the screws into them. Using the building level, we determine the most protruding sections of the surface. Then, in the lower corner, we screw in the screw, having measured out a strict vertical before that. In the same order, we repeat all the steps at the other end of the room. After that, we stretch the threads between the upper and lower marks, along which new screws are screwed. The gaps between them should be the same.
After completion of work on the marking of future lighthouses, priming should be started. The wall surface is thoroughly cleaned so that no dust remains after drilling. Apply primer with a roller. If you are dealing with brick wall, then the coating must be made denser to hide the unevenness of the seams. After drying, we proceed to the installation of beacons. Between the vertical marking lines we apply a little plaster, into which the lighthouse is attached. After installing all the profiles, they should be carefully covered with a solution.
The last step in preparing the walls is their alignment. For these works we use a mixture of sand and cement. It should be noted that a thicker layer of plaster requires coarse sand fractions. With a large amount of cement, the mortar dries faster, but such a coating is not very durable.
Back to index
Wall decoration with plaster
There is no unequivocal answer from experienced craftsmen to the question of the correct alignment of walls with plaster. But after careful preparation of the surface of the walls in this process there is nothing complicated. Finishing ordinary plaster consists of a primer and leveling layers with their subsequent smoothing. The first stage is performed in the technique of spraying. It is characterized by throwing small portions of the solution into the wall with strong and clear movements. This method allows the adhesion of the plaster composition with all surface irregularities. Throwing fills the entire gap between the beacons. This rough finish does not need additional leveling.
If desired, the first layer of plaster can be your last. With low beacons and a more even surface, this option is quite acceptable. If the coating is below the level of the profiles, then the work done should be repeated once again, having previously treated the bottom layer with a primer. Leveling plaster allows brick wall acquire all the properties of concrete. She is much easier to work with.
When the solution begins to dry out, you should start leveling it. For this job, you will need a building rule. The tool is applied to the beacons, which are located below, and with some effort moves up. The coating is considered completely even when the edges of the profiles appear on the surface. Now it remains only to wait for the complete drying of the mixture.
After the plaster coating has hardened, all beacons must be removed. If you leave them in the wall, then over time you may encounter some problems. The fact is that the plaster absorbs moisture, and this circumstance over time can lead to corrosion on the profiles. There is a risk of rust passing through wallpaper or decorative plaster. To avoid such phenomena, all beacons should be removed. Using a spatula, the coating is cut along the base of the profiles and they are removed.
Sanding the walls will complete the entire process. It is carried out using a special grater. It is necessary to remove all irregularities in a circular motion, carefully wetting the walls. After that, the surface is suitable for painting or wallpapering.


