
Repairs are always accompanied by financial expenses, and if there is an opportunity to save on something and do some of the work yourself, then this will be a nice bonus in the family budget. One of the types finishing works is a decorative wall putty, in its essence the task is not difficult, but it requires attention and accuracy. You can try to decorate the surfaces of the walls yourself, and if you wish and have patience, it will look no worse than that done by professional craftsmen. This is just the type of work that does not particularly require skills, and the tool needed for this is inexpensive to purchase.
Manufacturer and supplier: dispersant and contact adhesives for chloroprene for flooring and tiles; acrylic and silicone cements; polyurethane cements; polyurethane flooring; paints for wood and metals. Production and sale: chloroprene, acrylate and polyurethane adhesives; silicone, acrylic, polyurethane cements; polyurethane foams.
Production and application of construction chemicals for repairs and repairs concrete structures; cutting, grinding, milling concrete; paints and varnishes, plastics, cements. Wholesale and retail trade in building ceramics: paving slabs, tiles, adhesives and mortars, ends, sanitary ware, faucets, bathtubs, showers, bathroom furniture, bathroom accessories.
In the absence of skills, it is easiest to stick to step by step instructions and watch some visual video tutorials on the Internet.
What is the essence of the advantages of decorative putties?
Wall decoration with putty is the latest, final stage of facing work on the surface of walls and ceilings, during which you can change the relief, making it not monotonous and familiar, but more attractive and in step with the times. Decorative putty is laid on almost any building material from which walls and ceilings are erected: drywall, concrete, foam concrete, brick. This is just the kind of work in which you can try yourself and do something yourself for repairs.
Karlovy Vary
Business activities - ceramic tiles and floor tiles, adhesives and compounds, sanitary ware and bathtubs, showers and hydromassage systems. Business activities: plasterers and facade paints, building insulation systems, sealants and cements, paints for steel and concrete structures, roof coatings, floors, glazing varnishes.
Sale of finished products for production, repair and maintenance, consultations. Certified manual production of stone tiles and paving; specialized sales of stone tiles, paving slabs, tile imitation, Belgian facing brick, tile strips, connecting materials, flexible. adhesives, sealants, etc.; implementations, projects, architectural solutions.
The modern material used for this type of work uses special plasticizer additives, the task of which is to ensure maximum adhesion to the mixture. The ease with which it is superimposed on the walls makes it possible to organize part of the repair work for people who decide to learn how to save money by doing the work themselves, and at the same time learn how to perform such tasks.
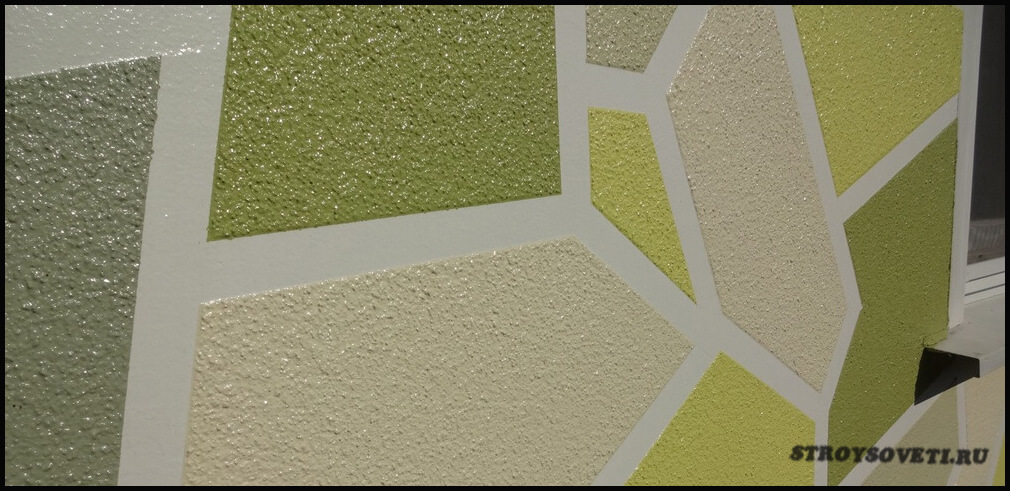
The most creative of you will be pleased with the opportunity to make an original mosaic house exactly to your liking. Before going into the material, it's important to clear up a few things. The most important is the color of the mosaic. Will it match the painting, or rather match the accessories? Will it be made from multiple shades of the same color, or will it vary? Are you taking it more abstractly or are you trying to create a symbol or image within the mosaic? Only when you answer these few questions, go shopping.
advantage decorative finishes is a longer service life, without visible violations of the coverage, and if this is the main plus, then in addition you can add more:
- Moisture resistant.
- Absence of destruction under the influence of mechanical loads.
- With direct sunlight, it will not fade for a long period.
Proper laying of the material in compliance with all technological moments provides approximately the same operational period as in the case of ceramic tiles and stone. A feature of such coatings is the ease of surface care, the absence of odor absorption, as well as additional heat and sound insulation of the premises. The most important circumstance is the fact that the mixtures do not contain substances with toxic elements. If we compare it with other compositions, then this is one of the most environmentally friendly building materials.
Familiar "fur coat" in a new way
Tiles are an important element. You have already decided on the color shades, but now you still need to find the ones that match your vision. You buy tiles in any store with building materials or household appliances, from about 100 CZK for square meter. Measure the area where you want to apply the mosaic. Determine which color will dominate or balance the colors and adjust the amount. Another necessary product is the gluing of putty, its smaller packaging cost is about 150 kroons.
![]()
The technology of laying decor on the walls
In order to independently qualitatively perform wall decor with putty with your own hands, you need to prepare the necessary tools and fixtures.
It's more convenient to buy already mixed, but it's also good to be free that you just mix. There is also a "trowel" for applying putty. The material is at home, so get to work. Squeeze the tiles into pieces as much as possible. It also depends on your patience, skill and idea of the result. Apply putty to a not too large piece and start creating a mosaic. Large gaps between different parts of the tile eliminate special scissors called parrot. Top tiles according to your idea.
They will harmoniously fit into each other. Does the original mosaic contain part or even the entire wall of your apartment? Then there is only a glimpse of spaces between the plates. Select suitable color already mixed or mixed at home. Jasmine shadow is a nice addition. You can buy a gadget in the form of a giant syringe and especially a spatula to apply and wipe off. At the end of the day, you will polish your creation and enjoy a beautiful original piece of your apartment.
- Two - three spatulas of different widths (it is not necessary to buy a whole set).
- Plumb, or building level.
- Ironing board.
- Graters and trowel for grouting.
Before performing work, it is necessary to prepare the surfaces and the material with which the structural putty will be applied.
Do you mean stucco plastering with resin? The thing is, when you make resin and cut that plaster model so that it doesn't soak into so much plaster, and when it cures, it will make the model look more like a thick layer of varnish. But you need a plaster to saturate the resin, like water, because when it saturates the resin inside the plaster, it polymerizes it, it creates new molecular networks through the plaster and greatly strengthens the plaster model and improves resistance to moisture.
Therefore, in order to impregnate gypsum resin without varnish, you must dilute it so that it settles well. The problem is that if you dilute the resin too much, it will lose its ability to polymerize and the molecules won't crosslink. In short, you are making a liquid that does nothing. Alternatively, it will crosslink, but this will take a long time and the resulting polymer structure will be poor. Therefore, it is necessary to dilute the resin to the point where it is still polymerizing in order to be stuck in the casting.
- The base is inspected and prepared, on which decorative puttying of the walls is carried out.
- Applying a base coat.
- Choice of processing method.
All work can be divided into stages, and this will be the most correct, since at the end there will be no imperfections and defects. An important point is to determine the amount of material to be applied. In the absence of experience, this is difficult to determine, so it is best to pre-calculate the costs and if you need an additional amount of the mixture, you can buy it in addition.
Decorative plaster - what is it?
Try experimenting with it and find enough acetone, or there will be some tables where you can find the percentage of thinner that will still allow the resin to polymerize. In pigmented gelcoats there is also pigment, in white it is classically predominantly titanium white. It's done there so that when the gelcoat wipes off or shatters the mold so it doesn't run from one side to the other but stays evenly throughout. Imagine the mold on the doll that you are going to drain off the oil before you pour the dough.
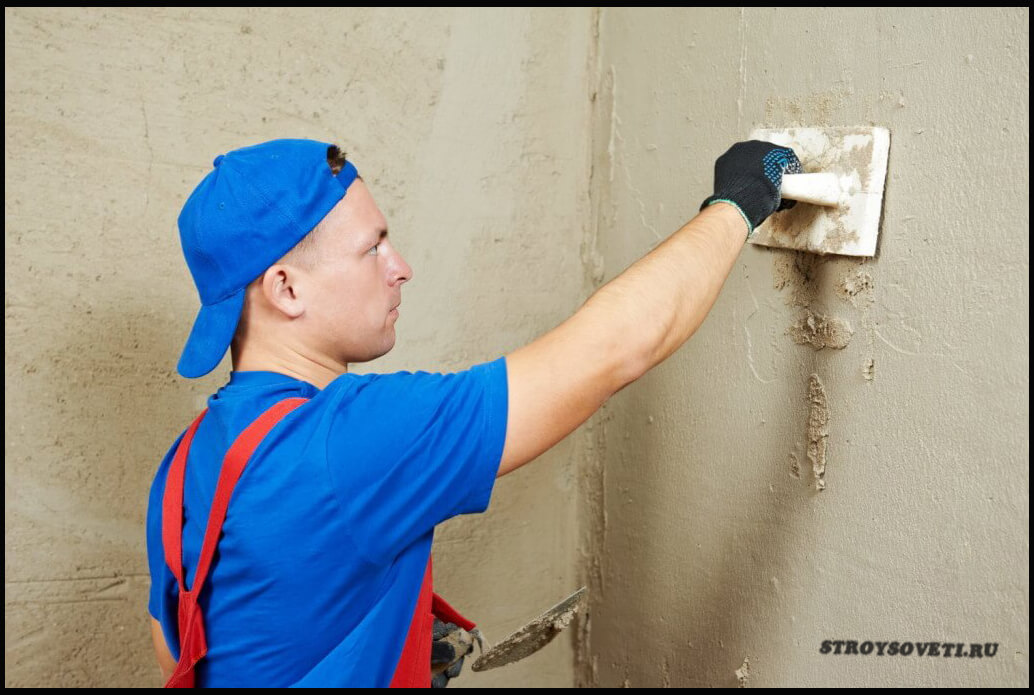
Preparing surfaces for decorating
Initially, before you start decorating the walls with your own hands using decorative putties, you need to prepare the foundation. Here is the list of these preparations:
- If there is another type of putty or wallpaper, they must be removed.
- If depressions, cracks and other defects are detected, they must be eliminated, the treated areas should be allowed to dry and sanded.
- With the help of the building level, it is found out whether there are deviations on the wall and ceiling and their nature.
All defects identified during the revision are corrected by leveling with putty, which must dry completely and only then grout. Before application, all treated areas are primed, for this you need to select the material that is required in each individual case.
But the oil sticks to the walls and doesn't flow, and actually forms a layer of the top layer after the dough is poured there. Well the gelcoat is actually an oil, it just won't disappear in the process like an oil, but it will remain as a top coat. So even with diluted gelcoat, plaster can be poured.
Decorative plaster - what is it?
Try experimenting with it and find enough acetone, or there will be some tables where you can find the percentage of thinner that will still allow the resin to polymerize. In pigmented gelcoats there is also pigment, in white it is classically predominantly titanium white. It's done there so that when the gelcoat wipes off or shatters the mold so it doesn't run from one side to the other but stays evenly throughout. Imagine the mold on the doll that you are going to drain off the oil before you pour the dough.
How to create a base decorative layer correctly
To help beginners and those who decide to make these types of repairs on their own, there are many different video tutorials in which all the main points are explained step by step on how to prepare the material necessary for work from a regular mixture.
When buying ready-made mixtures, manufacturers took care of the minimum time required for preparation. The main thing is to read the instructions correctly and strictly follow everything that is written in it. The amount of the mixture is diluted with the expectation of producing it at a time, this is important for two reasons, and the main one is the fact that the plaster, even despite the presence of various additives, dries quickly. And now the main thing: the decoration of the walls should be applied along the thickness of the layer, taking into account the height of the texture. In the absence of experience and primary skill, you can practice initially applying base coats in small areas in order to have an idea how to work with the material.

Creating textures on wall and ceiling surfaces
The textured layer is applied in a different way, it all depends on many factors. Listing them, experts distinguish three main ones:
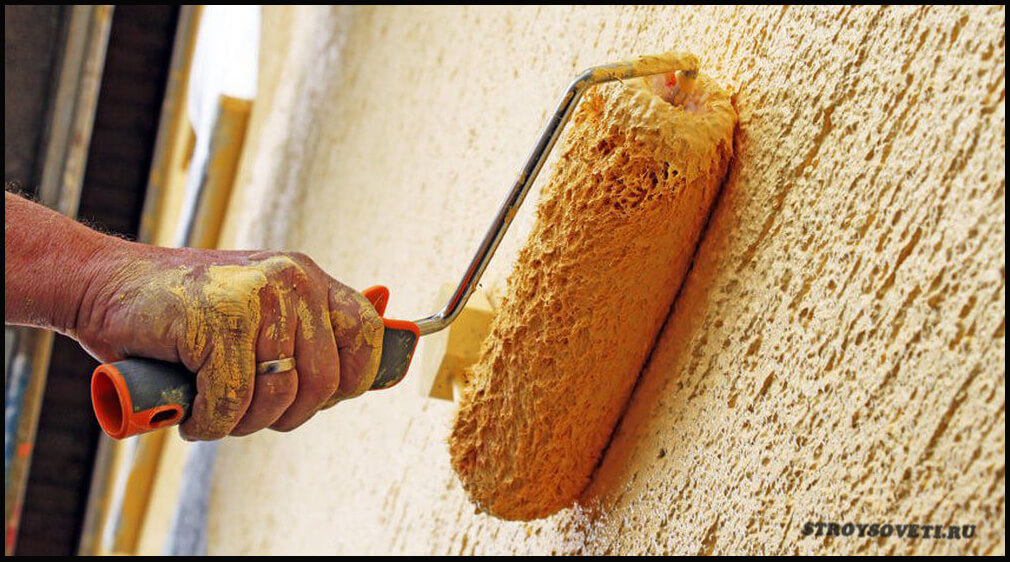
- Roller application.
- Applying with a spatula, brush, trowel.
- Using ready-made stencils.
The roller is the easiest tool, the use of which allows you to apply a layer of material. Regardless of the length of the pile on the replaceable sleeve of the roller, traces of ruffle are formed on the surface, there is nothing unnatural and terrible in this. Excess mass is easily removed with a smooth spatula. Thanks to the roller, the layer is even, there is a clear pattern.
If there is no roller, you can use notched trowels, brushes. This tool is easy to use, it is good for them to create patterns that resemble stone, concrete, suede surface. When pressing the spatula, you need to take into account that the material is soft, so you do not need to do much pressure when pressing. Structural putty can recreate any whim of the master, and with a certain skill, even foam rubber or cellophane film can be used to apply a pattern to the plane of the wall. A little practice with various subjects and using the video tutorial, any beginner will be taught how to properly handle the tool and improvised items.
The use of ready-made stencils, which are often sold in hardware stores, makes it possible to apply a conventional mortar, turning it into a decor. Along with the stencils, there is a special photo instruction that shows how the drawing is transferred. The stencil is a pattern in the form of a bulge. It is pressed into the base of the already applied composition. The result is a drawing. The more often the remnants of putty are washed off the stencil, the clearer and cleaner the pattern is printed. It is this moment that takes a lot of time and it is the only drawback of the technique. For corners, a special rubber stencil is used, which is sold separately. However, there are also kits that include all the elements for drawing a picture.
Completion of work
The applied plaster should fully dry naturally, in time it takes no more than 30 hours, provided that the room has a normal percentage of humidity. In rooms with high humidity in the absence of ventilation systems The drying process can take up to two days. If the plaster does not follow the sandpaper and there is dust, then the surface is ready for sanding.
Coloring several times in a row will help to make the texture more expressive. When painting, the first layer is applied with a roller with a long pile nozzle. It is necessary to allow time for the painted surfaces to dry, and then re-walk with a short-haired roller, but the tonality should be lighter from the base. At the finish, a special colorless varnish is used, after which the plane is ready for use. If one layer of paint is applied to the texture with one colors, it's a work in progress. It makes no sense to carry it out, as the plaster will quickly fade.
In the absence of a roller, staining can be done with a regular brush. This will take longer and you need to make sure that there are no streaks left. However, there are pluses: this method saves the amount of paint consumption. The second layer of paint is applied in the same way.
So that the painted planes can be used longer without fading or cracking, the third and fourth protective layers of varnish are applied. Lacquer is diluted in a standard way. Usually the proportion is 1 x 1 and the same sequence of processing is performed: after application, they wait until the exposed surface dries and only then the final layer is applied.
How to choose putty
Finishing compositions are divided into several types of different types:
- For drywall. It is gaining more and more popularity among developers and people involved in repairs of various types of premises. The material is easy to use, absolutely harmless, environmentally friendly. The only drawback is the sensitive hygroscopicity. It is undesirable to use in rooms with high humidity.
- By concrete. Moisture resistant, not afraid of temperature changes. Disadvantages are manifested high percent shrinkage, possible cracks after drying.
- polymer compounds. The new kind putty, which managed to prove itself only from the best side: durable, moisture resistant, endured any temperature changes, easy to clean and with a long operating period.
- Acrylic. With a relative high cost, the material fully justifies itself in rooms with high humidity and temperature changes. An excellent material for finishing surfaces in bathrooms and kitchens.
- Glue-oil. The cheapest, but not the most practical material made on the basis of drying oil paint. Undesirable for use in areas where people live or work. Not an environmentally friendly material. For a long time after the walls have been treated with this material, an unpleasant smell of paint is felt.
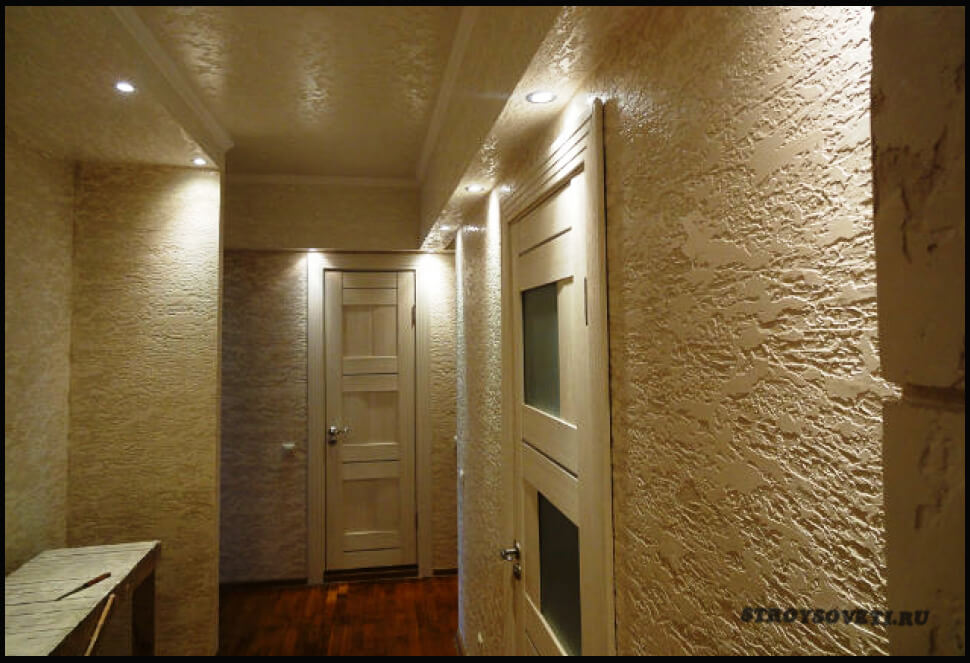
Decorative plaster considered the most beautiful surface finish, structural plaster will make the design of the room original.
Decorative plaster is considered the most beautiful surface finish.
And in vain, some are afraid of the cost of decorative textured coatings. Instead of expensive ready-made mixtures for decorative plaster, you can use, for example, putty. You do not have to suffer with imported compounds used by professionals. can be applied on your own with no experience or special skills.
Do-it-yourself mixture for decorative plaster
It is inexpensive and easy to make a mixture for decorative plaster with your own hands.
For plaster mixture we take water and putty in a dry form and mix all the ingredients with a construction mixer until a homogeneous composition. The solution will be ready when the mixture resembles thick sour cream. Add PVA glue to a homogeneous composition and mix. If plastering is required for the facade, then it is better to choose tile adhesive instead of PVA.
Important: in order for the mixture to be thick and properly prepared, the proportions must be observed. So, 2 liters of water will require 6 kg of dry putty and 200 grams of PVA glue.
Methods for applying decorative plaster from putty and fixtures

In fact, there are no restrictions in applying decorative plaster on your own, it all depends on fantasy and imagination.
Today, there are a huge number of ways to decorate with putty. In fact, there are no restrictions in applying decorative plaster on your own, it all depends on fantasy and imagination.
The basics for self-plastering the surface can be learned from professional surface decoration. Simple types of structural, textured plaster can be reproduced independently without special preparation, ready-made expensive mixture and special devices. Different kinds decorative textures will be obtained depending on the tools used and the application technique.
Any object or material can be used as fixtures: brushes, rollers, leather, a bag, crumpled newspaper, rags, etc. The unique texture can be reproduced by various application techniques.
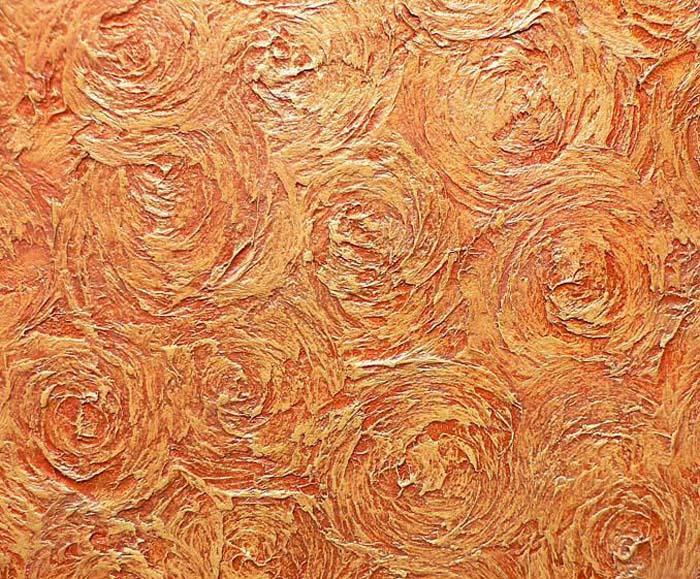
For example, if you perform circular movements with a spatula on still damp plaster, you can achieve a pattern resembling sea shells. Grooves, as in the "Bark beetle" finish, can be done with a grater (see a separate article about). The rough surface of the pattern is formed using a roller, which, by the way, can also be arranged independently.
The roller can be wrapped in a bag, securing it with an elastic band. The drawing will be unique. A roller with different textures can create different patterns on the surface. An original drawing is obtained using a crumpled newspaper, a sponge, a fur glove.
Variants of decorative plaster from putty
In fact, with the help of putty, you can come up with and create on your own the effects of any relief, texture.
The whole process of work consists in applying a layer of plaster, after which, without waiting for it to harden, surface treated with tools or various devices. Then they begin to form a pattern by mixing or moving layers of plaster.
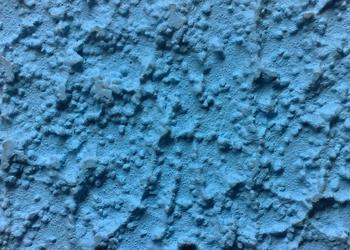
- Decorative plaster with the effect of "fur coats". The first layer of putty is applied to the prepared surface, leveled.
We make the mixture thin, so that the solution does not spread over the surface. We apply the composition to the wall with the tool, smooth it and immediately press the brush against the wall on the completed area, release it. It turns out the effect of fur. Then, with a spatula, we begin to smooth the textured pattern in one direction. You can choose any drawing, it all depends on the direction you choose.
Important: in order to avoid visible transitions in the decoration areas, the plastering work is done quickly so that the plastered layer does not dry out.
For work, we need to dilute the dry putty with water, the working state of the mixture is a thick mass that should not drain from the wall. We take the solution with a spatula in small portions and apply "strokes" putty mixture. The drawing in this case can be different: small, large, stylized as some kind of material.
Important: in order for the pattern of decorative plaster to look holistic, during work you need to periodically move away from the wall and inspect your “creativity”.
After the putty material dries, we grind the surface with a sandpaper. Then we clean the drawing from dust and prime it.
After complete drying of the surface painting work begins: first we cover the plaster with white color, and when the paint dries, we apply the tinted version, not allowing the colored layer to dry without pressure, we remove part of the color only from the convex texture.
It is better to use a damp cloth for this purpose. If you did everything right, the texture should “appear” on the surface. For effect, you can cover the decor with varnish or gilding.
It is quite possible to do decorative finishing with putty with your own hands. To do this, stock up essential tool, prepare the mixture and turn on your imagination, diligence. You do not need special skills, and you can see how the decor is applied on specialized forums or on video.
Video instruction


