
What are the main advantages of this material, which decorative plaster is better to choose and how to apply?
Advantages of decorative plaster
 The first and most important advantage is uniqueness. After all, even if the coating in two identical rooms is applied by the same person with the same tool, you will still end up with a different pattern, so this type of finish is a great chance to make your room unique. In addition, with the help of decorative plaster, you can achieve an imitation of a marble, metal, granite, silk, etc. coating.
She fits to although many believe that it fits best in classic interior. With the right choice of color and texture, it will be an excellent addition to the interior in the style of hi-tech, modern, minimalism.
It is not difficult to apply decorative plaster - it is rather a pleasant creative process, however, you will have to try with surface preparation, because the cleaner and the better the result will be.
 Such plaster is capable hide some imperfections of the walls, small cracks and irregularities, especially if it contains cellulose fibers. In addition, it is able to add warmth to the room, since well-chosen plaster, together with a good primer, are good heat insulators.
Environmental friendliness and safety- another plus. So, decorative plaster is made from natural materials, and the finished coating does not absorb odors, does not emit harmful substances, and therefore is not capable of causing any inconvenience or harm to health.
Such a coating will not cause any trouble in operation either: it is durable, resistant to temperature extremes, and practically does not need maintenance. Moreover, as a result of application, there are no seams, joints and other defects on the surface.
Of course, one cannot pay attention to such a direct disadvantage as the high cost of the material. But given that such a coating will last long enough, be unique, easy to maintain and repair, then its cost is quite justified.
Classification of decorative plasters

The whole variety of different types of surface obtained with the help of decorative plaster is formed due to the fact that the compositions can be different: some have elements due to which a certain relief can be obtained, while others must have a special approach and the ability to create the desired surface.
What is decorative plaster made of? In most cases, the composition includes a water base, binders, additives and fillers such as thickeners, antiseptics, etc. Fillers can be completely different, but in addition to the filler, plasters can also differ in their basic composition. And it is this characteristic that makes this or that material applicable in specific conditions.
So, among interior decorative plasters, the following main types are distinguished:

In addition, all decorative plasters differ in type. finished surface: bark beetle, with marble chips, with imitation of granite, rain, roller, rustic, Venetian, etc. Graters, spatulas, fabrics and other materials can also be used to add texture - all this in order to move away from typical factory solutions with filler, but about the technique of creating relief a little later.
In order to better understand what will be discussed below, it is also worth giving a classification of decorative plasters. filler type:

Surface preparation

Like any other coating, decorative plaster requires some surface preparation. Naturally, the very first step will be to completely remove the old coating: the wallpaper must be carefully removed, you can use a spatula, slightly moisten them with water. All paint residues are also removed: a spatula, a building hair dryer or even special solvents will also come to the rescue.
When the surface is completely cleaned, it is necessary to wash it from all traces of work: use a cloth and detergent. If there are obvious defects and large cracks on the surface, then, naturally, it is better to level them. Small irregularities are leveled, depending on the situation: for example, Venetian plaster and some other types require a perfectly flat surface, so putty is useful.
 But the primer is needed in any case - it closes microcracks, prevents absorption, improves adhesion. For each type of decorative plaster, a different type of primer is suitable, and manufacturers often indicate the recommended composition. If the wall surface has metal surfaces, then it is better to treat them with a protective compound, otherwise there is a high probability that they will begin to rust, and brown spots will show through the plaster.
If the walls have never been finished before, i.e. Since the building is brand new, then it will be enough to cover the surface with lime mortar, although many professionals still advise the use of appropriate primers.
Necessary application tools
 In order to apply decorative plaster, you may need a different set of tools, but the minimum required is as follows:
- spatulas;
- graters;
- metal trowel;
- container for the plaster itself;
- rollers or stamps for textured plaster;
- you will also need paint if the plaster is not painted in bulk;
- varnish on water based for fixing a layer of paint and a primer for paint.
Application of decorative plaster
 So, the application of decorative plaster begins with the fact that it is necessary to prepare the material itself. If the plaster was sold ready-made, then you just have to make sure that the expiration dates and storage conditions have not been violated, open the mix again and start working - such compositions usually harden longer, so hurry up like with plasters that need to be prepared alone, not worth it.
If you chose the dry option, then the instructions for preparing the mixture with the exact proportions should be indicated on the package. Such material seizes quickly enough, so it must be prepared in the amount that can be used at a time, otherwise it runs the risk of freezing right in the working container, and you will have to work quickly.
 The prepared solution is applied to the wall with a spatula in an even layer, and when it grabs a little, they begin to create a relief: here a grater, stamps, rollers, brushes can come to the rescue, own hands and even plastic bags, leaves and feathers - everything that is at hand can be used to create unique patterns. They work a little differently, but the tools for creating a relief are applied, drawn over the surface, drawing some patterns, etc. The thickness of the layer will depend on what kind of pattern you want to create and what effect you want to get.
 Most often, when applying plaster on their own, they create a pattern in the form of rain, horizontal or vertical stripes, circles and other similar simple patterns. They usually start from the corners on which they train - they are not so noticeable, if suddenly your technique is not perfect from the very beginning. You have to work at a pace and Special attention give joints so that there are no influxes, and so that they are generally invisible.
When the plastered surface loses its wet sheen, and this happens after about 15-20 minutes, it is necessary to walk over the surface with a wet trowel and smooth the resulting relief a little. The trowel should be washed as often as possible in water so that plaster particles do not accumulate.
 When the layer is completely dry - after about 24 hours - it is necessary to walk on the surface with a fine sandpaper to smooth out possible irregularities.
Separately, it is worth highlighting Venetian plaster: it requires a very responsible approach, so it is not always possible to cope on your own. Here you need a perfectly even and smooth surface, even tools, attention to applying and tamping all layers of plaster, correct application of the pattern and skillful grinding in order to end up with a glossy or matte surface.
By the way, if you have a disposition to create drawings, then you can try in the center of the wall, for example, to create a small bas-relief depicting some simple object, landscape, and maybe even people or animals - it will look very stylish and harmonious, especially if you emphasize all this with paint.
If you used mineral plaster, then after drying it must be painted in the desired shade. Before painting, a layer of plaster is recommended to be primed so that the coating lasts longer.
 You can paint in any chosen color, it is better to choose a waterproof paint that is resistant to mechanical damage and sunlight. Coloring is carried out with a long-haired roller, but often monochromatic coloring does not give the desired effect, therefore, after the wall is painted, the protruding relief parts are shaded. They are tinted, as a rule, in a more saturated or even contrasting shade. There is also the application of a second layer of paint by washing - this is a more complicated option, since here paint of a darker shade is applied to the surface, and then, without letting it dry, they wipe the surface, removing the paint layer, while it remains only in the recesses. For washing, it is better to use non-moisture-resistant paint - this will even save money.
 If the surface of the plaster was additionally painted, then this layer must be fixed with a water-based varnish. It is better to pre-dilute it with water in a ratio of 1: 1 so that it penetrates better into the structure of the plaster. The varnish is applied with a brush in 2-3 layers: carefully with streaks, you need to squeeze the brush well, and after one layer has dried, you can apply the next one. By the way, the varnish does not dry for a long time, so you don’t have to wait.
In conclusion
Although Venetian plaster remains the prerogative of professionals, it is quite possible to apply any other type of decorative plaster on your own. There is absolutely nothing complicated in this: you just need to skillfully prepare the base, and boldly apply the solution itself, forming a pattern - and that's it, the unique and environmentally friendly coating is ready.
Decorative plaster firmly occupies a leading position in the market of finishing materials, due to its strength, reliability, unpretentiousness during operation and aesthetics of the coating.
Next, we will introduce readers to various types of this material, we will give advice on where, when and what mixture is better to use, how to choose the right texture in interior design, we will offer several interesting ways, and analyze reviews of decorative plaster.


Types of decorative plasters
From a binder, fillers (stone grains, sand, etc.), additives that improve properties: adhesive, antiseptic, bactericidal, hydrophobic. According to the binder, decorative plaster can be classified into:
- - base cement or cement-lime, suitable for outdoor and internal works, has high vapor-permeable properties, lime compounds more plastic than cement.
- Polymer - based on acrylic resin, is not afraid of humidity, temperature deltas, does not fade under the influence of UV rays, and rooms, thanks to additives, you can create complex textures of leather, velvet, etc. Acrylic decorative plaster is not recommended for use for external work in conjunction with loose heaters.
- Silicate - based on liquid glass, has low elasticity, which allows you to apply the solution on the surface of cellular concrete. Moisture resistant, well tolerated by mechanical stress, does not contribute to the formation of fungi and mold, does not accumulate dirt, does not swell. It is recommended to apply on walls finished with rough plaster with the addition of lime.
- Silicone - consists of silicone resins and fine filler: marble dust or fine sandstone. Suitable for facade and interior work. Durable, has an antistatic effect, does not accumulate dust.

Table of characteristics of decorative plaster
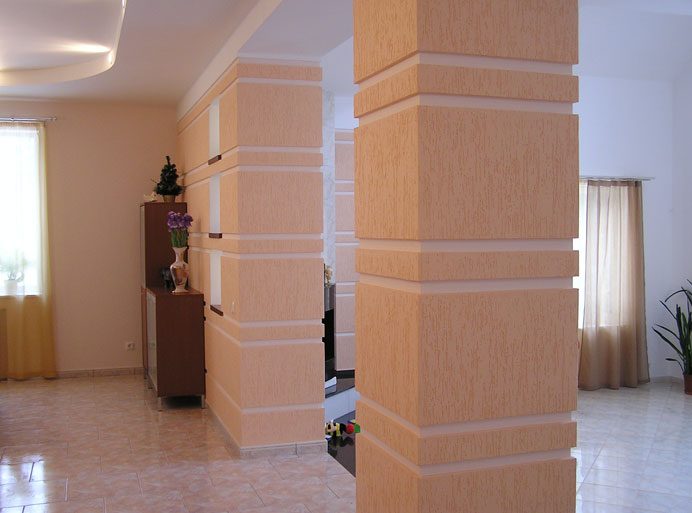
Good to know: For small rooms, for example, in the hallway, it is better to stay on a calm, fine-grained texture, without volumetric relief.
Decorative plaster, photo in the hallway, a combination of different textures helps to correct the geometry of the room
By decorativeness, artistic plasters can be divided into several large groups:
- - the most refined of all representatives, with its help you can make marbled coatings, polished stone, silk, velvet, leather, crinkled fabric. The finely dispersed composition is plastic, thanks to various techniques, a smooth surface and a three-dimensional pattern are obtained. Venetian, silk, etc. is covered with a protective wax or special varnish, which gives it the shine of a well-polished surface.

Decorative plasters for interior decoration, photo of Venetian pavement in Moroccan style
- It is made on the basis of synthetic resins, coupled with fillers: flax, cotton, sequins, metal inclusions, crumbs of natural and artificial materials, which create an interesting pattern. You can form bas-reliefs, drawings, apply textures with different tools - wood. This is the most large group, differing both in composition and decorative possibilities.

Textured plaster, made using a stencil, with an original dry brush coating
- Pebble decorative plaster - a binder filled with stone chips. Usually sold ready-made, the mixture is heterogeneous, blotches can have several shades. It has a decorative mosaic effect, pebbled to the touch. It is also used for facades of buildings, indoors it is recommended to use it accentuated, in small areas, since the material is cold. The ideal solution for bathrooms and corridors, as well as for office spaces.

Pebble decorative plaster for exterior work is used much more often than for interior work, where I use it fragmentarily to highlight interior elements
- - the mass is plastic, heterogeneous, it can be any base: mineral cement-lime, synthetic latex, filler - grains of stone, shells and sand of different fractions. It is modeled thanks to inclusions, it is enough to apply an even layer, and after drying, walk over it with a trowel.

Photo of decorative plaster for interior work, travertine texture - imitates concrete blocks
- Flock coating is a new word in finishing, it is applied in three stages: the base is glue, then flock particles are glued, which are protected from above with varnish. Multi-colored chips can lay out any drawings or ornaments.
We offer a master class, the video will help you master some of the embossed finishing techniques.
Good to know: and swimming pools, it is recommended to use moisture-resistant decorative plaster, which should be additionally covered with protection. , bathrooms and corridors, mixtures for outdoor work that are resistant to difficult operating conditions are relevant.

Photo of decorative plaster in the hallway, a practical solution, coupled with wallpaper, the lower part of the finish is easy to care for, remove dirt
How to make decorative plaster - lessons on applying popular textures
The most popular and easiest way to apply decorative plaster is, which is formed due to the granules in the mixture. Compositions with grains up to 1 mm are used inside the house, from 1 to 3 mm is preferable on the street or in large areas.

Relief of a bark beetle, applied with a solution with inclusions of a large fraction
A solution is applied to a puttied, sanded and primed wall, its thickness should be equal to the size of the inclusions. Align, after 20-30 minutes, process with a smooth trowel. drive depending on the selected texture: rain - diagonally, oak bark - up / down, travertine - in circular motions.

Decorative plaster, photo of the bark beetle structure applied by different methods
Another simple option for applying decorative plaster is. For facades, a cement-sand mortar is used; inside the house, any mineral plaster. Outdoor work is best done by spraying: with a pulverizer, or manually - through a mesh, sprayed with a brush with long bristles. In the fur coat room, it is recommended to use fine-grained decorative plasters. The layer is evenly applied to the wall and after drying, it is carried over with a roller with a fine fur coat, the villi pull the solution behind them, forming a characteristic pattern.

Finishing a fur coat or lamb - simple, inexpensive, practical
The rock pattern is borrowed from the technology of applying Venetian plaster. Here, the solution is applied with a trowel, with sharp chaotic strokes, first pressing the tool strongly and weakening the pressure towards the end. Venetian plaster is applied in 3 or more layers, each is ground and rubbed with a trowel. The texture of the rock is usually applied white decorative plaster in 2 layers, the first is the base, and the second is strokes of the texture. Sharp edges are worked out with a damp brush. . 2 shades look beautiful, the base one, and the additional one - by washing or applying a patina, this is how the depth of the decor is achieved.

Decorative plaster, photo in the corridor, large relief is balanced by a pastel shade
Patterns can be applied with a variety of rollers, brushes with stiff bristles, stencils and stamps. We will talk about the techniques in more detail in the next chapter, using photo examples.


The role of decorative plaster in the interior
Decorative plaster in the interior is a real hit of modern repairs. A variety of compositions and decoration methods allow you to choose the right texture and color for almost any stylistic decision, from historical classics to industrial styles and high-tech design built on high technologies. Decorative plaster goes well with wood, natural and artificial stone, with bricks, modern plastic and 3D panels, wallpaper. A competent combination of several materials allows you to create an exclusive, noble interior that will remain relevant. long years.

Decorative plaster for interior work, photo of fashionable craquelure texture - torn surface
Loft
In the modern loft interior, popular among young people and progressive personalities, decorative concrete-like plaster is in demand; it fits perfectly into the overall ensemble of the industrial style, adding zest to it. To ennoble the coating, it is varnished on top.

Decorative plaster, concrete look coating photo, loft-style interior
You can safely use it in bathrooms and pools, it is important to make the right finish for them - water-repellent impregnation.

Decorative plaster, photo in the interior of the bathroom, concrete-like coating, additionally decorated as agglomerate
Classic
Originally from Italy, which can be safely called the progenitor classic styles. Over the years, it has not lost its popularity. For historical classic design the Venetian technique is appropriate, imitating stone, more often marble, glows from the inside, emphasizing the nobility and high cost of decoration.

Decorative plaster in the interior, Venetian texture imitating natural malachite
For artsy french styles(rococo and baroque) decorative is suitable, the glossy surface reflects expensive furniture, makes the room visually larger, emphasizing the luxury and pomposity of the situation.

Finishing a classic bedroom with Venetian plaster
If moldings are used to separate the walls - an imitation of frames, then plasters with a drapery effect look very nice inside. For an accent wall, artistic painting made using the Venetian technique is often exploited.

Decorative plaster with painting
For those who are calmer - decorative plaster with the effect of aged walls, it is also very relevant for some Mediterranean destinations.

Wall decoration with Venetian plaster
ethnic styles
To create ethnic styles, decorative plaster is most often used under natural materials. So, to create a Mediterranean direction, decorative plaster with an aging effect is suitable. Usually, this is covered with paint using a special technique: the first covering layer is applied - the base, a thinner layer on top, which is washed away with a damp rag.

Living room in antique style with stucco wall decoration
The rustic style is characterized by a decorative wood finish. The application technology is quite simple, but requires skills. First applied in large strokes base layer, leveled with a spatula, and on top with a brush it is covered with a thin layer of darker liquid plaster. After drying, the texture of the tree is drawn with a special stamp.

Plaster with wood texture in wall decoration
For the African direction, the use of decorative plaster imitating the skin of reptiles is relevant. The surface is finished with a base layer of a textured mixture, about 3 mm thick, then a relief is made with a patterned rubber roller. At the finish, it is decorated with paints, mother-of-pearl additives, golden patina, metallic effect are often used.

Decorative plaster under the skin, decorated with paints and patina
Modern directions
For modern styles decorative plaster - inexhaustible possibilities and boundless horizons of fantasy. These are flock, and fibrous textures for modern, and sparkles for romantic design. There are usually two decoration options:
- Using modern mixtures with already added inclusions, it remains only to apply the solution in any way you like.
- Application of ordinary white decorative plaster, followed by the desired effect.


Decorative plaster, photo of the Venetian coating in the bedroom

Facade decoration "mosaic" with a mixture of different colors
For exterior decoration, sometimes fragmentary indoors, decorative is very relevant. To make such a drawing, it is enough to apply a layer according to the rock technique, with strokes. You can make a “masonry” pattern using a polyurethane stamp, which is pressed into the surface of a slightly dried mortar. Or draw grooves manually with a cutter or thin spatula. To make the texture look natural, with a brush dipped in water, the sharp edges are slightly smoothed.

Decorative brick-like plaster, this finish is easy to do with your own hands
Interesting textures are obtained if the dried layer of decorative plaster is treated with a marine sponge, slightly pressing and slightly turning it in a circular motion. A brush with hard bristles allows you to paint:
- grooves (vertical and horizontal);
- waves, if driven in a zigzag manner;
- fabric - drawing lines with a bristle vertically, then horizontally, and to give naturalness, light strokes in both directions alternately.
The craquelure effect is achieved thanks to a special technology. First, a smooth base layer is applied, which will be visible through the torn edges. It is covered with a special varnish, which will ensure the formation of cracks. Apply to varnish desired color. The fresh coating is intensively blown by fans, due to this treatment, cracks are obtained.

Craquelure, with varying degrees of blowing, you can achieve a small or large pattern
- all these are unlimited possibilities in the field of modeling decorative plaster. Do not be afraid to show your creativity, perhaps you can invent your own, exclusive texture. Watch the video on how to properly use decorative plaster rollers.
Reading forums where craftsmen and simple DIYers speak out, one of the most sought-after and versatile finishes is decorative plaster. Reviews about the material are the most commendable: practical, reliable, beautiful, relevant, will not lose its aesthetics for a long time.
Plaster, as a method of wall decoration, has been used for a long time, since the Renaissance. In those days, the style of their decoration, called frescoes, was born.
This wall painting, which has come down to our times, cannot leave anyone indifferent. Modern decorative plaster for interior decoration, in the hands of a good master, is able to create masterpieces that are not inferior to frescoes.
Our article will discuss what types of decorative plasters exist today, and what aesthetic effects can be obtained from their use.
According to the binding element, decorative plasters are divided into water and polymer. What is water - everyone understands.
So:
- Polymer plasters can be based on polyurethane. They can be used for both outdoor and indoor decoration.
Another type of polymer composition, epoxy, is used only indoors. - Plaster compositions are also classified according to other criteria: according to the material used as a filler, as well as the method of applying and forming a pattern.
- Due to the fact that polymer mixtures can emit toxic substances, finishing apartments with decorative plaster based on polyurethane and epoxy resins is undesirable. For this, it is better to use water-based options.
Water plasters can be acrylic, styrene-butadiene, PVA-based. - According to the type of the resulting surface, the plasters also differ. The most popular are pebble.
Granite, marble or quartz chips are used as a filler for them.

- As a bonding base, cement is more often used here, because pebble plaster is used, mainly for. The filler, as a rule, is sold separately from the mixture itself, and is added to only the last batch of mortar for applying the finishing layer.
But there are also ready-made gypsum-based options on sale. - The most environmentally friendly can be considered mineral plaster, which includes: white cement, lime, granular marble and various minerals. This material has good thermal insulation properties.
- It is used more often for outdoor decoration, but sometimes it fits well into the interior of the premises. To mineral species decorative plaster can be attributed to the well-known "bark beetle".
- Spectacular pictures and amazing beautiful drawings on the wall are created with the help of so-called structural plasters. Their solutions are incredibly plastic, so working with them is a pleasure.
The image can be sculpted as if from plasticine. - Structural plasters are available only in white - pigments are sold separately, so that the solution can be tinted as you wish. The finished coating can be washed using detergents, it will retain its color and pattern for a long time.

- Venetian plaster is decorative for interior decoration, the most difficult to perform. Accordingly, its price is the highest.
In common parlance, it is called liquid marble. And this is true. Since the filler for such plaster is marble flour and gypsum of the finest grinding. - The surface of Venetian plaster recreates the natural beauty and rich palette of shades of marble, which makes any room acquire a rich interior, similar to an ancient palace. It is almost impossible to do such work with your own hands.

- You need to know the technology of applying plaster, and it is very complex, at least six or seven layers. You also need to have professional skills and creative imagination, which allows you to create unique drawings.
These are masterpieces, in the truest sense of the word, since even the master himself cannot repeat the same pattern twice. This is Venetian plaster. - There are some other types of modern plaster mixes that do not fit into any of these categories. For example: microcement plaster. By and large, it is an analogue of Venetian plaster, but cheaper.
- The pattern created with microcement plaster looks similar to the Venetian version, but this mixture does not contain gypsum and marble, but cement and polymers. Due to this, microcement plaster can also be used for, as well as in rooms with high humidity.
![]()
most accessible to self-finishing kind, is a soft decorative plaster, popularly called "liquid wallpaper". They are based on loose cellulose, or silk threads, CMC glue and pigment.
With good imagination and observance of a certain technology, on the walls and with the help of liquid wallpaper you can create beautiful compositions, as in the photo above.
Relief creation
The technology of finishing with decorative plaster, like any other, begins with surface preparation. The old coating is removed, and the walls are cleaned to brick or concrete - depending on which house.
Wet cleaning is carried out in the room, dust is removed from the walls with a vacuum cleaner.
Further:
- Masking tape should be sealed all the places where the plaster should not get. The surface of the floor is covered with thick paper, or cellophane film.
The wall is treated with a primer. This is a prerequisite for ensuring good adhesion of the mortar to the wall. - Then you need to think over and choose the color you need to create your interior. Plaster mixtures are sold both in finished form and in dry form.
If it is required, for example, to finish only a niche, of course it is more convenient to take a solution ready for use.

- And when finishing large areas, it will be much cheaper to work with dry mixes. They are diluted with water, in the ratio required by the instructions, and carefully knocked down with a construction mixer, to the consistency of thick sour cream.
- When working with decorative plaster, it should be remembered that a light shade is the basis for a darker color. Therefore, the first layer should be light.
The solution is applied to the wall as evenly as possible, using a rubber spatula. Although, careful smoothing, in this case, is not required.

- To create a relief, craftsmen use a variety of tools: rubber and rag rollers, figured spatulas. Any improvised means also help: rags, sponges, cellophane.
- You can even take a Christmas tree toy or a children's mask and make a trial relief. If you don't like something, you can always smooth over the drawing and make a new one.
Rubber stamps, specifically designed to create relief on the plaster, can give it the appearance of a wall pasted over with textured wallpaper.

- If you want to get a clear pattern, after applying the relief, the wall must dry completely. Then a second, darker layer of plaster is applied.
It is applied in small portions and carefully smeared. - The thinner the layer, the more transparent it is, and the better the relief will be visible. And due to the fact that the second layer of plaster is darker than the first, the relief looks more voluminous.
- It is worth noting that in order to achieve the original, masters often perform more than one relief, but several. In this case, various shades of plaster can be combined, as in the picture below.

- Depending on the nature of the pattern, you can apply a second layer without waiting for the first layer to dry. Who is seriously thinking about how to do this work on their own, look at the video, how experts do it.
- Unwanted sagging or the resulting corners, they cut with a knife, grind with sandpaper. There are many nuances in this work, and each master has his own professional secrets.

- There are many varieties of structural plasters offered by manufacturers to create a specific relief, for example: cracked old plaster, tree bark or, as in our example, crocodile skin.
In order for the finished relief to acquire durability and not be contaminated during operation, the wall must be covered polyurethane sealant. This is done half an hour after drawing the picture.
Drawings and panels on plaster
The original panel on the wall can decorate any, even the most modest interior. That is why many people ask themselves: “How to make a panel, and where is it better to place it?”.

So:
- It is best if the panel is located on a protruding part of the wall or in a niche (see). Especially if good lighting is used.
An excellent choice would be a free wall, framed decorative stone or polyurethane molding. - The drawing on the wall will also look great in the walls: next to a window, an interior door or an arch. It is permissible to cover all the walls of the room with a pattern only in one case - if it is a children's room.
Naturally, the theme of landscapes and drawings, in this case, is more often associated with cartoon characters and fairy-tale characters.

- A decorative panel, like no other finishing material, catches the eye, causes delight, a desire to touch and make sure that this is an ordinary wall. The choice of pattern when creating a panel is not limited by anything - you only need good taste.
And, of course, the drawing should not cause disharmony in the overall concept of the interior. - In order to understand how the wall panel is made, and the interior decoration with decorative plaster - videos and photos found on the Internet will be indispensable helpers. And we, for our part, will also try to help you understand this issue.
- There are three types of techniques for creating a visual effect on plaster. The simplest, and most accessible for self-creation, is a three-dimensional stencil panel.
As a stencil, a piece of drywall, hardboard, or plywood can be used, with a pattern or pattern cut out on it. - On a leveled and dried wall surface, with masking tape, around the perimeter, fix the stencil. On vertical surfaces, there is a possibility of stencil shifting.
This can spoil the nuances and subtleties of the picture. Therefore, instead of masking tape, you can use aerosol glue to fix the stencil. - A plaster solution is applied to the cut out elements of the stencil. The larger its layer, the more voluminous the drawing will be. After that, the stencil is carefully removed.
Your creation should now be completely dry. The time required for this depends on the thickness of the applied layer of plaster, but no more than a day.

- After drying, the convex parts of the panel are shaded with tinted paint, rolling over them with a roller. Then, when the paint dries, you can give them a darker shade, make it metallic or pearlescent.
Such panels are often performed on the ceiling, in combination with plaster moldings. - Another very popular type of decorative wall decoration is painting on structural plaster and relief graphics. For this, plastic fine-grained plasters, acrylic paints and colorless varnish are used.
Sharpened wooden sticks, different-sized brushes, sponges, cardboard templates and narrow spatulas are used as tools.

- Many people know how to draw well on paper, it costs them nothing to make the same drawing on wet plaster with a sharp object. For those who do not know how to draw, there are paper templates.
To create a texture on the panel, special rollers are used. Paint the panel after it is completely dry. - The third type of decorative finishing on plaster is stucco panels, and various combined options. They are three-dimensional figures, or whole paintings, made in the entire wall.
- Such panels can imitate brick or stonework, depict figures of people and animals, flowers and various objects. This is the most complex type of decoration, and without the participation of a specialist it is hardly possible to perform it.

Such work, especially if it is done by an artist, is not cheap, but the aesthetic impression it makes is worth the money, believe me. decorative trim, made in this style, will delight all the inhabitants of the house for many years, and will never go unnoticed by the guests who visited it.
Wall decoration with decorative plaster is work that is carried out on internal or external surfaces. They are aimed at giving the walls or ceiling a certain texture and color. Depending on the selected composition, different techniques for applying this material are used. Only preparatory work remains unchanged.
To finish the walls with plaster with your own hands, you will need the following:
- spatulas of different sizes;
- graters and half graters;
- trowel;
- containers;
- brushes, rollers and sponges;
- drill with mixer nozzle;
- ladder or scaffolding;
- polyethylene film, masking tape;
- plaster mixture, wax, paint.

For the preparatory stage, the following tools and materials are needed:
- sandpaper, grinder;
- rule;
- level and plumb;
- spatulas;
- reinforcing mesh;
- deep penetration primer;
- starting plaster, putty.
Preparatory stage
Finishing with plaster requires a perfectly prepared surface. To do this, you need to carry out the following manipulations:

- Completely remove the old coating or clean it from traces of paint, wallpaper, and so on.
- Align the walls with starting plaster and reinforcing mesh or drywall sheets.
- Repair possible surface defects, such as potholes and cracks, with putty.
- Remove protruding fragments.
- Check the evenness of the walls with a level or plumb line.
- Apply two coats of primer to increase adhesion.
Structural plaster walls
With the help of this material, Finishing work on external and internal surfaces. Finishing decorative plaster with your own hands does not require rich experience or qualifications - a home master can easily handle it. Difficulties can arise only with applying the mixture to the ceiling.

Solution preparation
The modern construction market offers ready-made mixtures in plastic containers of various sizes or dry powders in bags that need to be diluted with water. If we are talking about saving the budget, then it is better to buy powdered material and prepare decorative plaster with your own hands. For this purpose, you will need an electric drill with a mixer attachment, water and a mixing container.
Important! Most structural plasters dry very quickly, and water should not be added to them after preparation, so it is not recommended to make large batches so as not to lose material.
The material consumption directly depends on the filler fraction:
- Coarse-grained material - 2 kg per square meter.
- Medium grain - 1.7 kg.
- Fine-grained - 0.7 kg.
First of all, you need to wash the breeding container and pour into it the amount of water indicated by the manufacturer on the package. The temperature of the liquid should be approximately 20 degrees. Then you should gradually add the solution to the water, stirring it with a mixer.

After that, you need to wait about 15 minutes and stir the plaster again. If the material is made on the basis of acrylic resins, then color is added to it, otherwise it is subject to subsequent coloring. This completes the preparation of decorative plaster with your own hands.
Application features
The prepared composition is collected on a spatula and applied to the wall, after which the plaster is stretched over the surface. Excess material is also removed with a spatula. During application, it is important to observe the thickness of the plaster layer, which must correspond to the fraction of the material, therefore it is not recommended to make it more than 3 mm. At the same time, too thin a layer will not be able to completely cover the walls, and after drying, a primer will appear on them.
As mentioned above, this material dries instantly, so a limited time is allotted for work. To get a uniform, you should apply it at a time. If the surface to be treated is too large, then you will have to divide it into sections with masking tape. Then apply plaster with an overlap, remove the tape until the material has hardened, and treat the rest of the area in the same way.
 The applied layer of plaster should not be thicker than the grain of the filler included in the composition.
 Rubbing plaster
This stage is considered the most responsible. It depends on its proper implementation. appearance the resulting surface and its performance. Work must begin immediately after the material has set. This usually takes 30 minutes. Checking the readiness of the wall is simple: just put your hand on it, if it does not stick, you can start.
The procedure is carried out using a plastic trowel. To achieve different effects, different rubbing techniques are used:

Should know! If for some reason it is not possible to process the entire wall at a time, then you do not need to grind exactly to the boundaries of the treated area. It is necessary to leave the plaster untouched along the edges, and after applying the entire layer, carefully wipe the joints.
Coloring
A day after the main work, you can start painting the wall. The first step is to process the entire surface with sandpaper to even out minor defects. Then the wall is painted in a dark color and wait until it dries. The next coat of paint should be lighter by 1-2 tones. The work is carried out with an ordinary paint roller, and the joints of the wall with the floor and ceiling are treated with a brush. After the second layer has dried, it is recommended to apply a glossy varnish.

Wall decoration with textured plaster
First, a solution is prepared taking into account the manufacturer's recommendations, after which it is applied to the surface with spatulas. Such plasters dry longer than structural ones, so you can safely process the entire wall. Excess material is also removed with a spatula. After processing the entire area of \u200b\u200bthe wall, you can begin to create a texture.

How to make a texture layer
Such coverage can be obtained using the following tools:
- roller;
- stencil-stamp;
- trowel and spatula.
Using a roller is the easiest and fast way. With this tool, you can create a surface that resembles velor. To do this, you need to forcefully pass them over the entire surface of the wall, while the movements should be directed in one direction. Then wait for the material to dry and remove the protruding fragments with a spatula blade.

If applying decorative plaster with your own hands seems too complicated, then you can purchase special stencil-stamps with embossed patterns in hardware stores. These products are simply pressed against fresh plaster, after which a relief remains on it. The main inconvenience is the need to constantly rinse the stencil with water in order to remove residual material from its surface.

On a note! When buying everything you need, you need to purchase several small stencils for the corners.
Using spatulas and trowels create patterns that resemble texture natural stone, suede or concrete. You need to work with them according to the same principle as with all the above tools. The brush, spatula or trowel is pressed against the surface and carried out over its entire area. If there was no construction tool at hand, then you can use an ordinary sponge or even a plastic bag. In general, anything that can leave relief on the surface will do.
How to stain
Such decorative plaster for interior work does not require mandatory painting, but to emphasize the texture, it is still better to carry it out. First, the surface is cleaned with fine-grained sandpaper, then the resulting dust is brushed off. The first layer of paint is applied with a long-haired roller, and the second with a short-haired one. Paint tones should be slightly different. They need to be applied at intervals of a day, while the plaster, after giving the texture, should dry for about 48 hours.

If there was no roller at hand, then the process of painting the decor plaster is as follows:
- Open a can of paint and pour it into a special container. The brush is completely dipped into it, for the entire length of the bristles. Then wring out the embossed edge of the container to remove excess paint. If there is no special container, you can squeeze the bristles of the brush on a piece of multilayer cardboard.
- Now you can start applying paint. It is not necessary to paint over every detail, you should apply a layer with sweeping movements, barely touching the surface. Thus, the paint will not rub into the texture, but will only touch the protruding fragments.
- Wait for the first layer to dry and apply a second, lighter one. In this case, the same technique is used as for the first layer.
- The last step will be the application of varnish. This material is first diluted with water in a ratio of 1:1, after which it is applied with a wide, clean brush. After some time (each varnish dries for a certain period), you can apply a second layer. After about 1-2 days, you can touch the plastered wall.

Some masters use the blur method. It involves applying only one layer of paint, which is then rubbed with a damp cloth. As a result, the texture remains saturated in color, and the protruding parts are lighter.
Drawings and panels
Before working with decorative plaster, you need to immediately determine the presence of additional design elements on the walls, for example, various drawings or panels. They are able to decorate and ennoble even the most ordinary interior, especially if they are combined with the right lighting.
What drawings can be used and where to place them
A win-win option is a separate wall, which is pre-finished with stone or stucco around the perimeter. It is also appropriate to place these elements between windows, near interior doors or along the edges of an archway.

If we are talking about a children's room, then here you can fantasize as much as you like. Drawings can be drawn to the theme of a child's favorite fairy tale or cartoon. For a children's room, it is permissible to apply drawings over the area of \u200b\u200ball walls.
As for bedrooms or living rooms, everything is much more complicated here. The first rule is that the drawing should not bring disharmony into the interior. Paintings on the walls are allowed only for classic design, baroque, empire, etc. It goes without saying that in modern or hi-tech, drawings and panels will look superfluous.
 The bas-relief on the wall is an excellent solution for creating a stylish and unique interior.
 The tone of the painted panel should either contrast with the tone of the adjacent wall, or differ from it by 2 tones. The combination of colorful and dark tones is unacceptable.
Application techniques
There are three main methods of surface decoration that require artistic taste. Therefore, it is better to trust professionals or get a master class on decorative plasters.
Working with a stencil
This option for creating three-dimensional paintings is the simplest. As a stencil, you can use fragments of plywood or drywall, after cutting patterns on them.

The application process is as follows:

Creating a bas-relief using construction tools
The relief graphics method is also considered one of the most popular. It involves the use of plastic fine-grained plasters based on synthetic binders, acrylic paints and colorless varnish. To carry out such operations, you will also need brushes of various shapes and sizes, spatulas made of various materials, pointed wooden pegs.

The process goes like this:
- After applying the final layer of plaster, the master, using the selected tool, applies a relief pattern to the surface. by the most simple example are the waves drawn with a paint brush.
- The composition is completed with a decorated relief frame, which is created using a sponge or foam roller.
- After the drawing has completely dried, it is painted. There are also no clear recommendations here - it all depends on imagination and talent.
hand sculpting
The last method is considered the most difficult and without a profile education, sculpture, most likely, nothing will work out. The purpose of this operation is to create a relief on the wall being processed by hand modeling. Such panels can occupy only part of the wall, or they can occupy the entire area. After they dry, the surfaces are also treated with paint and varnish.
Do-it-yourself decorative plaster is applied quite simply, if you do not take into account the artistic aspects of the issue. The main thing is to follow the above tips and recommendations from manufacturers.
Decorative mixtures are used for the final decoration of rooms. With their help, it acquires a unique style and special aesthetics. Wallpapers are gradually becoming a thing of the past, giving way to a durable and high-quality coating that has an original structure. for interior wall decoration - everything you need to know about it, how to prepare it yourself, application instructions are in this material.
Decorative plaster coatings are classified according to several criteria. Let's consider the main ones.
By place of application
According to the field of application, the compositions are divided into:
- outdoor (for facades);
- internal (for drawing on internal walls of rooms).
Mixtures for outdoor work, in addition to the decorative purpose, pursue the goal of insulating the walls of the house. Compounds with special fillers reliably protect the joints of panel buildings from the penetration of drafts and moisture.
With the help of mixtures for interior work, you can also level the walls and prepare them for further painting or pasting. Many plasters contain fillers that give the surface an unusual interior. This coating does not require further processing.
Related article:
Video, photos, features of different mixtures, how to properly apply with detailed instructions, an overview of prices and manufacturers, additional tips and tricks are in this article.
Composition
Coatings are classified according to their composition:
- acrylic;
- silicate;
- mineral;
- silicone.

Note! The surface of mineral plaster can be smooth, rough or have a relief.
Mineral mixtures are gray or White color and are mainly used for outdoor applications. To protect the coating from exposure to atmospheric moisture, it is coated facade paint. Composition based cement mixture differs in high fire resistance and ability to "breathe", passing air.

Polymer compositions based on acrylic, silicate and silicone are white monophonic or variegated, consisting of colored grains. The basis of the polymer composition after drying becomes invisible. Most plasters are made using epoxy and polyurethane.
Note! Polymer compounds are resistant to fire, but at temperatures above one hundred and forty degrees, they begin to release substances that are toxic to humans. Epoxy compositions emit chlorine, and polyurethane - cyanide. It is for this reason that water-based plasters are considered safe.

Epoxy plasters are used only for forming walls inside the building, while polymer-containing plasters can be used for exterior decoration.
Water Based Mixes non-toxic. They are resistant to abrasion and are well fixed on any surface. With the help of color, the coating can be given any shade. Acrylic coatings have increased elasticity and UV resistance. Their main drawback is a dense, non-breathable structure.

Silicone or siloxane plaster composition – newest material with silicone resin. The silicone compound forms a water-repellent elastic coating that will not crack over time. Such plaster is self-cleaning, skips carbon dioxide does not fade in direct sunlight. Walls can be washed, including alkaline detergents. Another advantage of the composition is that it does not support the development of molds.

silicate plaster mixes contain water-repellent additives and well protect the wall from moisture. Their strength is based on the process of double silicification, when potassium-based liquid glass reacts with the filler and the wall surface.
Note! The silicate mixture must not be applied to walls painted with organic synthetic dyes.

Related article:
What are they, how to make and apply them correctly, stencil templates (flowers, cats, butterflies) and helpful tips- read in the special material.
By invoice
Decorative plaster for interior wall decoration is able to imitate the texture of stone, wood, and even leather and fabric. This effect can be achieved using a special application technique and the use of an appropriate filler.

Structural mixtures contain mineral grains, granite, marble or quartz. Quartz sand gives the coating smoothness and good adhesive properties. Marble and granite filler allows you to create a rough surface that is resistant to scratches.
Note! Some plaster mixtures may contain silk or cellulose fibers. This filler allows you to imitate textiles and leather.
Plaster can be divided into three main groups according to texture:
- mixtures with a fine composition, the relief on which is applied with a roller or brush;
- compositions with filler of different sizes. When applied to them, a pattern appears in the form of stripes or furrows;
- textured mixtures with bulky filler and forming a variegated or plain surface.

Any of the listed mixtures requires careful preparation of the walls for decorative plaster. They must be treated with primer and putty, use grout. This is a laborious process that requires professional skills.
Decorative plaster for interior wall decoration: mix manufacturers
It is conditionally possible to divide all ready-made plaster mixtures into three price categories:
As you can see, you can choose a mix option that matches your planned budget.
Advice! When purchasing a mixture, pay attention to the presence of a special safety sign. If there is an A + sign on the label, then the composition does not pose a danger to people and animals.

Options for applying decorative plaster, price per m2
| Surface | Image | Application features |
 | The relief can be created with a trowel. First, the main layer is applied, and then a small amount of the mixture is distributed with a trowel. | |
 | During the design process, several layers of plaster are applied. Then the surface is painted. | |
 | On the surface of freshly applied plaster, brush several times with a stiff brush. After drying with a dry rag, excess crumbs are removed. | |
 | For such a surface, a special roller with a convex pattern is used. You can make a drawing yourself, for example, by wrapping a regular roller with a rope. | |
 | Several layers of coating with different shades are applied to the wall. After drying, the sections are cut along and the top layer is carefully removed. This is a complex technique that gives an original result. |
These are just the basic ways of applying plasters. There are many other options, including copyright ones, which give a unique effect.
The more difficult the task, the more expensive the services of the master will cost. The usual plastering of walls in a smooth way will cost from 400 rubles per square meter.

Examples of using decorative mixtures
The purpose of the premises dictates the choice of a particular composition and the method of its application. Consider the most successful interior options using decorative mixtures.
Decorative plaster in the living room: photo gallery
For a room in which the owners receive guests, it is important that everything is perfect. Here, compositions with a fine structure are appropriate, requiring careful application.
1 of 4


For decorating the walls in the kitchen, it is important that they do not get dirty and can withstand cleaning with detergents. Silicone mixtures in this regard are ideal.
1 of 4


Decorative plaster in the bathroom: photos of successful solutions
Wall surfaces in the bathroom must be moisture resistant. Epoxy-based polymer compositions will reliably protect the walls from dampness.
1 of 4


1 of 4


When the surface of the layer hardens a little, it can be embossed. For this purpose, a printed roller or a simple crumpled rag or paper is suitable. Volumetric drawing is created using. To align the edges of the convex structure, they are leveled with sandpaper after drying.

After the surface is dry, the wall can be painted with a brush or soft roller. detailed instructions how to apply decorative plaster on the walls in the video:
Plaster tricks
- To independently prepare a mixture for interior wall decoration, you need to mix clay, lime and fine stone chips. To make the composition durable, a primer or PVA glue is added to it.
- You can make a composition based on tile adhesive. It is suitable for imitation brickwork or natural stone. Relief patterns are well obtained from a gypsum mixture.
- A roller with a “fur coat” will allow you to create an original relief surface.
- The structure of marble will help to create a crinkled fabric or a piece of leather, which is wrapped around a working tool.
- To simulate a textile surface, a piece of burlap should be pressed against the dry plaster.
Summing up
The use of modern plaster mixtures allows you to create fashionable and modern interiors.

For rooms with high humidity, it is better to use polymer-based compositions. The plaster layer can be given a relief structure and imitate with its help many natural materials: stone, wood, fabric and leather. Interiors created using decorative compositions look modern and expensive.


