
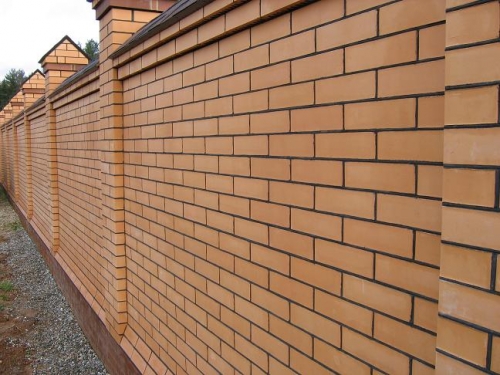
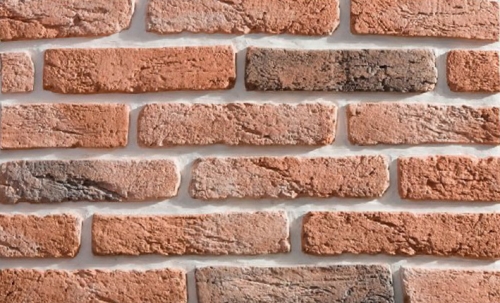
building material country house often a brick. It looks very elegant, and at the same time it has a lot of weight. useful properties- for example, it retains heat well in the finished building. And even the finishing brick also brings considerable benefits, besides, it also performs an aesthetic function. And to make the house even prettier, you can add additional decorative elements to the walls. For example, grouting brickwork looks impressive, and, as it turned out, brings considerable benefits.
Why is she needed?
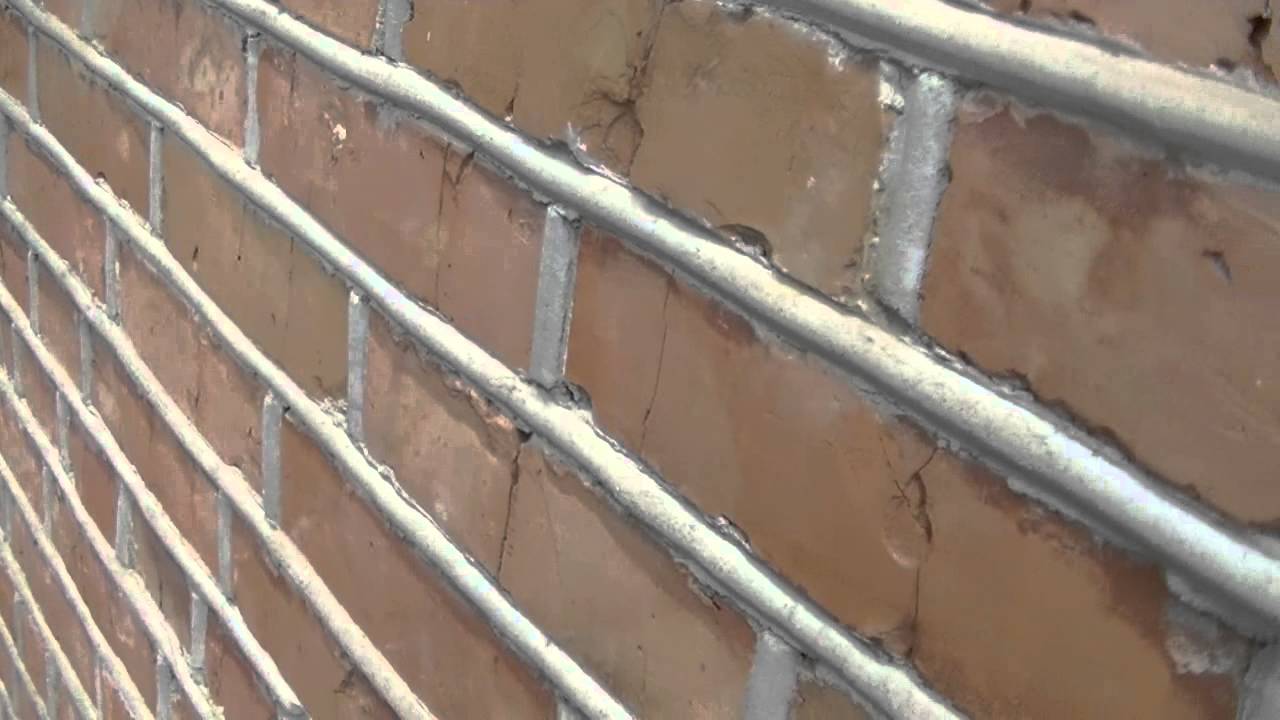
Grouting the joints of brickwork is the alignment of the joints formed during the laying of bricks, their decorative design, possibly applying an additional layer of mortar of a different color, which will effectively emphasize the correctness of the lines and the accuracy of the masonry itself. This is a kind of wall decoration, thanks to which they will become more expressive and neat. The grout unites the horizontal and vertical seams, formed during the bricklaying process, into a single whole.
Grouting brickwork is necessary not only to decorate the facade of the house. It makes the masonry more resistant to weather conditions, increases its tightness, and increases the service life of the entire structure. That is, it increases the density and strength of the masonry seam and allows you to give clarity to its pattern.
On a note! Grouting is not always able to improve the appearance of the masonry. If the work on the construction of a brick wall was carried out negligently and carelessly, then the curvature of the joints and walls, unremoved pieces of excess cement and other shortcomings will not be corrected even by the best and neatly applied grout mixture.
The main purposes of using grout or jointing.
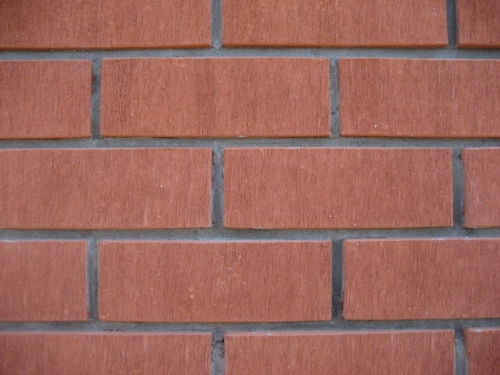
- Improvement appearance facade of the house. The use of grout mixtures that have different shades (and their color range is quite rich) can emphasize the accuracy of bricklaying. Contrasting shades are often used, for example, grout looks good in combination with dark brick light color and vice versa.
- Grouting will protect the joints of the cement mortar from moisture, which will significantly improve its service life, as well as the house and walls in general.
- The indicators of heat and sound insulation of walls made of bricks are significantly increased due to grouting.
Where can stitching be used? After all, it is not always possible to see houses with such decoration, which means that theoretically it is possible to do without it? Grouting is necessary if the walls of the brick house will not be further lined or plastered.
Advice! If the walls of the house will be made using grouting, then during the laying it is necessary to use only whole and neat bricks without flaws. And the seams between individual bricks should be of the same thickness, although some craftsmen make horizontal ones a little thicker than vertical ones - this is a kind of design move. In general, according to the requirements of SNIP, the thickness of the seam layer of brickwork should be as follows: vertical seams from 8 to 15 mm, horizontal - from 10 to 15 mm.
Grouting is suitable for any type of brick - building, facing. The main thing is that the bricks themselves should be beautiful if grouting work is planned specifically for an aesthetic purpose. She looks very good on facade walls at home, and indoors. Also, grouting masonry joints from natural stone.
Grouting methods
Grouting brickwork can be done in several ways. The effect that will be given to the walls of the building will depend on this. Let's get acquainted with the most popular of these methods.
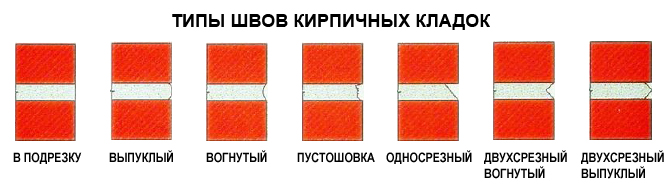
Table. Seam grouting methods.
| Name | Characteristic |
|---|---|
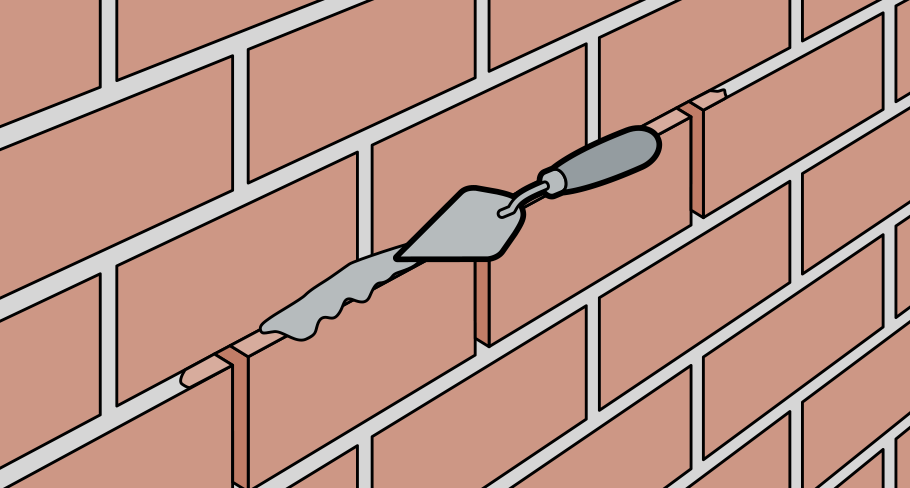
| Flush | This is the easiest way to grout joints and can be done even without a special narrow spatula. The grout laid in the cracks, or the usual cement mortar, protruding beyond the border of the brick, is simply removed from the wall with a trowel. After that, the seam is processed with a stiff brush. |
| Concave | In order to make just this type of grouting, you will need a small spatula (called "joint"), which will be used to fill the joints with a mixture and seal it. It should not be long so that it can fill both vertical and horizontal seams with it. Cement mortar from the masonry is cut flush, and then it is passed through with a special jointing spatula. Using the same technology, work is also carried out with a special solution applied inside the seam. |
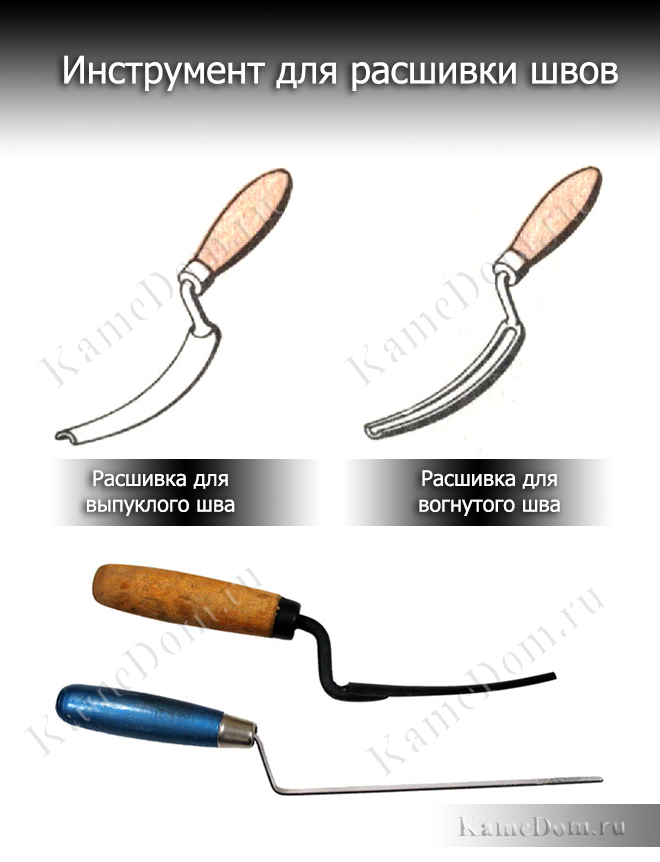
| Convex | In this case, the spatula must be arcuate, it is applied to the seam outward with an arc part, and the free space is filled with a building mixture. Then the spatula simply moves further along the seam, the process of applying the mixture continues. |
| Rectangular | But the rectangular grouting method is more complicated. First of all, about 5-6 mm of mortar is removed from the seams (sometimes even already dried up), and then the gaps between the bricks are again sealed with a new mortar. This finish looks beautiful, but it is undesirable to use it for facade work, since it does not drain water well. |
| bevelled | An ideal grout option for those houses that are being built in regions with a harsh climate. In this case, the solution inside the seams is cut off with a sharp trowel not evenly, but at an acute angle of about 3-4 mm. |
![]()
What is used for grouting
What may be needed to grout joints between bricks? Not as much as it might seem. Firstly, you need the grouting solution itself, the creation of which we will talk about a little later. Secondly, we need the tools with which all the work will be done.
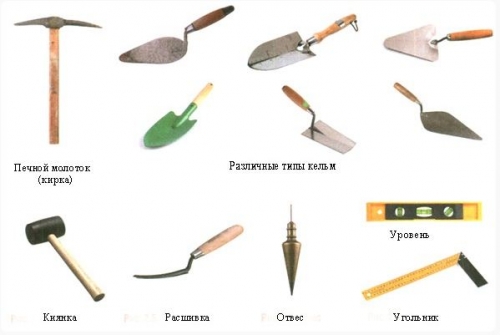
For grouting you will need:
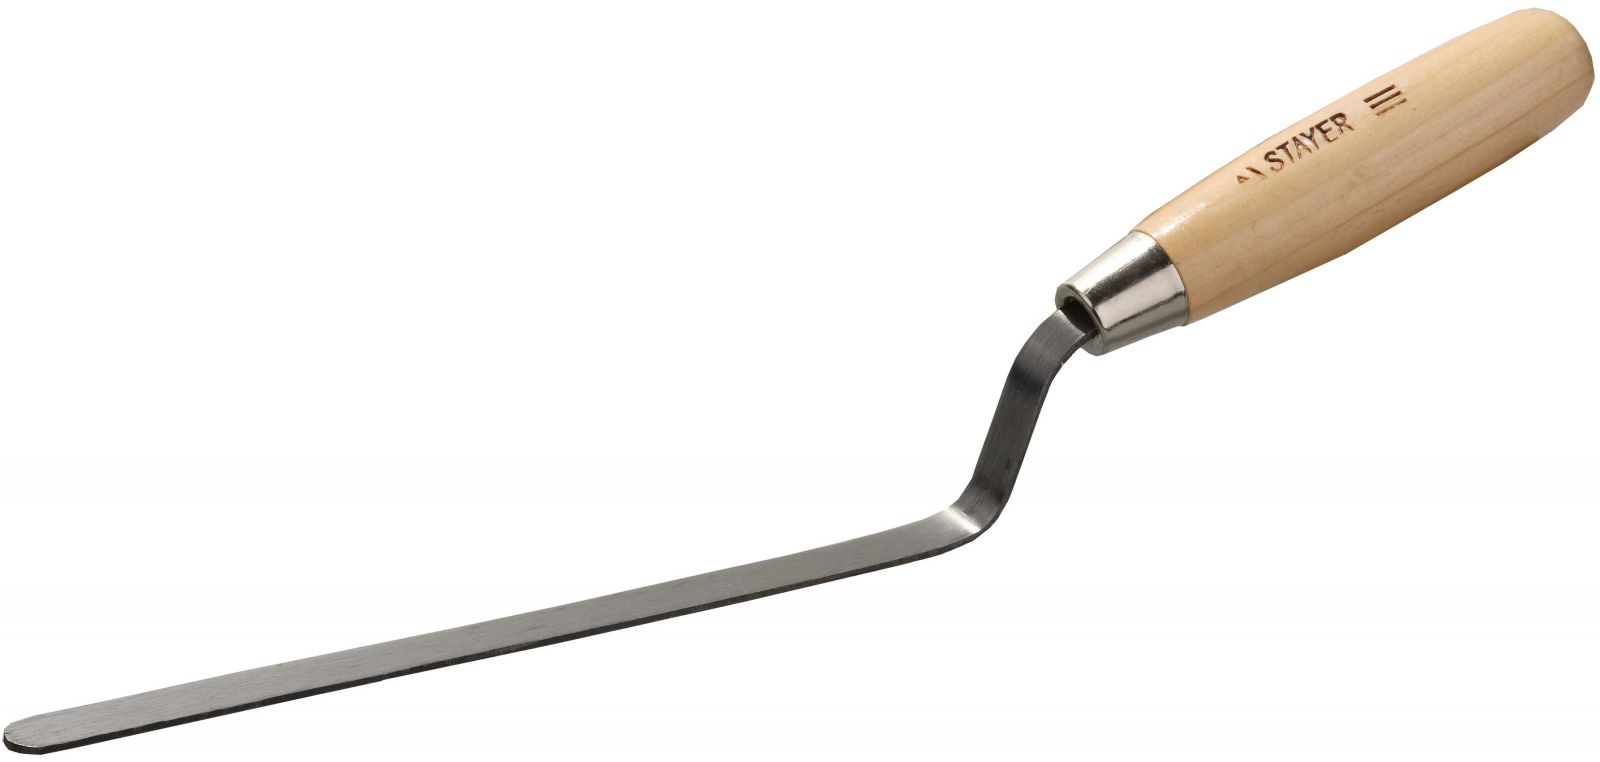
- spatula (trowel);
- "Turntable" for a puncher or a construction mixer;
- the puncher itself is directly for working with the "turntable";
- fine sieve for sifting sand;
- container for mixing the solution;
- jointing of such a size that its width is equal to the width of the seam between two bricks. If the vertical and horizontal seams have different widths, then two types of this device will be needed.

Note that the main tools that may be used are listed here. But in some cases, they may not be useful at all. For example, if it is not planned to make a figured gap, then you can simply remove fresh excess cement during masonry with a trowel.
We prepare the solution
The color of the grout solution is determined after the masonry is fully completed. But in general color scheme you can choose at the stage of choosing a brick. It is better to buy materials that are as close as possible to each other in color, they should be in harmony with each other, and not cause a desire to immediately look away from the wall of the house. But often designers experiment with a combination of two bright contrasting colors, and such experiments often look very impressive and beautiful.

On a note! If color desired color was not, then you can wipe the seams with the usual cement-sand mortar. In any case, it will look pretty, as it has a grayish natural color in harmony with all other shades.
To prepare the mixture itself, with which the joints on the brickwork will be grouted, the following components will be needed:
- cement High Quality- 4 buckets;
- clean fine sand - 2 buckets;
- dry ready-mix for grouting;
- clean water - about 6 liters.
Note: The amounts of materials are approximate, but will allow you to roughly calculate the costs.
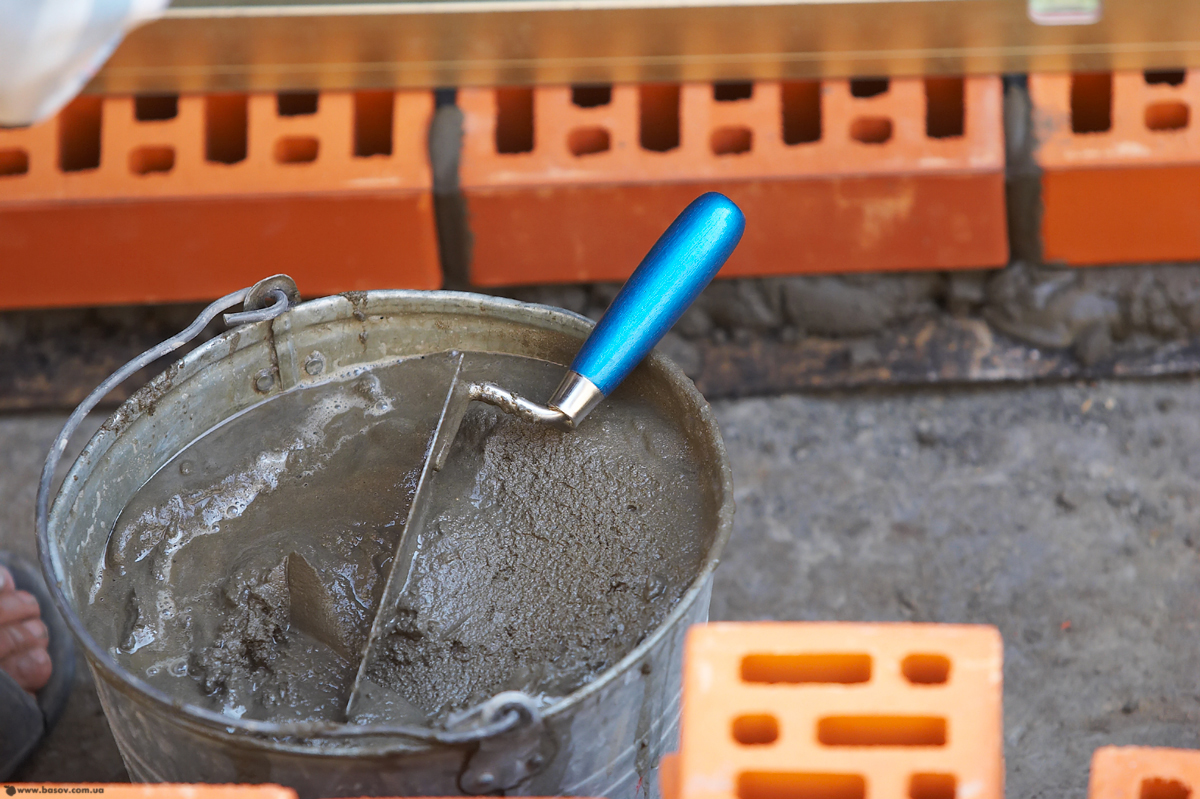
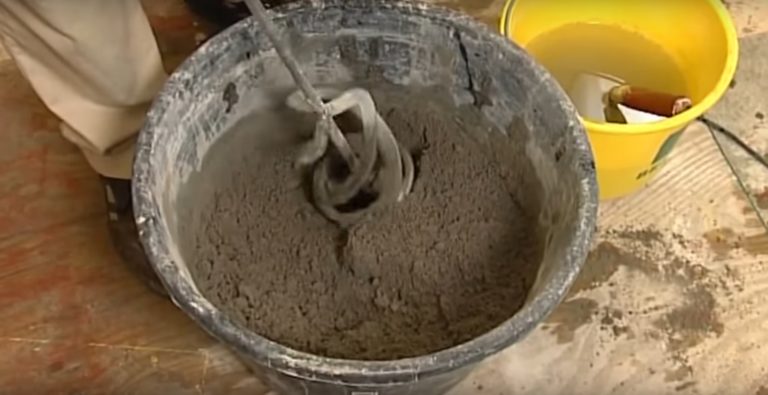
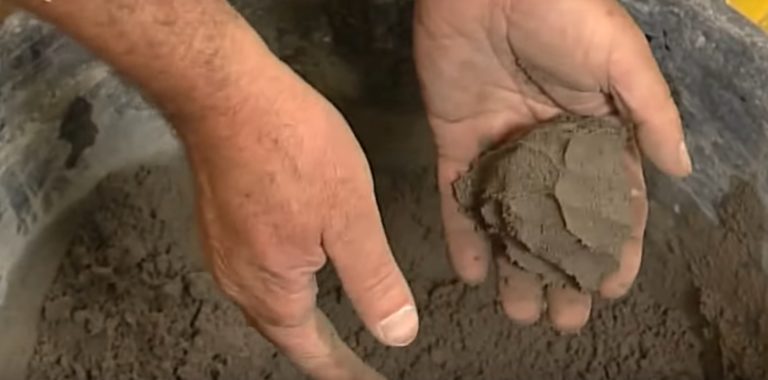
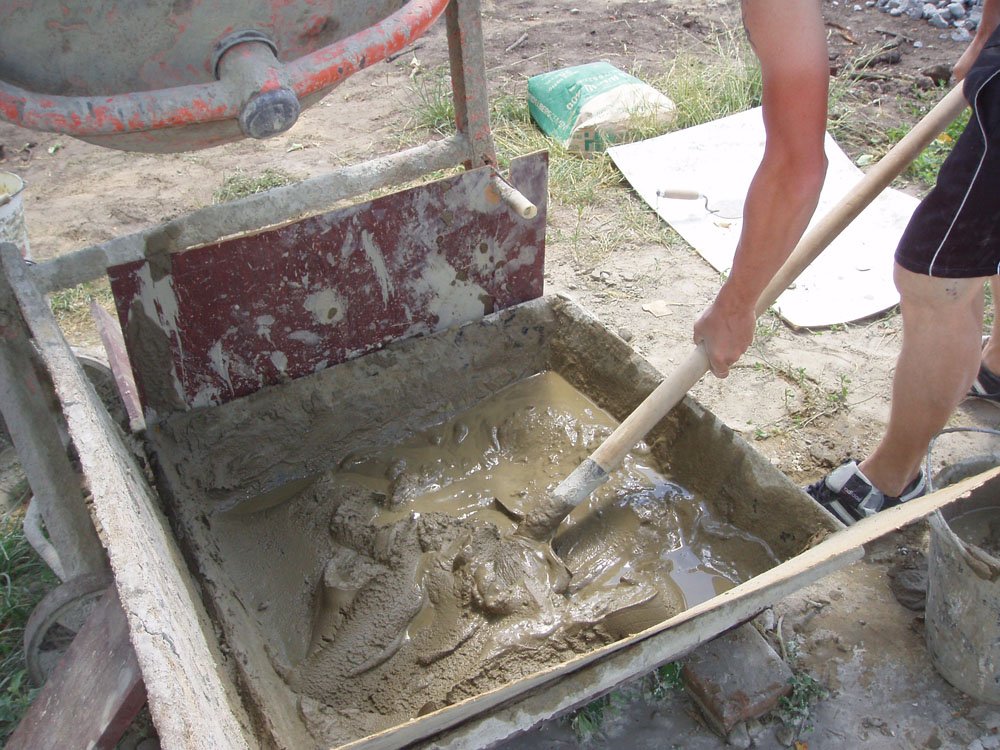
To prepare the solution, it is necessary to carefully sift the sand with a fine sieve, remove large fractions and possible debris from it. One part of the entire sifted material must then be mixed with two parts of dry cement, after which a little water is added to this composition and everything is mixed to a thick mixture of a homogeneous consistency with a construction mixer. Then the grout mixture, water is added, again everything is thoroughly mixed.
The finished mixture must be allowed to brew. After the solution swells a little, having absorbed the liquid, it is mixed again. Everything, the solution is ready for use.
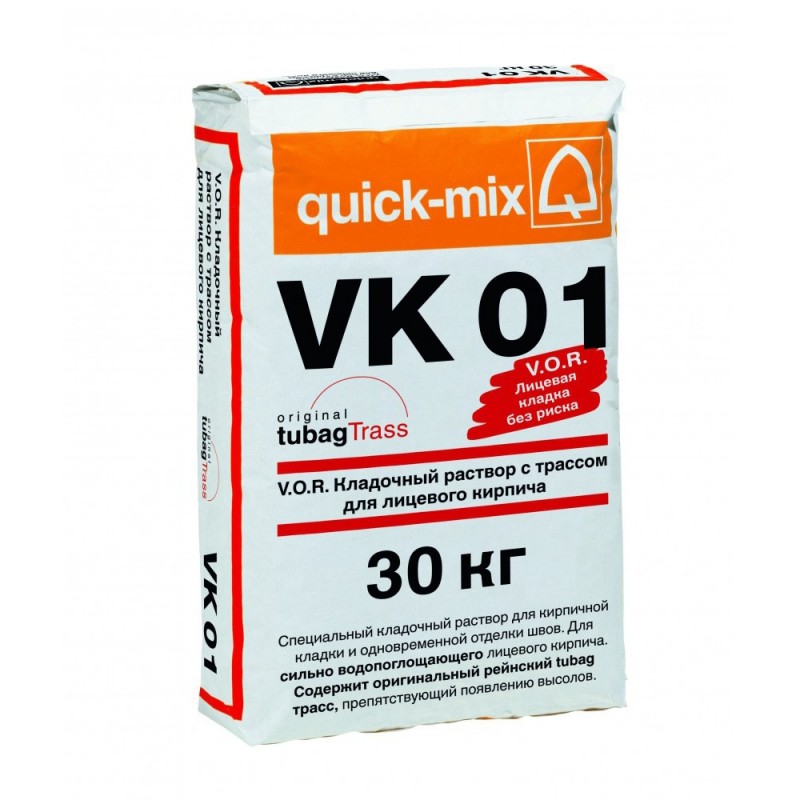
Quick Mix series VK 01 — Masonry mortar with track for face brick
The process of grouting brickwork may be monotonous, but quite simple. Any person can carry it out, so the owner of a suburban area will be able to cope with this task on his own.
On a note! It is important to carry out grouting work only when the bricklaying is fully completed. Otherwise, there is a risk of ruining all your work. At the same time, it is important to take into account the weather conditions during the work, the humidity and the quality of the materials used for grouting - all this will significantly affect the quality of the entire work.
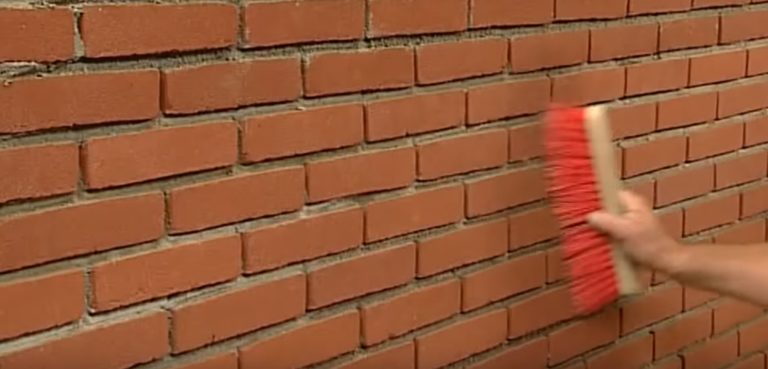
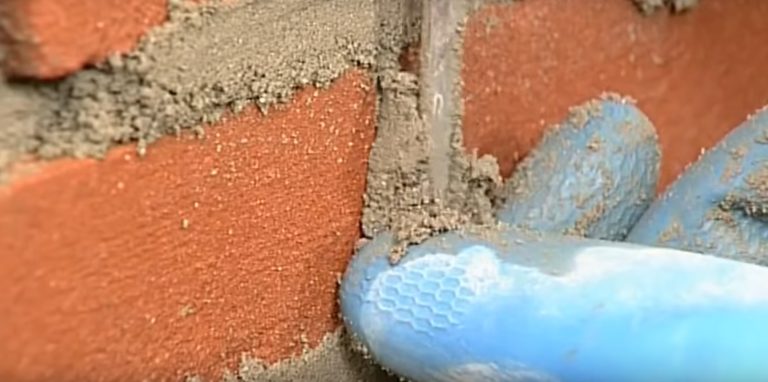
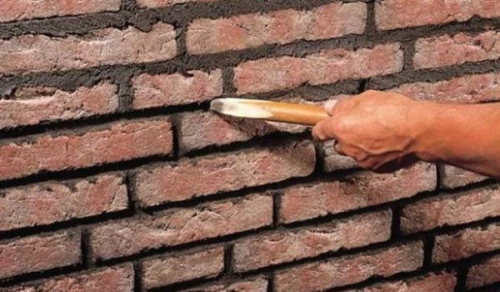
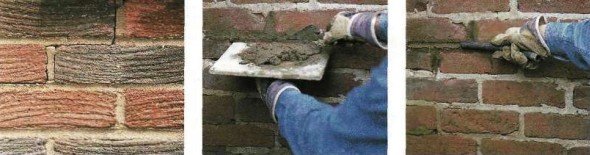
Step 1. Grouting of masonry joints should be carried out on a clean and prepared surface, it is even desirable that the cement mortar has already been dried. First of all, the surface of the seams is cleaned with a brush from debris.
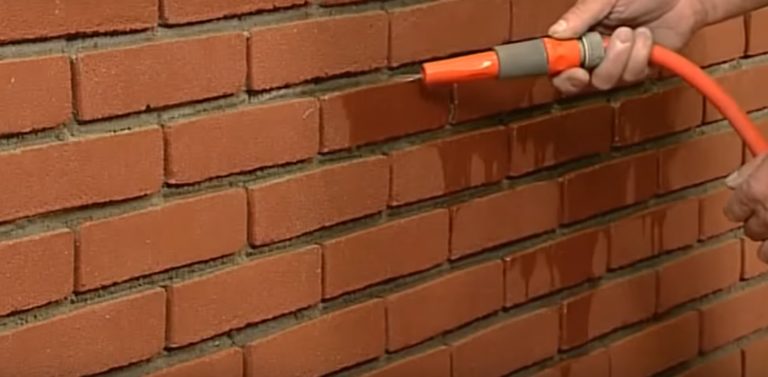
Step 2 Then the seams are washed with ordinary clean water from a hose. In addition, this procedure will make it so that the brick itself does not draw water from the cement mixture.
Step 3 The solution for grouting is prepared according to all the rules.
Attention! If you use a ready-made mixture for grouting, then you need to prepare it as it is written on the package. The above instructions are only a rough guide.
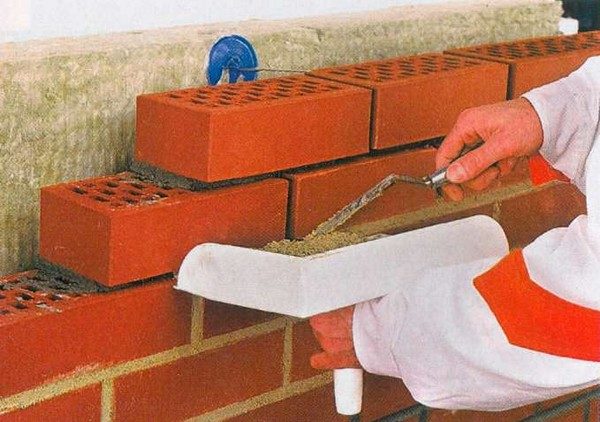
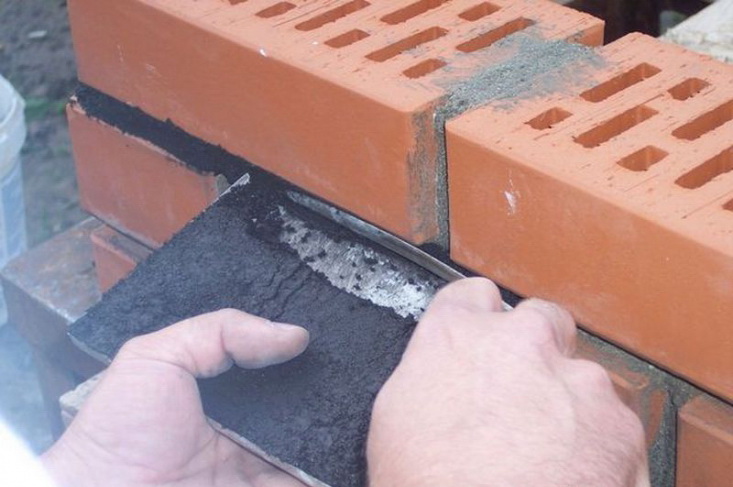
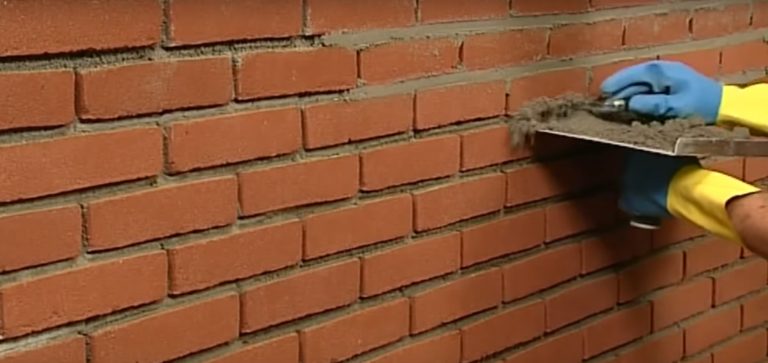
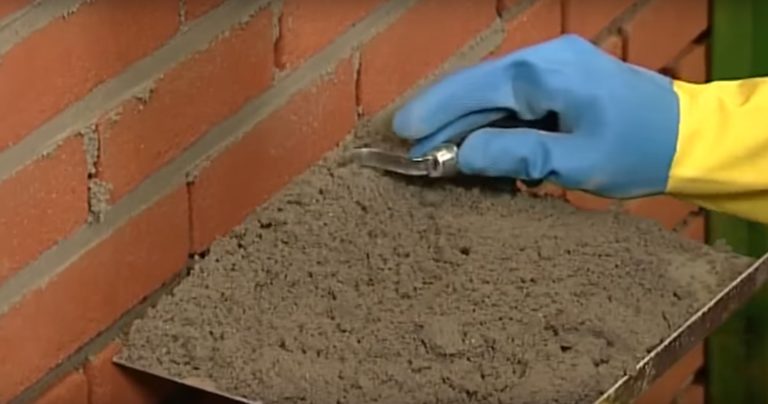
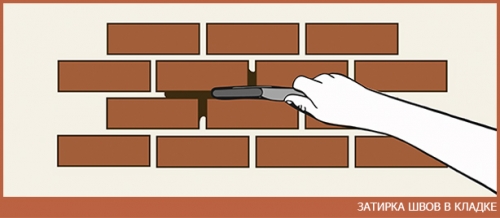
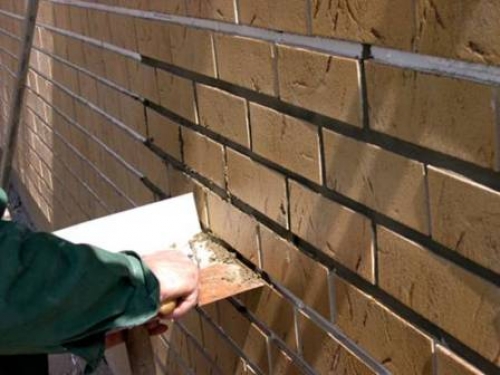
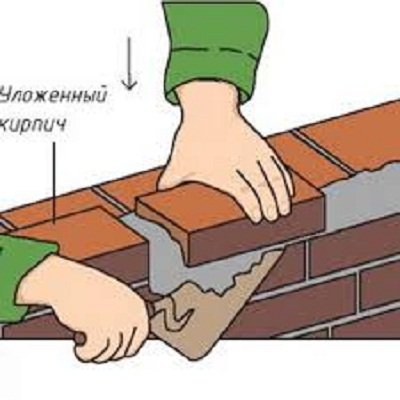
Step 4 The prepared mixture is placed on a large spatula, which is then attached close to the seam. With the help of narrow jointing, the mixture is gently but quickly applied to horizontal seams, in the process, slightly pressing into the gap to remove air from the cavity.
Step 5 Vertical seams are easy to fill if you hold a little mixture in the palm of your hand. By the way, builders are advised to first fill the vertical seams and only then move on to the horizontal ones.
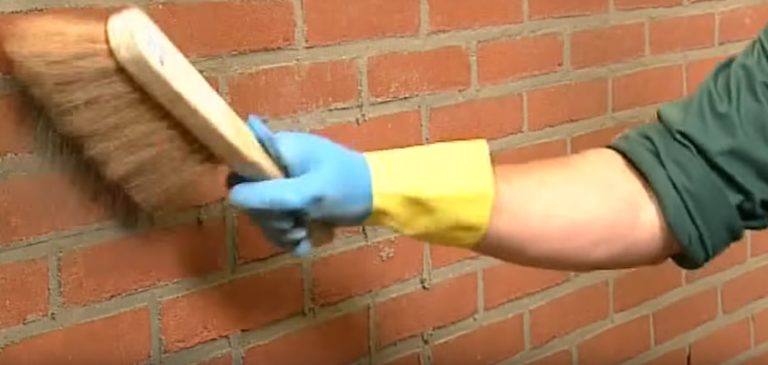
Step 6 After filling the joints with grout, its residues are removed with a brush. The work has been completed.
Attention! After applying the solution to the seams, it is important to immediately remove its excess, if any. Otherwise, they will freeze and spoil all the work. And you can form the shape of the seams when the solution grabs a little.
Video - Method for grouting brickwork
Grouting old masonry
Grouting can be done not only on fresh masonry. Using this method, you can improve the appearance of an old brick building. This is especially true if the solution in the gaps has already begun to collapse, which worsens the thermal insulation of the entire structure.
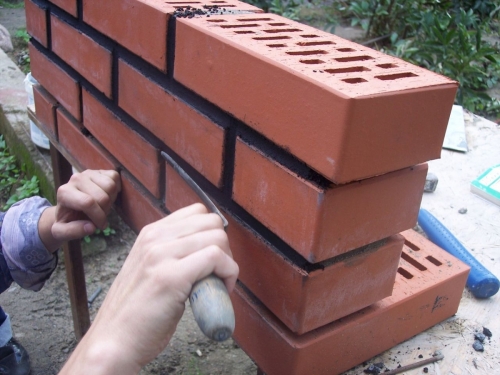
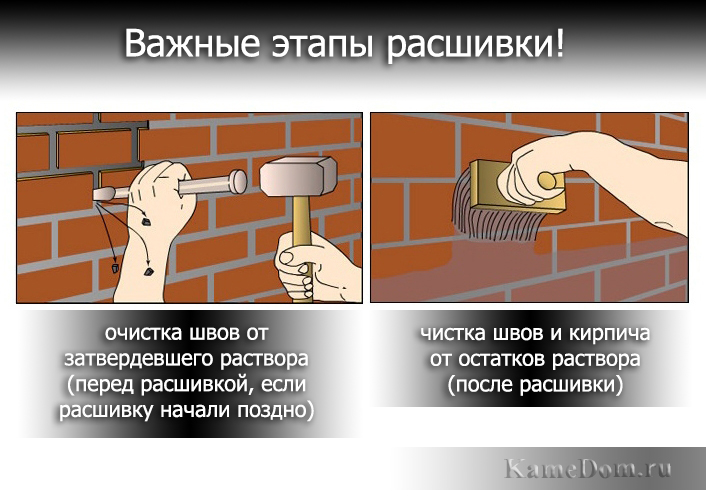
If grouting is done on old brickwork, then you must first remove part of the old mortar (about 1-2 cm). This is done with a chisel and a hammer. You can also wash out the remnants of the old solution using a special apparatus that acts on the masonry with a powerful jet of water (for example, a mini high-pressure cleaner).

The solution prepared as described above is applied in the usual way inside the gaps. It is important to ensure that during the work the mortar does not get on the vertical surface of the brick - stains may remain.
You can not choose without understanding what it is architectural element when it is needed and what requirements are put forward for it. Only taking into account these data, it is possible to choose the optimal brick for the base, take into account all the parameters and performance characteristics.
And finally - a few tips and secrets that will help improve the quality of work performed.

Grouting brickwork is one of the most durable ways to design the appearance of a brick wall of the facade. It looks very impressive, and all the work is easy to carry out on your own, without resorting to the help of specialists. And this is undoubtedly a huge plus.
If you have purchased a suburban area and decide to do the construction yourself brick house, experts do not recommend forgetting about a number of nuances associated with brickwork technology. One of these nuances is the jointing of brickwork. Its importance is due to the fact that, regardless of the final purpose of the building, before the start of operation, its brick walls must undergo high-quality aesthetic design. And one of the ways to finish it externally is to grout the seams of brickwork. However, experts say that jointing in brickwork can be done not only at the time of the construction of the wall, but also on the old masonry of a building that was already in operation. long years. Naturally, the technology of jointing in both cases will differ. How the jointing of brickwork is carried out, as well as what are the differences in the technology of jointing a newly erected wall and a wall of a building that was in operation - you will receive an answer to these and other questions in this article. But, before moving on to considering the technology of jointing, we suggest that you familiarize yourself with some of the theoretical aspects of brickwork.
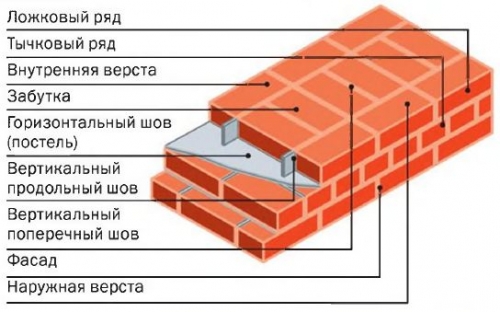
A bit of theory: masonry seam dressing systems
As you know, the main requirement for a brick wall is stability, which can be achieved by bandaging the seams of brickwork. It is carried out in such a way that each overlying brick rests on two or three underlying bricks and at the same time overlaps the seams between the lower bricks. It was this method of laying bricks that was called dressing. It contributes not only to increasing the stability of the wall, but also uniform distribution loads on a brick wall in case of uneven precipitation and temperature deformations. In construction practice, the following types of dressing have found the greatest use:
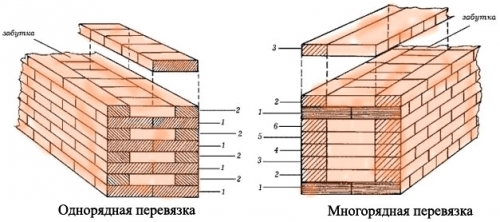
- Chain single-row dressing;
- Three-row dressing;
- Multi-row dressing.
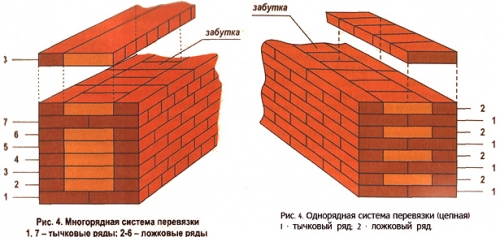
Each of them is characterized by reliability, as it firmly combines bricks into a single system. However, it makes sense to consider each separately. Experienced craftsmen know that the rows of brickwork, depending on the location of the bricks, are divided into spoon and bond.
Technology single-row dressing brickwork involves the alternation of spoon and bonder rows, and is most often used most often in cases where wall decoration with facing bricks is not provided.
Three-row dressing, which is a popular variation of the multi-row system, involves tying every three spoon rows with tying rows. In most cases, a three-row system is used in cases where walls and posts are laid out.
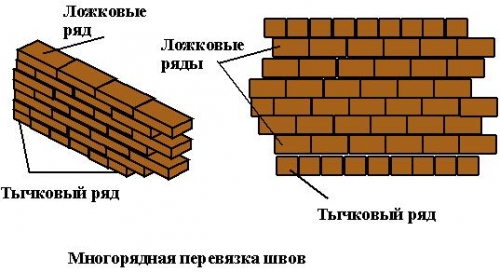
Multi-row dressing involves laying out spoon rows, which are tied up with tying rows every 5-6 rows. As for the number of spoon rows, it depends on the thickness of the brick. If it is 65 mm, it is necessary to lay out 6 spoon rows, and if it is 88 mm, the multi-row dressing technology involves laying out 5 spoon rows.
Jointing brickwork: the relevance of the issue
Traditional brickwork involves the presence of vertical and horizontal brickwork joints. Brickwork technology involves filling them with a mortar designed to bind the bricks into a single whole. After the implementation of the brick dressing, the excess mortar that protruded beyond the seams is removed. Having done this, the brickwork is jointed, which is a process of grouting the joints in order to increase their tightness. Thanks to this procedure, the wall becomes not only attractive, but also resistant to external adverse factors. In this regard, we come to the conclusion that the jointing of brickwork significantly prolongs the operational juices of the building.

Types of jointing: main characteristics
Before you get acquainted with the algorithm and technology for jointing brickwork, first of all, you need to familiarize yourself with the possible options for sealing brickwork joints, which are most often used in construction practice.

Rectangular Undercut or the so-called flush jointing - is one of the simplest and, accordingly, popular ways of jointing. Technologically, this method involves cutting off excess mortar from the wall using a trowel, and then the seams between the bricks are processed with a hard-bristled brush. After such processing, the seams are clearly distinguished;
Rectangular recessed used as decorative finishes brickwork. Despite the fact that this method is more laborious, its use is not advisable for processing brickwork exposed to precipitation. The technology for performing this method of jointing implies, first of all, the removal of the mortar from all joints to a depth of 5-6 mm, their subsequent compaction and smoothing of the new mortar using a rounded dowel;
Concave joint- a popular way of grouting, involving the use of a special tool for jointing with the same name "joint". First of all, this method involves cutting off excess mortar, followed by processing them with semicircular stitching throughout the entire length of the seam;
Beveled stitching- a method, the use of which is relevant in conditions with a harsh climate. Before its implementation, the trowel is carefully sharpened, after which, having directed it at an acute angle, the solution is cut off. The optimal level of tool deepening is 3-4 mm;
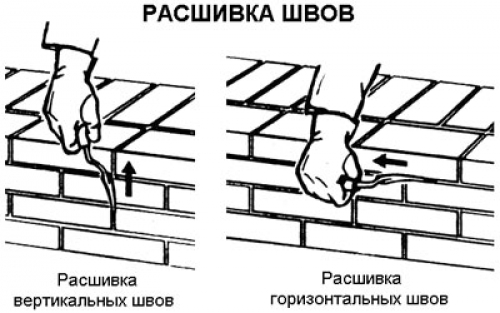
Important! In the process of jointing seams, it is important to follow the sequence of their processing: first, vertical seams are processed and only then horizontal ones.
At the same time, according to experts, the thickness of the brickwork joints is not given decisive importance, and it varies within 10-12 mm. This rule is due to the rules of SNIP, according to which the size of brickwork joints is a variable indicator and for a horizontal joint it ranges from 10-15 mm, while for a vertical one these figures vary within 8-15 mm. In addition, situations often arise when builders prefer thin seams, the thickness of which reaches 3-4 mm. This is due to the desire to save cement mortar.
Important! The thickness of the brickwork seams is a very variable indicator and can change depending on the climatic conditions in which the building is located, the desire to save materials, as well as the responsibility and pedantry with which the master approaches the work.
What is the purpose of stitching?
Due to the fact that many structures do without grouting and are operated for a long time, we consider it necessary to consider the main functional purpose of grouting brickwork. So, what is it?
As noted earlier, it significantly increases the aesthetic characteristics of the building. Using this method of decorating a structure, you can effectively mask the difference in shades, if the solution is mixed gradually, over several days;
The use of grout for brick joints helps prevent the destruction of the cement base, which allows not only to extend the operational life of the building, but also to postpone the construction for a long time overhaul. This is achieved by reducing moisture that enters the seams, since it is she who destroys the brickwork, and, as you know, the price of restoring a brick wall that has undergone destruction due to cracking and wall collapses leaves little pleasant impression;
Having carried out the jointing of the brickwork in accordance with all the rules, you can significantly increase the thermal insulation characteristics of the building and keep the heat in the room during the cold season;
Features of the application of jointing of brickwork
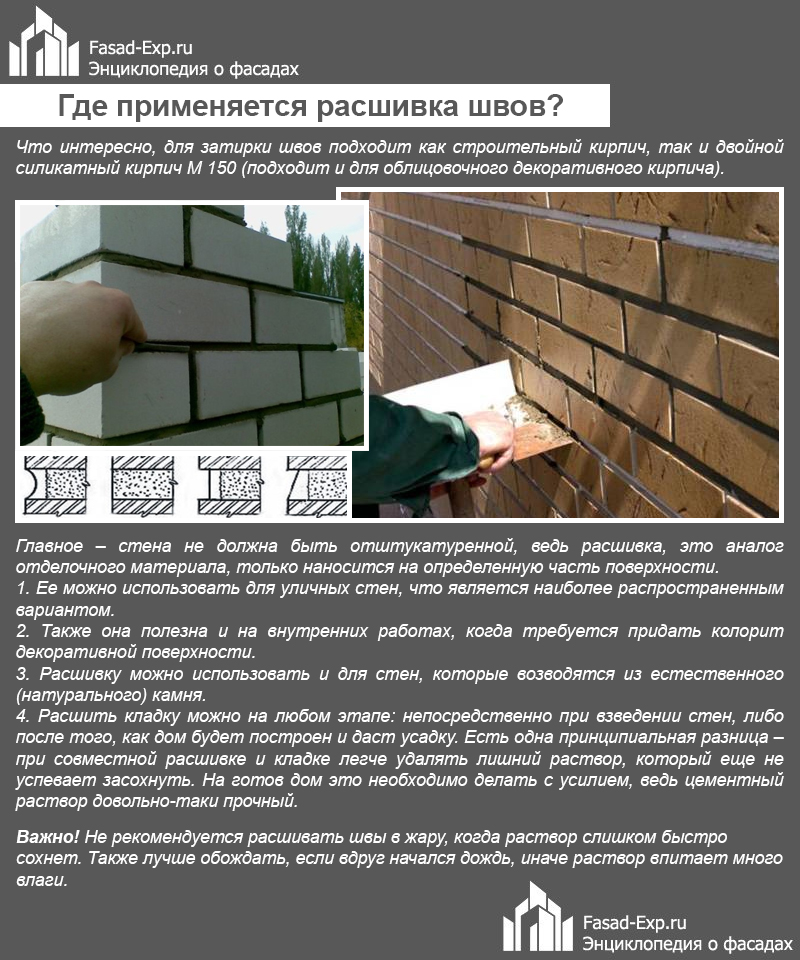
- Masters should know that jointing is relevant not only for houses built from building bricks, but also for those that were built from a double silicate brick M150.
Important! The main rule that must be observed when jointing is that the wall to be finished should not be previously plastered, since the jointing of brickwork is a kind of analogue of a finishing material, which is applied only to a single part of the surface.
- The most common use of jointing is for finishing street walls;
- Internal work also often cannot do without its use, which is acceptable in cases where the surface to be finished needs to be given a certain color to it;

- Walls built from natural stone can also be finished with brickwork;
- Masonry jointing can be carried out at any stage of construction, whether it is the direct erection of walls or the finishing of a building after it has been used for a certain time and shrinks. However, in the case of the first option, the removal of excess mortar is more “painless”, since, being fresh, it does not have time to dry yet, having reached the stage of jointing. In the case of jointing the seams of an old house, this is much more difficult, since the mortar becomes much stronger;
- In addition, if you decide to start grouting on an old building, in the process of removing the old mortar, it is necessary to make a more thorough deepening up to 10-15 mm;
- We must not forget that in order to increase the strength of the structure at the construction stage, ligation of the seams of brickwork is used, which implies laying out the overlying row of bricks not parallel to the underlying one, but with some displacement;
- In the process of jointing, it is important to use only sharply sharpened tools, for example, it can be a chisel designed to remove hardened mortar. Only if the tool is sharply sharpened can you remove the hardened mortar properly, otherwise there is a risk of the tool slipping and damage. building material.
Stitching Technology: A Step-by-Step Guide
Since you have thoroughly familiarized yourself with the theoretical aspects of jointing brickwork, it's time to study the algorithm for its implementation, which consists of several stages.

Stage number 1: preparation of brickwork
Like any construction event, the jointing of brickwork begins with preparatory work. What is their essence? Let's consider further.
All impurities, including dust, are removed from the surface of the walls that have undergone processing. After that, using a brush with a hard bristle, the cement joints must be cleaned of the most "coarse" contaminants. It is also possible to use an apparatus based on the principle of operation of which is the use of high pressure. It is thanks to him that you get the opportunity to remove even the smallest particles that are not visible to the eye;
When finished cleaning the surface, prepare a roller and a bucket of water, and then wetting those seams that you plan to work on in the near future.
Important! Masters advise not to grout brickwork in the hot season, as in this case the mortar dries extremely quickly, which contributes to the disruption of the entire jointing technology. It is also recommended to stop work in the event of rain, as the solution can absorb excess moisture, which also contradicts the jointing technology.
Stage number 2: preparation of the solution
The mortar for grouting in masonry is sold by hardware stores in the form of a dry mix, the components of which are strictly indicated on the packaging, or in the form of a ready-made solution. If you purchase a dry mixture, it must be diluted with water, the amount of which is indicated on the package with the mixture. Regardless of whether you are purchasing a dry mix or a solution, you must follow the instructions on the package, as well as strictly observe all the indicated proportions. In addition, it is necessary to strictly take into account the time limits during which the solution must be fully used.
To mix the solution, it is better to give preference to an automated method and use a specialized drill equipped with a “mixer” nozzle, since mixing the solution manually is a much more laborious and time-consuming process.
Important! Experts do not recommend kneading the mortar for application to all walls at once. In their opinion, it is better to prepare it in small portions and use mainly an electric concrete mixer for this. If you apply too liquid or already slightly dried mortar to the expansion joint in the brickwork, this is fraught with a violation of integrity due to the first sharp temperature drop.

Stage number 3: jointing brickwork
Initially, remove a small amount of the old solution (10-15 mm will be sufficient). If in some places there was a destruction of brickwork for more than deep level, apply a deliberately larger amount of freshly prepared mixture.
Then again take a brush with a hard bristle and carefully remove traces of mortar from the wall. In hard-to-reach places, the solution is removed using special devices or a chisel, which we wrote about above.
At the top of the wall, it is necessary to prepare scaffolding for grouting. Despite the fact that the most effective way, as before, it remains to install scaffolding, you can use a stepladder.
Having fully prepared the surface, you can begin to apply the solution.
Important! In the process of applying the solution, remember that the key to a high-quality end result is the uniformity of the applied mixture and the complete absence of lumpy masses.
The technique of applying mortar when jointing brickwork involves applying it with some excess, which is immediately removed with a trowel.
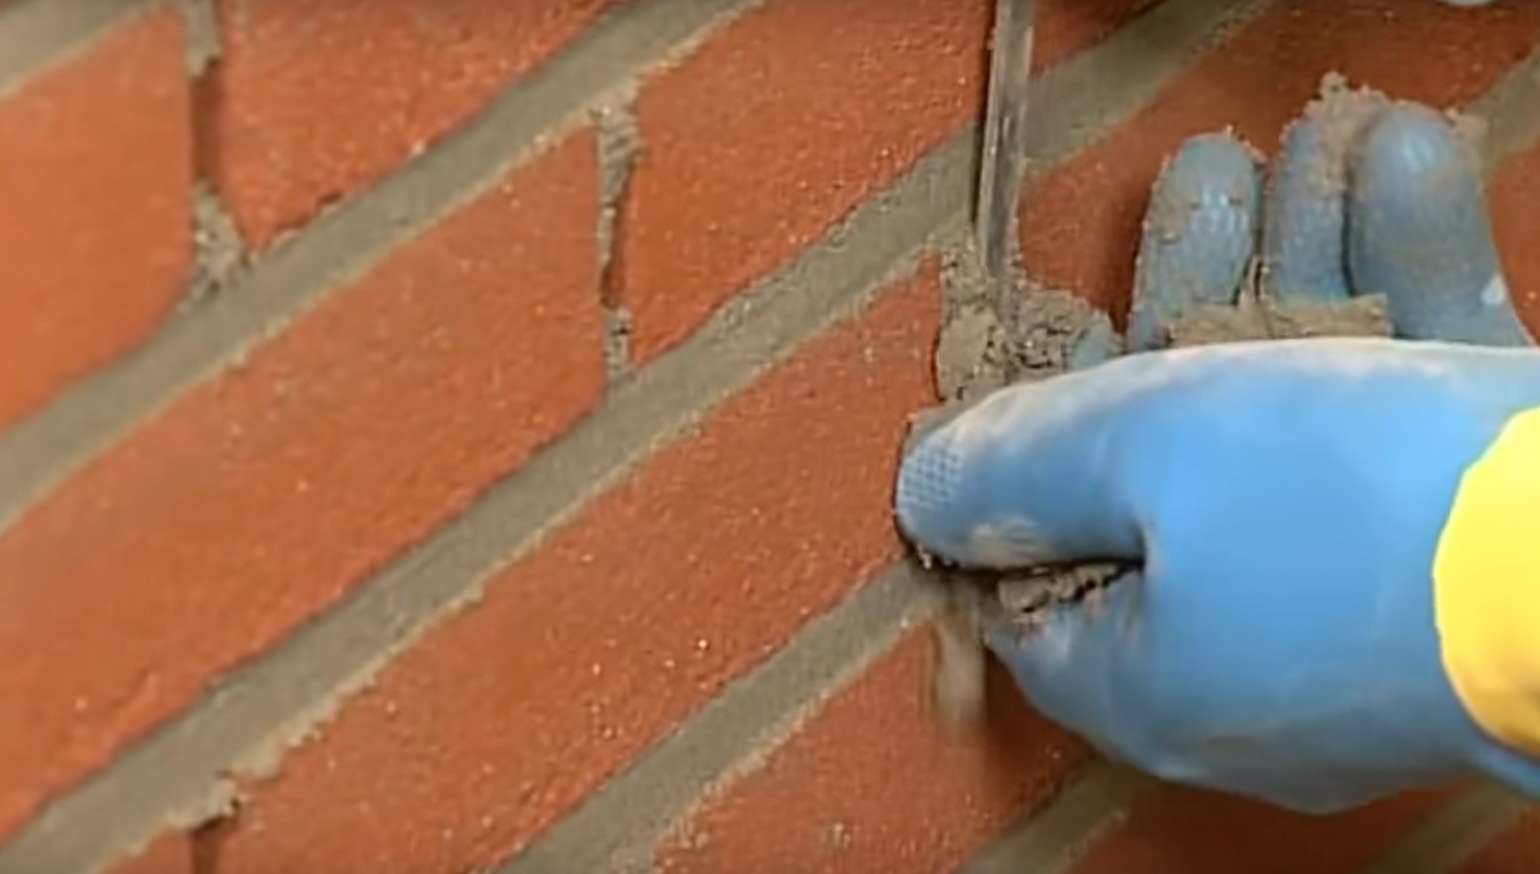
Next, take a narrow joint, and intensively press the solution into vertically oriented seams. At the same time, it is important to press in, and not to smooth, since only the use of this technique allows you to get rid of excess air, which, if the work technique is not followed, can remain between the old and new layer of the cement mixture.
Next, the new mortar is given the desired shape, which can be done using improvised means, for example, a plastic tube or rubber hose, using which you can make a concave seam. To get a beveled seam, experts recommend using a wooden plank, before working with which you need to clearly determine its size. And the use of a sharpened wooden peg will allow you to easily turn a rectangular seam into a recessed one.
Important! If rain catches you while grouting, temporarily stop work and insulate the surface to be treated with ordinary plastic sheeting.
As can be seen from the above instructions, the process of jointing is not particularly difficult and can be carried out even by a beginner in the construction business. Of course, as a beginner in this industry, you will most likely spend more time than an experienced craftsman, but a significant plus is that you can save money by refusing the services of workers.
Important! When erecting brick structures with your own hands, remember the existence of expansion joints in the masonry, providing for which you can protect your building from possible seismic terrain fluctuations, uneven shrinkage of the structure or sudden temperature changes.
And finally
We understand that most of our readers are not professionals in the construction industry, so we have tried to explain in as much detail as possible the entire process of grouting brickwork. You just have to familiarize yourself with the proposed materials and follow our advice. To facilitate the process of understanding the whole technology, a video will be offered below, in which the process of jointing brickwork is once again considered in detail.
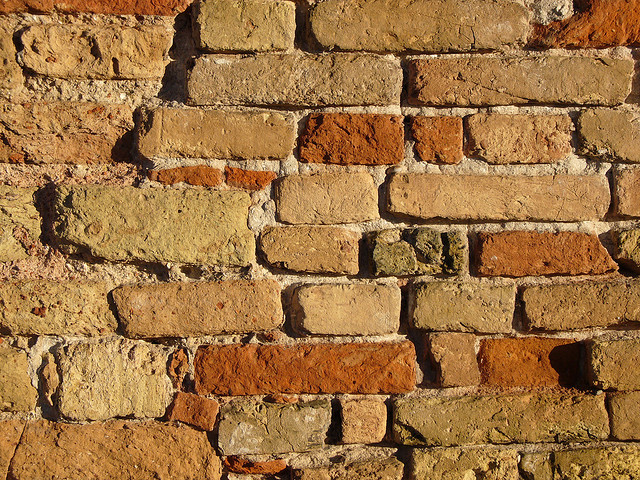
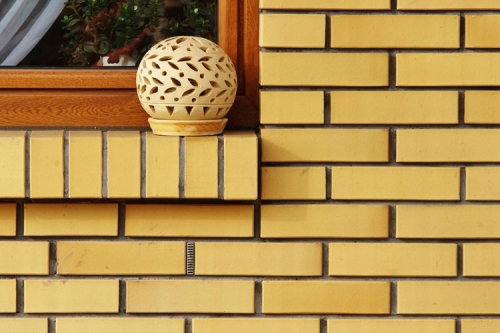
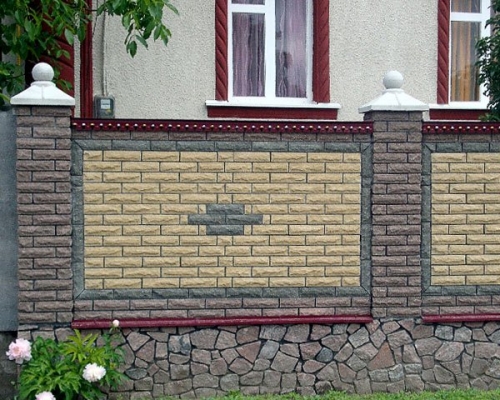
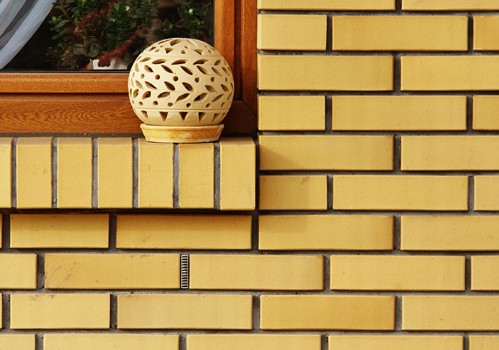
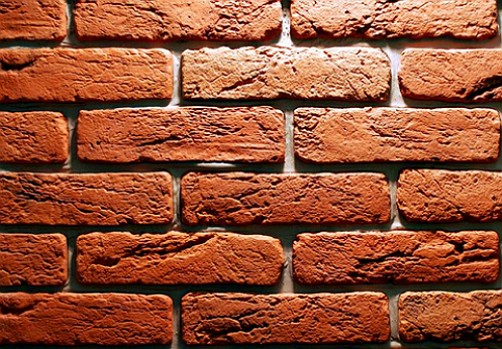
Embroidered brick or stone masonry looks beautiful and aesthetically pleasing
Experienced masons know that in order to increase the strength and increase the thermal insulation properties of the structure, all seams in brick or masonry must be completely filled with mortar. Unfortunately, during this process, part cement-sand mixture it is squeezed out of the space between the rubble or bricks, therefore it has an unaesthetic appearance. Jointing helps to put the walls in order - the process of sealing and refining the seams to increase their strength and visual appeal. At the same time, a clear geometric pattern appears on the masonry, and the structure takes on a complete look.
jointing brick walls performed in the following cases:
- Directly during construction, when finishing is carried out until the solution has completely set. This reduces the complexity of work, allows you to get a tight and even seam;
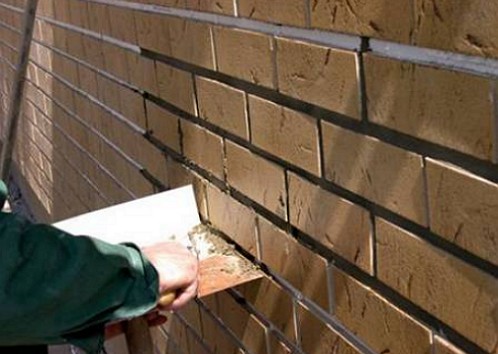
- To improve the appearance and extend the life of old brick walls. In this case, the procedure is best carried out in dry, cool weather, since a thin layer of mortar will dry quickly in the heat, and therefore will not provide good adhesion to the old surface.
Wall paneling is not required if the walls are to be plastered. In this case, to increase the strength of the plaster layer, the seams are not filled with a solution to a depth of 15 mm, obtaining the so-called wasteland.
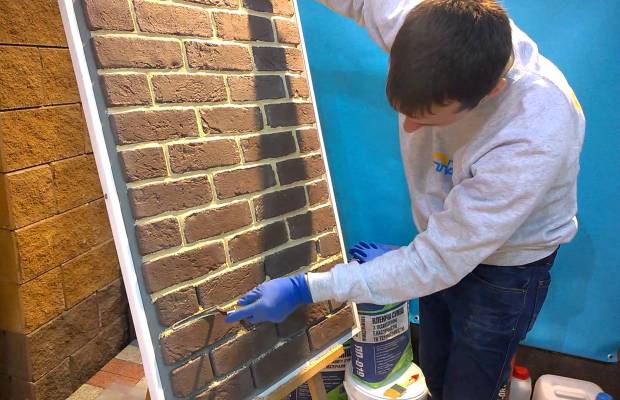
Sometimes embroidery is performed on internal surfaces, in order to decorate walls or parts of them.
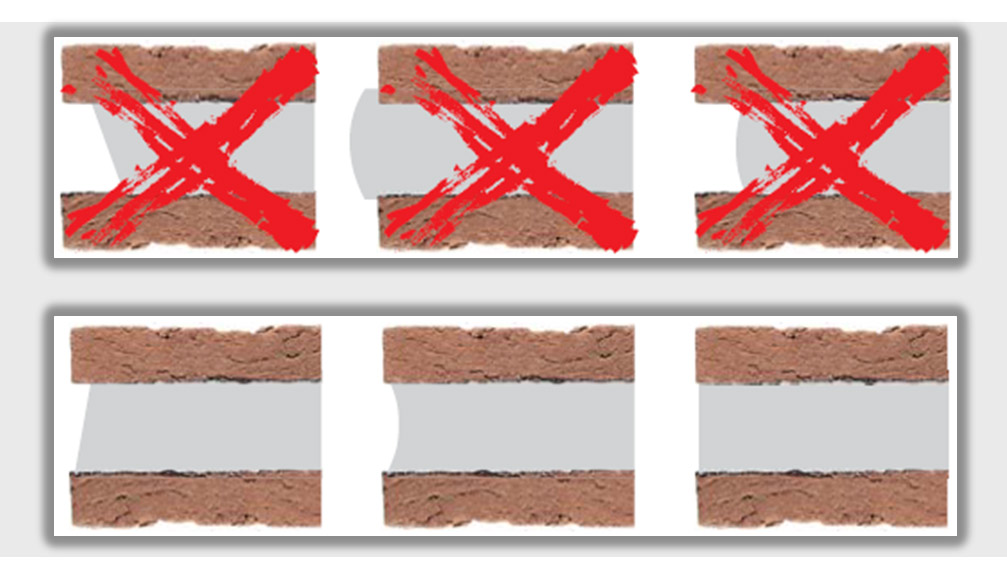
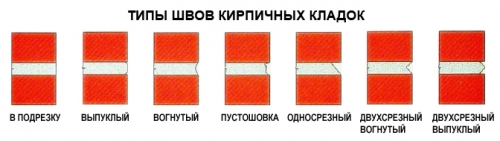
Depending on the goals and aesthetic preferences, you can get seams of various shapes:
Sometimes masters are not limited to a standard set of configurations, making embroideries of more intricate shapes. In addition, in order to increase the aesthetics of the masonry, specialists often resort to different thicknesses of the mortar layer, making horizontal seams wider than vertical ones.
Advantages and disadvantages
The advantages that bricklaying provides are obvious:
- finishing in this way practically does not require the cost of building materials, while sheathing with clapboard or siding, plastering for painting or a “fur coat” will require additional funds;
- due to the rapid drying of the wall masonry with an embroidered surface, the construction time is significantly reduced;
- no need for restoration and repair work for a long period of operation;
- the work does not require high qualifications, it can be easily done with your own hands;
- embroidered walls can be finished at any time in a different way, without resorting to dismantling the sheathing or removing plaster.
The disadvantages of this method include lower thermal insulation of walls compared to other methods. In addition, when building walls made of silicate brick, increased accuracy will be required, since it will be problematic to clean surfaces contaminated with cement mortar.
Necessary tools and materials
Before proceeding with the laying of brickwork, the following tools and materials should be prepared:
- brushes - with hard pile and wire;
- a hammer;
- embroidery tool, which can be used as a finished factory product, as well as home-made devices;
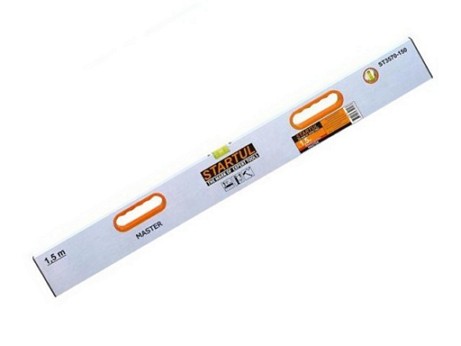
- a flat wooden lath with a length of at least 1 m;
- roller or soft brush to wet the surface.
If you plan to restore the old wall, then you will additionally need:
- puncher, wooden wedge or narrow chisel with a width of the working part slightly less than the thickness of the seam;
- a special mixer designed for mixing the solution;
- container for the preparation of a cement-sand mixture;
- trowel or trowel.
In addition, you will need cement, sand, lime and water in the required quantities.
Preparatory activities
Jointing can be carried out immediately after laying bricks or after erecting walls. In the first case, the bricklayer brings the masonry into proper shape after several rows have been passed and the mortar begins to set.
In the second case, when laying, the master leaves the outer part of the seam empty for subsequent filling with jointing mixture, and they start refining the wall after a certain time has passed, which is necessary for the masonry to completely shrink.
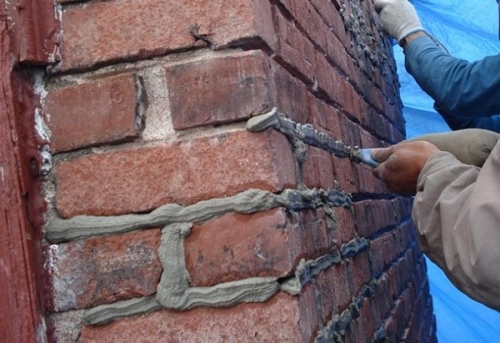
Before restoring the old masonry, it is necessary to remove the mortar from the joints to a depth of 15 mm and clean the wall from dust and dirt.
Masonry preparation is carried out in the following sequence:
- Update lining if necessary old wall, parts of the old jointing are removed from the seams to a depth of 10 - 15 mm. In order not to damage the bricks, it is better to use a narrow wooden wedge and a hammer. If it is not possible to knock down parts of the frozen solution, a chisel is used;
- With improvised means, they clean the walls of the building from dust and dirt;
- Seams are cleaned with a stiff brush or high-pressure cleaner. This work must be carried out very carefully, as dirt and dust particles interfere with the adhesion of the grout;
- After cleaning, the seams are moistened, for which they use a roller or a soft brush and a bucket of water.
The preparation of the cement-sand mixture is started only after full training surface to the next step, which prepares the grout.
The jointing mixture can be made independently or you can use the ready-made composition of the factory preparation, which is sold as dry. as well as wet. Since the solution is used for decorative purposes, it is allowed to introduce dyes for concrete into it.
A concrete mixer will speed up the process of preparing the grout
If you prefer to do everything yourself, then to prepare the optimal mixture, take lime, sand and cement in a ratio of 1:10:1 and mix with water until a very thick sour cream is obtained. Remember that the composition remains mobile for up to 1.5–2 hours, so only knead as much as you can use during this time.
If the mixture you received is too liquid, you can remove excess moisture from it by placing a dry red brick in a container with a solution for 1 - 2 minutes.
With large volumes of work and the presence of assistants, a concrete mixer will help speed up the process.
Work sequence
The technology for jointing a new wall and reconstructing an old finishing coating are different, so we will consider them separately.
Work in progress
The processing of seams during construction is carried out each time after laying several rows of bricks. The starting point for the work can be the beginning of the setting of the solution - it must remain plastic.
We present to your attention the algorithm of this process:
Seams are filled in the following sequence: first, vertical seams, and then horizontal ones, while moving along the treated surface from top to bottom.
After the mortar has completely set, the wall is cleaned of grout particles using a whisk or brush.
In the process of reconstructing the old masonry
Over time, the mortar crumbles from the brickwork, exposing the joints between the bricks. This contributes to the penetration of moisture, after which cracks appear in the seams and adjacent bricks. After that, the destruction of the masonry occurs exponentially.
You can stop the process by restoring the seams and performing their stitching. A nice addition would be to improve the appearance of brick walls.
According to the method presented earlier, preparatory measures are carried out, during which the surface of the walls is cleaned, and the seams are deepened with a hammer and chisel. Further work is performed in the following sequence:
The remains of the solution are removed from the surface of the walls after the cement-sand mixture has completely set. To do this, use a manual wire or hard hair brush.
Video: jointing brickwork
Being a very simple and affordable way exterior finish brick walls, jointing has found widespread use in the process of individual and industrial construction. In addition, unlike plastering, jointing is the best way to finish unheated rooms. The operation of such structures does not require work to maintain the appearance of the walls, and facing work is possible even for a person without building experience.
Jointing brickwork requires the use of various patterns that have a certain geometric shape in the form of a triangle, oval, etc. They allow you to give the layer of masonry mortar the required content. When laying building material, a certain effect is achieved, which involves a change in its appearance.
The principle of do-it-yourself bricklaying
At the first stage of the implementation of brickwork for jointing, you will need to prepare the following types of tools and materials:
- solution containing a plasticizer;
- sponge with metal brush;
- brick;
- trowel;
- patterns for stitching.
To remove the remaining mortar from the joints, you will need to use a trowel. The composition must be laid out at the same level with the surface of the brickwork. Templates allow you to embroider the desired shape, after which a trowel is applied. Excess masonry composition must be removed from the surface of the brick with a trowel, otherwise the desired result will not be achieved.
The seams are given the desired shape when the mortar sets. The functional jointing template allows you to press the brickwork mortar inside them by about 3 mm. Then the composition should be carefully compacted, which should improve not only the quality of the masonry, but the entire wall as a whole.
The time during which it is necessary to carry out the process of jointing depends on a number of points. Among them, the most important are:
- plasticity and consistency of masonry mortar;
- temperature conditions and the level of atmospheric humidity;
- the speed of work performed by a brick laying master;
- the process of laying walls requires a jointing procedure only after several rows of bricks have been laid.
What is required to prepare for stitching?
Before laying a brick under the jointing, it is necessary to properly clean the surface from various contaminants. After that, you can start preparing the solution. Only the masonry composition that has sufficient plasticity will allow to make high-quality jointing. To give the mortar such a property, plasticizers can be added to the composition, which facilitate the process of laying bricks.
Jointing for brickwork involves 2 stages:
- processing of seams located vertically;
- horizontal stitching.
It can be processed with a mixture without special additives. There is a risk associated with the fact that the template may break the composition with a plasticizer in certain places. Very often, various dry mixes can be used for such processing of masonry joints, which become plastic after adding water to them. Such compositions are convenient to use, as they perfectly retain their shape after the jointing procedure is completed.
To fold the wall of the building, you can use bricks of various shapes. To give a special evenness to the wall being built, you will need to use special templates. They allow you to drown all horizontal and vertical seams beyond the plane of the masonry surface.
Templates must be selected in accordance with the masonry profile. If this condition is met, then the same thickness of the mortar layer is ensured. Such a composition should not cause contamination of the surface of the brickwork. As a result, the solution will be used sparingly, which is important if the material has a torn texture.
It is quite laborious to make laying for jointing. This work requires attentiveness, perseverance and patience, which is better to stock up in advance. If this is not taken into account, then the treated surface will not look neat. You can make a special tool for embroidery with your own hands. After that, it is given the required form.
What tools will be needed
Jointing of brick masonry joints can be performed not only with the help of a ready-made tool. Some master masons have to make different kinds hand tool independently, without purchasing ready-made devices in the store. To obtain seams of a non-standard shape, only jointing will not be enough. Tools with different configurations are needed. Their set is determined depending on the condition of the brick wall:
- chisel;
- a hammer;
- drill;
- concrete mixer;
- triangular trowel;
- hard brush and brush;
- soft brush or roller.
You can remove the old mortar from the masonry with a sharpened chisel and hammer. For this purpose, a perforator is ideal. To prepare the grout, you need a drill with a mixer nozzle, which makes it easy to mix the masonry mortar. For large volumes of work, a concrete mixer is usually used.
Gently apply the mixture, and then remove its excess with a triangular trowel. You can clean the surface of brick walls with a stiff brush and brush. This type of work is performed after grouting and jointing.
To wet the strips, you can use a soft flute brush. A rail made of wood, having a length of about 1 m, allows you to comfortably support the tool for jointing brickwork horizontally. We should not forget that the preparation of grout requires a special container. It can be deep, but not too wide, otherwise the solution in it will begin to set faster.
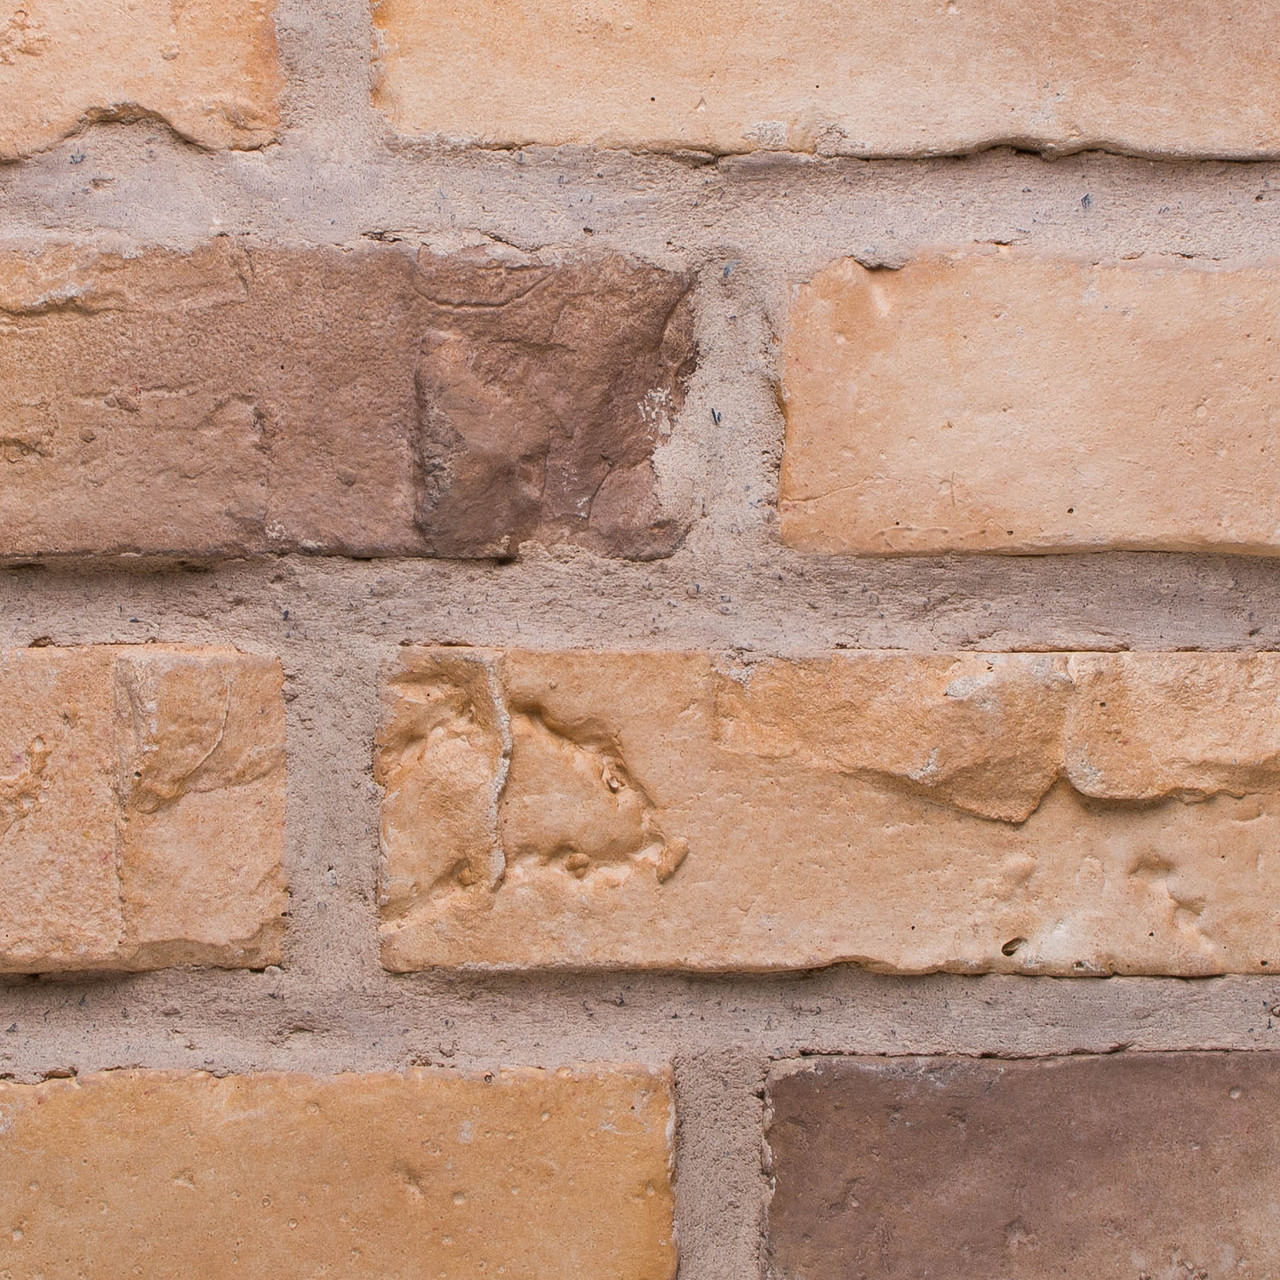
How to grout masonry joints
Bricklaying is required when restoring old walls. The technology may be associated with the execution of embroidery in one color. Very often, the mixture in different areas differs in its shade.
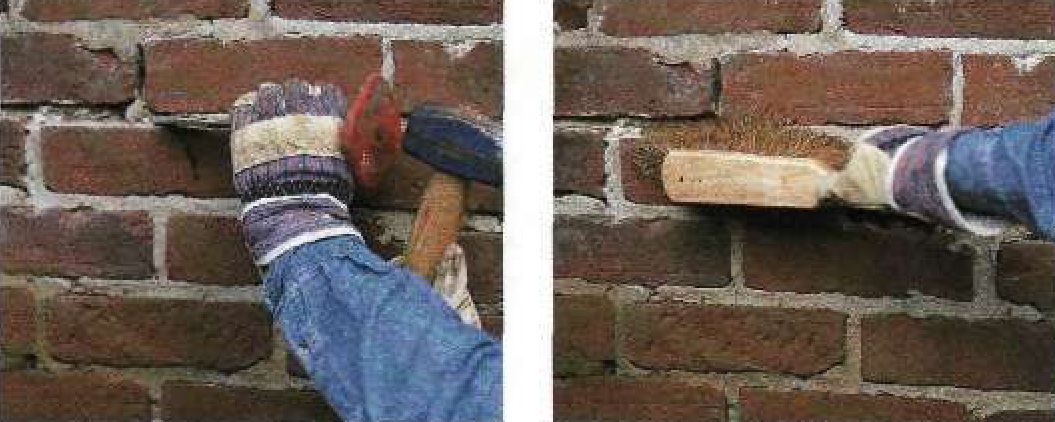
First, the surface of the dry solution is cut to a depth of 1-1.5 cm using a hammer and chisel. After that, all its remnants are removed. Stripping should be performed not only at the seams, but throughout the masonry. To make the treated surface look beautiful, the wall should be cleaned of dirt before grouting.
![]()
You can simplify the task if you blow out the cracks using a compressor unit. This will remove even the smallest crumbs and particles so that the adhesion of the fresh seam is the best. To prepare for the procedure, you will need a sharply sharpened reliable tool. This is the only way to remove excess mortar from the surface so as not to destroy the brickwork.
Next, all seams should be moistened with water and the jointing procedure should begin. It is not necessary to moisten the entire surface at once, since you can limit yourself to a small area that will need to be dealt with in the next 1.5-2 hours.
In the store, you can buy ready-made grout or dry, in which pigments or plasticizing additives are added. When choosing a solution for jointing, you need to pay attention to its basis. You can process the seam using the following types of materials:
- cement;
- epoxy resin.
If you prepare the mixture yourself, then such a composition will have an inexpensive cost. The simplest material used for grouting is a mortar prepared from 2 parts of lime and cement, which are taken equally. You will also need fine sand in the amount of 10 parts. Do not mix too much of the composition, since its pot life is about 90-120 minutes.
For another recipe recommended by experts, you will need to prepare a ground volcanic trail and 5 parts of sand, which will be the aggregate. This composition is suitable for treating walls with efflorescence and whitish smudges from the seams. The prepared solution must be stirred until it has the consistency of liquid sour cream. It is important that it does not spread, but keeps a lump on an inverted trowel.
The sequence of execution of the procedure
Before preparing the grout, read the instructions for the product on its packaging. After that, you can start making vertical seams. The composition must have the following properties:
- softness;
- plastic;
- density.
If the grouting mortar is made liquid, then it can flow along the masonry. Having completed all the preparations, you can begin to work. To do this, you must follow a series of basic steps:
- Use a trowel to apply a layer of grout so that it is larger than required to fill the joint. So that the bottom row of bricks is not dirty, you can use a plaster falcon, substituting it in the right place.
- Remove excess mixture with a rib, smoothing the surface with the most suitable hand tool.
- Firmly press each of the joints so that the space between the grout and the old mortar does not have any voids.
- Process horizontal rows with a rail, under which you will need to draw a straight line, like under a ruler.
- After completing the jointing of the brickwork, its front side will need to be cleaned of traces of mortar with a stiff brush.
- During the curing of the mixture, it is necessary to ensure that it does not dry out and does not get wet in the rain.
The special jointing used after the mortar has set can be replaced with a piece of hose. Each seam should be smoothed and slightly compacted, if necessary, pressing the composition 2 cm deep.
After summing up all the results, it is necessary to take into account some additional points, without which the stitching will not be of high quality:
- engage in the procedure in cloudy weather, when there is no precipitation;
- start stitching with vertical rows.
The main advantage of jointing is the increase in the heat and sound insulation parameters of the wall. The stitching procedure allows you to provide high level protection of the masonry seam from the influence of moisture on the wall surface. Brick laying for jointing is not only easy to use, but also durable when compared with a plastered surface.
Beautifully executed brickwork is distinguished by an impeccable line of seams. The strict geometry of the jointing of the seams can be confidently called the final chord of the construction of the masonry. However, it is necessary to make the jointing according to the rules, clearly and smoothly leading a special knife. How is it recommended to do the embroidery so that the hand does not tremble?
Features of brickwork
Bricklaying during the construction of partitions and walls of the house is performed according to a certain scheme - dressing. Bandaging allows you to build a wall with a uniformly distributed load over the entire surface.
At the end of the process of erecting brickwork, it is supposed to produce jointing. The following factors influence the final result of the construction of brickwork:
• dimensions and color of bricks
• seam configuration, finish and color
• high-quality alignment of a masonry seam.
High-quality alignment and sealing of the seam is a must. For finishing works masonry joints use the following techniques:
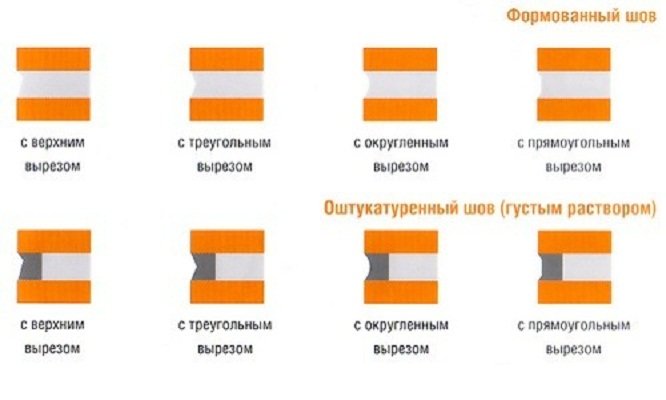
• sealing and plastering.
When sealing a masonry joint, molded or plastered joints can have triangular, rounded and rectangular profiles. The type of profile depends on the depth of the knife for jointing into the seam and its angle of inclination during operation.
![]()
Recall that according to SNiP, the size of brickwork seams is: for a vertical seam 8-15 mm, for a horizontal one - 10-15 mm.
Types of jointing brickwork
There are the following types of masonry jointing:
• flush (rectangular undercut)
• rectangular recessed
• concave semicircular
• bevelled.
![]()
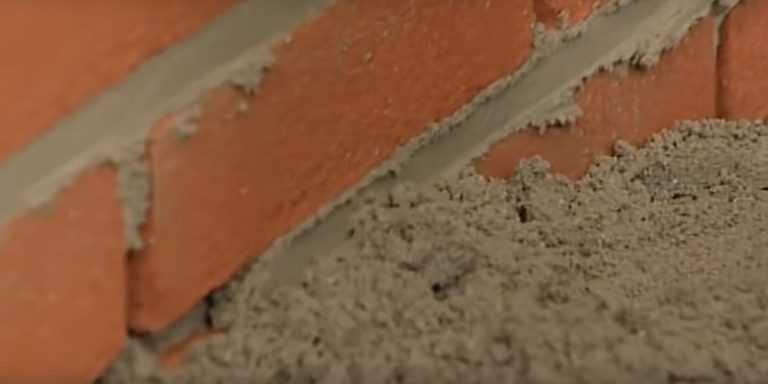
Flush jointing is the most used type of joint sealing. The technology consists of filling the seam with mortar, then cutting off the excess using special knife and subsequent processing of the seam with a brush with a long hard bristle. Flush jointing is distinguished by an outwardly clear seam line. The depth of the seam reaches 5 mm.
![]()
Rectangular recessed jointing is used to create decorative masonry finishes. Technologically, jointing involves the initial removal of the mortar from the joints, and then the subsequent filling with a new mortar (depth up to 6 mm) and sealing with the help of a rounded end of the dowel.
Concave semi-circular jointing has a characteristic profile, which is created using a semi-circular knife when cutting off excess mortar from the seam. The seam has a depth of 4-6 mm.
The beveled view of the jointing is based on the specific position of the jointing knife, directed at an acute angle when cutting the mortar. For these purposes, a sharply sharpened knife is used, which allows the tool to be lowered into the suture material to a depth of 4 mm.
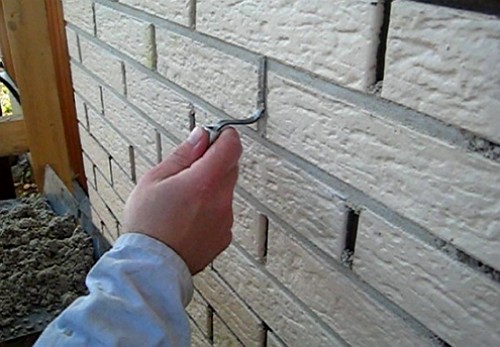
Naturally, stitching can only be done using a special tool.
What tool is used for stitching
The hand tool for stitching is a trowel with a long handle. Trowels for brickwork joints can have a flat, semicircular outer and inner working part with a width of 8 to 12 mm.
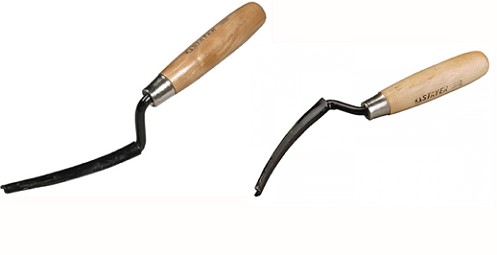
The end of the trowel knife forms the profile of the seam on the masonry. The tool for jointing the seam is made of steel.
Solution for stitching
Stitching solution, e.g. OSNOVIT BRIKFORM T , designed for brickwork with medium water absorption.
For jointing, a ready-made masonry mortar is used, which has the consistency of damp earth. The composition of the cement-lime mixture solution: 1 part - cement, 1 part - lime, 10 parts - fine-grained sand.
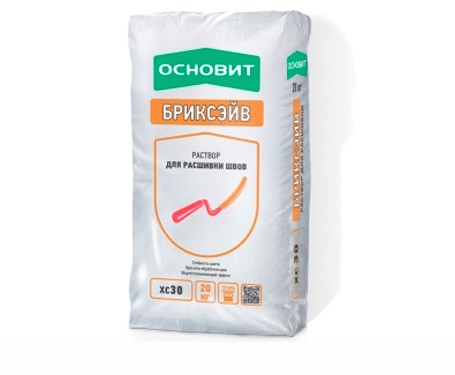
The selected granulometric composition of the mixture of the solution allows you to easily and quickly grout the joints, and the strength of the solution (more than 15 MPa) ensures the durability of the seam. In addition, the composition of the mortar prevents the appearance of efflorescence on the surface of the brickwork, ensuring the durability of the suture material.
Application of the solution for jointing on the work surface is carried out in a dry way. Therefore, it is not difficult to make a seam jointing with your own hands.
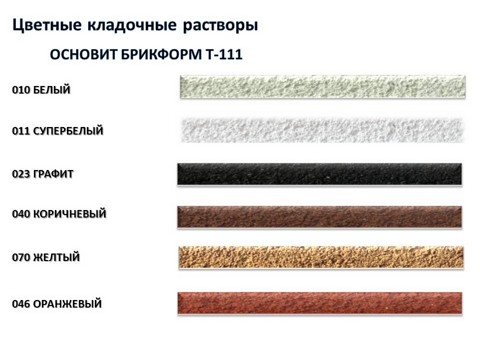
colored grouts for grouting
Colored suture solutions, for example weber ZK557 , used for decorative purposes for ceramic, silicate masonry, clinker bricks and blocks. The material has the same qualities as the basic jointing mortar.
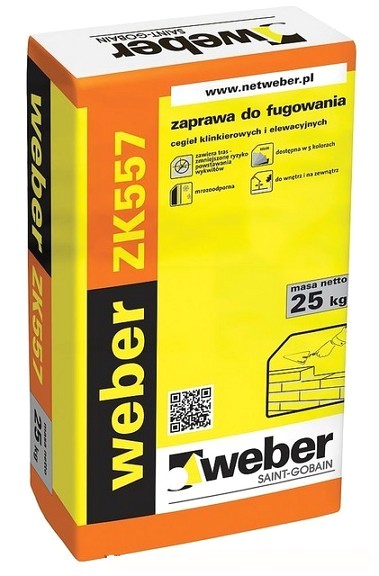
Long-term chromaticity of the seam is supported by colored pigments of inorganic origin, which are part of the mixture. Naturally, a colored joint can decorate any properly executed brickwork surface.
How to do your own seam stitching
It is important to remember that the process of jointing brick joints and jointing stone requires strict adherence to the sequence of processing. Initially, all vertical and then horizontal seams are processed. To create an even seam, corners are initially built to track the thickness of the seam. Then the thread is pulled for each masonry row. Recall that the thickness of the seams horizontally is 12 mm, and vertically 10 mm.
Jointing must be done according to a certain technology. These are the main technological steps:
• preparation of brickwork
• preparation of working solution
• jointing a seam using a tool.
Before applying the masonry mortar, the working surface is abundantly moistened with water, and after applying the jointing material, the seams are cleaned with a stiff brush.
This video will help you to make the correct jointing of the brick seam.


