
The desire to transform their living space and make it as comfortable as possible makes city apartment owners think about the effective use of every centimeter of space. Balconies and loggias fell under the transformation, but these additional meters to the apartment have only a floor and a low fence. To make it cozy and comfortable here, you need to make a lot of effort. Before you sheathe a balcony with your own hands, we recommend that you read our instructions.
To finish a balcony or loggia from the inside, materials are used that differ in texture, appearance and characteristics. We will talk about some types of sheathing that you can do yourself, without involving a team of professionals.
For interior decoration of loggias and balconies, all types of wooden lining, plastic panels of various textures or MDF panels are mainly used. When applied as a finishing decorative stone coating, various kinds plaster or tiles, for the base you need to choose good drywall sheets.
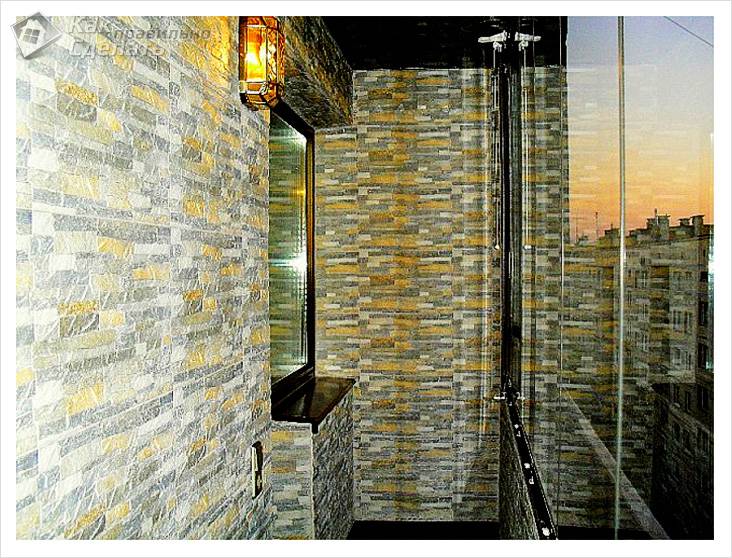
Balconies decorated from the inside with decorative plaster of various structures, block house, cork panels or artificial stone that looks like a natural material look unusually beautiful. These materials are extremely beautiful and of high quality, but their price level is not accessible to everyone.
Advantages of using plastic panels:
- Large selection of textures and colors.
- The material is safe for human health - completely non-toxic.
- Walls sheathed with plastic will delight you with their perfect look for a long time.
- Accuracy and accuracy of the work - a guarantee of excellent quality plating.
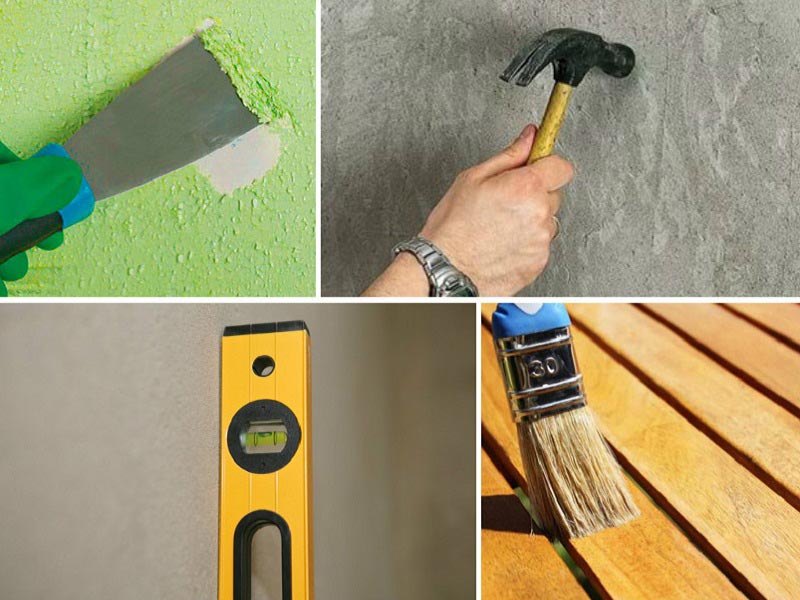
To install plastic panels, prepare a set of tools:
- Hacksaw for metal.
- Drill and a set of drills.
- Level.
- Electric jigsaw.
- Stapler and hammer.
Step-by-step instruction
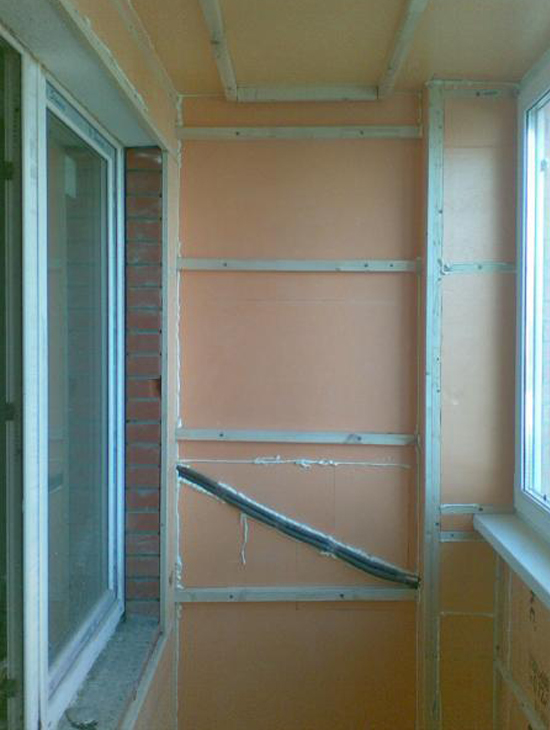
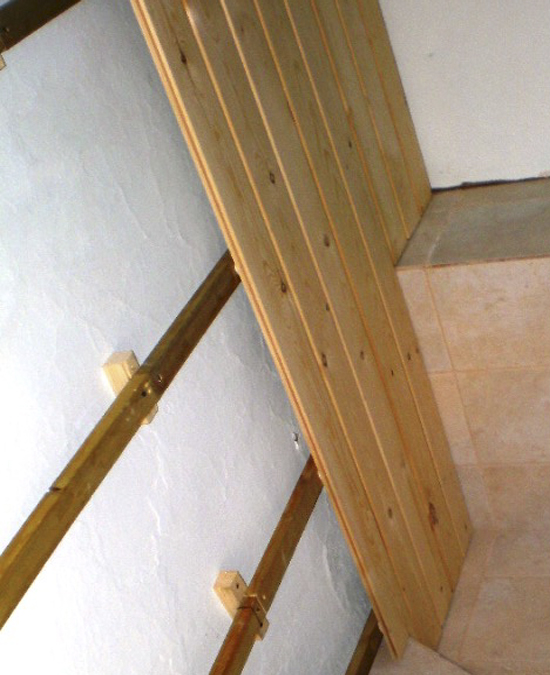
Step #1. Installation of a crate made of wooden bars.
It is necessary to install the crate on the wall in the same plane. To check the quality of the fastening, use the level.
Step #2. Balcony insulation. Between the bars for thermal insulation it is necessary to lay mineral wool or foam boards.
Step #3. Proceed to sheathing a wall on which there are no openings. Start work by installing a U-shaped box with sidewalls of different sizes. The wide side should be attached to the crate.
The location of the box is vertical. The top box is attached to the ceiling and the bottom box is attached to the floor.
It's time to start installing the panels. Bend the first part of the skin a little and insert it into the boxes. Slowly move the skin to the starting box. Using force, slide the skin element into the box. When you hear a click, the panel is in place. Attach with a stapler to the installed crate. If desired, fastening can be done with mounting clips.
Install all panels, completely covering the wall. Fix the last panel with a finishing profile with a larger depth.
Step number 4. Sheathing of door and window openings. The work at this stage is slightly different from the previous step. Install the panels from the opening into the corner. After that, install both U-shaped profiles. Continue work until complete.
Sometimes you can still see small gaps in the corners. Eliminate this shortcoming by using mounting adhesive and a neat decorative plinth. Being engaged in the interior cladding of a room using PVC panels, do not be afraid to experiment, using cladding parts of different colors at the same time
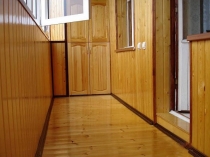
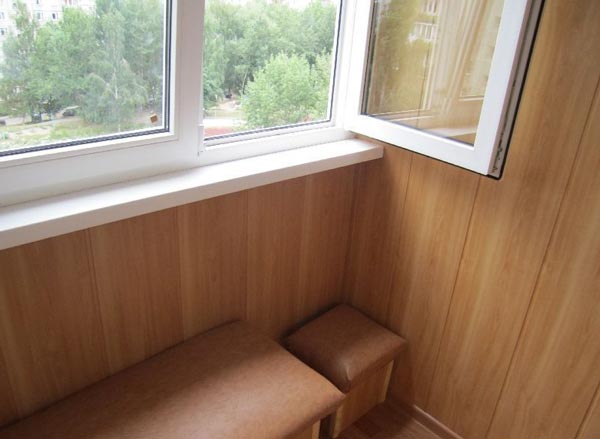
We work with eurolining

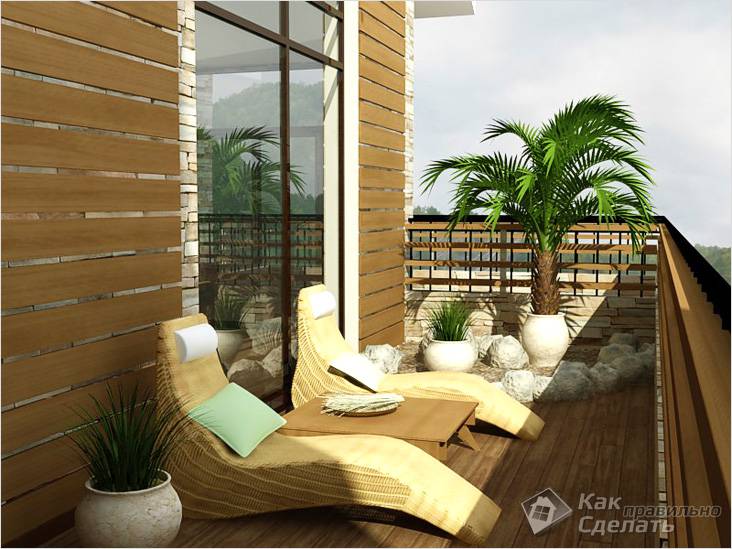
Spaces sheathed with wood are distinguished by special comfort and warmth. There are three types of wood profiles:
- Original block house.
- Excellent quality eurolining.
- Lining of a standard form.
The unusual form of the block house is used much less frequently than other types. Special demand for internal works uses material that meets European standards, made of coniferous wood, oak, ash, linden or alder.
In terms of price level and the best quality, products made of cedar and oak are distinguished. Pine, lime and spruce materials are more available.
The use of pine material is only advisable when the balcony windows are located on the north side. Under the influence of the rays of the sun on the walls of the pine lining, resin fumes begin to stand out.
To work with eurolining, you need a set of tools:
- Fine-toothed hacksaw for wood.
- A set of drills and a drill.
- Miter box.
- Level.
- A hammer.
- Electric jigsaw.
Step-by-step instruction
Step #1. Start with the installation of the crate. Be sure to check the correct location of the bars.
Important! Lathing bars are placed vertically for work with horizontal or diagonal sheathing and horizontally for vertical installation of sheathing.
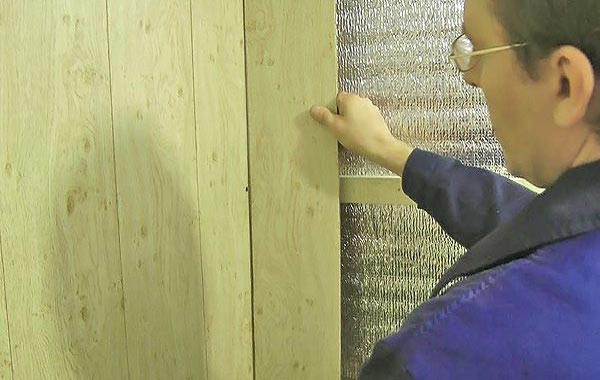
Step #2. Do not forget to lay heat-insulating material between the elements of the crate, and on it a layer of film for vapor barrier.
Step #3. It's time to start decorating the room with eurolining. Sheathing eurolining balcony is not as complicated as it might seem at first. The main thing is the desire to achieve a good result and a little patience.
Choose one corner of the balcony and get to work. The comb, the first part you install, should be directed towards the corner. Use a spirit level to check the correct position of the cladding element. The location of the material is vertical. Using small nails through the bottom of the groove, attach the part to the crate.
Continue installation until the wall is completely covered. Most likely, you will have to cut the last part to the desired width. Bring the cut blade at an angle to the previous one and press firmly. The sheet will definitely fall into place.
Close the narrow cracks in the corners with a neat simple plinth or rail.
Prevent damage to the balcony cladding by fungus. All wooden parts must be treated with polyvinyl acetate putty, which is completely harmless to human health and perfectly protects wood from fungus.
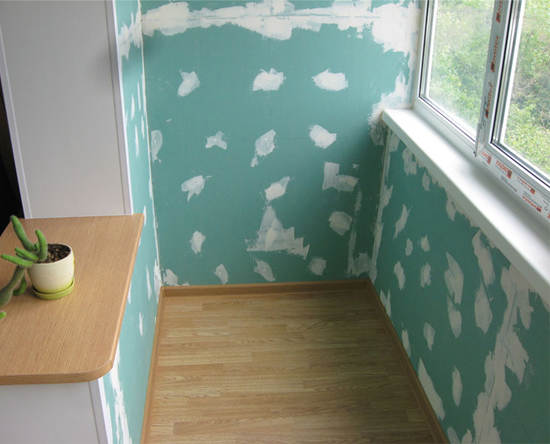
Working with drywall
The amazing ability of drywall to level any surface has made it one of the most popular interior finishing materials. To apply a decorative finishing material to a drywall surface, no additional preparation is needed. The finish coating can be wallpaper of different quality, fake diamond or any type of plaster,
To use drywall for sheathing, a loggia or balcony must be glazed and insulated. To carry out work on finishing the balcony with drywall with your own hands, you need a set of tools:
- Planer and building level.
- Special knife.
- Perforator and screwdriver.
- Scissors for cutting metal.
To fix the sheets, you first need to make a frame from the purchased metal profile. The distance between the frame strips should not exceed 60 cm.
You will need the help of another person to continue working with drywall sheets. The material is heavy and it will be difficult to work with them alone. Fasten the sheets to the frame with self-tapping screws every 20–25 cm. Insert the hats as deep as possible so that they do not interfere with the application of the finishing layer. Check the installation of the first sheet with a level. Subsequent sheets are installed close to the first.
Glue all joints with sickle and apply a layer of putty.
Finishing options for drywall
Simply installed sheets of drywall with sealed seams do not look very attractive. The walls have become smooth, but they are still far from beauty. A final coat is required.
For work you will need:
- Bucket.
- Plaster "bark beetle".
- Mixer for mixing the mixture.
- Plastic grater.
- Metal spatula.
Drywall must be primed before applying plaster good quality primer. Stir right amount plaster and start applying it to the walls with a spatula.
The layer of plaster should be even and not too thick so that you can rub it to the desired texture.
30 minutes after applying the plaster, start rubbing it using a plastic grater. How you move the grater depends on the final result and the pattern on the wall. If you started to rub rotational movements so keep doing it till the end. The treated surface should be without sags with a beautiful even pattern.
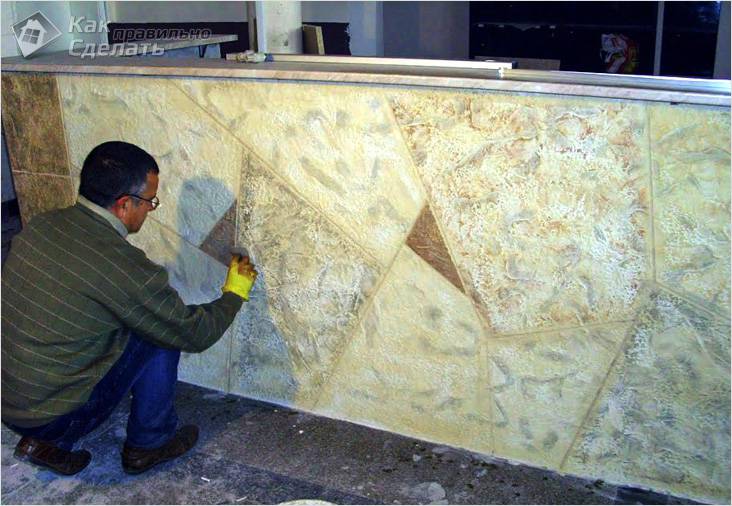
Artificial stone is beautiful
If you want to use artificial stone as a finish, first draw up a project for your new balcony. The drawn sketches will help you achieve the desired result and plan the work with the material correctly. What will your balcony look like? It all depends on your imagination and diligence.
Treat drywall walls with a primer first. For gluing the stone, use a good quality special glue. Apply glue to the back of the decorative material using a notched trowel.
Artificial stone goes well with other decorative materials. The result always pleases with its unusualness and originality. Experiment.
We were talking about different ways covering balconies of a closed type, but apartment owners do not always want to completely cover this small area. In this case, it makes sense to say a few words about the decoration of an open type balcony.
Open balcony - decoration and design
The main difference is the choice of decorative material. The open surface is exposed to the external environment: precipitation, temperature changes and the burning rays of the sun.
The material chosen for finishing should have a high rate of moisture resistance. Such characteristics are tiles and stone. A good option would be to choose plastic panels. Most apartment owners prefer wood panels.
Using natural wood as a cladding will require additional costs from you. Will definitely have to do good protection. In addition to protection, the tree will need more careful and painstaking care.
Open balconies are mostly sheathed with stone. Having spent a decent amount of money once, you will get a wonderful vacation spot for decades.
We told you about different materials and methods for cladding balconies. If you have something to add to the information received from the article, leave your comments. It is very important for us to know your opinion.
Video
From the video below, you will learn how to beautifully and quickly sheathe a balcony on your own.
Photos of balconies sheathed with different materials
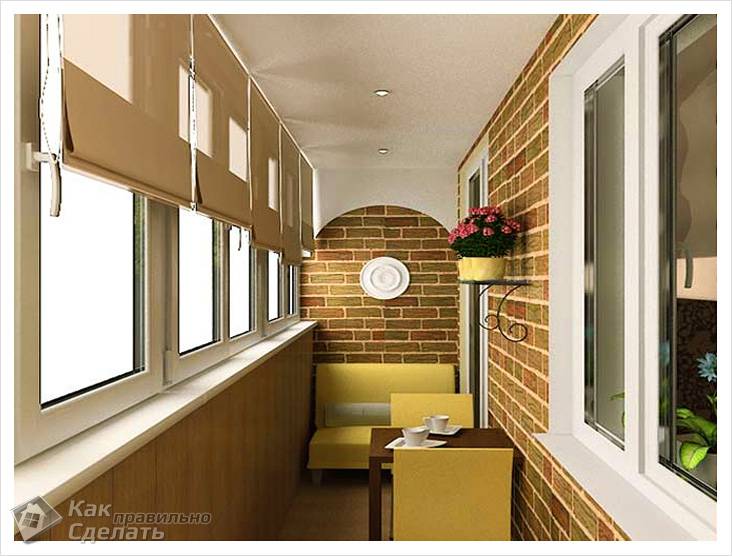
Interior decoration balconies and loggias are an important step towards the transformation of these premises from warehouses. The range of finishing materials today is so great that it is quite difficult to make a choice. And the features of such a room as a loggia dictate their own rules in the design. What finish is best for the loggia, how and how inexpensively and beautifully sheathe the walls - you will find answers to these questions in our article.
Types of interior decoration
The choice of materials for the interior decoration of the walls of the loggia depends on several factors:
- Appointment of the premises of the loggia and its.
- or cold.
- Loggia dimensions.
- Repair cost.

Properly selected materials, subject to their proper quality, will last a long time and will only please the residents of the apartment.
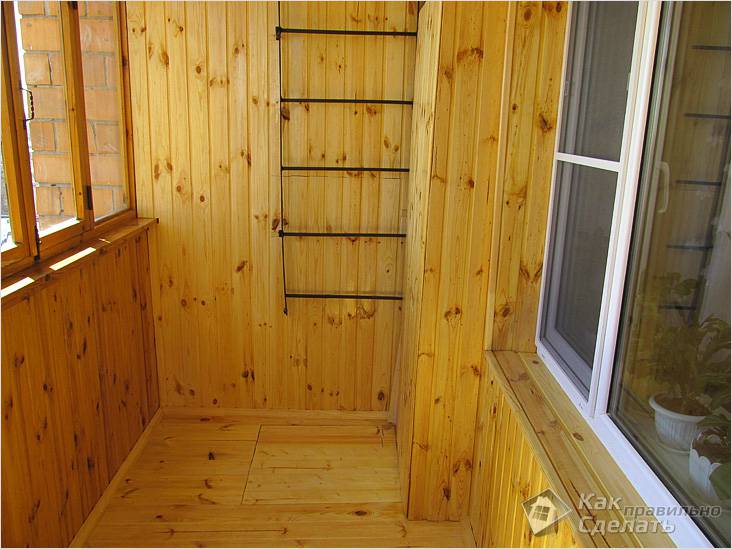
Finishing the loggia with clapboard
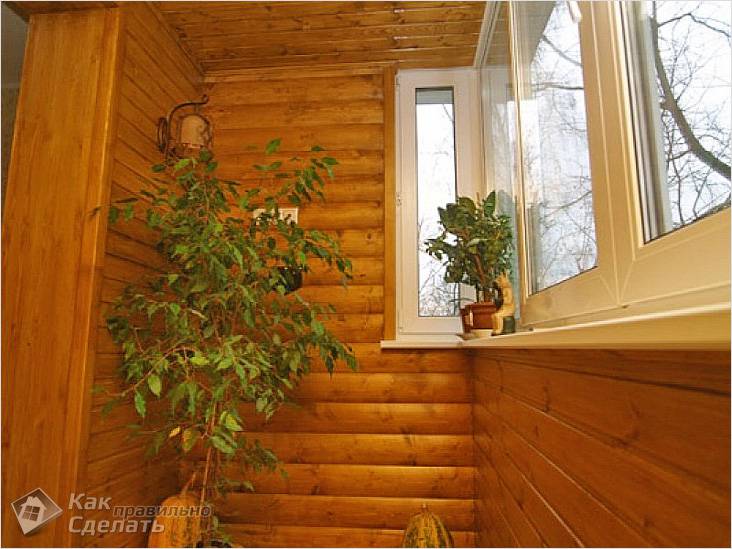
The traditional and fairly widespread material for the interior decoration of the loggia is lining. It is a processed board made of wood of various species. The planks are connected to each other by means of a “groove-thorn” system, which ensures the protection of the seams and easy installation.
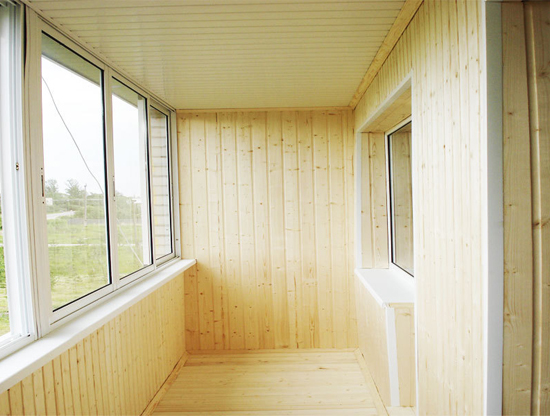
Finishing balconies and loggias with clapboard is very popular
The board is about 9 cm wide and 1.5 cm thick, although elements of any size can be made to order.
There are such types as:
- Euro lining - the same board, but made according to European quality standards. Some types of eurolining have special ventilation ducts on the reverse side. For sheathing loggias, it is recommended to use a material class of at least B.
- Block house - a lining that imitates a rounded log.
The popularity of clapboard finishing is due to high aesthetic and operational qualities. This material is environmentally friendly and has low thermal conductivity, wooden lining is suitable for complex finishing of the loggia from the inside: wall, floor, ceiling cladding.
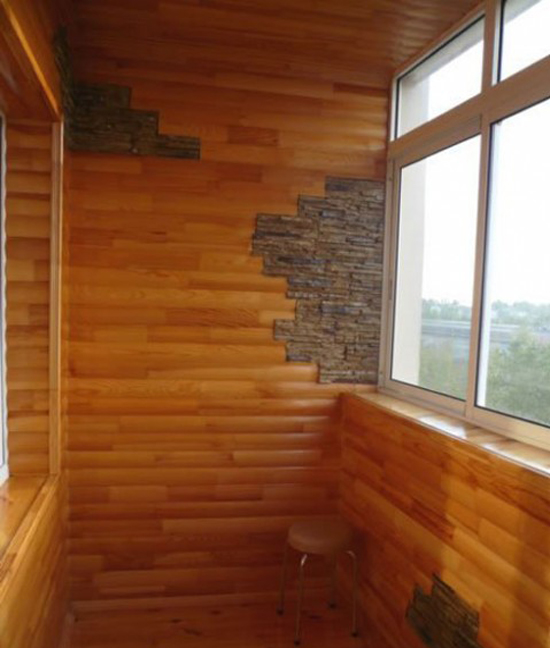
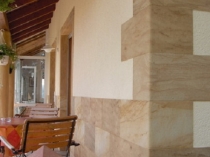
Block house combined with decorative stone- the answer to the question "how to sheathe the loggia inside"
Among the disadvantages of wood cladding:
- The need for protective coatings.
- The possibility of finishing only because the material is unstable to moisture and strong temperature changes.
- Burns out in the sun.
- High price.
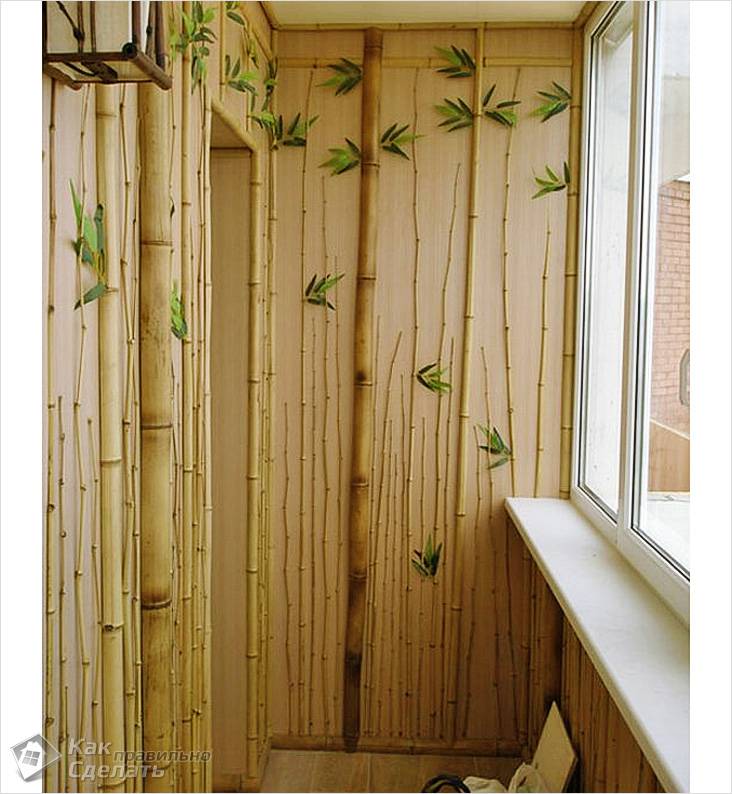
There is also such a type of lining as siding (plastic lining). AT recent times it began to be used everywhere both for interior decoration of loggias and for them.
With the help of siding, you can make the most different ideas finishes
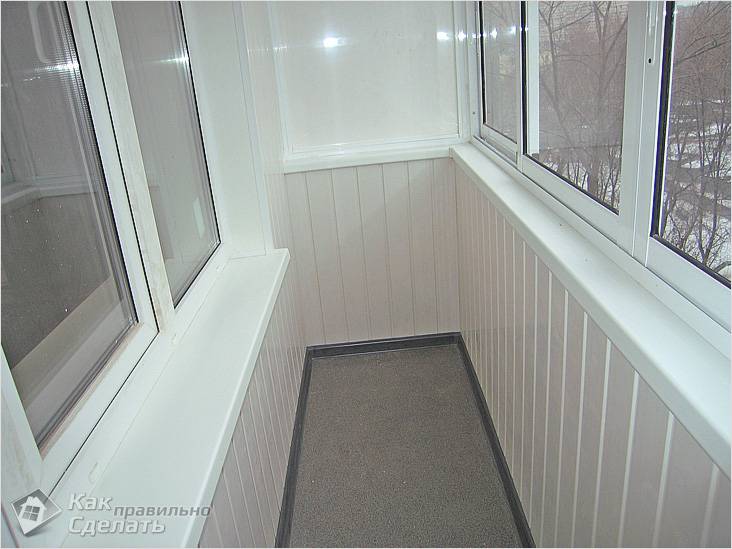
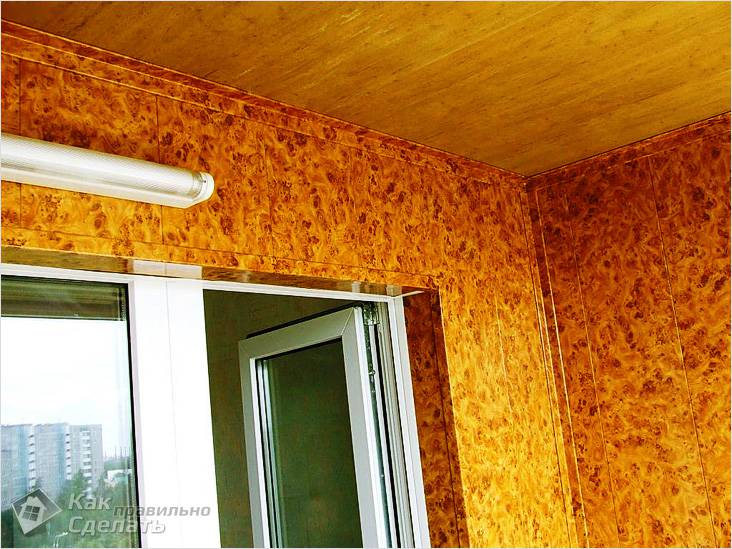
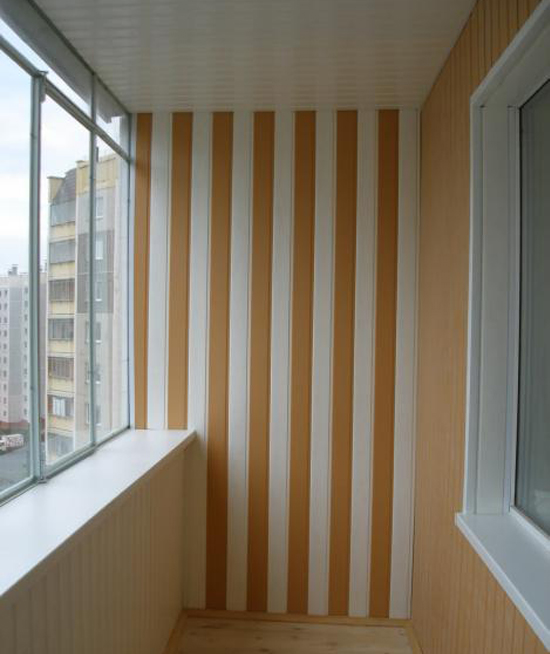
Plastic lining does not need any additional processing and has an attractive appearance. Siding is presented in a wide range color scheme that will allow . This finish is used for any type of glazing, and some types can also be used on open loggias. It does not deform over time, is resistant to temperature extremes and does not fade under the influence of direct sunlight. The installation technology is very simple, and the material itself does not need special care. Of particular note is the low cost of plastic lining.
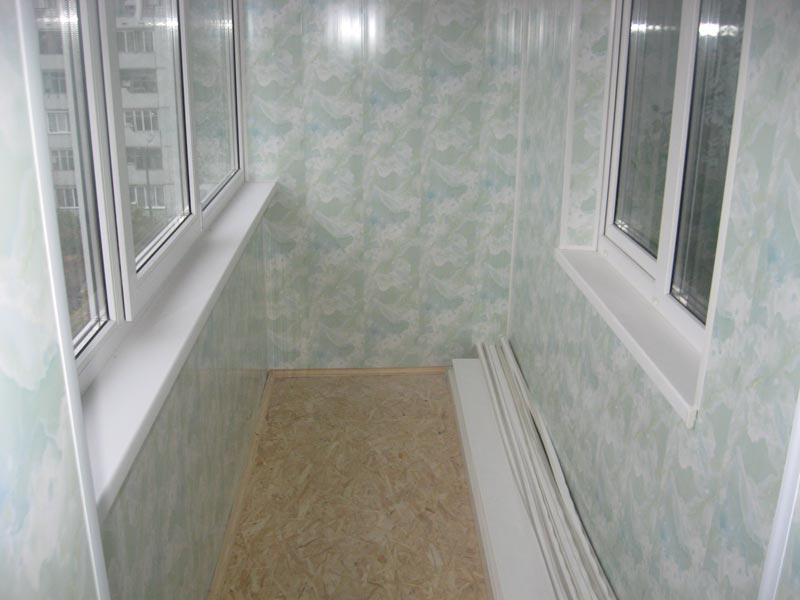
PVC wall panels
Finishing loggias with plastic panels resembles siding. The main differences are the width of the panel (25-30 cm) and the absence of seams during installation, due to which the loggia room becomes more aesthetic.

PVC panels - something that can sheathe any loggia
PVC panels are durable, resistant to negative environmental influences (temperature, humidity, sunlight, etc.), so they are suitable for cladding a cold loggia. They are made of environmentally friendly materials and do not require special care - just wipe them.
Sheathing of loggias PVC panels does not require special skills and can be done by hand in a short time. The cost of finishing with plastic is low, and the range of colors will allow them to sheathe any loggia.
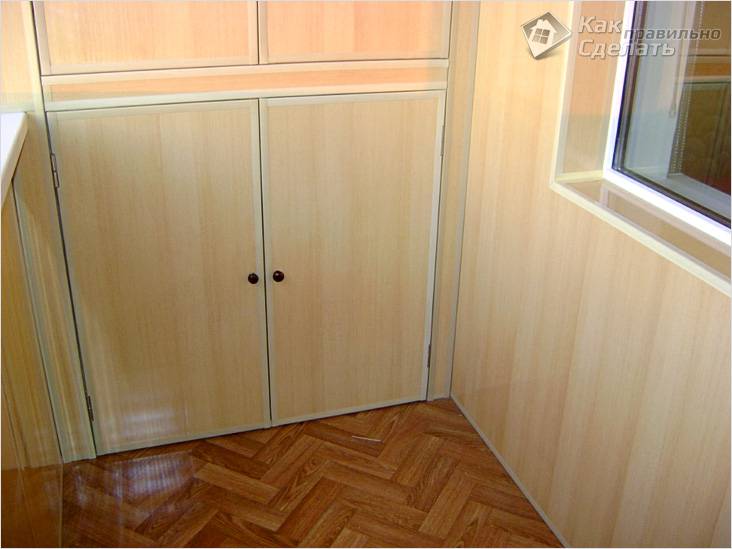
MDF panels
Visually these Wall panels resemble a tree. It is from wood that they are made (dried and pressed wood fibers), but the front side is a PVC film glued to the base, imitating natural wood in structure and color. It is thanks to this film that high performance finishes are achieved. Features of MDF panels are:
- Wear resistance.
- Heat and noise insulation properties.
- Beautiful appearance.
- Ease of installation.
- Low price.
An example of facing a loggia 6 meters with MDF panels
But this finish has a number of disadvantages:
- The panels are unstable to moisture, therefore, before sheathing the loggia, it follows.
- Low mechanical strength.
Interior decoration of the loggia with drywall
Drywall has long been used for finishing apartments, as it significantly speeds up repair work, does not require special preparation of the base, is easy to install and cheap. For finishing the loggia, the photo below, this material is also suitable, but only if it is insulated. In addition, drywall requires mandatory finishing (painting, wallpapering, applying decorative plaster).
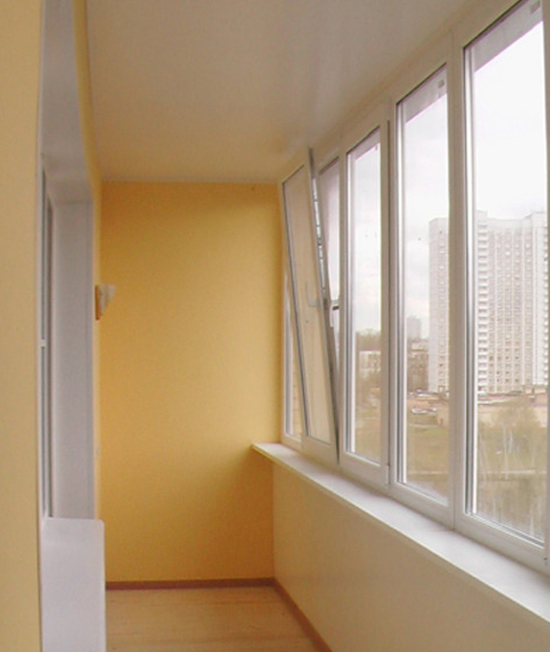
In the photo - the final version of the plasterboard sheathing
For sheathing loggias, moisture-resistant sheets of GKL with a thickness of 9.5 mm or 12 mm are used. Drywall is best suited for finishing or.
Finishing the loggia GKL
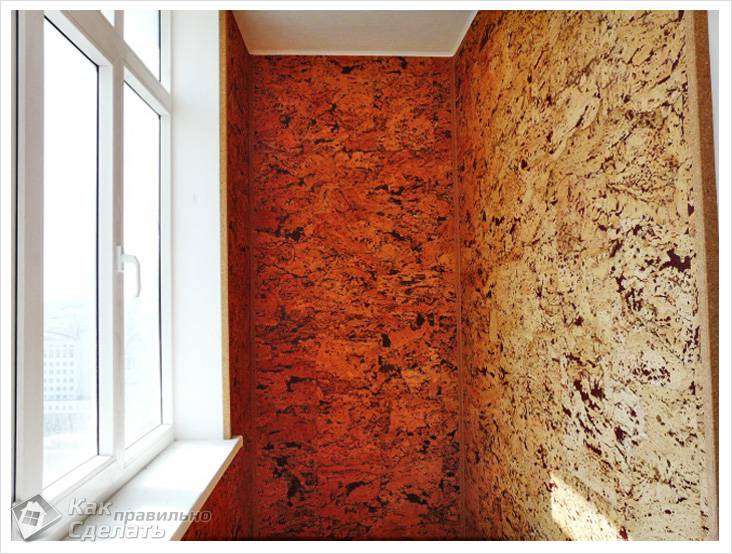
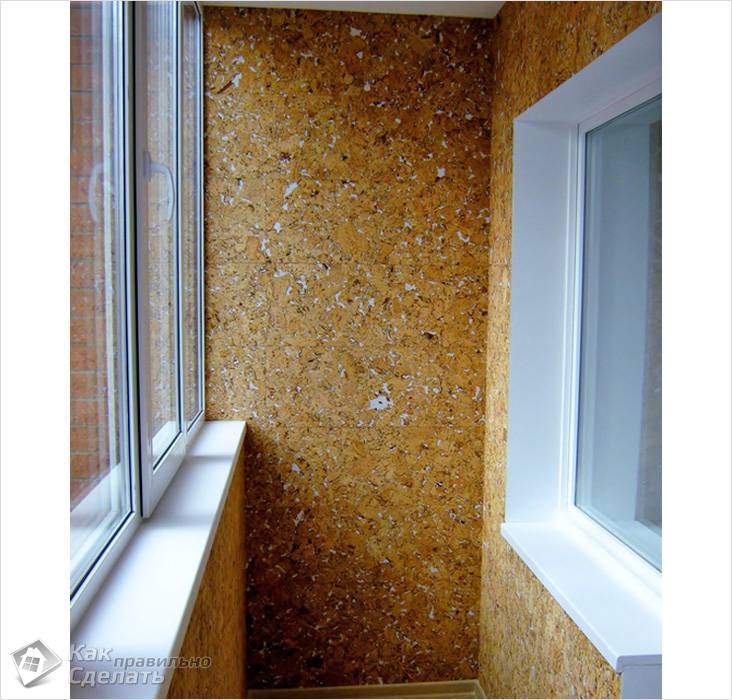
In addition to these materials for and loggias, the photo below also uses artificial stone, ceramic tile, cork. These materials can be used for finishing both warm and cold rooms, they are durable and. But they have a drawback - a high price, which makes their use not so common.
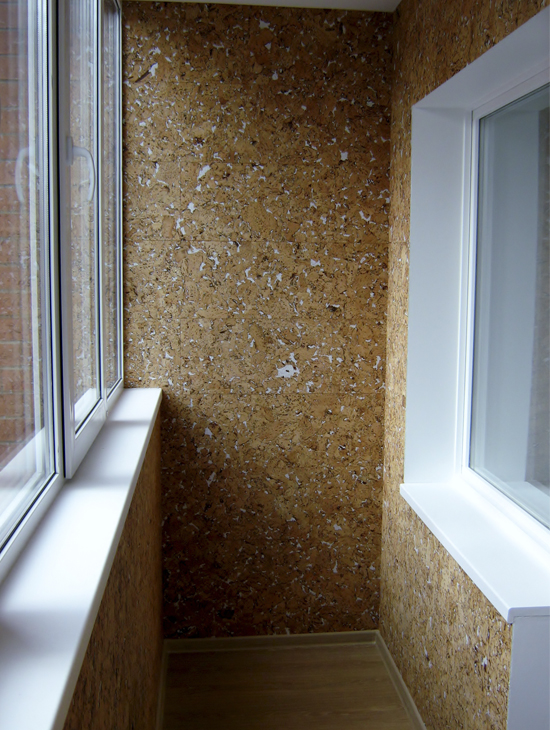
Loggia lined with cork
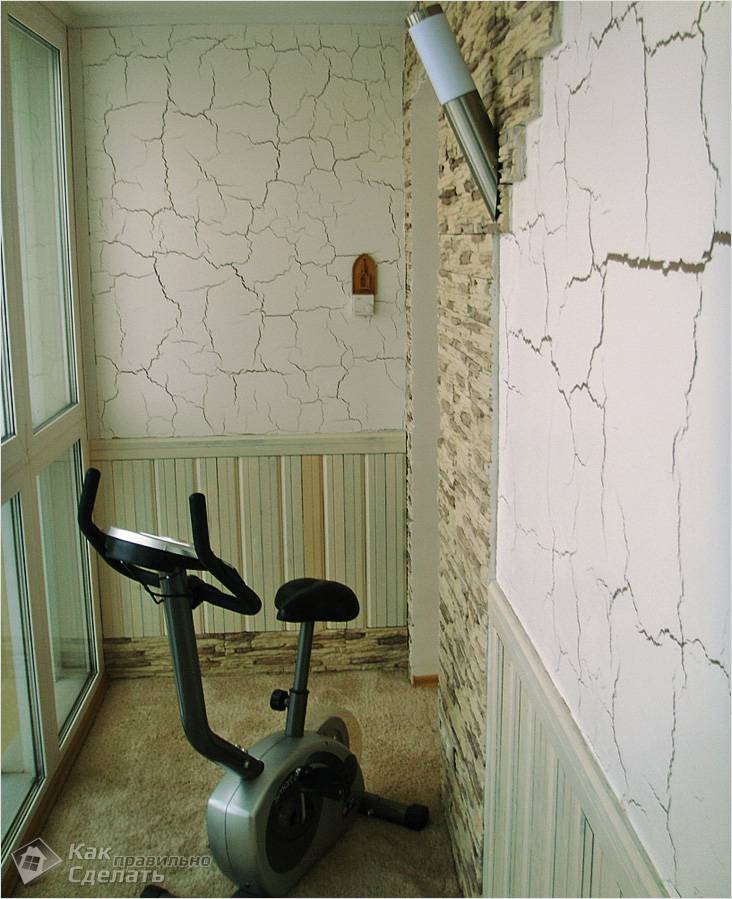
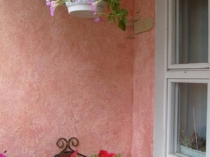
The decoration of the loggia with decorative plaster is also widespread, photo below. It is a durable material used for cold and warm finish, can completely, and its types and application options are so many that unique design interior provided.
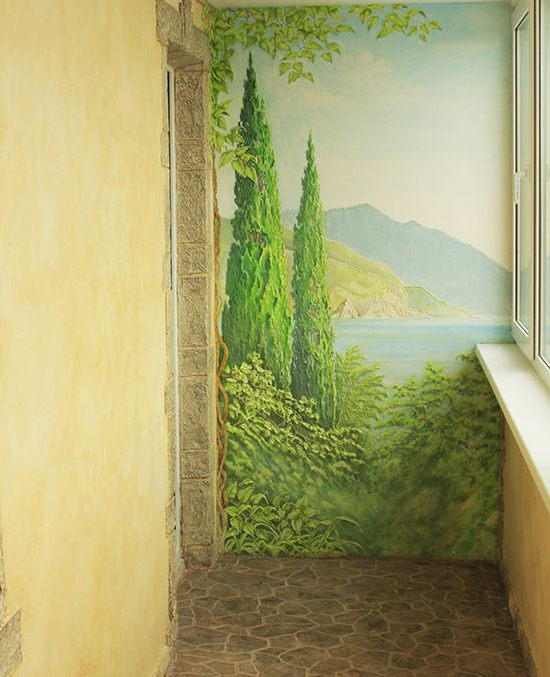
Interior decoration of balconies and loggias with decorative plaster is the basis of a unique interior
Sheathing of the loggia clapboard
Finishing the loggia with eurolining with your own hands is a very simple process, the main thing is to approach it responsibly.
Step 1
It is necessary to measure the loggia to determine the amount required material. The calculation is more convenient to make in square meters. The cladding area is calculated by multiplying the height of the wall by the length. If there are complex sections, then they must be divided into separate rectangles.
Important: The tree dries out over time, which leads to a decrease in the width of the slats, so when buying material, you should give preference to lining with a moisture content not exceeding 12%. In addition, it is better to choose lining from coniferous wood, which are more resistant to decay.In addition to the lining itself, when sheathing, you will need slats for battens, corners and skirting boards for finishing, plastic film for waterproofing, insulation (), and fasteners (self-tapping screws, dowel-nails, kleimers).
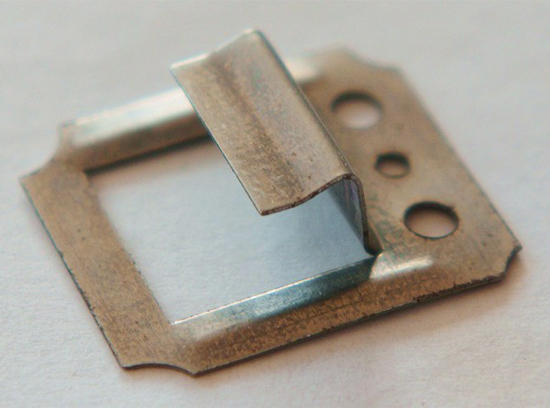
Kleimers allow you to complete the sheathing faster and without damage to the material
Of the tools - a hacksaw, a hammer and a drill, a screwdriver and a level.
Step 2
The wall should be covered waterproofing film, then the crate is fastened. The slats are attached to the wall with dowel-nails parallel to each other at a distance of about 0.5 m. The distances between the slats are filled with insulation.
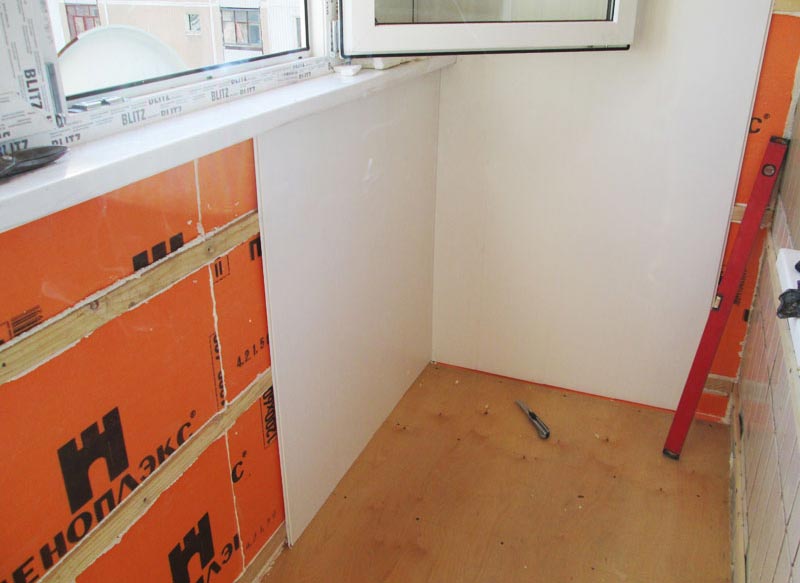
Before finishing the walls on the loggia, it is better to insulate them
Important: If penofol, penoplex or the like are used, they are attached under the crate on top of the waterproofing. And, instead of a wooden crate, it is better to use metal carcass so the lining will last longer.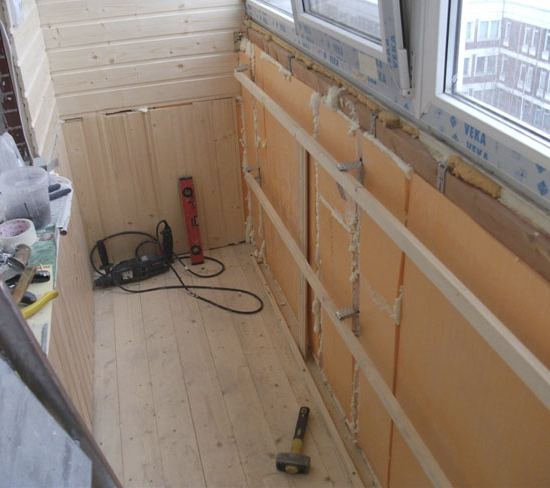
Comprehensive finishing and insulation of the loggia
Step 3
Sheathing starts from the corner. The first board is leveled and nailed to the crate with a groove to the corner.
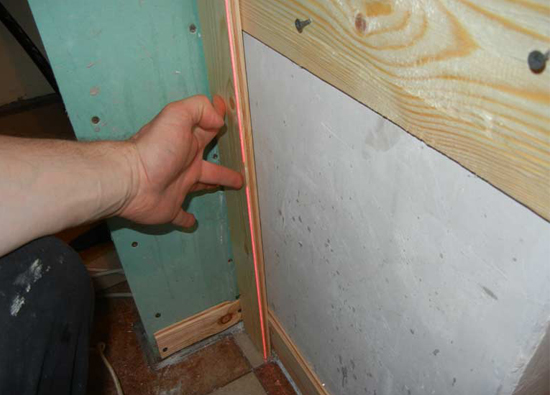
Where to start lining with clapboard
The groove of each subsequent board should fit snugly on the crest of the previous one; each board is attached to the frame by means of a clamp inserted into its groove, which is nailed to the crate.
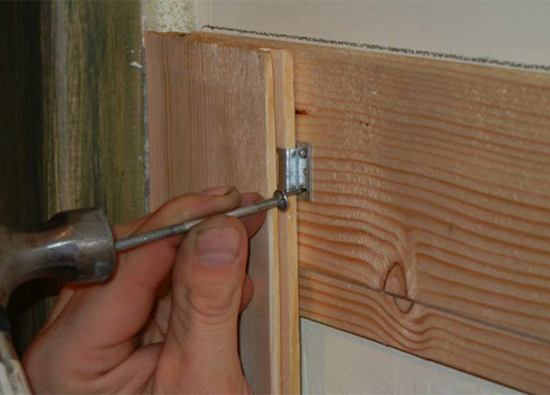
With the help of clamps, you can easily carry out the installation yourself
When the sheathing is finished, all the gaps formed should be filled with sealant, and the joints in the corners should be masked with corners.
The better the planks adjoin each other, the longer the sheathing will last.
In conclusion, the lining should be treated with protective tinting compounds that prevent the formation of rot and mold.
How to sheathe a loggia with a clapboard yourself is shown in the video:
Finishing of loggias with PVC panels
It is easy to sheathe the walls of the loggia with plastic panels; neither special skills nor preliminary leveling of the surfaces are required for this. The installation method described below is characterized by a high assembly speed, wiring can be hidden in the profile, the panels do not deform over time, and their dismantling will not cause difficulties.
Step 1
The loggia is measured to determine the amount of material for sheathing.
Important: The presence of window and door openings on the loggia increases the consumption of materials, so this should be taken into account before finishing.For finishing you will need:
- PVC panels.
- Mounting plastic rails.
- Mounting clips.
- Drill or screwdriver, screws, hacksaw.
Step 2
The rails are attached to the wall with self-tapping screws parallel to each other at a distance of 0.5 m. They can be cut to the required length with a hacksaw.
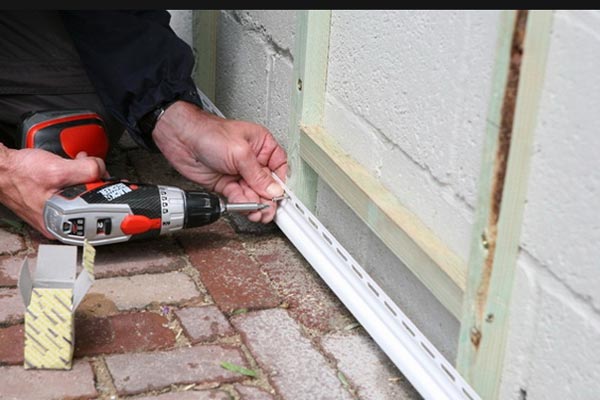
![]()
Fastening rails to the wall
First, an angular profile is installed - this is done by simply pressing the bracket until it clicks.
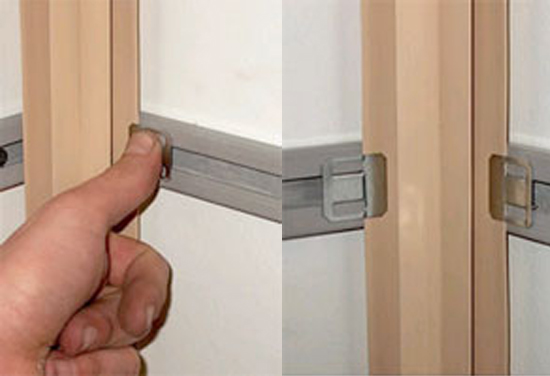
Mounting brackets
The panel is inserted into the corner element, the spike is snapped to the rail with a mounting bracket. Each subsequent panel is inserted into the previous one and is similarly attached to the frame.

Panels are securely attached to each other
At the points of contact with the openings, the edges of the panels should be closed with plastic corners.
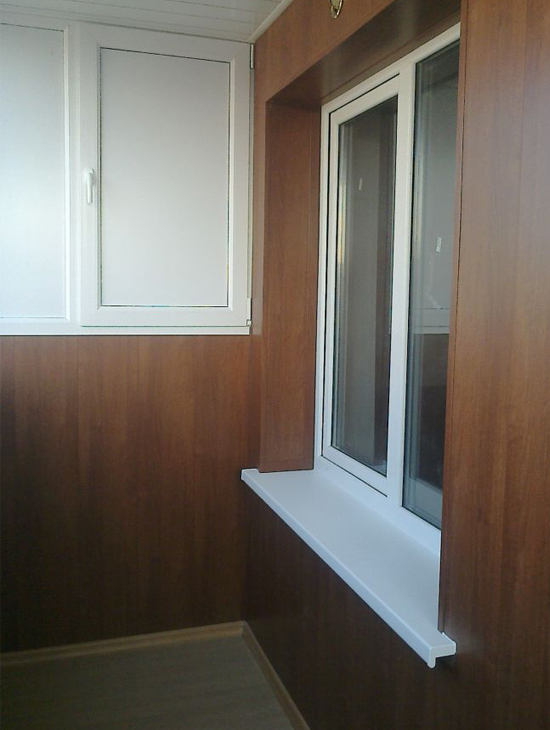
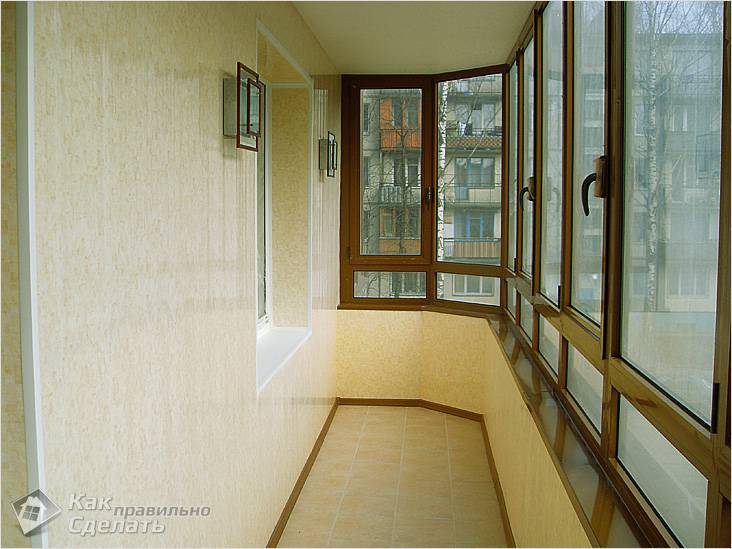
Finishing the loggia with plastic "under the tree"
Important: This method of fastening panels is suitable for finishing loggias without insulation, or if roll insulation is used. In the latter case, the slats are mounted on top of it.Below it is clearly shown how to finish the loggia with your own hands (video instruction) on the crate using plastic panels:
The interior decoration of the balcony is an event that is resorted to to create a comfortable atmosphere in this room and expand the living space of the apartment. Work begins with the choice of material. It should be noted right away that no matter which option is chosen, it is important that the material is of high quality, therefore it is better to refuse dubious purchases in the markets and from hands.
This material is a planed board with natural moisture. There is a subspecies of building material called eurolining. These are better products with profiles of complex geometric shapes, as well as ventilation ducts. At the same time, the material is more demanding on the level of humidity in the room and the quality of the rough surface.
The advantages of lining:
- Environmental friendliness. The material consists of 100% natural raw materials, which does not pose a danger to the health of people of any age category.
- Long service life. On condition correct installation and use lining can last up to 20 years.
- Ease of installation. Products are equipped with a connecting system, so installation does not take much time. A novice master will cope with finishing the balcony in 1 day.
- Additional insulation. Despite the fact that lining is a simple finishing material, it slightly protects the room from noise and retains heat.
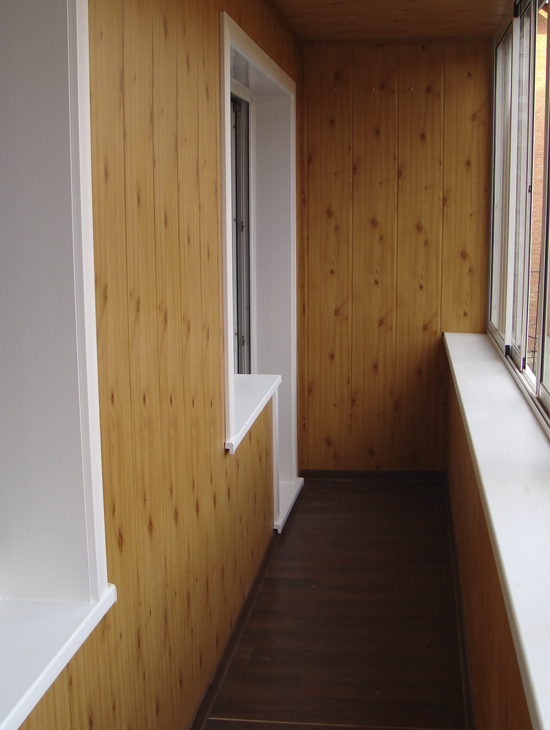
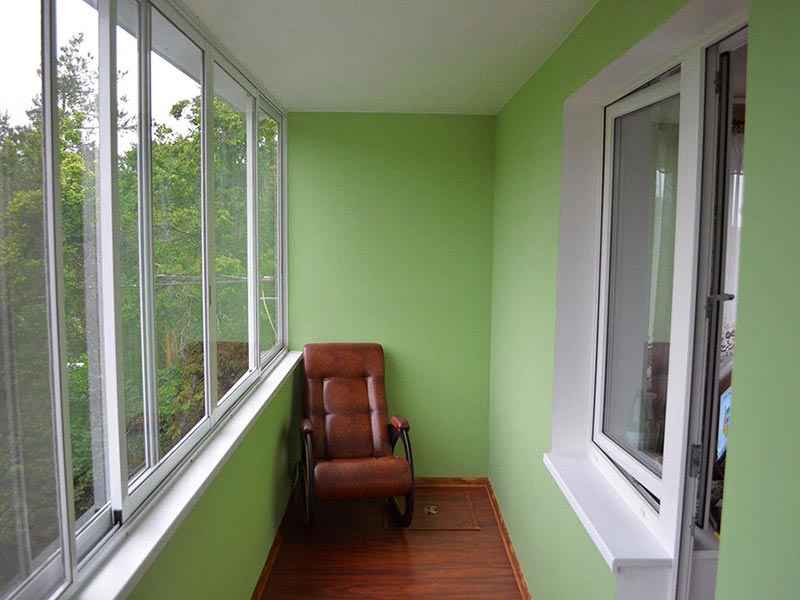
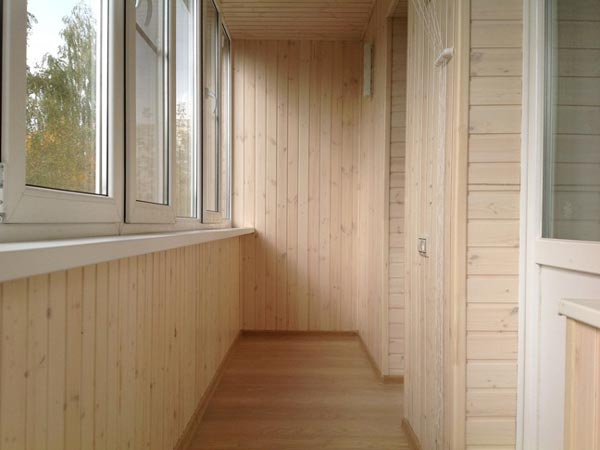 Clapboard is one of the most popular finishing options for balconies and loggias.
 Installation of lining
Before sheathing the balcony inside, you should stock up on the following tools and consumables:
- Screwdriver, hammer drill or impact drill, jigsaw.
- Square, building level, tape measure.
- Hammer or ax, 3 cm nails, dowel-nails up to 6x100, wood screws.
 Tools and consumables required for mounting the lining on the balcony
 Then you need to carry out the following preparatory work:
- Remove the old coating and thoroughly clean the substrate. Tap it with a hammer to identify weak fragments, they must be removed, and the resulting potholes should be covered with a cement-sand mortar or putty.
- Check the evenness of the walls. With a strong blockage, it is recommended to apply a rough plaster layer, on which the lining will subsequently be attached.
- Thoroughly soak each product with a special antiseptic composition.
 Preparatory work before lining installation
 Next comes the installation of the crate. This stage is time-consuming and responsible, so it is worth talking about it separately. First of all, you need to mark up, the lines should be located 50-70 cm apart and 10 cm from the walls. After that, you need to cut the wooden bars and drill holes in them for fasteners in increments of 15 cm. Using dowels and self-tapping screws, the crate is installed on the wall.
Now you can start lining the inside of the balcony with your own hands:
- You need to take the first element, lean it against the crate and fix it on it by driving a nail in the middle of the spike.
- Then you need to take the second element and connect it to the first by inserting the spike into the groove.
- Thus, finish the entire surface.
- Before entering the area near the walls and ceiling, the material will have to be cut with a jigsaw.
On a note! You can also use clamps instead of nails. Then the fastening will be invisible.
MDF panels
For cladding the balcony, MDF panels are also used, which are fiberboards. The modern construction market offers several types of this material: flat products with a protective polymer coating on the front side and panels with embossed patterns.
The benefits are:
- Do-it-yourself balcony cladding will require a minimum of money, time and effort.
- No serious preparatory work is required.
- Behind the panels you can hide electrical wiring or other utilities, you can also lay insulation.
- The material is produced in a wide range of colors and sizes.
 Balcony decoration with MDF panels
 Installation work
Sheathing of balconies from the inside begins with the preparation of the tool and the installation of the crate. It should be noted that this material is somewhat similar to lining, therefore, it requires exactly the same preparatory actions. The only difference is that the panels can be installed on a crate made of wooden slats or metal profiles. The installation process is as follows:
- The first element is installed in the corner. It is attached to the clamp, but if such fasteners were not at hand, then an ordinary construction bracket will do.
- The next panel is installed in the groove of the previous one and fixed in the same way.
- After finishing the entire wall, plugs are installed on the edges of the coating.
 The process of sheathing a balcony with MDF panels on a wooden frame
 Plastic panels
To sheathe a balcony inside with your own hands, sometimes plastic panels are used. This building material is inexpensive and easy to install, so it has gained popularity among domestic users. It is a PVC sheet equipped with a connecting system.
Advantages of plastic material for finishing loggias and balconies:
- Wide range of colors. Thanks to this feature, you can create a unique interior on the balcony.
- Easy care. It is enough to wipe such a coating with a damp cloth or sponge.
- Can last up to 30 years. At the same time, it is resistant to temperature extremes, exposure to water and sunlight.
- Low cost. Plastic panels on the this moment are considered the most affordable option for interior cladding of balconies.
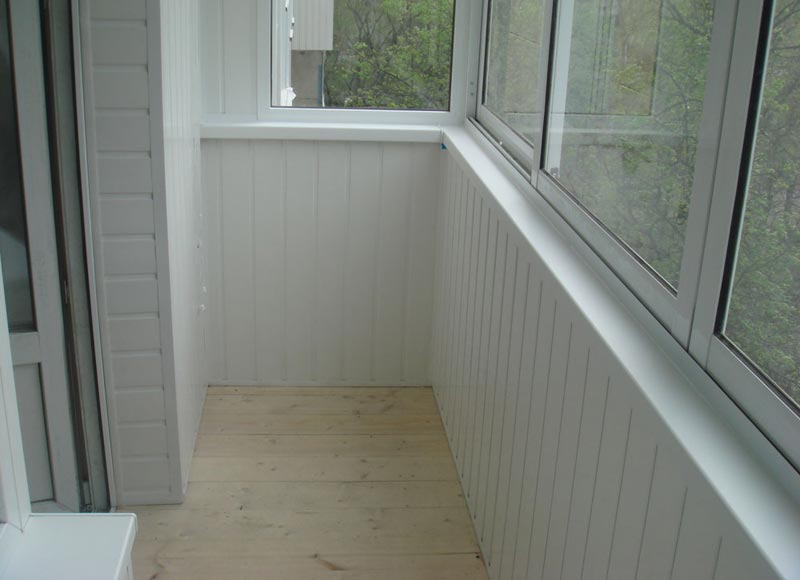
 Plastic panels can be used as a budget finishing material for finishing a balcony.
 Mounting technology
The preparatory work is exactly the same as in the previous cases:
- Removal of old coating and preparation of a rough surface.
- Measurements of the area, marking, installation of the crate.
- Acquisition of material with a margin of 10%.
- Acquisition of sound and heat insulation.
The first profile is fixed with a self-tapping screw on the ceiling crate. You need to start at the top to make it easier to work. After that, you need to fix the profile in the center, which will be the guide. Under the installed elements, wiring is laid, as well as insulation. The entire ceiling is covered with panels using a tongue-and-groove system. The last panel, most likely, will have to be cut. The walls are finished in the same way. Plastic plugs are used to decorate the corners.
Drywall
Sheathing a balcony with drywall is only permissible if painting, decorative plastering, liquid wallpaper and so on. This material is quite popular for interior decoration, despite its fragility and soiledness.
The positive aspects of drywall are as follows:
- Relatively low cost.
- Quick and easy installation.
Important! This material is made on the basis of gypsum, so it requires preliminary waterproofing.
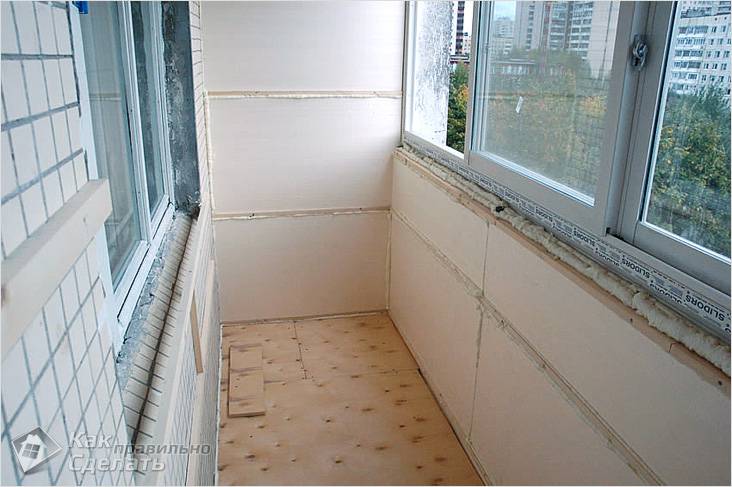
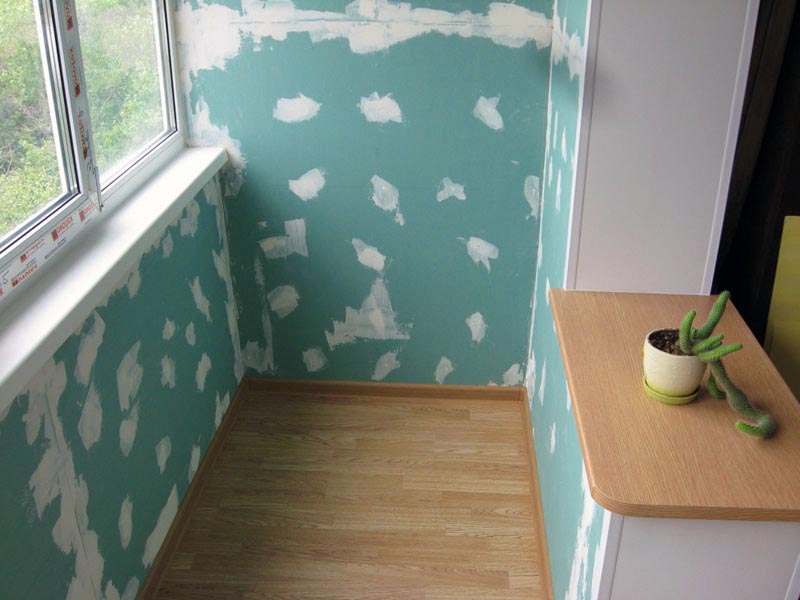
 Drywall is often used for cladding a balcony, but only as a base for decorative coatings.
 Sheathing of balconies and loggias with plasterboard
Before sheathing the balcony with drywall, it is necessary to prepare the surface and install the crate:
- Draw a line in the center of the ceiling and a few perpendicular to it.
- Draw lines along the perimeter of the room at a distance of 5 cm from the ceiling.
- Make marks on the ceiling through 1/3 of the length of the sheet of building material.
- Cut metal profiles to the desired size with scissors.
- Using dowels, fix the rails on the wall, and on the ceiling by means of an anchor connection.
- Starting from the corners of the balcony, install the profiles on the ceiling, and then on the walls with dowels - in increments of 40 cm on the ceiling and 60 cm on the wall.
After that, you can start laying heat and soundproof materials and, if necessary, engineering communications. The cut sheets of insulation are installed between the crate and the rough surface. The resulting design is covered with foil, fixing it with a stapler. Now you can sheathe the balcony from the inside with drywall.
The order of work is the same as in the case of the crate: first, work is carried out on the ceiling, then on the walls.
- The first step is to prepare the material. To do this, the sheets are cut to the required dimensions and chamfered from them (the edge is slightly turned to make it easier to putty the seam later).
- The first element is mounted 20 cm from the corner on self-tapping screws in increments of 15 cm. The hat must be drowned in the surface, but it is important not to overdo it so that the sheet does not crack.
- Similarly, the rest of the sheets are installed on the main area of \u200b\u200bthe ceiling and walls. At the end, small fragments of material are mounted in the corners and begin to putty.
- A primer is applied to the finished coating, and after it dries, a thin layer of putty is applied.
- While the material has not yet dried, a sickle is laid on it and covered with a thicker layer of putty.
- At the end, the surfaces are primed again to prepare for further finishing.
 Balcony sheathed with plasterboard, ready for further finishing
 Siding
Usually this material is used for finishing facades, but it is permissible to use it inside the balcony. Products are made on the basis of vinyl, therefore they have the following advantages:
- Good resistance to atmospheric influences (precipitation, wind).
- The absence of substances harmful to human health in the composition.
- Good level of ventilation, providing timely removal of moisture from under the coating.
- The material tolerates high and low temperatures well, therefore installation work can be done at any time of the year.
- Possibility of spot repairs.
Installation of siding inside the balcony
Preparatory work, tools and consumables are exactly the same as in previous cases. Inside the balcony can be damp, so it is better to treat all surfaces with an antiseptic composition and lay waterproofing material.
Installation of siding begins with the installation of a frame for panels. Wooden slats are stuffed on the ceiling at a distance of 40 cm, on the wall - 50 cm. Cross slats are mounted at a distance that is 5 cm less than the length of the element. The crate is attached to dowels.
 Before installing the siding, it is necessary to erect a wooden frame and lay waterproofing material
 Should know! Before starting the installation, it is recommended to treat the crate with an antiseptic.
Then the heater is installed. A thermal insulator is mounted in the formed voids of the frame and fixed with a waterproof film. As a result, the balcony will turn into an insulated room.
Now consider how to properly sheathe a balcony with siding. First of all, special guide profiles are mounted on the crate, after which the siding is cut to the required size using metal shears. There is no need to make indents, the first panel is placed right in the corner and secured with a self-tapping screw. For its wide part, the tongue of the next panel is brought in and also fixed. Thus, they trim the entire area. At the end, plugs are installed on the corners and edges of the coating.
 Installation of special guide profiles for siding
 Sandwich panels
This material has a three-layer structure. The outer layers are made of metal, and the inner one is a heater, for example, mineral wool. Sandwich panels are a popular option for finishing a balcony due to the following features:
- Safety and environmental friendliness.
- High rates of heat and sound insulation.
- Light weight, which reduces the load on the balcony and makes installation easier.
- No need for further finishing.
- Pathogenic microorganisms cannot develop on the surface.
 Sandwich panels are often used for finishing a balcony due to their sound and heat insulating properties.
 Panel installation
- The installation process begins with fixing the fasteners: internal corners and final parts on the crate.
- Preparatory work is the same as in the case of the above materials.
- If the panels are planned to be mounted up to the ceiling, then the first thing to do is to install a plinth at the top of the crate.
- The first panel is installed on a metal or wooden frame in the corner closer to the ceiling. It is fixed with a self-tapping screw, after which the next element is inserted into the groove. The rigidity of the structure is ensured by a reliable tenon-groove connection, so you can do without additional fastening of each part with self-tapping screws.
- Before installing the next element, it is necessary to check the evenness of the installation of the current one. It is also important to ensure that gaps and backlash do not form.
- After finishing the entire wall, it is necessary to install additional elements on the edges and external corners of the material.
- The design is checked by the building level, after which it can be operated.
Conclusion
The better to sheathe a balcony inside, each owner will decide for himself. The above materials do not differ much in cost, with the exception of sandwich panels, since they already have insulation. The balcony area is small, which also has a positive effect on the cost of work. It doesn’t matter what exactly will be chosen as the material for finishing, the main thing is to follow the above recommendations and do not forget to check the correct installation of products by level.
Loggia decoration
The need for additional space leads to the release of old and unnecessary rubbish that has accumulated over the years on a balcony or loggia. With the advent of free space, it is worth thinking about repairing and choosing desired material, suitable for interior decoration of loggias, not forgetting about the insulation of external walls - a guarantee of comfort in the winter. There are many types of heat insulators, choosing them, the degree of moisture absorption is taken into account to avoid further rotten walls. The main factors that you need to rely on when choosing a material are practicality, convenience, a guarantee of reliability and, most importantly, not a high price. Materials used during finishing:
- OSB boards,
- panel MDF,
- drywall sheets resistant to moisture,
- pvc panels,
- lining made of wood.
Plastic is a leader in building materials, still popular, low cost carries good insulation, easy to install, a wide selection of colors, no cleaning skills are needed. It has become fashionable now to sheathe loggias with natural wood materials, it is almost impossible to just buy them, such panels are made to order and at a high price compared to plastic.
Balcony decoration
An important factor in the repair is the floor covering on the balcony, most often they resort to using:
- ceramic tiles - despite the durability, laying will take longer, wet technology is used,
- linoleum - the option is more practical, immediately after the flooring is ready for use.
The cost of finishing balconies in Moscow will directly depend on the material chosen, since sheathing with simple chipboard or fiberboard plywood can be inexpensive. At the same time, you get a lot of advantages - saving your time and finances, trusting the repair of a balcony or loggia to one company, you get a full range of services.
Finishes:
- cold - the minimum amount of not very expensive material;
- warm - upper class, complete set on all technologies.
The practicality of the room plays an important role, but design is an integral part of the whole process. To recreate the elegant style of Provence, it is enough to use plaster for decoration by adding elements of brick or stone, yes, this option is not cheap. When plasterboard sheathing, you can increase the flight of your fantasies - wallpaper, paint, tile, painting.
Turnkey balcony
Finishing a turnkey balcony includes:
- Updating the exterior material of the balcony - siding is used, the pleasure is not cheap, but strong and durable.
- Installation of double-glazed windows - the climate in the living area is taken into account. . Warming - attention is focused on the upcoming load on the floor.
- Internal work - wall, ceiling, floor cladding. Interior decoration affects the coziness and comfort in the new room.
- Completion - the design of the room.
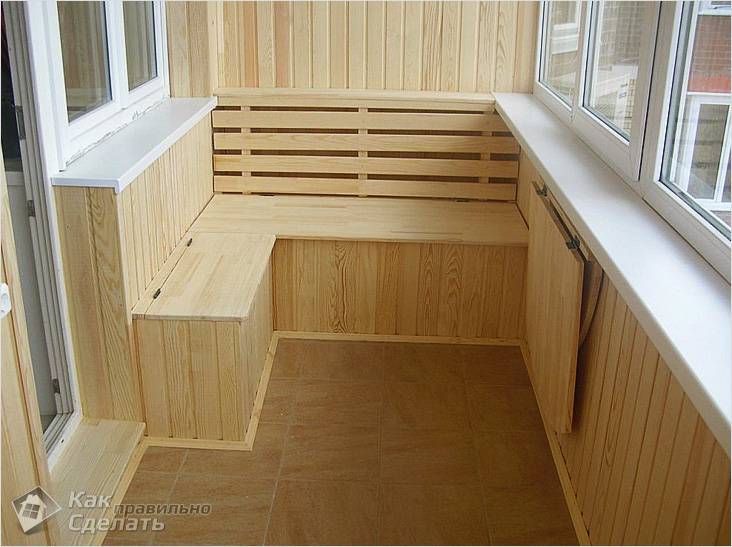
With a strong desire, you can install a lot on the balcony additional equipment- light, clothes dryer, shelves and cabinets. For this, the fantasy of the owner of the balcony should already work.
A lot of unnecessary things are stored on the balconies, for their convenient configuration, you can use:
- plastic cabinets or frame, built-in, they are made specifically for the size of the loggia or balcony,
- curbstones or cabinets made of chipboard, they are initially ordered at special furniture manufacturing enterprises, and assembly is already taking place on site.
The strength and convenience of the frames are much inferior to products made of chipboard. The structure of the frame is subject to distortions, loosening, damage during transportation, more expensive, but "furniture" chipboard is better.
turnkey loggias
If the parameters of the loggia do not allow you to repair it yourself, then Rehau specialists will help you to decide on the turnkey loggia service, visit the website and read the company profile, the price for the service you have chosen is calculated immediately. It is worth remembering that even expensive and high-quality materials in the hands of a non-professional usually give bad result. The subsequent work with the loggia depends on the finishing, you just need to trust the hands of a professional. You can make an opinion about the work of the company yourself, according to the reviews of former customers.
Price list
|
Types of work on finishing and insulation of loggias |
The cost of work with the artist's material |
The cost of work with the customer's material |
||||
|
CONSTRUCTION OF WALLS AND FENCES |
||||||
|
Manufacturing and installation of roofs (truss, corrugated board) |
From 2500 per tree frame |
Up to 5000 for an independent metal frame |
||||
|
Foam block masonry |
||||||
|
Frame made of timber 70x50 under AL glazing (treated with antiseptic) |
||||||
|
Frame made of timber 100x50 for PVC glazing (treated with antiseptic) |
||||||
|
Finishing with galvanized sheet from the side of the street (slots along the parapet) |
||||||
|
Finishing with galvanized corrugated sheet from the street side |
||||||
|
White vinyl clapboard trim from the street side |
||||||
|
Finishing with colored siding from the side of the street |
||||||
|
Dismantling of existing finishes, furniture, glazing without saving |
||||||
|
Cut of metal structures |
||||||
|
Installation of the subfloor (timber, plywood or spool board) |
||||||
|
Installation of the subfloor (beam, insulation, moisture-resistant plywood 17 mm.) |
||||||
|
Raising the floor level over 80 mm. |
||||||
|
Europol (beam, insulation, expanded clay, chipboard, rise by 50mm) |
||||||
|
Raising the euro level of the floor for every 50 mm. |
||||||
|
DSP screed |
||||||
|
Laying tiles |
||||||
|
Linoleum flooring |
||||||
|
Laminated parquet flooring |
||||||
|
Installation of skirting boards |
||||||
|
Installation of a warm infrared floor under the laminate / thermostat |
||||||
|
Wall and ceiling decoration with laminated panels made in the USA |
||||||
|
Finishing walls and ceilings with laminated panels made in RUSSIA |
||||||
|
Finishing walls and ceilings with MDF panels |
||||||
|
Wall and ceiling decoration with vinyl clapboard (white / color) |
||||||
|
Finishing walls and ceilings with sandwich panels |
||||||
|
Finishing wooden clapboard PINE (class "A" / class "Extra") |
||||||
|
Wall decoration with decorative stone (on top of drywall) |
||||||
|
Finishing walls and ceilings with plasterboard |
||||||
|
Finishing plastic slopes from the side of the balcony / loggia |
||||||
|
Penofol insulation |
||||||
|
Foam insulation (20mm) |
||||||
|
Installation of plastic window sills, thresholds |
||||||
|
Installation of electrical wiring (up to 20 r.m.) |
||||||
|
Installation of a spotlight |
||||||
|
Installation of customer's lamp |
||||||
|
Switch mounting |
||||||
|
Socket installation |
||||||
|
Manufacturing of built-in wardrobes |
||||||
|
Manufacturing of built-in cabinets |
||||||
|
Installing the customer's countertop |
||||||
|
Installing a ceiling dryer |
2000 by JIMI (Italy) |
|||||
|
Finishing fire hatches, with the possibility of their use according to appointment. Ceiling / floor |
||||||
|
Departure of the manager for measurement and calculation |
Moscow - Free. |
M.O. up to 70 km from MKAD - free of charge |
||||
|
Delivery of material to the customer's facility, taking into account the rise to any floor |
Moscow - 2000 rubles. |
M.O. up to 50 km from MKAD - 2500 rubles. |
||||
Additionally*
- Window sill Crystalit 3000 per 1 sq.m.
- Danke window sill 4800 per 1 sq.m. .
- Window sill Muler 3000 sq.m.
- Finishing with slopes together with materials 650 m.p. panel house, 750 m.p. brick house, 850 Stalinist house.
- Installation of PVC and Aluminum glazing: panel house 900 rub. , 1000 rub. , brick house, 1100 balcony, loggia.
- Installation of a window sill and a low tide on an installed structure is free of charge, on a previously installed product 200 rubles. for m.p.
- Free installation of mosquito nets.
- Covering furniture with a protective film from debris in one room 500 rubles. , garbage removal to the landing - free of charge, in a container 500 rubles. for one design, recycling (garbage removal by the contractor) up to 2 cubic meters. 4000 rub.


