When I first wanted to do the installation myself, everything seemed very simple. But in the end I had to redo everything, but I photographed the results of my efforts in order to show my mistakes by example. Today I will tell you how to install an LED strip with your own hands on the ceiling or kitchen, I think it will be clear to both the child and the pensioner.
To avoid repeated alterations, carefully calculate the lighting project. If you have any doubts, it is better to once again consult with a specialist. Learn from the mistakes of others, not your own.
Plasterboard ceiling installation video
In the video clip, a colleague will tell you a diagram of how to install it on a plasterboard suspended ceiling. It will show the dimensions of the box and the side for laying the diode tape.
Mounting types
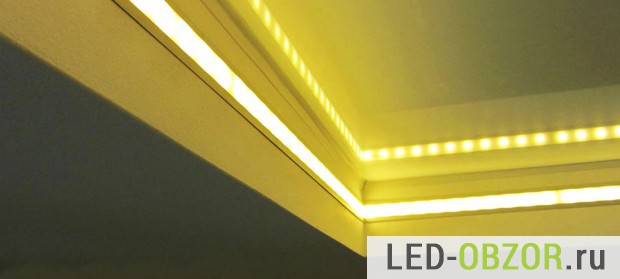 An example of an overhead method, type No. 2
To ensure that LED lighting does not blind and is safe, 3 mounting methods are used. The color scheme of the room plays an important role, light reflects, dark absorbs. My apartment is not located on the sunny side, so the design had to be made light, only the laminate on the floor is dark, it eats up part of the light.
Method number 1
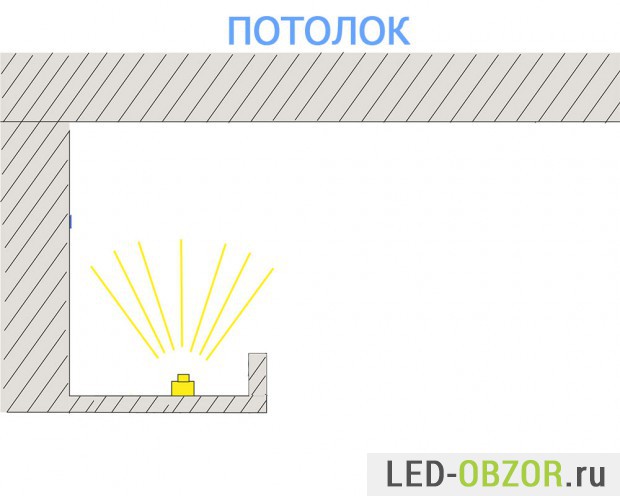 Placement with light reflection
The luminous flux is directed upwards and then reflected downwards. Works well on a white ceiling or stretch. Its role is played by the gloss and matte finish. The ability to reflect light is best checked with a luxmeter on site to find out a more or less accurate percentage of light lost. Here you will also lose up to 50%, if measured by the illumination of the floor. If you want to reduce the percentage of reflection losses, then opposite the led diodes you can paint with reflective paint. Or you can cover it with a colorless varnish with a reflective pigment.
Most often, this method is used when installing on a regular or two-level. The place of installation depends on your imagination. I have seen design projects where LED lights fastened inside the tension, the diodes shine through the film, it turns out they shine like stars.
Method number 2
The tape is installed in an aluminum or plastic box with a matte diffuser, as in LED lamps. Depending on the transparency of the diffuser, you will lose from 20 to 40% of brightness on it. In addition, in a closed volume, the heating of the LEDs will be stronger. The box can be installed on the wall and ceiling.
Method number 3
Medium option, part is reflected and passes directly
A compromise between the two previous ones. surface-mounted aluminum or plastic profile glued to the wall so that part of the light directly enters the room, part is reflected.
If you are designing the main lighting, and not additional lighting for the chandelier, then it is better to install the second way. The advantage lies in the lower loss of luminous flux. Matte diffuser delays from 20 to 40%. If you choose a good one, then you will lose only 20% of the light, and with reflection 50%. You can avoid losing 20% brightness if found with a prismatic or fluted reflector. This one is used on LED lamps Armstrong, about which I wrote a review. It practically does not reduce brightness and there is no glare.
Installation in the kitchen, video
A colleague will tell you in detail how to mount the backlight of the working area in the kitchen. A surface-mounted aluminum profile with a matte cover is used. Instead of a profile, you can use a plastic cable channel, it turns out 20 times cheaper. In addition, it is not necessary to close the LEDs if the height of the edge of the profile is sufficient to close them from your eyes. The only exception is children. Due to their small stature, they will see diodes if they come close to the kitchen countertop.
An example of a bad installation
A sample of how to fix it is not necessary, it has peeled off in places
The diode tape on the coil sometimes bends in waves, it must be carefully straightened. Otherwise, uneven areas will peel off.
Since I did not put it in a box, and the LEDs are clearly visible, these places stand out strongly from the rest, it looks absolutely terrible. Repeated attempts to fix these sections to the surface of the locker did not bring success, it still falls off. Complete dismantling is required, cleaning the surface of the laminated chipboard from the remnants of the adhesive layer, isopropyl alcohol does a good job of this. We buy a good expensive 3M adhesive tape of a suitable width, and stick it on the cleaned base of the tape. Complete with adhesive tape or sold separately activator wipes to increase surface adhesion. Simply put, what would stick to the surface better. Such an activator is quite poisonous, so use it very carefully.
Average prices for installation and installation
Did you find out indicative list works, now it remains to make a decision, install it yourself or invite a master. I will give a table of average prices for installation work. The cost may vary depending on the region.
Now a reader has contacted me, one company has calculated the main lighting project for an apartment with an area of 105 squares. The cost was 600 thousand rubles, it looks like an elite lighting project, like in a presidential suite. Although the client was interested in the project that was optimal in terms of price and quality. Organizations can sell you an Italian design profile at a huge price and prestigious components. Be careful, consult independent experts.
Periodically, innovative materials for the construction, installation and decoration of an apartment appear on the market. Special attention in the design of the room today is given to ceilings. Modern lighting fixtures are successfully used to decorate them.
New types of lighting
Modern fixtures include:
- duralight;
- fluorescent lamps;
- neon lamps;
- LED strips.
Each of them has its own advantages and disadvantages. Let's take a closer look at LED strips.
LED strip: what is it, advantages
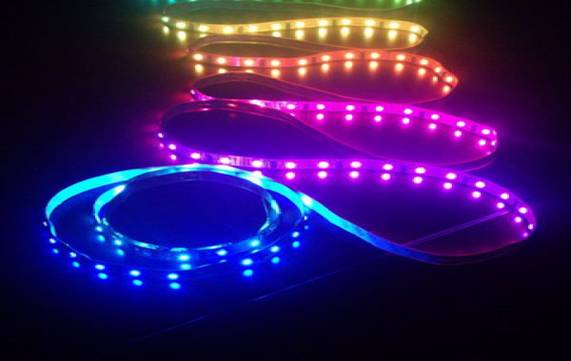
The LED strip is directly a strip of flexible material, the base of which has fixed LEDs. As a rule, two main types of LEDs are used for its manufacture:
- SMD 5050 (5060);
- SMD 3528 (3028).
5050 LED fixtures cost an order of magnitude higher, but have higher power. From a visual point of view, the fixtures also differ from each other. They can be located in different ways, namely with different densities. With an increase in the number of diodes, the brightness also increases.
An important advantage of LED lamps is their ease of installation. One more feature they have a low cost. It should also be noted that the market has a huge selection of LED devices of various colors and shades. The advantages include a long service life of the tape.
Preparing for installation
The installation includes such milestone as direct preparation for installation. It is necessary to determine the density with which the lamps will be located. To create a basic lighting system, you need to choose LED models such as SMD 3528 (with a density of 120) or 5050 with a density of 60.
Next, we determine the footage and power supply of the system. For this, calculations are made of the perimeter of the area on which the backlight will be placed, the area is calculated. The next step multiplies the power consumed by one square meter to the illuminated area. What kind of power supply is suitable for installation in this particular case, sellers can tell at the time of purchase. Directly on the tape itself marks the places for the cut. Usually these are pieces of three LEDs.
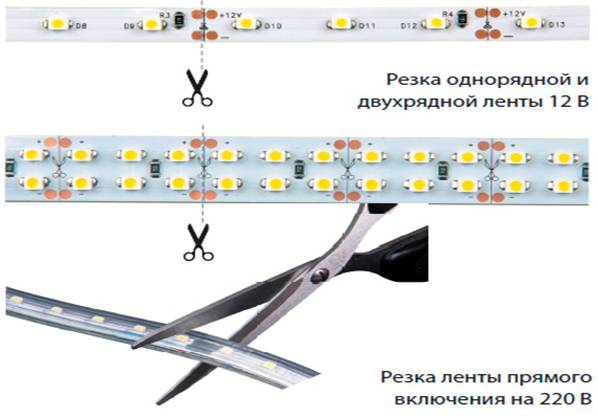
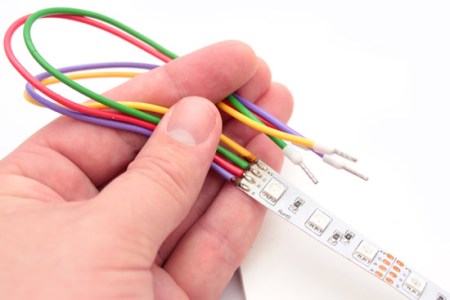
The soldering of a simple strip occurs in accordance with "+" to "+", "-" to "-". If RGB models are used, the contacts are soldered in accordance with the marking.
The wires that come directly in the kit are considered not entirely reliable for installation, so they are often soldered. For these purposes, stranded lugs with a cross section of 0.75 mm are used with fastening at the opposite ends.
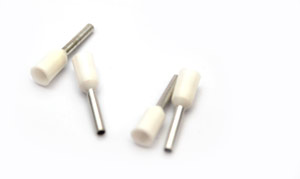
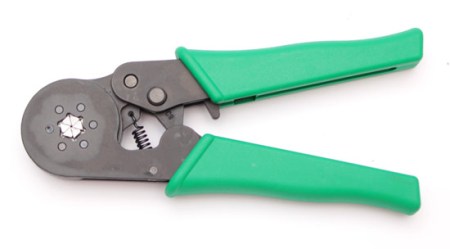
To install the tips, only special tools are used - clamps. The use of conventional pliers is highly discouraged.
This results in wires that will have better contact with the dimmer, power supply or controller.
Contacts are placed directly in the block, and they are fixed with screws.
For even greater security, heat shrink tubing is used, which creates additional strength and isolation of the contacts.
Mounting
When installing most LED strips, two connection schemes are used:
- parallel connection;
- circuit with two power supplies.
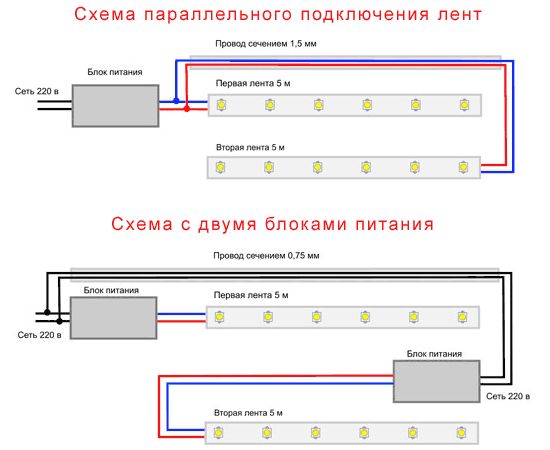
Installation methods
One of the popular ways to install an LED device is one in which the tape itself is not visible, but soft and warm light comes from it through stretch ceiling.
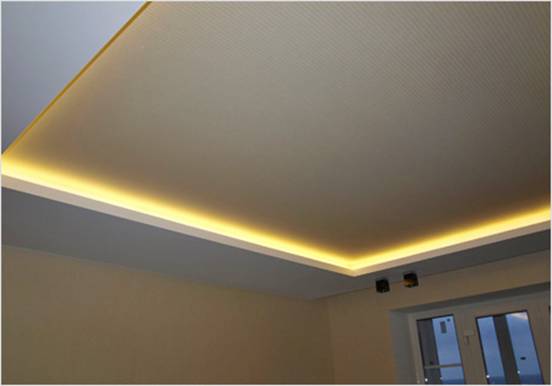
To make such lighting, you must:
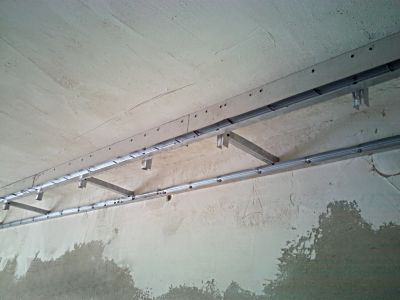
The mounting kit, as a rule, has an adhesive tape with which the tape is fixed to the ceiling cornice.
You can see more details about the installation in a special video.
If there is a need to illuminate a large room, it is not recommended to use a strip longer than 15 meters. This is due to the fact that the lamps closest to the power supply will burn out in a short period of time due to high voltage networks.
When installing LED strip on the ceiling, there are a number of points, following which you can make the process and the result of the highest quality.
- Mounting on the ceiling must initially have a project, that is, it is necessary to think through all the details before buying all the necessary components;
- Installation takes place with Velcro. In this case, the sticky layer is located on the reverse side of the tape. In addition, it is protected by a special film. Before mounting, it is necessary to choose a PVC corner that is suitable in size to the slope and the shelf. It is attached to the niche with small screws. This is done on the basis that the sticky strip peels off from drywall over time, but it is finally attached to the PVC material. This is especially true of the stretch ceiling - it has to be removed even when minor repairs are required;
- The wires must be soldered as carefully as possible. The basis is plastic, and the LEDs themselves do not tolerate overheating. Best for this goals will suit flux paste for soldering. As for the solder, POS-61 has proven itself well. It is important that the melting point is no more than 160 degrees. If you do not have a sufficient level of melting of small parts, it is better to trust this work professional;
- It is not recommended to connect more than three meters of tape together. A conductive track in a significant mass cannot always withstand a large voltage. Therefore, sections whose length reaches 3 meters are best connected to the controller with separate wires;
- If the installation is done independently, it is imperative to observe the polarity and purpose of the wires;
- It is necessary to trim and cut the LED strip exclusively along special lines. For convenience, they were originally marked by the manufacturer and it is better to use sharp scissors or side cutters;
- Remember the importance of backlight color, because it has a significant impact on psychological perception. For example, yellow-green and green are able to calm and relax, red excites the psyche, and yellow is neutral.
If you are doing repairs in the house on your own, then mounting the LED strip on the ceiling will not be a problem for you. Plasterboard ceilings are now widely used, and this makes it possible to install LED lighting in any apartment or house, and besides, you can decorate individual elements of rooms with it - kitchens, bedrooms, bathrooms. Let's understand in more detail.
2.
3.
4.
5.
What is LED strip
An LED strip or LED strip is a flexible bar with an adhesive base on one side and LEDs and resistors on the other. There are multiple sections of 5 cm on the tape. They have three LEDs and special marks that indicate the places available for cutting. The LEDs located in the tape are connected by a series circuit. The tape can be either protected from environmental influences, closed with silicone or plastic tubes, or open. Two types of diodes are used in LED strips - 3528 and 5060 (5050). Diodes of the second type are more powerful and are often used as separate independent sources of room lighting.
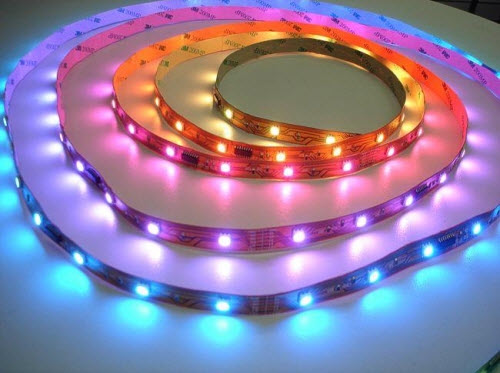
It is important to know that in the case of using an RGB tape, it has 4 outputs - one for the main mass and one for each color.
Installation of LED strip on the ceiling. Scheme and procedure
If you need to illuminate large areas, then you should not make tapes more than 15 meters, because. otherwise, the diodes closest to the power source will quickly burn out due to the high voltage at the beginning of the circuit. For spot lighting make led lamp.
Sequencing:
- Decide on the type of LEDs used - SMD 5050 or 3528. Do not forget that the first ones will be more expensive, but with more power.
- We determine the required density of LEDs. There are modifications of 30, 60, 120. These numbers show the number of diodes per meter. Of course, what than more figure, the brighter the ribbon will burn.
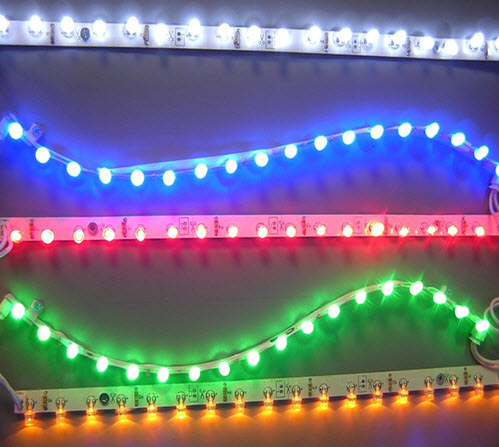
- Determine the type of tape you need. For example, whether you need waterproof or not, as well as with an adhesive side.
- We decide on the color, you will use one color or several. Multiple colors will require a controller.
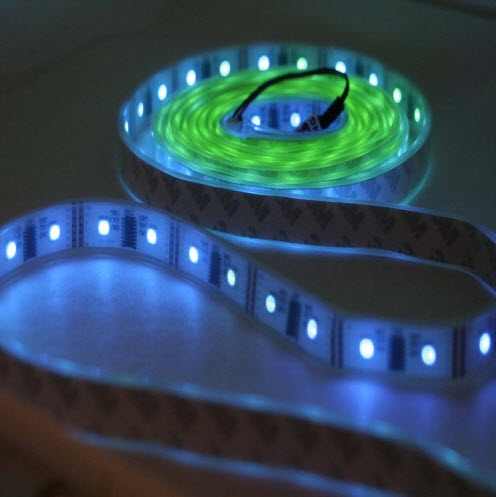
- We make calculations: for this you need to measure the perimeter of the area where the backlight will be located, calculate the area, then you need to multiply the power consumption of one meter by the footage obtained in the calculations. According to these received data, we will choose the controller and power supply.
- Next, we determine the options for the location of the backlight, namely, whether there will be drywall protrusions or not. Read how to make a curly plasterboard ceiling.
- Installation stage: we cut the tape (according to special marks), solder it according to the “+” to “-” type for single-color sections, and for multi-color sections, the sections of the same name with the designations “V +”, “R”, “G”, “B” are selected. Do not forget that only 15 meters of tape can be connected to one power supply.
- Connection stage: be sure to check the polarity, do not make mistakes. In the case when the power cord is not connected in advance, then connect it to the N and L terminals. After that, if a multi-color tape is used, the controller is connected and only after that the tape itself is connected.
In practice, contour lighting is most often used, but there are other options. With the help of LED strips, it is possible to separate different parts of the rooms, as well as to emphasize the color schemes of the rooms. For example, if the bedroom has deep blue tones, then on the ceiling you can make a pattern of LED strips and lamps in such a way that it will give the impression of a starry sky above your head.
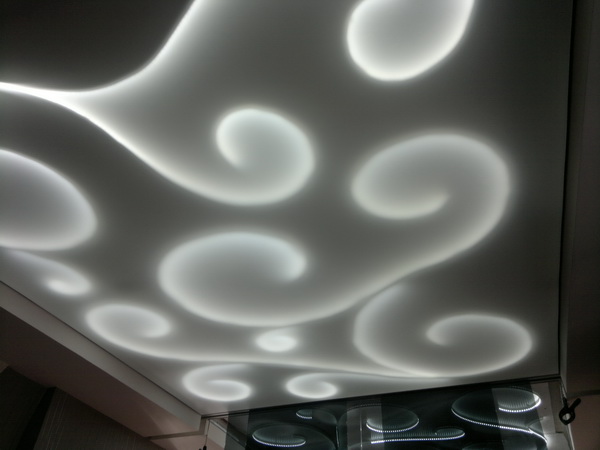
The advantages of LED lighting are that it is inexpensive, easy to install, durable, and also has a variety of colors. While conventional lamps have only two light options - cold and warm light. And if we talk about neon lighting, then it is short-lived and difficult to install. Therefore, produce installation of LED strip on the ceiling- it's quite real.
Lighting can be performed in various ways, both ceiling lighting with rigid modules, and Spotlights or mini spotlights. Which of the options is suitable, of course, you choose. The main task when installing the backlight will be that it remains invisible from below. Cornices or ledges are used to hide the backlight, but you need to consider that distances matter. If the distance is too large, then the backlight will illuminate the niche itself for the most part, and the ceiling to a lesser extent. At a small distance, the diodes and the unlit gaps between them will become visible.
LED ceiling lighting, made with tape, is the easiest in both functionality and installation. It will easily fit where other types of luminaires could hardly be installed.
Installation of LED strip on the ceiling should begin with a project. You need to create a drawing of what you want and draw up a work plan. It is very important to consider how many lamps you need, in what places you will place them, how much tape you need. Remember that the most convenient tape in installation is a multiple of 5 cm - it allows you to place 3 LEDs at such a distance. After the calculations, you can begin to purchase the backlight itself, power supplies and, if necessary, controllers. Don't forget to read the instructions. To improve mounting, the tape has an adhesive layer. Previously, the place of gluing the tape must be cleaned and treated with an alcohol solution. If during fastening the tape has to go around any obstacles, then the excesses should not exceed 2 cm in diameter.
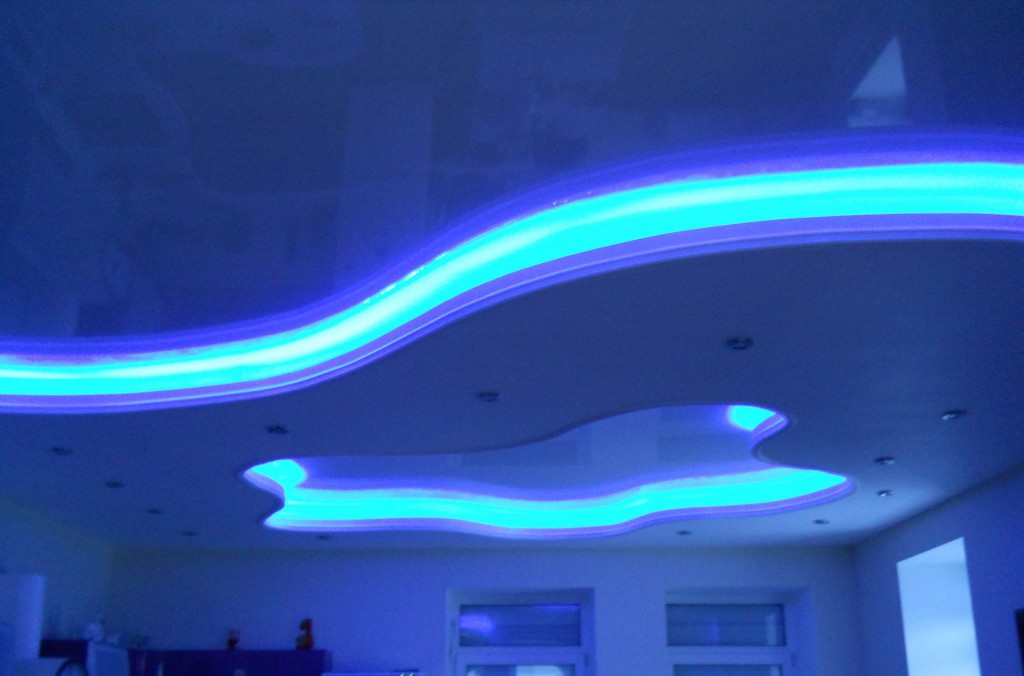
AT recent times LED lighting has become popular and trendy in kitchens. Indeed, with its help it is possible to designate different zones, as well as create coziness. With the help of LEDs, you can illuminate the "apron", niches or cabinets. She was especially fond of in restaurants, bars and hotels.
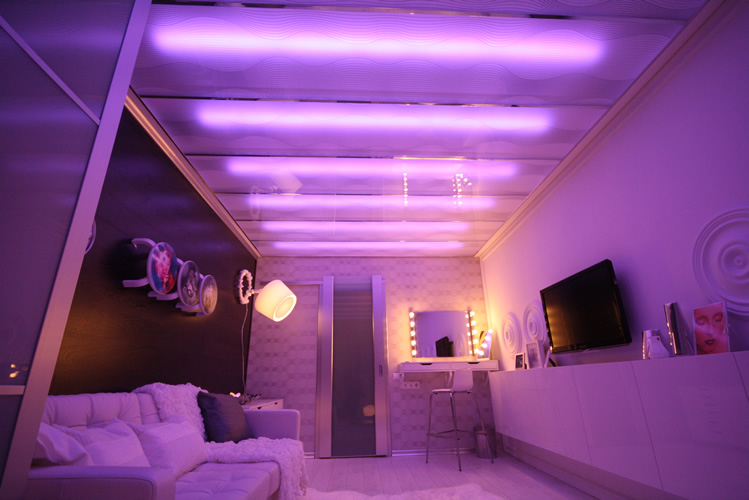
If you need to divide the kitchen space, for example, into work space and the rest, then it is better to use different colors. If wooden furniture is installed, then it is better to use LEDs with warm shades, such as orange or yellow. If there are high-tech elements in the interior of the kitchen, then silver or blue colors. The guest reception area will look great with a controller-adjustable full color ribbon.
LED panels
In addition to the common LED strips, there are also LED panels. Such panels are usually 13-15 cm thick and have a variety of colors. This innovation is very popular with designers, because. with their help, you can solve the problem of low ceilings. They will perfectly fit into the interior of children's rooms, office, warehouse, bar and restaurant.
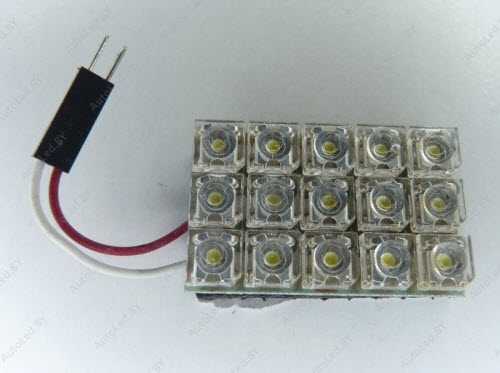
LED panels can be built into dropped ceilings, and can also be fastened with separate elements using special fasteners.
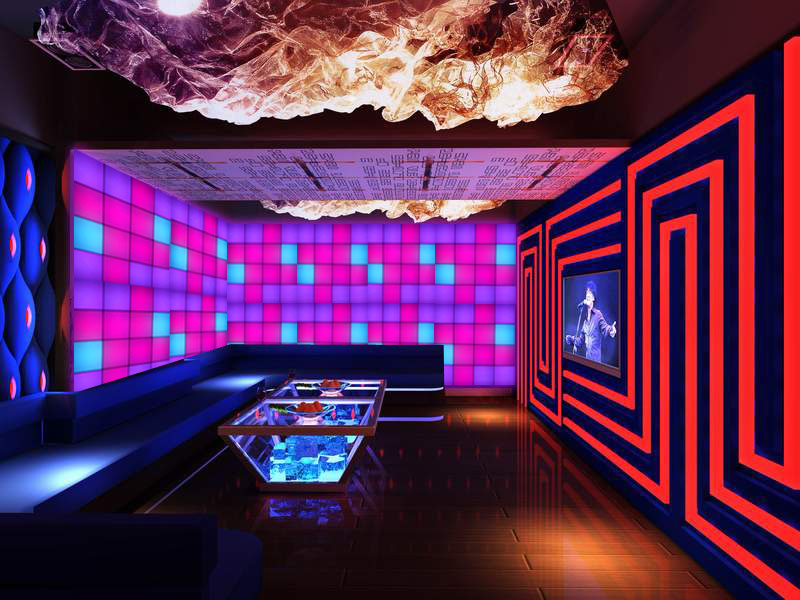
You don’t have to worry about vision when using such panels, because. they are absolutely safe. In addition, they usually have an adjustable light intensity, so everyone can choose the level of light as comfortable as possible.
The use of LED lighting in the interior is stylish, modern and non-standard. With it, you will create unique design premises. In addition, in addition to beauty, LED lighting consumes much less electricity and is a very reliable and high-tech product. And besides, if the installation of the LED strip on the ceiling is done by hand, then it will be doubly pleasant.
Video. Installation of LED strip on the ceiling
LED strip or duralight is a flexible printed circuit board, in which LEDs are mounted at the same distance from each other, as well as resistors that play the role of resistance. As a rule, the thickness of the tape is 2-3mm, with a width of 8-10mm. For packaging, duralight is cut into pieces of 5 m each and wound on a coil.
All about installation
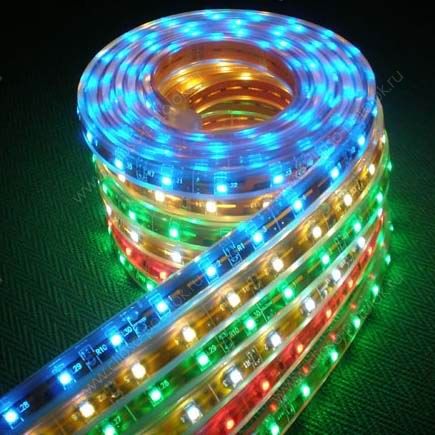
The installation of the LED strip, as a rule, is carried out before the installation of stretch PVC ceilings, although the tape is also installed on figured ones. The production of duralight is based either on SMD or DIP technologies, but SMD or surface mounting is most often used, as it is cheaper and quite acceptable for this type of fixtures.
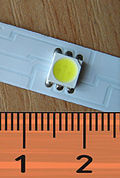
There are four digits on the tape label indicating the chip size in tenths of a millimeter, for example, SMD 3028 means the chip size is 3.0 × 2.8 mm. RGB strips, as well as individual LEDs, can vary in intensity or color temperature from 2700K to 10000K (measurement in Kelvin). Duralight works from a direct current source 12V or 24V.
What is needed to connect the LED strip
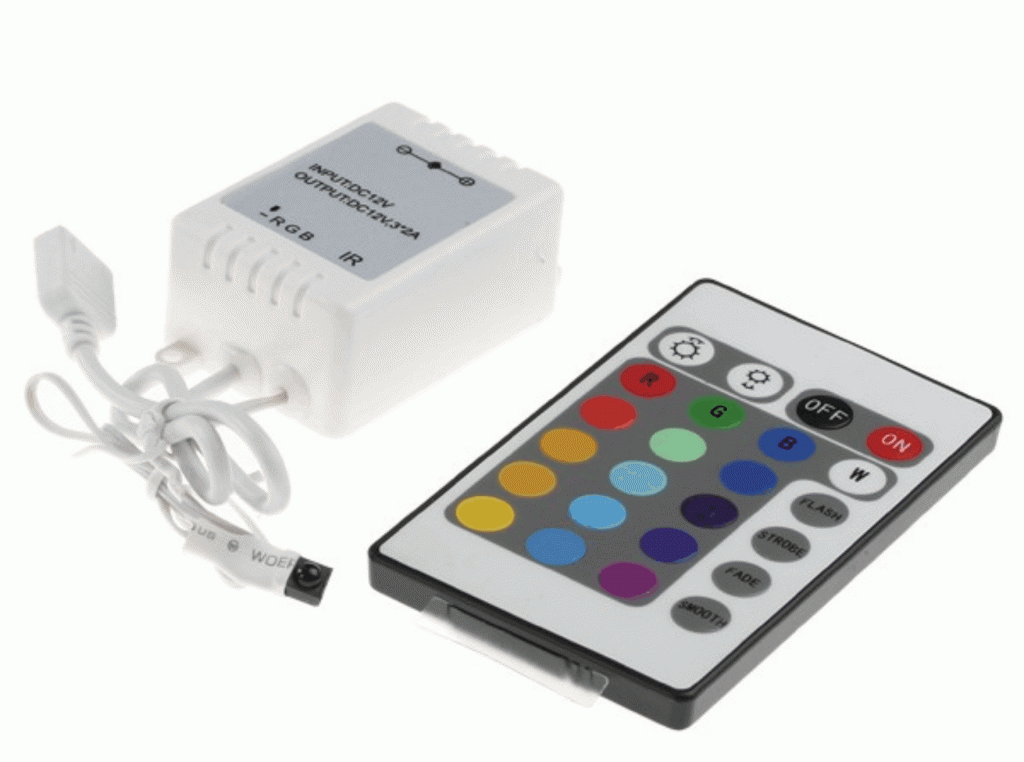
- In multi-color LED strips, there is a controller to control the color and brightness of the glow, which smoothly switches colors and adjusts the brightness with a dimmer. In most cases, this adjustment is made using the control panel.
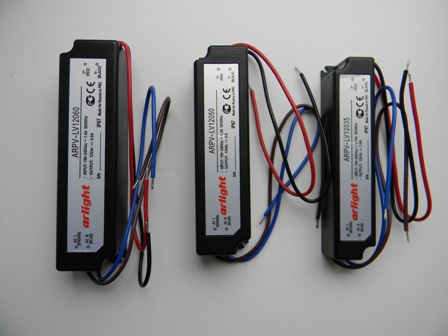
- To connect the circuit, you will need a power supply that acts as a step-down transformer. Since it is impossible to supply such devices complete with duralight (due to the individual dimensions of the tape for each installation), it is very important to correctly calculate its power.
| LED type | Number of diodes per meter | Power, W) |
- Let's calculate the power of a step-down transformer for a five-meter SMD 3528 tape with a power of 9.6W: multiply 5m by 9.6W and get 48W. But this is not enough, since in such cases a margin is needed, so a coefficient of 1.25 is applicable here - which means 1.25 × 48 = 60, that is, we need a 60W power supply.
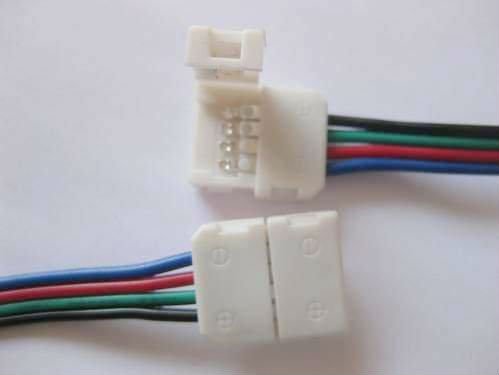
- It is very likely that installing an LED strip on the ceiling will require more than five meters of duralight, so it will have to be connected. For this purpose, you will need connectors. Such connectors can be either flat or round - everything will depend on the type of LED strip and the manufacturer.
Benefits of LED strip
Like any other electric lighting device, LED strip has its advantages and disadvantages.
- The LED strip is very easy to mount, since all samples are usually provided with double-sided tape on one side of the flexible board, which makes it easy to stick it to the ceiling. The LED has very low energy consumption, the smallest among all lighting devices, which directly affects the cost of energy consumption during the operation of duralight.
- The operational resource of LEDs is the highest among all lighting devices. It can be said that at correct operation such a device does not burn out at all. When mounting the tape under a PVC ceiling, there is no danger of its overheating at any length of the backlight, since the luminous flux is proportional to the length of the duralight.
- RGB LED strips provide a wide range of choices colors design, and the flexibility of the board will help to realize the most incredible zigzags.
Disadvantages of LED strip
LED strips also have their drawbacks, so in order to achieve the same luminous flux as conventional lighting fixtures you will have to spend much more money on duralight, so such devices are used for decorative and auxiliary lighting, and traditional light sources are used for main lighting.
Recommendation. When connecting the strips of the LED strip, a serial connection is used, but this method is applicable only up to a 12-meter length of the device. Above this length, a parallel connection is used, but it is best to consult the seller when buying a tape, as the manufacturer may make its own changes.
Installation of diode tape on the ceiling
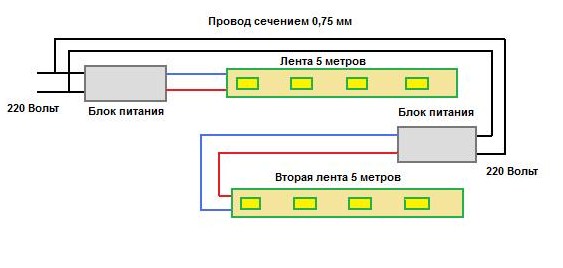
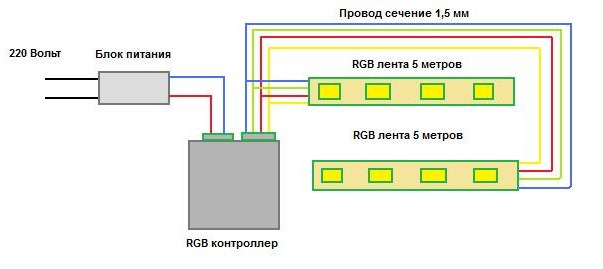
- First of all, determine the length of the connected tape and, if necessary, splice the strips to the desired size.
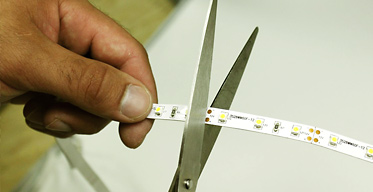
- If you need to cut the tape, be guided by special marks (sometimes they are in the form of small scissors) so as not to damage the contacts. Check the tightness of the connection and for this try to assemble the entire circuit on the floor to make sure of the quality.
- If the tape is colored (RGB), then first of all connect it to the controller, on the connectors of which there are marks according to the color of the wires. R (red) is for red wire, G (green) is for green wire and B (blue) is for blue wire. For the black wire, the terminal is labeled 12V or 24V.
- Then the controller is connected to a step-down transformer (transformer selection is described above). Here it is very important not to make a mistake with polarity reversal, since such an oversight will lead to the burnout of the tape, which means the need to replace it.
- Connect the assembled circuit to the 220V network and check for correct assembly. If all is well, then you can glue the tape to the ceiling, having previously disconnected it from the controller. After mounting the duralight, connect it again and check. With a positive result, you can proceed with the installation of a stretch ceiling (see)
Advice. If the connectors turned out to be of poor quality, then the tape can be soldered (without overheating), but for this, soldering wires need the same resistance as the color channel. For this, the wires from the connectors are the best fit.
Conclusion
As you have seen, the installation of the LED strip does not present any particular difficulty, but at the same time, the assembly of the electrical circuit requires care, since an error usually renders the duralight unusable (see). I would also like to draw your attention to the fact that the ceiling on which the tape will be mounted is not dusty, in which case the adhesive tape will hold well.
On our site, you may have already noticed a lot of articles on how to apply LED strip. In this article, we decided to tell you about how to make original lighting in the house. Let's say right away that the method is quite simple, every person can cope with it, even without a certain education. So ceiling lighting led strip with your own hands, what to look for and detailed instructions.
Installation of ceiling lighting from a ceiling plinth
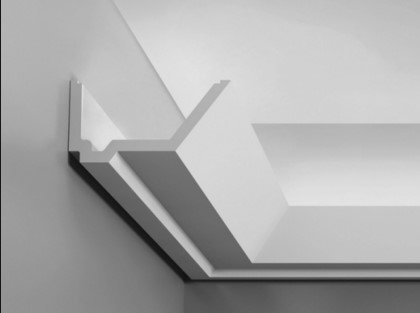
Remember, the plinth must be installed at a distance of 10 cm from the ceiling itself, otherwise normal lighting will not come out. After all, the light will not hit the ceiling in full measure, there will only be an indefinite strip of light that does not have any beauty. 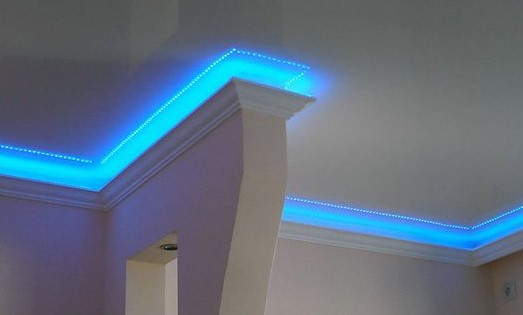
When choosing a skirting board, be guided only by your personal preferences, the material is also not important. The main rule here is one - the plinth should fit well into the interior of the room itself.
Ceiling lighting with LED strip: preparatory stage
The first thing you should do is find out the length of tape you need. To do this, you need to measure the size of the plinth on which you are going to install the LED strip.
If you decide to use a multi-color RGB tape, you will need to purchase a special controller. Although we do not recommend using such a tape, it is optimal when the ceiling is illuminated with only one color. 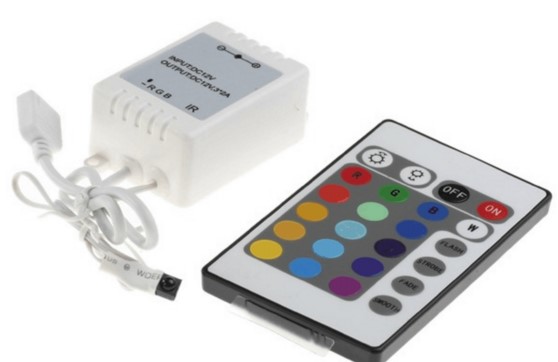
And the end result is unforgettable, there are two main types: 12 and 24 volts. Read more about the calculation in our article. 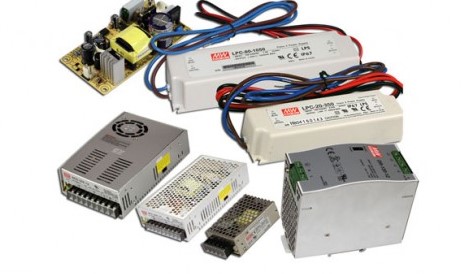
LED Strip Stretch Ceiling Installation
So we moved on to the most important question: how to install an LED strip under a stretch ceiling, follow our instructions, then you will not have any problems.
Remember! The tape is glued only on a clean surface, there should be no grease, the surface should be smooth. Otherwise, it just won't stick!
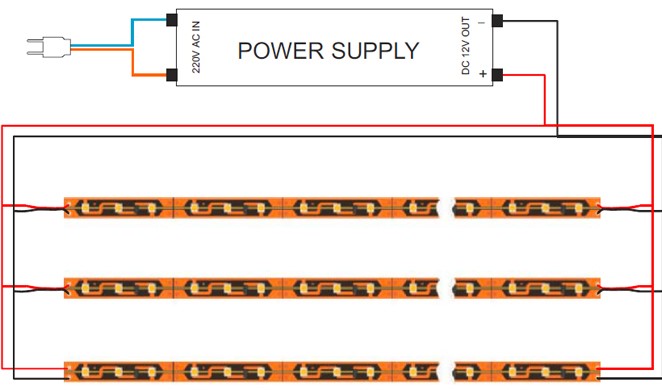
That's all we wanted to tell you, there is nothing complicated, the main thing is to make the right calculations.
Installing an LED strip on a stretch ceiling: video
For the visual perception of all the information, we decided to choose for you this video, which was made by our colleague.
Interesting article


