
In order to make the lighting in the kitchen under the cabinets with your own hands, you first need to decide where exactly it will be located, and which lamps for this zone will be the most optimal.
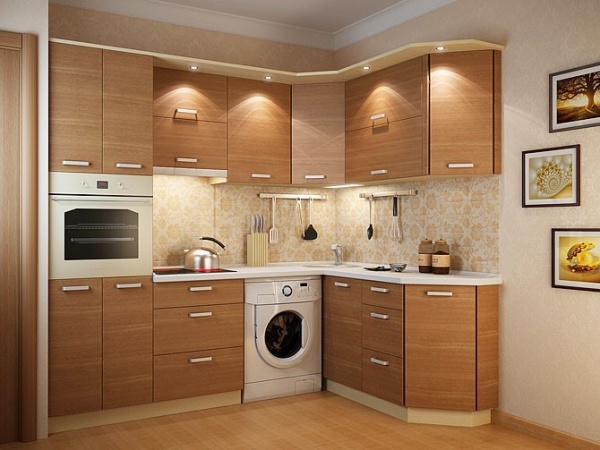
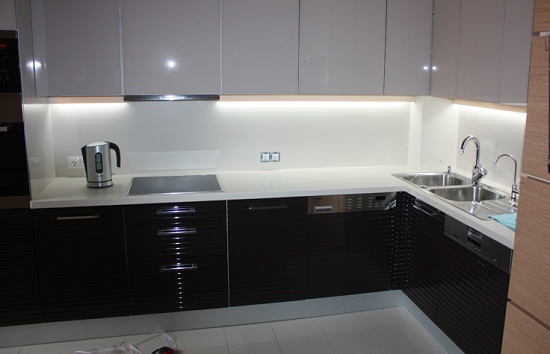
Illuminated lower cabinets in the kitchen
Illumination of the kitchen under the cabinets can mean both the illumination of the working area under the hanging furniture, and the illumination of the floor under the lower cabinets. First, consider the second lighting option.
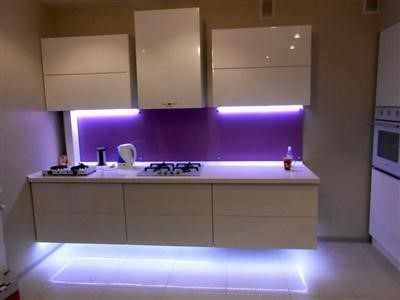
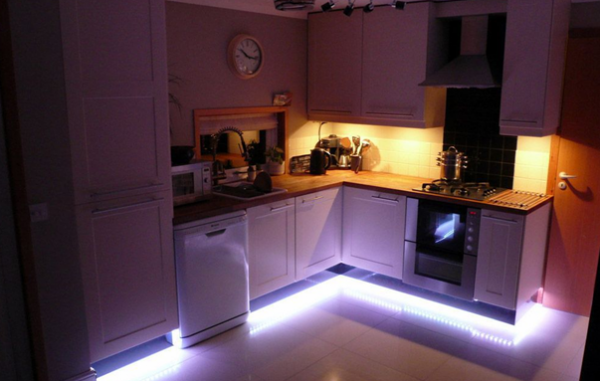
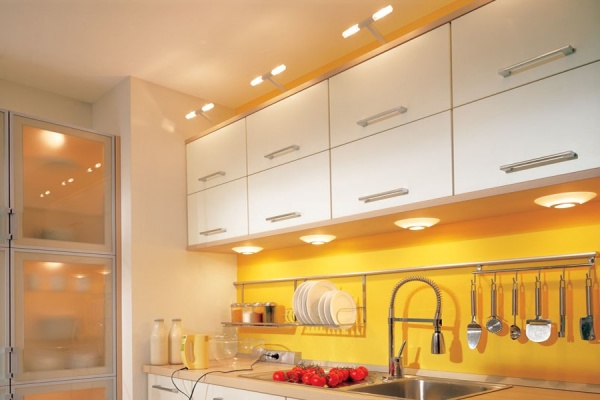
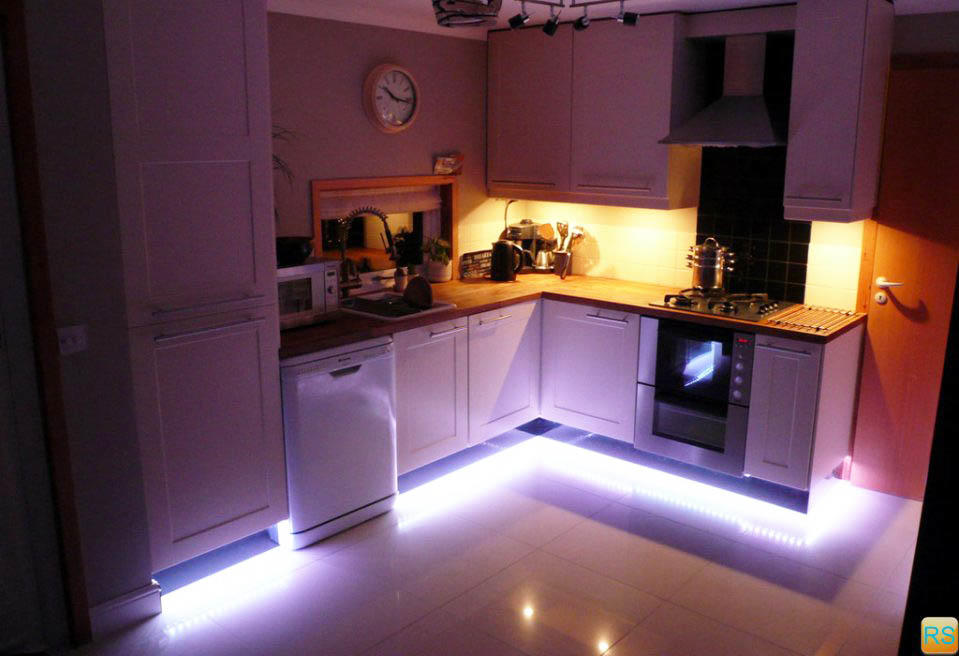
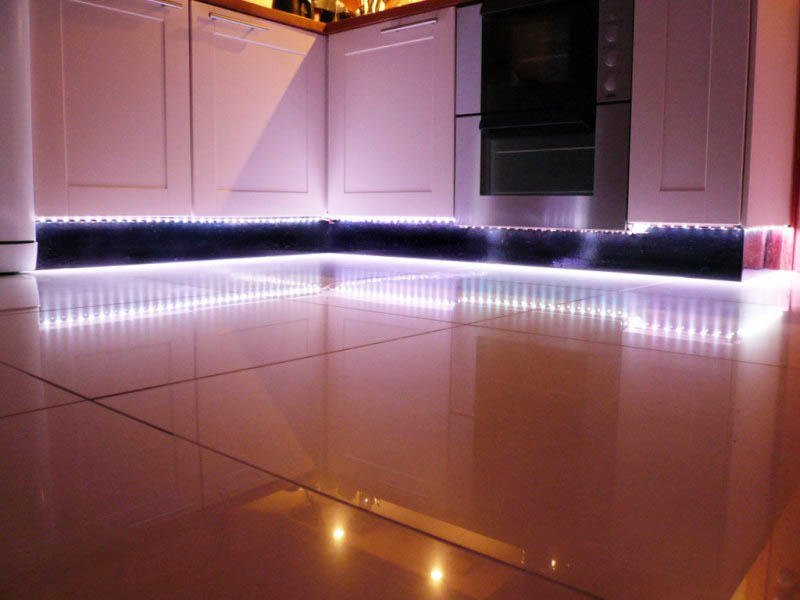
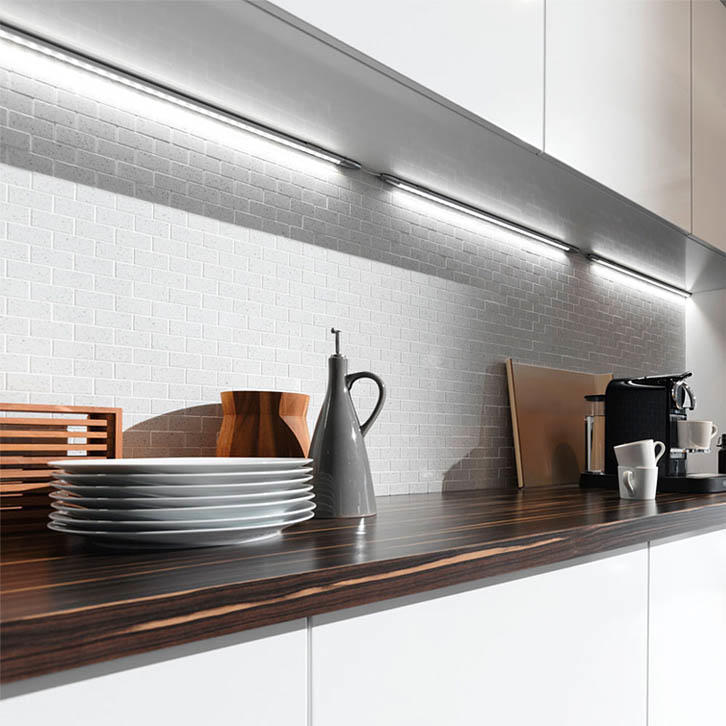
The so-called “floating cabinets” look very attractive and aesthetically pleasing in the interior of the kitchen. Such an unusual effect is easy to achieve with the help of an LED strip placed under the bottom of the kitchen set.
To install such a backlight you will need:
- Carefully consider the wiring of electrical wiring so that the wires do not stick out throughout the kitchen and are hidden in a place inaccessible to children.
- A transformer is needed for the operation of the LED strip, therefore a secluded place should also be allocated for it.
- To illuminate the lower cabinets, you can use LED strips, both in open form and in the form of closed lamps. In the first case, it is worth choosing a tape with an increased degree of moisture protection IP 65 or IP 68, since the likelihood of moisture getting on the tape body is very high in this part of the kitchen.
- Before you go to the store for LED strip, you need to decide on colors light bulbs and the required brightness. Professionals recommend taking SMD35x28 LEDs for lower illumination. Their power will be enough for these purposes.
There is one caveat! For a kitchen with a glossy floor, it is better to choose closed lamps, since open LEDs, reflected in the mirror surface of the floor, will hit the eyes.
In order to install LED lighting in the kitchen under the lower cabinets with your own hands, you will need the following tools:
- LED strip (required length + 10% for scrap)
- PVA cable with a cross section of 0.5 or 0.75 mm. sq.
- Transformer 12W
- Scissors
- soldering iron
- Solder
- Rosin
- Insulating tape
Do-it-yourself LED strip installation steps:
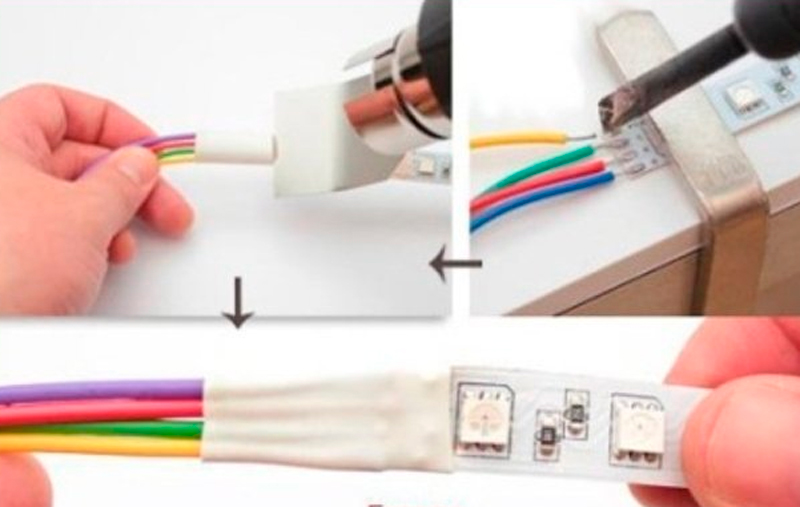
- At the required piece of tape, you need to expose the extreme contacts by 1-1.5 cm.
- Solder two cables to them and insulate them with electrical tape.
- Before attaching the tape, the surface must be degreased.
- If the tape is mounted without a lamp, it is enough just to remove the protective film from it and stick it to the furniture. If the LEDs are closed, the tape must first be attached to a protective strip or profile. And then the profile, together with the tape, is attached to the bottom of the cabinet using double-sided tape.
- Using soldering, the tape must be connected to the transformer, and it, in turn, to the plug.
- All joints must be treated with electrical tape.
- All wires, together with the power supply, are hidden in a specially designated place so as not to spoil the picture.
Here are some tips to help you avoid the most common mistakes:
- When purchasing an LED strip in a store, you need to choose the right transformer for it.
- When buying, you need to ask to check all appliances.
- All exposed wires must be insulated.
- Instead of connectors, it is better to use a familiar soldering iron and rosin to fasten wires.
- To control the intensity of lighting, you can install an amplifier and a dimmer together with the power supply.

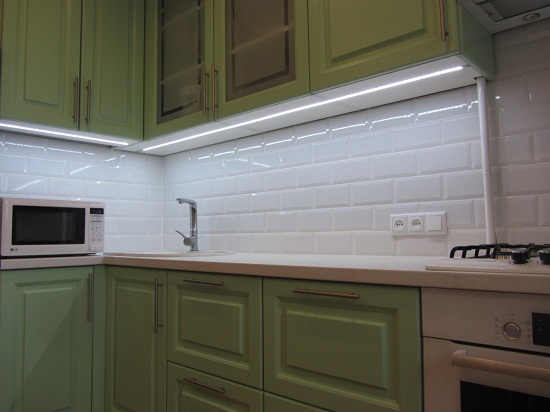
Illumination of the working area in the kitchen
Unlike floor lighting, a whole variety of different fixtures can be used to illuminate the work area. Almost all of them are mounted quite easily and do not require special knowledge and skills.
Top lighting in the kitchen under the cabinets with your own hands can be done using the following lighting fixtures:
- The leading place today is occupied, of course, by the same LED strip. Its installation above the working area is almost no different from installation below the cabinets below. One has only to pay attention to the characteristics of the LEDs. Since the work area requires fairly bright lighting, SMD50x50 LED strips are suitable for its illumination. It is worth remembering that if the tape is to be used in an open form, it is necessary to take into account its waterproofing. However, it is not recommended to use an open LED strip to illuminate the working area, as its light will strongly hit the eyes.
- Many people in the old fashioned way prefer fluorescent lamps. Their main advantages:
- uniform light
- Ease of installation
- economy
- Cheapness
This type of lighting is quite easy to install. Lamps should only be attached using a special mount to the wall or to a pre-designated hole in the furniture above the work surface. That's all! You can turn on the lamp in the network.
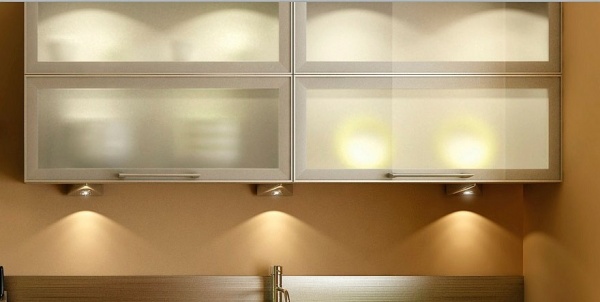
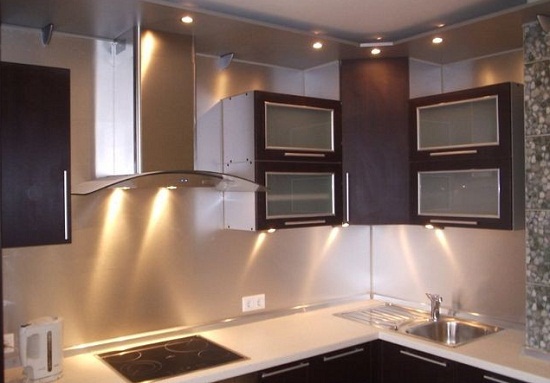
- Spotlights have always been popular, because due to their small size they can be located in any part of the furniture and illuminate the space reserved for them. There are three types of spotlights:
- Mortise- the location of such lamps must be planned at the stage of the kitchen sketch, since they require special recesses and space inside the cabinet for themselves and the transformer.
- Overhead- easy to attach directly to the surface of the cabinet, but work from the mains.
- Modular- can be used in any part of the kitchen set, and do not require electrical power.
For uniform illumination of the work surface, it is recommended to place Spotlights at a distance of 0.5 meters from each other.
- Recently, in the backlight under the cabinets, along with the LED strip, they began to use such interesting and colorful devices as neon tubes and duralights.
neon tubes are glass or plastic tubes filled with an inert gas. The ends of the tubes are powered by electricity. Such tubes work with the help of a transformer. The service life of the tube is about 12 years, but the transformer is smaller, therefore, during installation, you need to leave access to the power supply to replace it if necessary.
Duralights- flexible silicone hose with incandescent bulbs or LEDs inside. The service life of incandescent lamps is up to 1 year, but LED duralights will last much longer.
As a rule, such lighting devices are more used as a decor in the kitchen, since it is difficult to call them a source of lighting. Mounting tape can be used to fasten neon tubes and duralights under cabinets in the kitchen.
As you can see from the article, there is nothing difficult in installing lighting for the kitchen under the cabinets with your own hands. All you need is desire, time and a visual aid.
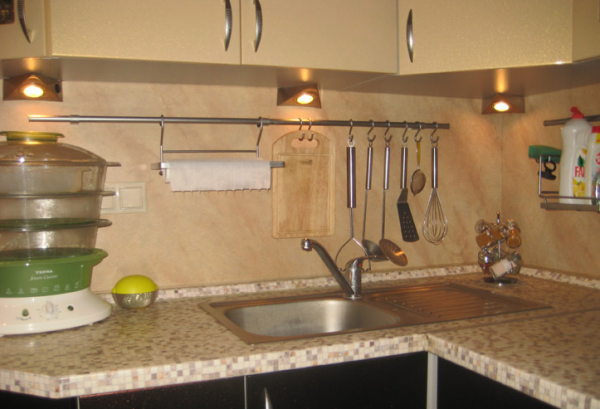
In almost all apartments with modern renovation, you can find furniture lamps. This type of lighting fits perfectly into the interior of any room and the kitchen is no exception. Furniture lamps will help in creating a cozy atmosphere and comfortable conditions for cooking.
Furniture fixtures: why are they needed in the kitchen?
In the process of cooking and washing dishes, good, even lighting of the work area is required. But in most cases, the kitchen set is located in two tiers, and, standing with his back to the main lighting, a person almost completely obscures the light, which creates uncomfortable conditions for doing work. The installation of furniture lamps will help to solve this problem.
In addition, this type of lighting is an important decorative element that gives the kitchen a modern, sophisticated and original look.
In small kitchens, furniture lamps can even be used to organize the main lighting.
Varieties of furniture lamps
Fixtures for furniture can be divided into several types.
By installation method
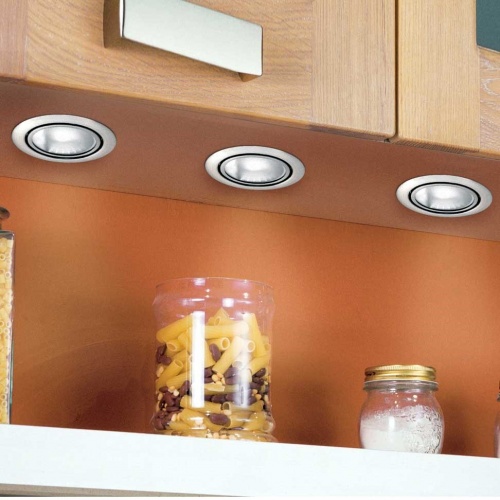
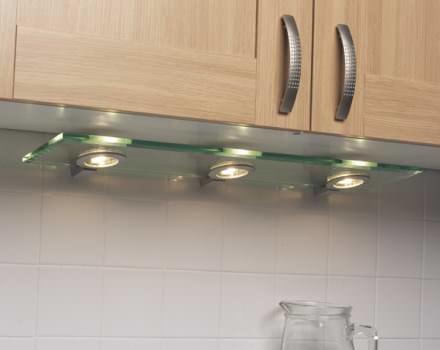
Embedded (point, mortise). In most cases, their installation is planned during the design of the kitchen, and the installation itself takes place at the stage of assembling the headset. The main purpose is to illuminate the contents of cabinets, drawers and the work area.
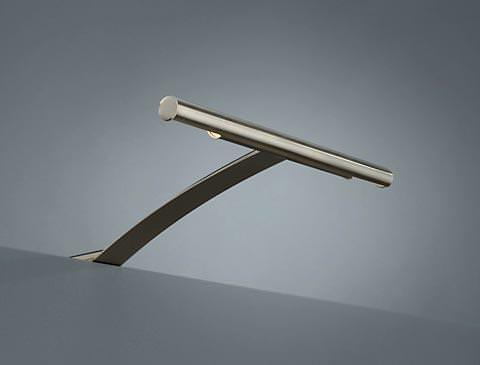
Overhead . They are sold separately from the furniture. The buyer can install them with his own hands in any place he needs. Ease of installation makes it easy to change their location if necessary. Replacing bulbs is also easy. In addition, in most cases, overhead lights have swivel mechanisms that allow you to change the direction of light.
By lamp type
Incandescent lamps. Their only advantage is their low price. Otherwise, they are very inferior to modern counterparts. The use of incandescent lamps in furniture fixtures is extremely inconvenient, since this requires the placement of the device at a great depth, at least 7 cm, and besides, incandescent lamps get very hot, which is contrary to fire safety rules.
Luminescent. They can be a source of both cold and warm light. Mercury is used in their construction. During operation, these lamps are harmless, but require special disposal, so you should not throw them in a regular trash can.
Advice ! The brightness of fluorescent lamps depends on their length, the longer the lamp, the brighter the light it emits. Therefore, instead of two short ones, you can purchase one long lamp.
Halogen. They have a long service life, about 4 thousand hours, low power consumption and bright light. The disadvantage is high heating, but unlike incandescent lamps, they have a heat-resistant housing that allows them to be placed on any piece of furniture. When using halogen lamps in furniture fixtures, it is necessary to use a transformer that converts 220V to 12V.
Xenon. Virtually no heat, but exude a bright light, too intense for use in the kitchen.
LED . This is probably the best option for use in furniture fixtures. LED lamp do not contain harmful substances, do not flicker during operation, do not emit ultraviolet light and at the same time consume little electricity. The only drawback is the high cost, but it fully pays off during the operation.
By way of management
Contact . In this case, a switch is installed next to the lamp.
Contactless. Light up only when the furniture is in use, for example, when opening the doors of a cabinet or pulling out a drawer. This lighting control option allows you to significantly save energy.
Furniture lamps differ in external design. They can be of different colors and shapes, for example, in the form of a diode strip, spotlights or linear fixtures.
Location options for lighting kitchen furniture
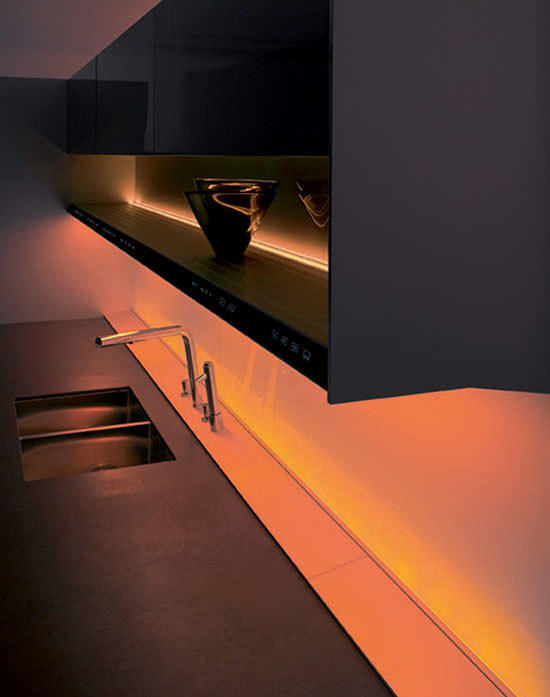
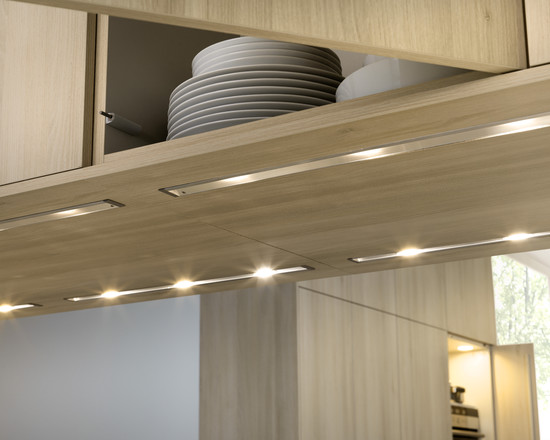
The backlight is installed in the middle, closer to the outer or inner edge of the lower surface of the wall cabinets. In this case, you can use absolutely any version of the lamps.
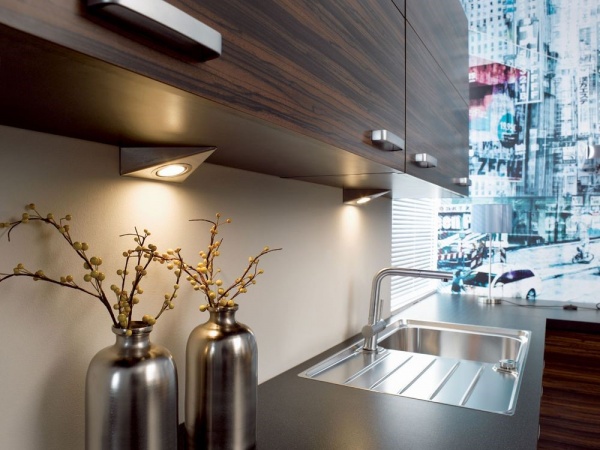
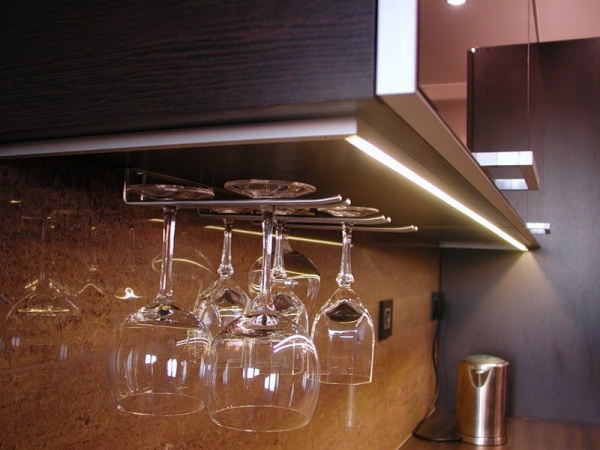
When installed above the sink, it is more convenient to use diode tape or linear fixtures.
The brightness of the light here may be greater than in the previous version, the main thing is that the lamp is installed so that it does not blind the eyes. It is also worth remembering that installed above the sink lighting fixture should have high tightness and not be afraid of moisture.
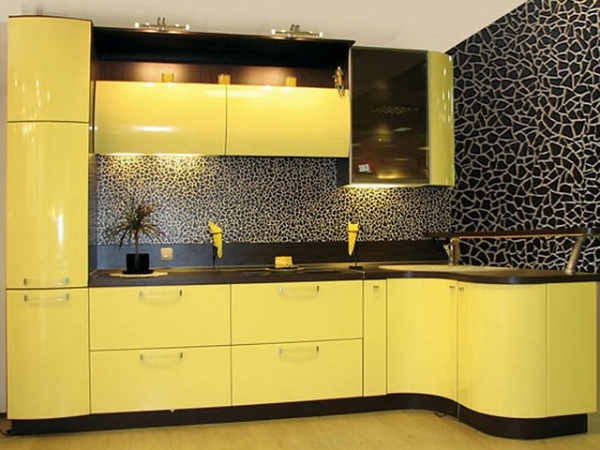
Interesting decorative effect gives backlight installed above wall cabinets and illuminating the facade of the kitchen.
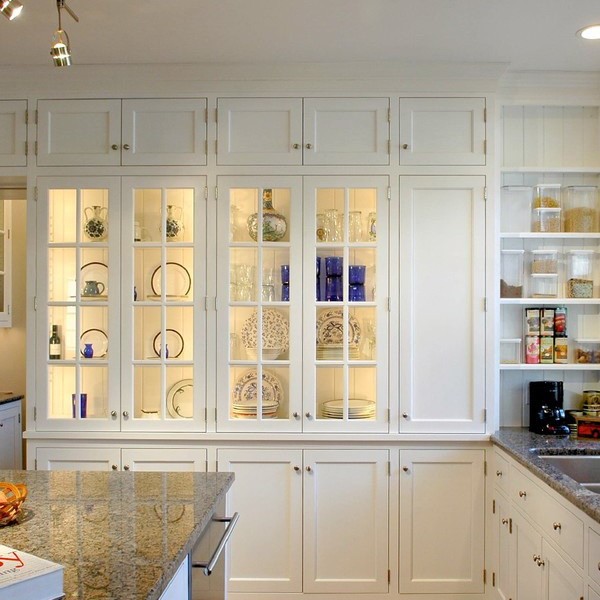
The lighting installed inside the cabinets is very convenient. And if the cabinet doors are made of glass, then it also plays a decorative role.
The effect of “floating” furniture is created by the illuminated plinths of the headset.
Lighting types
Using furniture lamps, you can create various options for lighting the kitchen.
Pinpoint. With such lighting, the rays of light do not scatter, but are directed in a continuous stream to the countertop, sink or stove.
Emphasizing. To create such lighting, it is better to use recessed lamps, which give the selected object a special expressiveness.
Decorative. To create it, colored lamps are used to help relieve tension.
Advice ! Installing dimmers will make it possible to adjust the intensity of light, thereby allowing not only to change the atmosphere prevailing in the room, but also to ensure energy savings.
Installation of recessed furniture fixtures.
There are situations when, when purchasing furniture, the buyer does not think about installing lamps in it. But, after a while, he realizes that he needs them. In this case, you can use overhead lights, or you can install mortise lights on an already assembled kitchen set. Some people think that only professionals can do it. But it is not so. Installation of mortise lamps is possible on their own. To do this, you just need to follow the instructions below.
Before starting work, you should consider the design of lighting. Then, calculate right amount lamps and prepare the following tools and equipment that will be required during work:
- roulette;
- pencil;
- drill or jigsaw;
- metal crowns for drills;
- screwdriver;
- side cutters or a sharp knife;
- required amount lamps.
Attention ! Before starting installation, be sure to turn off the power supply.
Installation of fixtures should occur in the following sequence:
Step 1. We make the markup according to which the lighting devices will be installed.
Step 2. Cut holes for them. If the devices to be installed are round, then the hole is cut out with an electric drill. In this case, the nozzle must match in diameter with the inside of the lamp. If the device has a square shape, then a jigsaw must be used for cutting.
Step 3. From the hole we take out the pre-connected cable. Given the small size of the hole, it will not be easy to do this by hand, therefore, to facilitate the process, it is better to use a wire bent in the form of a hook.
Step 4. We clean the ends of the output cable with a knife or side cutters.
Step 5. We connect the cable to the terminals of the device, guided by the colors of the wires. Firmly fasten the connection points with clamping screws.
Step 6. We insert the lamp into the hole. Strongly pressing fastening-springs. When the springs are released, they are automatically straightened and the device is positioned between the walls of the hole.
Step 7. We screw the lamp into the installed lamp.
Step 8 Install the decorative ring.
- To organize lighting in the kitchen, it is better to choose white spectrum light, as it does not distort colors and is closest to natural light.
- Warm light will help create a cozy atmosphere in the kitchen.
- To illuminate the countertop, it is worth using more than three light sources at the same time. This will provide soft and even lighting without shadows.
- Lighting should be in harmony with the overall style of the kitchen. Yes, to classic interior warm or neutral white light will do. And cold lighting will fit well into a minimalist kitchen.
- Illuminated glossy surfaces visually expand the space.
- Do not overload the kitchen with light sources. Especially if it has a small area. Otherwise, you risk turning a cozy home space into a hospital room. Remember that everything is good in moderation.
Furniture lamps make it possible to organize such lighting that will give the kitchen uniqueness, sophistication and comfort. And an extensive range will allow you to choose a model that is ideal for the most original interior.
An interesting option for organizing additional lighting is presented in the video below:
Any of the modern families spends most of their time in the kitchen, and the fair sex generally considers this part of the house to be their indestructible fortress, a symbol of the hearth. It is impossible to think of a more comfortable place to meet old friends or read the latest newspaper over a cup of aromatic coffee.
Why is furniture lighting needed?
But what to do if, when buying an apartment, you did not pay special attention on kitchen design, and do overhaul Or is it not possible to reschedule? Incorrectly planned areas and the lack of good lighting can be easily corrected with the right furniture lighting.
Light is the first assistant of modern designers in cases where it is necessary to refresh or visually enlarge the space in a short time and on a small budget. A well-placed lamp between the cabinets and kitchen set lighting will easily transform your old kitchen and guarantee excellent illumination of work surfaces.
The right light for work areas

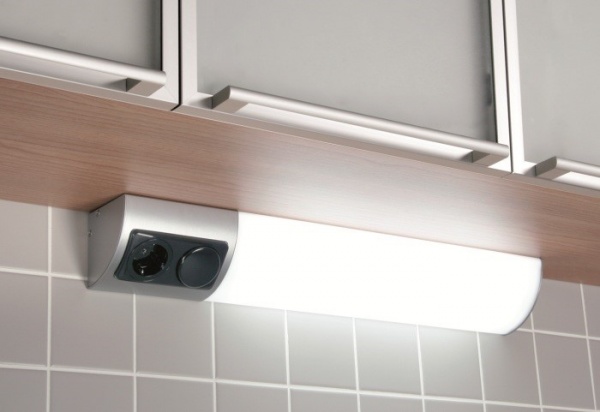
What is an average standard lamp? This is a single module, with several spot light sources built into it. Such a device is attached to the outer surface of the cabinet or other kitchen furniture using anchors.
Standard 36-watt mercury lamps, which are still used in most apartments, can be easily replaced with more modern options without much effort. Modern analogues like LED lamps can be found in any specialized store and installed on your own without spending extra money on installers.
A correctly selected furniture lamp for illuminating the working area should be as electrically safe as possible, economical and protected from moisture. When choosing a lamp, be sure to consider that it must have good protection against moisture and grease and have a long service life.
Such a lamp or lamp can easily be built in with your own hands under the upper cabinets or, for example, between cabinets and will make your kitchen brighter and more elegant.
Such a furniture lamp has its own switch, which will allow it to be used only as needed, and its compactness allows it to be used even in the smallest kitchens.
Ease of installation, minimum weight that does not allow additional loads on workplace, eye-pleasing diffused light - all these qualities can be obtained at quite loyal prices or you can do it yourself.
 As a backlight of the working area, a skinali apron, illuminated from the inside, can act. By the way, you can also read about it on our website in the "Lighting" section.
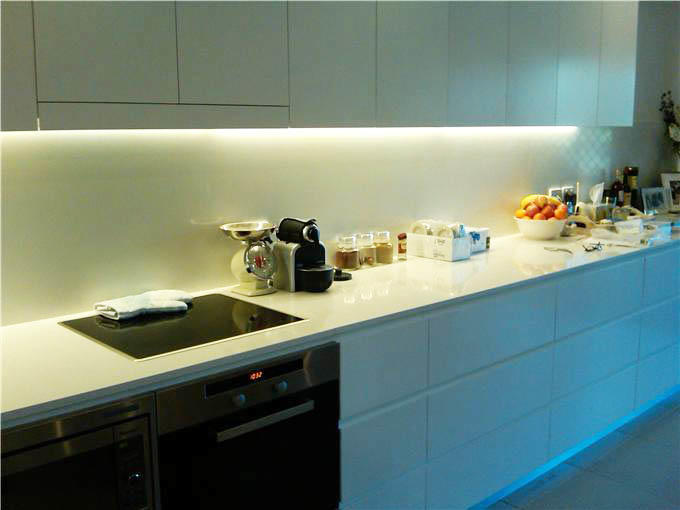
The so-called LED-lamps may well become an analogue of the usual incandescent lamp or halogen lamp. They are characterized by low heat dissipation, do not produce any radiation and allow you to save on electricity.
The easiest and most profitable option is to install a do-it-yourself furniture lamp above the work area on the surface of the cabinet, exactly in those places where it is most needed.
LED lights
Do-it-yourself LED lighting will help save money, besides, you yourself can choose its intensity and location, which is most preferable for your kitchen. Even the most sophisticated furniture will not look as impressive without well-chosen lighting.
This method will save energy and give your work area a personality. LED lighting between cabinets, for example, will visually enlarge the space. The light will reflect off the surfaces of the cabinet and increase the overall illumination of the space, and the power of the LEDs will be sufficient for use without additional light sources.
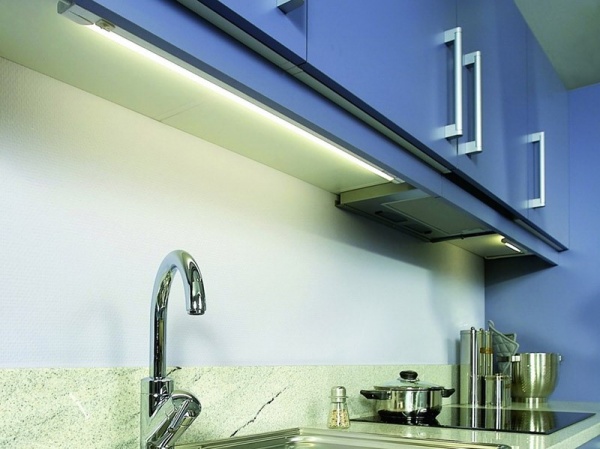
The most convenient and economical way to backlight is LED strip. It is easy to install by hand, its adhesive surface is easy to attach to the wall of a cupboard or sideboard, and its moisture-proof properties make it an indispensable assistant in kitchen lighting.
Such tapes do not heat up, so they can be used even under lighting conditions. stretch ceilings. It is easily glued to any surface, like cabinets or decorative niches.
AT recent times designers more and more often resort to lighting at the bottom of the cabinets, because such a technique will very favorably emphasize the beauty of your furniture. Beautiful and functional lighting of kitchen furniture will help you refresh the interior, and a new decorative lamp will breathe in new life in the old familiar room.
How to choose the right tape
A high-quality housing should be made of an aluminum LED profile and protected from moisture by a transparent or matte screen. This tape will last you more than 60,000 hours.
It is possible to mount a micro-switch in the aluminum profile body itself, which does not require tactile contact. To turn on the backlight, you just need to move your hand directly next to the tape. This function is quite useful if the backlight should be located on the territory of work surfaces.
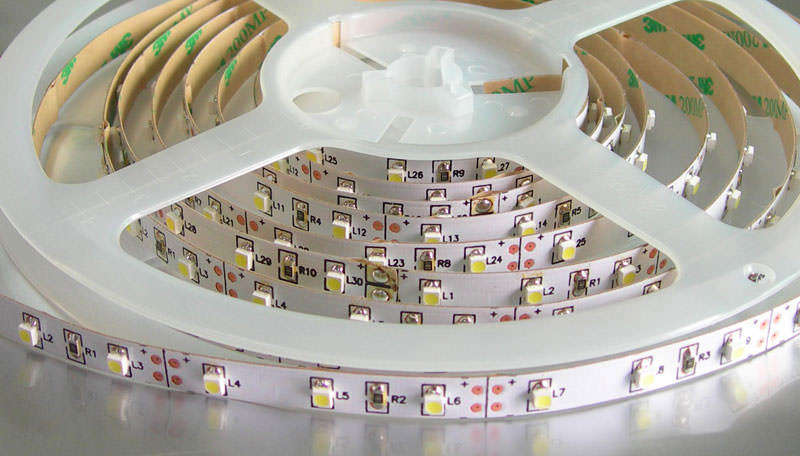
In any tape there is a certain number of diodes, which directly affects the strength of lighting. This characteristic is measured by the number of LEDs per meter of tape, usually from 30 to 120. The most preferred option is 60 diodes per meter. As for power, a 14.4 W / meter tape is perfect for standard backlighting.
The main thing is to choose a high-quality tape in the store, without defects and damage. It is also worth checking the voltage of the power supply - for proper operation, the voltage of the tape and the power supply must match.
When choosing the color of the LEDs, remember that ordinary white diodes of a cold or warm shade are enough for good lighting.
DIY LED lighting
Main advantage LED backlight in that its installation will not be difficult even for people who understand little about electrics. The DIY installation process is simple and will not cause any additional difficulties.
However, even in this simple matter, there are a number of certain mistakes when mounting LEDs with your own hands. It can be as bad circuit planning or chaotic placement of fixtures in all possible places.
To avoid such mistakes, plan the placement of the lighting in advance and mark them on the kitchen plan. So you can figure out where they are most needed, and where they can be abandoned.
materials
To install LED backlight you will need:
- LED Strip Light;
- PVA cable with a cross section of 0.5 sq. mm;
- power supply 12 volts;
- scissors;
- soldering iron;
- rosin;
- solder;
- insulating tape.
Stages of work
Be sure to measure your kitchen cabinets before starting work to find the right length of tape.
What you need to do to install the backlight under the kitchen cabinets:
- Turn off the power and carefully degrease the surface of the cabinet, for example with alcohol, before work.
- The tape is laid in an aluminum profile, which should later be fixed on the required surface, for example, on the surface of a cabinet. In the absence of the desired profile, you can use an ordinary wooden plank.
- It is necessary to fix the bar or profile to the surface of the desired cabinet.
- Attach the tape to the required wire of the power supply using soldering, and the block to the outlet.
- Install the power supply somewhere in the corner so that it is inconspicuous and does not spoil the overall appearance of the surfaces.
- Secure all joints with electrical tape.
When creating such a backlight with your own hands, it is important to remember the polarity and quality of the solder joints. Be careful to isolate all exposed contacts.
Remember that the quality of the installation plays an important role in the subsequent appearance of the kitchen. Do everything carefully so that later it is impossible to notice the consequences of installation visually.
Practical and cozy kitchen lighting
Kitchen lighting is an important element of kitchen design. The backlight is not only a decoration, but also has a great practical value. From my own experience, I can say that it performs two main functions - this is the illumination of the working area of the kitchen set and the illumination of the kitchen when bright light is not required.
The lighting of the kitchen set and the working area can be organized in different ways. Often they do not make additional structural elements directly to the kitchen furniture itself, but organize lighting on the ceiling. To do this, along the perimeter of kitchen furniture, a plasterboard box is mounted on the ceiling, into which spotlights are built.
This approach is good and universal, but this can only be done at the repair stage. And what to do in the case when the repair has already been done, but the kitchen lighting has not been provided? There are two more options: make a backlight with a visor or install a backlight directly above the tabletop.
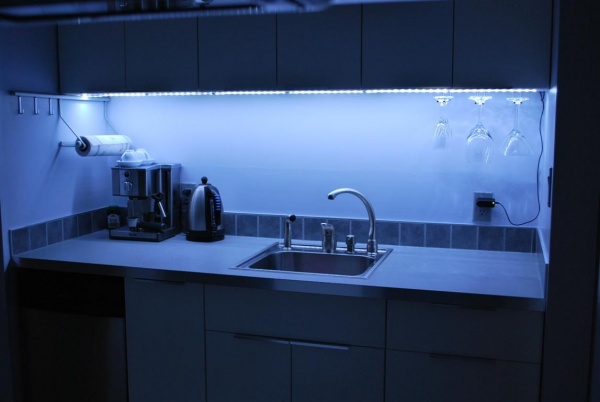
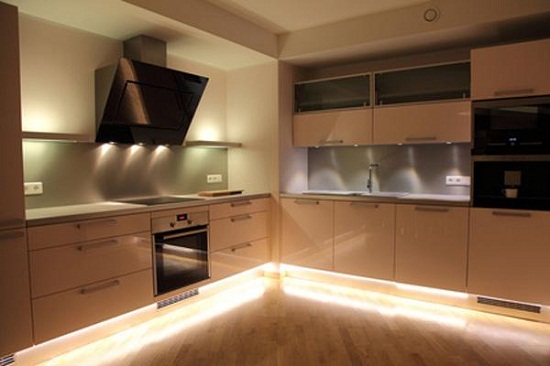
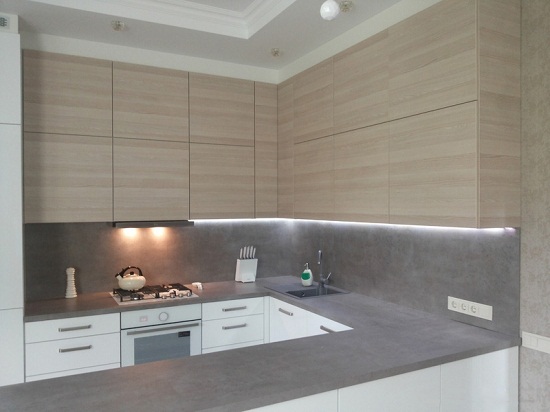
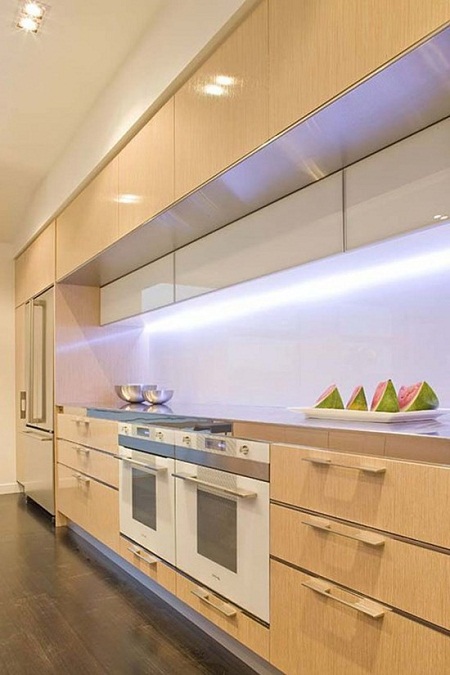
Countertop lighting is a good option for organizing kitchen lighting. You can make it in various ways. Previously, for this purpose, fluorescent lamps. Now, with the advent of LED strip and special boxes, this task has been greatly simplified. In addition, due to the low power consumption of LEDs, such lighting is also economical.
LED strip can be glued both directly on kitchen furniture and in special boxes. Boxes come in various configurations, including a triangular shape. Triangular boxes can serve as a corner covering the seam between the cabinets of the upper row and an apron, and at the same time perform the function of scattering light. The only problem of organizing the illumination of a kitchen set of this type is the low prevalence of such structures in the construction market and their significant cost.


Structurally, the kitchen lighting consists of several laminated chipboards and lamps. Chipboard can be made to order, or purchased ready-made and finalized on site. Depending on the configuration of the kitchen, the visor may consist of one or more parts.
An important feature is the width of the visor. Considering that the depth of the top row cabinets is 30 cm, the width of the canopy will be 50 cm. It turns out that the visor will protrude by about 20 cm, which is enough for mounting furniture fixtures.
The visor looks good when it looks like a single chipboard. If it consists of several parts, then naturally there are joints that are clearly visible, this spoils appearance visor. The joint is clearly visible when the edge tape is glued on the chipboard. If you join two plates that do not have an edge, then the joint is almost imperceptible. It should be noted that the raw end face of the laminated chipboard will not be damaged over time, since it is not exposed to moisture.
The second stage of organizing lighting is the installation of furniture lamps. To do this, holes are drilled in the visor in increments of 60 cm. Drilling is convenient with the help of a special crown for wood.
After that, pre-purchased furniture fixtures are installed in the drilled holes. Furniture recessed fixtures can be purchased at almost any specialized store. When buying lamps, we specify in the store the required number of transformers, if the bulbs are 12 volts.
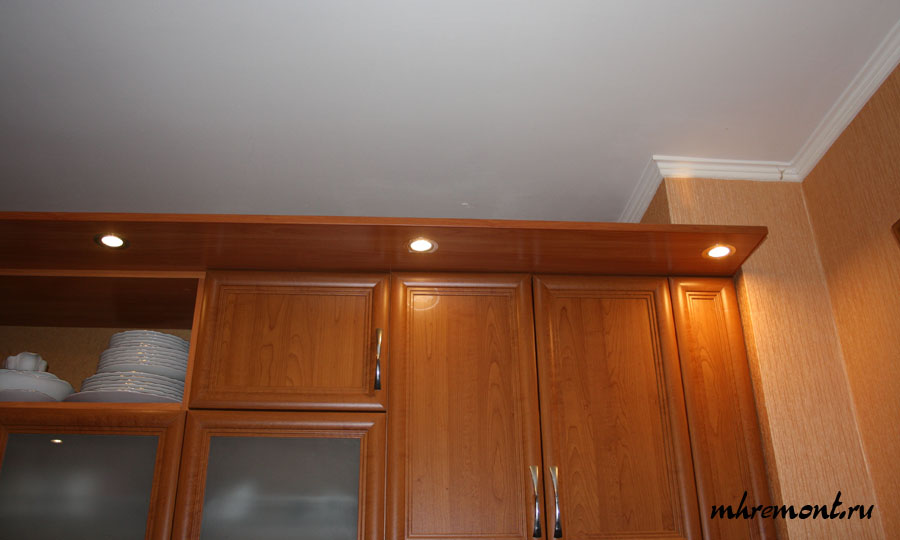
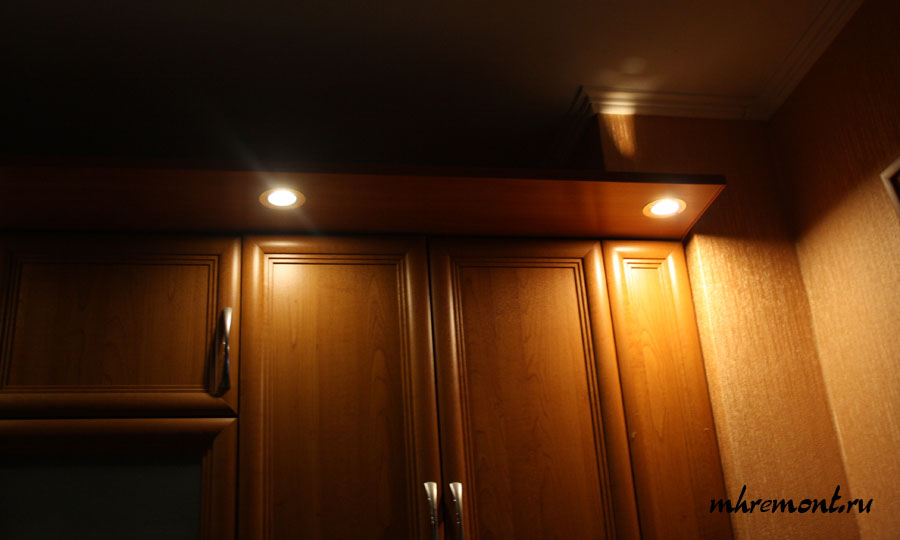
Thus, you can make the backlight of the kitchen set. As an addition, and to hide the unfinished end of the chipboard, I added a thick stuffed edge.
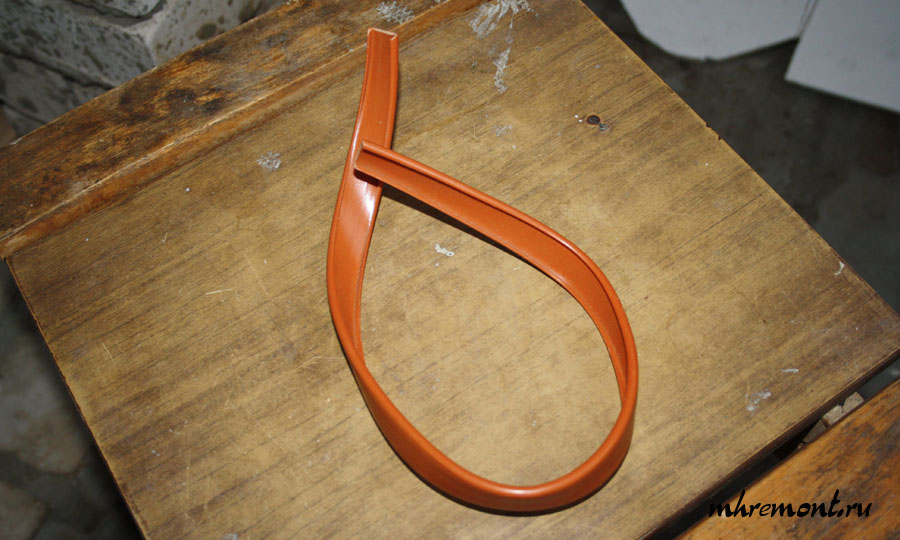
In my opinion, it turned out well.
![]()
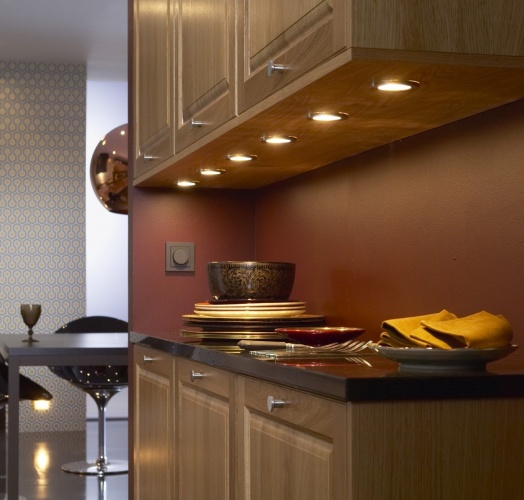
Comparison of LED and halogen lamps
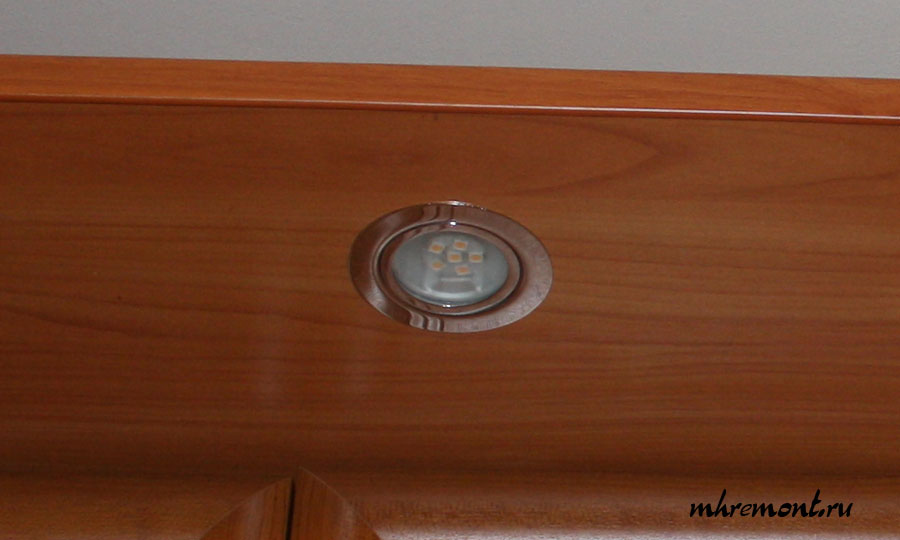
After a little thought, I decided to install 3 W LEDs, which, in fact, is shown in the photo. They look like this.
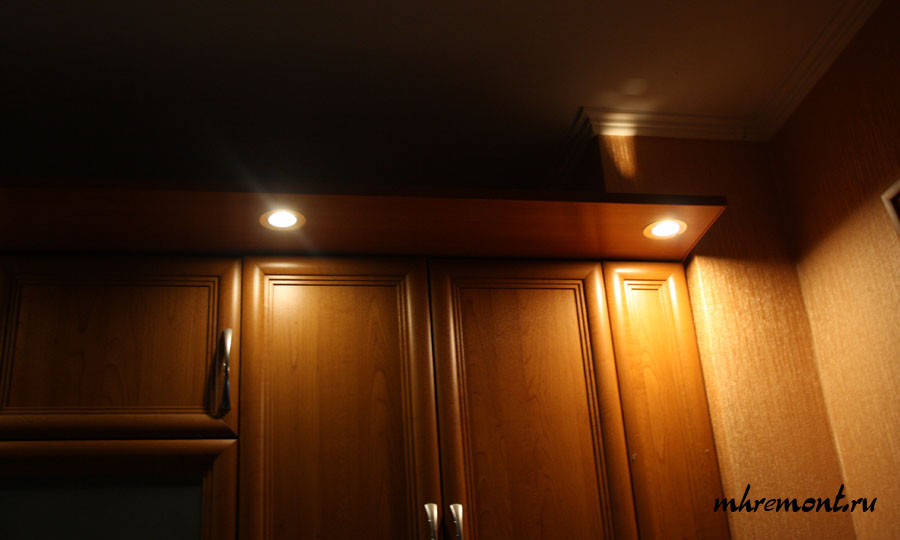
Acquired specially with yellow light. Here's what happened in the end. This is how it looks during the day.

And this is what it looks like at night.
The last photo shows a comparison of the glow of a 3W LED bulb (left) and a 20W halogen bulb (right). The LEDs are less bright, but illuminate the kitchen and countertop quite well. In addition, they do not heat up and have a directional glow, i.e. do not shine upward through the technological holes in the lamps.
Why one halogen lamp? The fact is that due to their low power consumption, all six LED light bulbs cannot run a 60W transformer. Therefore, I had to leave one halogen. Hence the moral, to connect LED bulbs, you must purchase a special low-power transformer.
In conclusion, a few ideas for organizing the lighting of the kitchen set.
Kitchen lighting is an important element of kitchen design. Illumination is not only a decoration, but also of great practical importance. From my own experience, I can say that it performs two main functions - this is the illumination of the working area of the kitchen set and the illumination of the kitchen when bright light is not required.
The lighting of the kitchen set and the working area can be organized in different ways. Often they do not make additional structural elements directly to the kitchen furniture itself, but organize lighting on the ceiling. To do this, along the perimeter of kitchen furniture, a plasterboard box is mounted on the ceiling, into which spotlights are built.
This approach is good and universal, but this can only be done at the repair stage. And what to do in the case when the repair has already been done, but the kitchen lighting has not been provided? There are two more options: make a backlight with a visor or install a backlight directly above the tabletop.
Countertop lighting is a good option for organizing kitchen lighting. You can make it in various ways. Previously, fluorescent lamps were used for these purposes. Now, with the advent of LED strip and special boxes, this task has been greatly simplified. In addition, due to the low power consumption of LEDs, such lighting is also economical.
LED strip can be glued both directly on kitchen furniture and in special boxes. Boxes come in various configurations, including a triangular shape. Triangular boxes can serve as a corner covering the seam between the cabinets of the upper row and an apron, and at the same time perform the function of scattering light. The only problem of organizing the illumination of a kitchen set of this type is the low prevalence of such structures in the construction market and their significant cost.
Structurally, the kitchen lighting consists of several laminated chipboards and lamps. Chipboard can be made to order, or purchased ready-made and finalized on site. Depending on the configuration of the kitchen, the visor may consist of one or more parts.
An important feature is the width of the visor. Considering that the depth of the top row cabinets is 30 cm, the width of the canopy will be 50 cm. It turns out that the visor will protrude by about 20 cm, which is enough for mounting furniture fixtures.
The visor looks good when it looks like a single chipboard. If it consists of several parts, then naturally there are joints that are clearly visible; this spoils the appearance of the visor. The joint is clearly visible when the edge tape is glued on the chipboard. If you join two plates that do not have an edge, then the joint is almost imperceptible. It should be noted that the raw end face of the laminated chipboard will not be damaged over time, since it is not exposed to moisture.
The second stage of organizing lighting is the installation of furniture lamps. To do this, holes are drilled in the visor in increments of 60 cm. Drilling is convenient with the help of a special crown for wood.
After that, pre-purchased furniture fixtures are installed in the drilled holes. Furniture recessed fixtures can be purchased at almost any specialized store. When buying lamps, we specify in the store the required number of transformers, if the bulbs are 12 volts.
Thus, you can make the backlight of the kitchen set. As an addition, and to hide the unfinished end of the chipboard, I added a thick stuffed edge.
In my opinion, it turned out well.
![]()
Comparison of LED and halogen lamps
After a little thought, I decided to install 3 W LEDs, which, in fact, is shown in the photo. They look like this.
Acquired specially with yellow light. Here's what happened in the end. This is how it looks during the day.
And this is what it looks like at night.
The last photo shows a comparison of the glow of a 3W LED bulb (left) and a 20W halogen bulb (right). The LEDs are less bright, but illuminate the kitchen and countertop quite well. In addition, they do not heat up and have a directional glow, i.e. do not shine upward through the technological holes in the lamps.
Why one halogen lamp? The fact is that due to their low power consumption, all six LED bulbs cannot run a 60 W transformer. Therefore, I had to leave one halogen. Hence the moral, to connect LED bulbs, you must purchase a special low-power transformer.


