
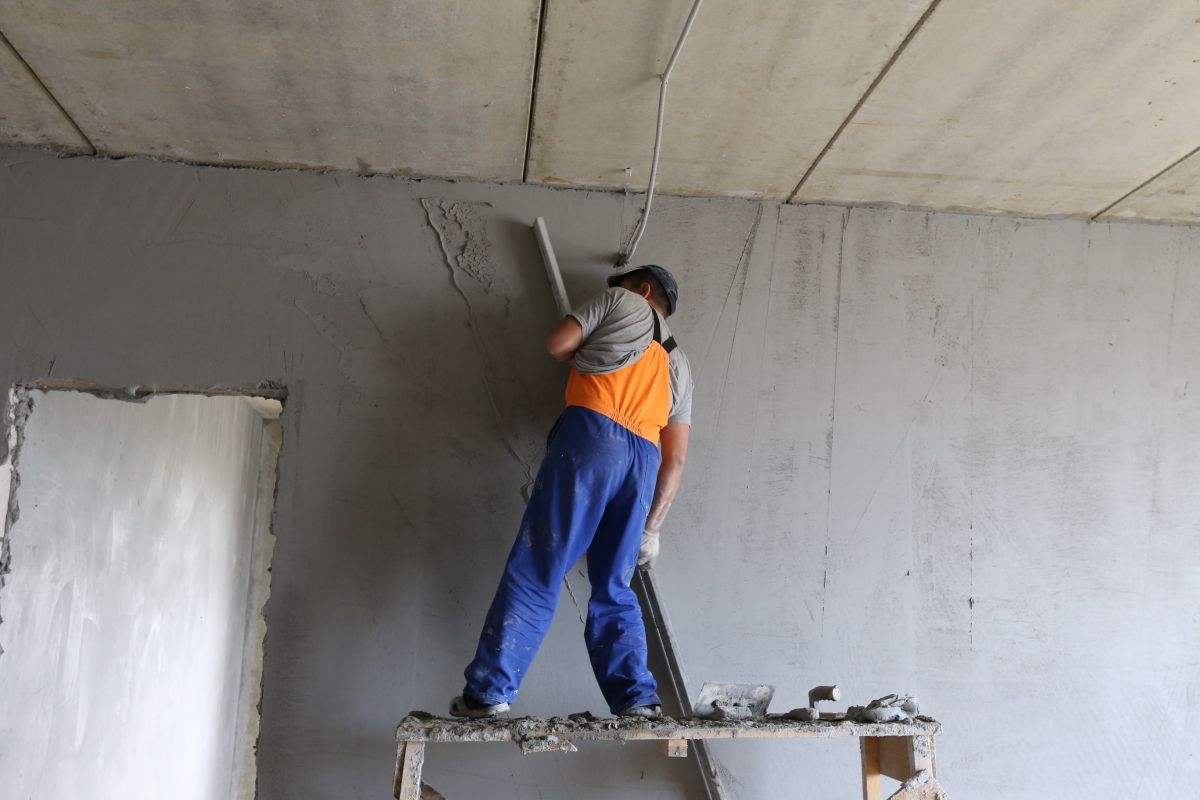
Improved wall plastering is not a special mortar, but a surface finishing method. It is of superior quality and the best parameters operation. This method is often used for interior cladding of buildings.
The solution is well suited for surfaces made of brick or concrete. The requirements that such coatings must meet are specified in building rules and regulations.
This article will study in detail the technology for applying improved plaster and its main characteristics.
The main differences between improved plaster
 A wall finished with improved plaster can be painted immediately
 Improved plaster has a number of significant differences from other types:
- The surface of the wall after such processing is of better quality. In addition, the wall can be immediately painted or wallpapered on it.
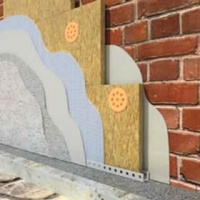
- The thickness of the layer of such a lining, according to the norms, can reach 15 mm, the thickness of a simple plaster is 12 mm. Improved lining is thicker due to the additional layer.
- According to the norms, when facing walls in this way, it is necessary to use construction beacons with the same thickness as the planned finishing layer.
- The errors allowed with improved processing are lower than with simple finishing. Vertical deviations up to 2 mm per 1 m² are allowed. No more than 2 areas with defects are allowed per 4 m².
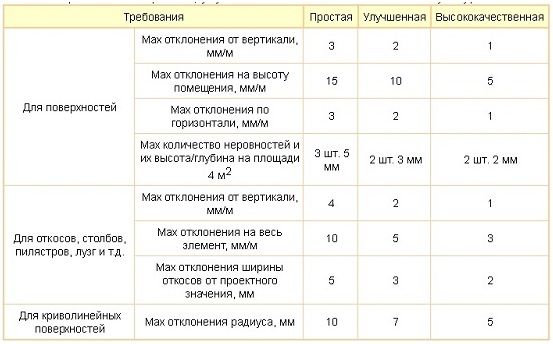
Comparison table different types plasters can be seen below.
Technological features
 Spray with a liquid solution
 The stages of work with an improved mixture are the same as when applying other solutions. The first step is to spray the wall, then priming and applying the main layer of plaster. However, there are some differences:
- spraying is carried out with a liquid solution. It is applied to the wall and smeared on it, there is no need to perform alignment. In this case, the layer thickness should not be more than 5 mm;
- the soil is made from a thick mixture that looks like dough. Only 1 layer is applied with a thickness of not more than 8 mm. Sand particles in the solution should be no more than 2.5 mm;
- the covering is carried out with a thin layer of approximately 2 mm. The size of sand granules is not more than 1-2 mm. The density of the solution should be the same as when sprayed.
Due to the small thickness of the improved mixture, it can be used for facing almost any surface, even with complex relief.
Areas of use
 Such plaster is used for interior cladding of various types of premises. It also applies to outdoor processing various buildings and structures.
There are main areas where this technology is used most often:
- Plaster brick walls and facades from different materials.
- Facing various columns and cornices, erected from a variety of materials.
- Finishing surfaces inside the building.
- Handling small buildings.
 Improved wall plastering and the technology for applying it are complex, so not every novice builder can handle it on their own. The procedure consists of the following steps:
- surface preparation;
- solution preparation;
- spatter;
- padding;
- finishing layer or nakryvka.
Wall preparation
The technology for performing improved plastering begins with preparatory work. First of all, everything superfluous is removed from the wall. After filling all minor surface defects
Before proceeding to plastering, it is recommended to treat the wall with a deep penetration primer. This will improve the adhesion of the mixture to the surface. Work continues only after the primer has dried.
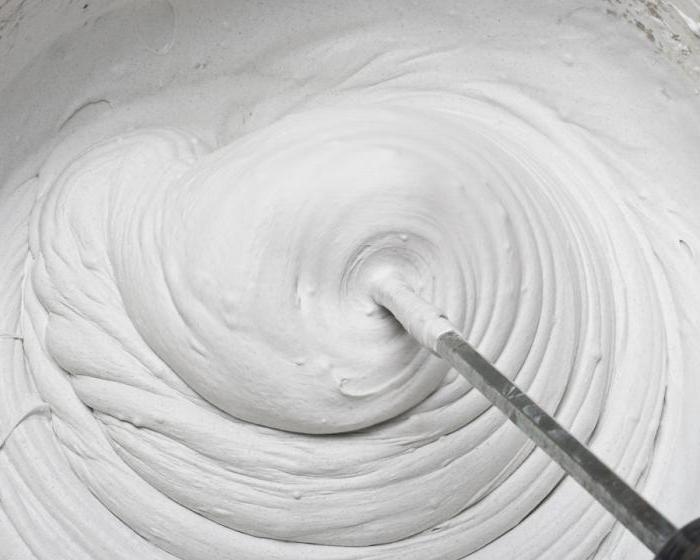
Mixing the ingredients of the solution
 PVA glue is added to improve the quality of the mixture.
 Facing for such a surface can be made of slaked lime and sand. The ratio of solution to water is 1 to 1.5. When adding sand, use 1 part water, 0.3 parts lime and 3 parts sand.
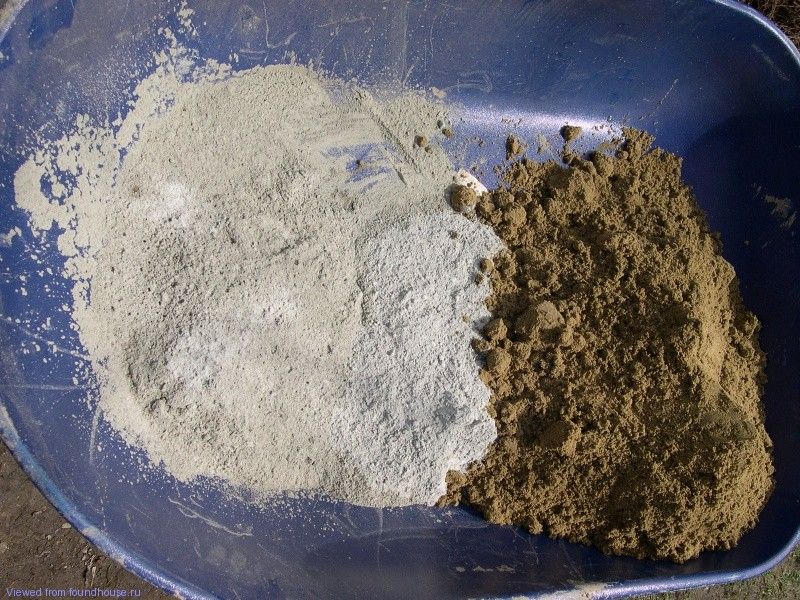
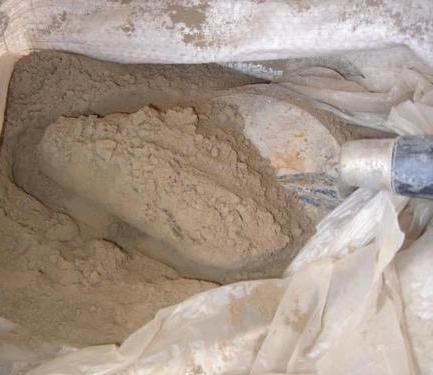
- The following ingredients are prepared: water, cement, sand and PVA glue. All materials will be cheaper than purchasing a ready-made solution.
- 20 liters of water are poured into a large container.
- Approximately 200 grams of adhesive is poured out, if necessary, the amount can be increased.
- The composition is mixed.
- Sand and cement are gradually added until the desired consistency of the solution is formed. For more information on applying the improved mixture, see this video:
 This recipe allows the solution to adhere well to the wall, due to the presence of PVA glue in the composition.
Even if the surface is poorly primed, the adhesive will prevent possible cracking and lagging of the mixture from the wall.
Also, the addition of glue will significantly increase the plasticity of the mixture, which will facilitate the application of the plaster.
Such a recipe in the production of the solution allows the use of a larger layer during application. The maximum allowable thickness increases to 8 cm. At the same time, there is no need to use a building mesh for reinforcement. This factor is extremely important if the walls have a large number of irregularities or when carrying out outdoor work.
Sometimes gypsum is used instead of cement to create a mortar. In such a composition, it is necessary to add a small amount of PVA glue. For 10-15 liters of water, you need about 100-150 grams of glue. This will increase the strength of the composition and its quality.
Spray
 Liquid mortar well fills all recesses and cracks in the base
 Pre-spraying is carried out with a weak solution.
This is an extremely important nuance, as it is used to prepare for priming.
Due to the liquid state, the solution can easily fill all cracks and recesses. This allows you to create a flat surface for subsequent work.
Spraying must be done carefully so as not to miss the bumps. Then the result will be a good coating without cracking and lagging behind the wall.
Ground application
After spraying, the wall is primed. The solution is applied with a trowel, after which it is leveled with a trowel. You need to hold the tool at a special angle of 150 ° and perform movements first from the sides, and then from the bottom up. For more information about spraying, see this video:
The thickness of the soil should vary from 12 to 20 mm. Evenness is checked using a rule. If defects are found, they are sealed with a solution.
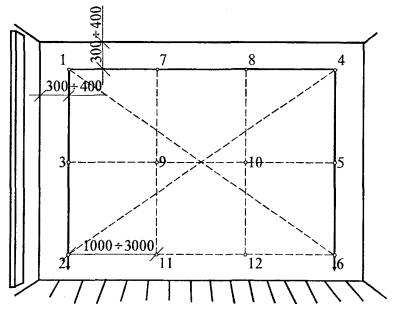
To make sure that the primer was applied evenly, the rule is first applied to the wall horizontally, and then vertically and diagonally.
The soil is the main layer of plaster, which makes up its largest thickness. It is this material that allows you to finally level the wall, so it is extremely important to follow this stage in accordance with all the rules.
Final layer
Covering is done according to special technology. It is applied, smoothed, and then rubbed. For such work, you can use an air bucket or an ordinary brush and a grater. See more in this video:
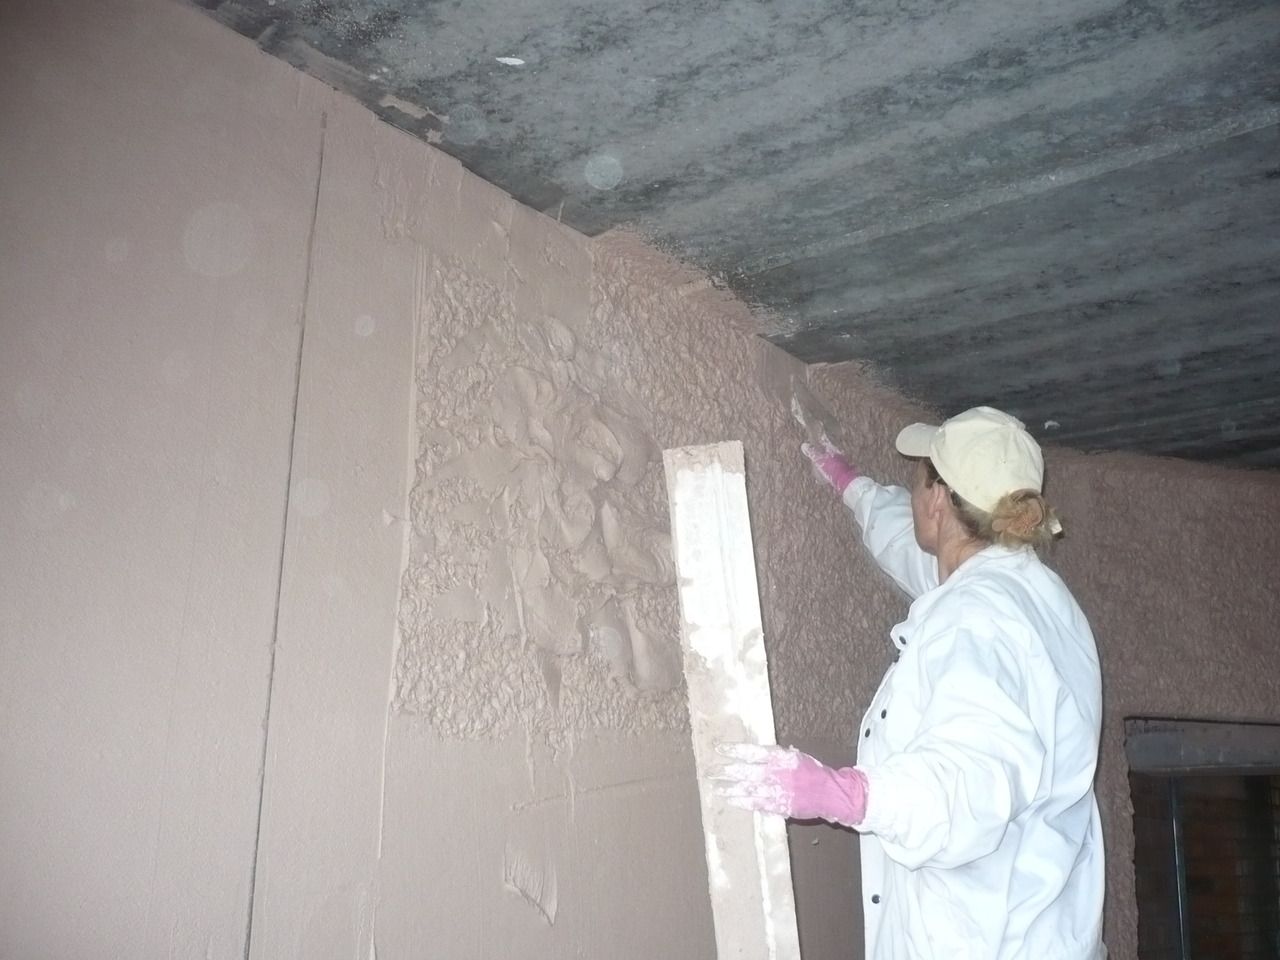
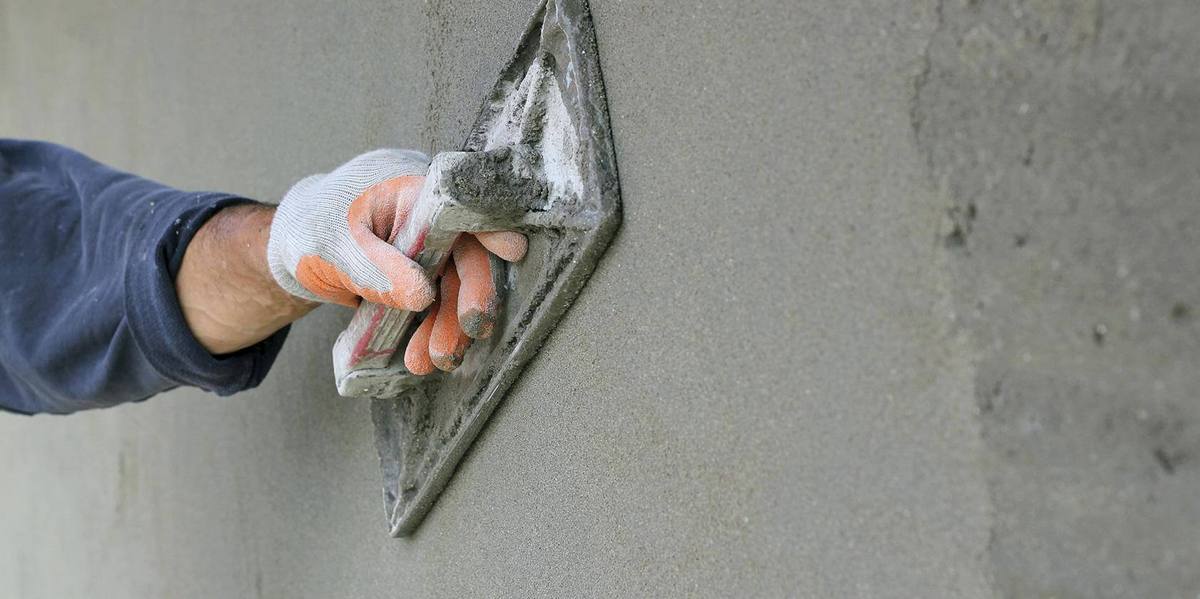 Each layer is leveled with a trowel
 First, the dried soil is moistened with a small amount of water. The brush is applied in several layers. Each layer is leveled with a trowel.
After the mixture dries a little, it is overwritten. For this, a wooden grater is used, while it must be pressed tightly against the surface. With the help of such a tool, circular movements are first performed, then vertical and horizontal.
The processing procedure is complex and will require skill and experience to complete. If the cladding solution was bought ready-made, you must carefully follow all the instructions from the manufacturer indicated on the package.
Plaster is associated with the simplest types of finishing materials, which are distinguished by their affordable cost and ease of application. The very technique of facing surfaces with plaster coatings is characterized by versatility, which allows it to be used in both professional and household repair activities. Nevertheless, the requirements for finishing are constantly increasing, affecting the technical and aesthetic aspects of wall design. Therefore, there are more and more formulations on the market, some of the properties of which have been modified with additional ingredients. This is how improved plaster appeared, which stands out against the general background not only in composition, but also in laying technology.
What is the advantage of improved plaster?
In most cases, even simple plaster, subject to its high-quality application, fully fulfills its functions for a long time of operation. Nevertheless, improved compositions make it possible to eliminate a number of technical and physical shortcomings of conventional solutions. First of all, it is mechanical stability, which implies a high threshold of tolerance of the structure to the formation of microcracks, increased sealing, wider possibilities for reinforcing with a mesh, as well as the absence of destructive processes in contact with moisture. Modern technology Improved plaster also focuses on the preservation of the coating under special conditions of use. It has already been noted that such compounds are not afraid of moisture, but this does not mean that any improved solution can be used in the kitchen and bathroom. For such tasks, there are special modified mixtures, which are also improved. A universal modification is fire resistance. Towards ordinary plaster such mixtures have a long structure retention period under direct thermal conditions and do not contribute to the spread of fire.
Composition of improved mixtures
To begin with, it is worth saying that coatings made from traditional compositions without modifiers are also called improved plaster. Only three components are used to prepare such mixtures - sand, water and cement. And they are called improved only because of the special styling technique, which will be discussed below. The normative composition of improved plaster necessarily provides for the introduction of PVA glue, which acts as an additional binder between the cement base and sand. More importantly, the base components must be of high quality. Suitable sand, for example, is mined from the ground, and not washed in rivers. The second option is cheaper, but in this case you cannot get a real improved composition. Also, cement should not be stale in cold and wet warehouses, but dry and ready for use - it is recommended to use either M500.
Solution preparation

There are also features in the procedure for preparing the solution. So, if simple mixtures are prepared using four parts of sand to one part of cement, then in improved solutions the ratio will be 3:1. An increase in the number of sand fractions, however, is allowed when added to the solution. PVA glue should be used at the rate of 200 g per 20 liters of water. With the formation of a water-glue solution, preparation should begin, stirring it thoroughly. Next, a dry base with cement and sand is already being introduced. After thorough mixing with a construction mixer, an improved plaster with high elasticity and ductility should be obtained. In some ways, it will resemble molten rubber, but after drying, this effect will pass and a tenacious coating with a strong structure will remain.
Features of gypsum compositions
One of the improved varieties, which is obtained by modifying the basic set of components. As the name implies, this is achieved through the introduction of gypsum. First, the already described procedure for creating adhesive solution, after which gypsum is added to the dry mixture of sand and cement. The volume of this additive may vary, but in any case the following rule remains: the mass of gypsum filler replaces only part of the mass of cement, but not sand. That is, 20-30% can be excluded from the usual proportion of cement, compensating for the lack of gypsum. If you plan to perform improved plastering at minimal cost, but without much loss in quality, then you can use just such a combination. Gypsum interacts optimally with PVA, so the displacement of cement will not be as noticeable in terms of the technical qualities of the coating, as is the case with conventional mortars.
Preparatory work before application

It is possible to apply the solution only on durable surfaces, the bases of which do not have collapsing areas. To do this, it is necessary to first clean the previous peeling or weak coatings, primers and paint layers. Next, vertical deviations, that is, pits, are checked. It is desirable that the target surface does not have deviations in height of more than 2 mm. A mandatory step in preparation is spraying. This is a kind of priming of the site, on which the improved plaster with an adhesive base will be applied. The spray solution itself is prepared from soap and water. In fact, this is soapy water, which should be lightly moistened with a work surface before laying the plaster. At the same time, the spray should not leave individual places dry. It is necessary to fill small cracks and holes, so the presence of such defects in the open can create a risk for the destruction of the new coating.
Improved plastering device

Laying is implemented in two stages - by making the base and covering. The base is applied as a primer. To apply the mass, you can use a trowel, performing circular movements at an angle of 150 degrees relative to the working surface. The thickness of the base coat is 15-20 mm. As for the coating, to some extent this is the finishing layer, during which accuracy is especially important. This layer will have a height of about 10 mm, that is, the total thickness of the improved plaster will be 25-30 mm. The coating is applied with a grater, brush or trowel. The high responsibility of this stage is due to the fact that the contractor will need to have time to complete the grouting and leveling the coating on time. For this, a pneumatic ladle can be used - a mechanized tool for high-quality laying of plaster mixtures.
Where is it appropriate to apply improved plaster?
An improved mortar for plaster, with all its advantages, has a number of restrictions on its use. Firstly, the mixture is more expensive due to the use of high quality main components and the addition of an adhesive ingredient, not to mention possible auxiliary modifiers. Secondly, the presence of PVA glue, in addition to a positive effect, also gives a negative one - the environmental friendliness of the composition is reduced, which is an obstacle to the use of solutions in children's rooms, bedrooms, etc. Therefore, ordinary home craftsmen can recommend such mixtures for exterior finish. The best option would be improved plastering of the walls of the facade. The performance characteristics of the composition will protect the house from climatic influences, as well as protect the base of the brick or concrete surface from mechanical damage.

Conclusion
As can be seen, such mixtures can be called improved only with some reservations. Therefore, before deciding to switch to this type of finish, you should think about why it is impossible to use conventional coatings. In addition, improved plaster in a broader sense can also be improved solutions in the base component. Other natural ingredients can be used to improve certain performance properties. Professional plasterers, in particular, regularly experiment with adding the same lime and gypsum in different proportions.
Contrary to popular belief, the terms "improved plaster" or "high-quality plaster" do not mean a composition of higher quality at all. More precisely, certain requirements for ingredients are present, but the main point is still in the difference.
Let's see what the differences are, hiding under the concepts of "improved" and high quality.
Improved and high quality plaster. Differences and benefits
The technology of applying the described methods may seem complicated, but in the future, the extra work will pay off with the trouble-free operation of the coating.
Differences with a simple finish: application
First, let us explain how the performance of the plasters in question differs from simple ones. The type of finish familiar to us is always applied, the solution is kneaded at the same time quite steep. It can be either a beaconless installation. The surface is quite smooth, but still requires puttying before further fine finishing.
High quality and improved wall plastering technology in direct sequence:
- spray. The solution is taken quite liquid, such that it is easily thrown over, and then distributed over the surface.
- Priming. For this operation, there is already a steep solution, of the same consistency that is used for single-layer installation. The application technique is the same. High-quality finish - 2 layers of primer, improved - 1.
- Nakryvka. A very thin layer that evens out the finished surface.
All these actions ensure the application of a high quality finish with a long service life.
How the application options differ: technological table
Note:all other actions for the implementation of improved plaster - leveling layers, cutting corners, grouting, finishing slopes, smoothing are done in the same way as with a simple application. Preparatory work carried out as standard.Differences among themselves
And now about how improved plaster differs from high-quality one. The main parameters for applying the mortar for both finishes are described above. But there is one more nuance: the use of beacons. Installation of high-quality plaster is carried out only on them. In this case, the walls will be perfectly flat both vertically and horizontally. However, it requires certain skills, including the ability to handle a laser level.

Work on lighthouses
Improved wall plaster is applied without beacons, with one layer of primer. In this case, the finished coating will be of very high quality, even in plane. The performance remains very high. True, there may be slight deviations vertically and horizontally.
Note: in rooms where improved plaster is used and it is not supposed to organize a finish with a distinct geometric pattern, this disadvantage is not significant. Especially since you benefit from material and time savings.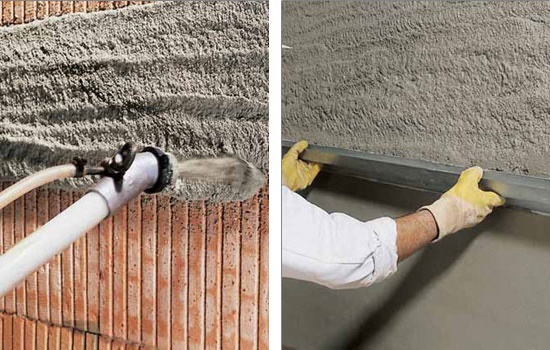
Each of us may face such a problem in his life as a repair. And one of the main materials that will be involved in this is plaster. But there is also a more progressive composition for leveling surfaces - improved, but what improved plaster is and how it is applied in practice will be discussed below.
Peculiarities
The high relevance of plastering works, which are becoming milestone, is confirmed by practice. Every year more and more people want to decorate their homes in this way.
Because of this, even despite the large and constantly replenished assortment of sellers of this finishing material, the price of plaster mixtures rarely drops. As an example, we should show improved plaster, which appeared, although not so long ago, with us, but consumers appreciated it.

This method of decorating walls, which results in more high quality work, surpasses the usual application of plaster. Additional work allows you to make the surface more even and smooth, completely, painting or wallpapering.
From the foregoing, it follows that the main convenience of this material is its high efficiency in leveling walls. In this case, an ideal surface is obtained without defects and with a moderate consumption of plaster, but the price of the work increases.
Technology using improved composition
Such plaster is used for processing the internal walls of public buildings, country houses and city apartments. Most often, the base for it is brickwork, but it also showed itself well on a concrete surface.
The number of plaster layers and the technology of work depend on the declared quality of the finishing of the building mixture. of this type. In this situation, the consumption of a single material during the design of the walls will be different.
The sequence of steps and the number of layers when working with improved plaster remain the same as when using ordinary plaster:
- Base.
- Spray.
- Padding.
- Nakryvka.
According to SNiP for improved plaster, the thickness of its layer is allowed up to 15 mm, while for ordinary plaster it is 12 mm. Additional millimeters are obtained by applying another layer to the surface.
In addition, the thickness of the improved wall plaster according to SNiP on concrete flat surfaces is 2-3 mm, i.e. you need to cover and grout, on brick - up to 10 mm.
The instruction for the sequence of actions of this method of plastering looks like this:
- Prepare the surface. To do this, you will need a hammer, chisel, brush and bucket. Clean it of dirt and dust, remove all irregularities, cut off the influx of mortar and moisten the mass of seams if the masonry is made in a wasteland. When brickwork made in a full seam, select it to a depth of 15-20 mm and moisten.
- Prepare a solution. Use the trowel, bucket and box. If lime mortar is needed, it can be prepared as follows: 1: 1/5 (lime paste: sand). Extinguish lime, add water, strain with lime milk, mix sand: 1: 0.3: 3 (water: lime: sand).
- Apply a deep penetration primer to the wall to remove dust and improve adhesion.
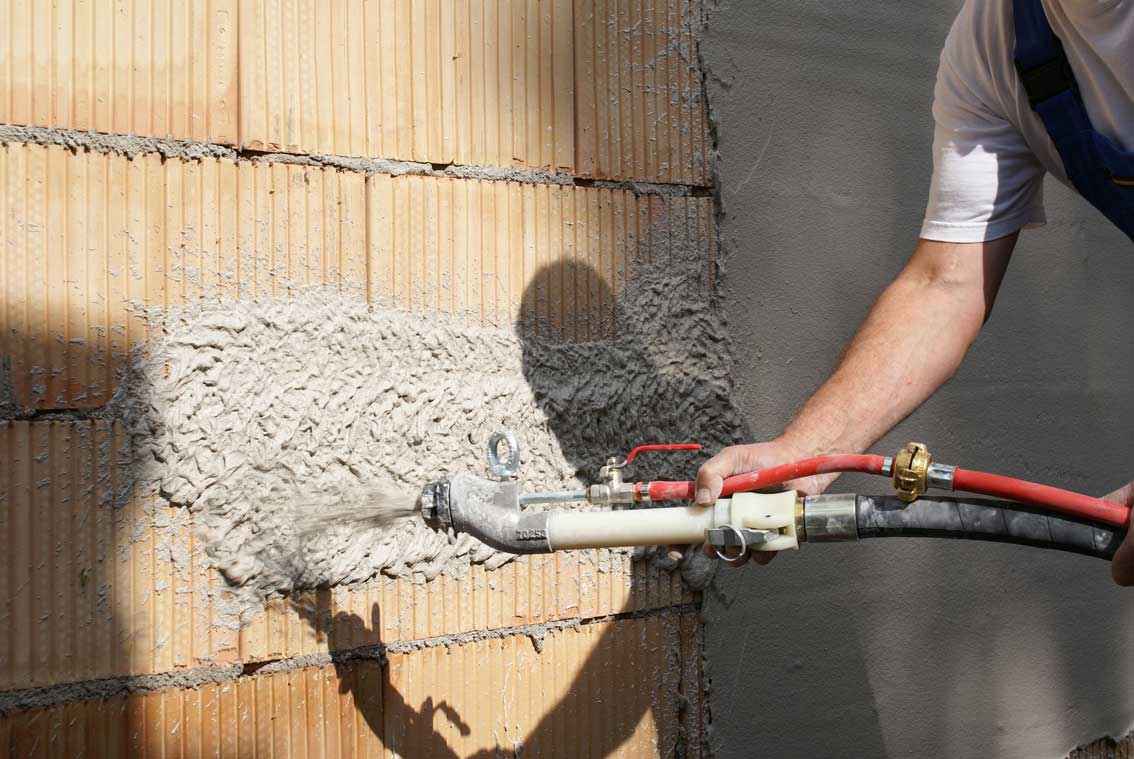
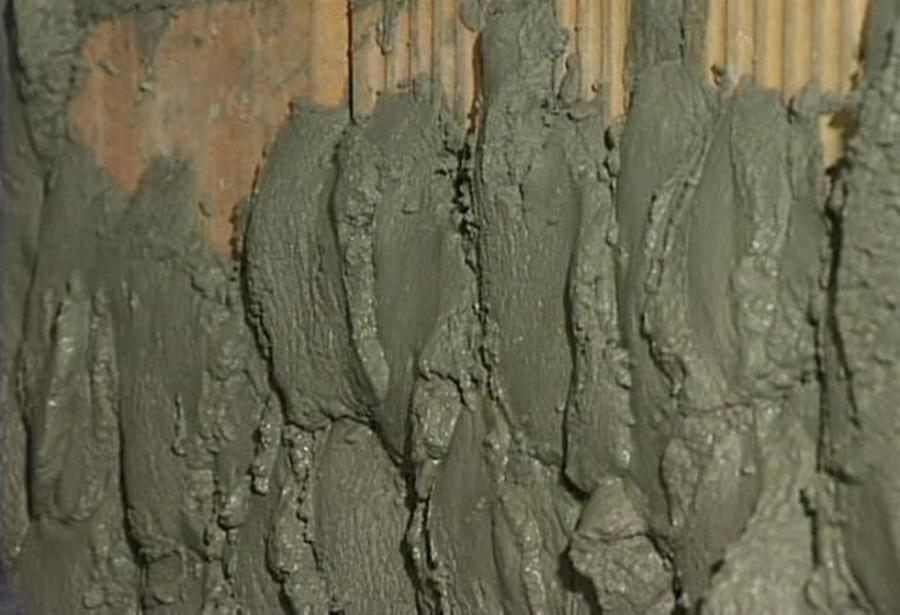
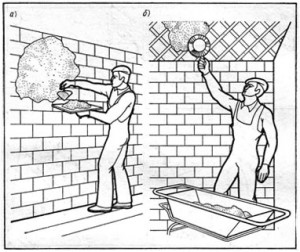
- Spray the surface of the wall with your own hands. You will need a trowel, bucket, falcon. Spray the spray with a layer of 3-9 mm, covering the entire surface so that there are no empty spaces. It is designed to fill all sorts of irregularities. The solution should have a creamy consistency.

In the photo - spraying a brick wall with mortar
- Apply a primer up to 15-20 mm thick, which will become the basis of the plaster. Its consistency should be denser than spray and resemble dough.

- Smooth out the solution. Take a trowel and trowel for work. Attach the latter to the surface with one edge. Position the other at an angle of 150˚ and compact and level the mortar with upward movements. Move halfway again from right to left and from left to right.
Check and level the ground with a rule. Use a building rule 2 m long. Place it on the surface, improved plaster tolerances allow 1-2 defects up to 3 mm deep per 2 m. Mortar them and level them.
Tip: apply a template or rule 2 m long in different directions horizontally, vertically and diagonally to detect surface irregularities.
- Apply a top coat, smooth it out and rub the top coat. Use a ladle, a grater, a trowel, a bucket and a brush at this stage.
The coating has the same consistency as the spray.
- moisten the soil abundantly with water and wait until it is absorbed;
- apply a cover. It is necessary to apply it in several layers, the thickness of which is small;
- carefully level each of them with a half;
- grout the covering after it has set, for which press firmly to the surface and make circular movements. Then make the grout in a straight line.

It is possible to plaster in this way not only walls and ceilings, but also window openings, going through the same steps as in conventional plastering. In this case, the deviation of the width of the finished slope from that indicated by the project by more than 3 mm is not allowed.
Tip: make sure that the plaster mortar adheres firmly to the surface, does not peel off and has a well-worn outer layer without visible defects.
Process features
Use the list of actions described above for plastering niches for radiators, coating skirting boards and trim. It is difficult to argue with the statement that such processing of wall surfaces is a rather laborious, expensive and responsible process.
In this situation, it will be difficult for a beginner in the construction business to do without the advice of a qualified specialist, since this work involves the possession of certain skills.
Therefore, if finances allow, it is better to entrust it to master finishers. As a result, you should get the most even walls, which can then be painted, wallpapered or decorated in some other way.
Tip: Be sure to follow the instructions for use of the material provided by the manufacturer. Thus, you can avoid the risk of swelling, cracking and peeling of the plaster layer from the wall.
Remember that the low level of performance technique, as well as rapid wear, have a very negative effect on the final result. plaster mixture which does not correspond to the declared quality.
Therefore, be sure to check the expiration date before purchasing the latter in order to obtain a durable coating. Do not forget also that it is necessary to observe the tolerances for improved plaster according to SNiP.
When working with plaster, be sure to follow the safety rules.
Below are the main ones:
- Remove nails from the surface to be treated before applying the plaster.
- Wear safety goggles when you use reinforcing mesh to reinforce the layer. This is due to the fact that it can vibrate when a solution gets on it, which can fly in different directions, it is possible that in the eyes.
Conclusion
The technology of improved wall plastering makes it possible to carry out high-quality wall finishing in country houses and city apartments. But it requires a special approach to repair work. In this situation, a special role is played by the precise implementation of the instructions for preparing the solution and applying it to the surface.
Remember that you can make perfectly smooth walls only when you can put in enough effort and knowledge. In the presented video in this article you will find additional information on this topic.
Surely, everyone knows the expression "Walls help at home." In the literal sense, they help us by keeping warmth, silence and pleasing to the eye from the inside.
And plaster is a building mixture, thanks to which we eventually get such comfort, safety and beauty.
More about plaster
The choice of finishing layer is a responsible matter. It is important to choose the right composition of the mixture and the optimal thickness of the plaster. Let's delve into the entertaining theory of the repair business, so as not to be mistaken.
So, you are going to clad the walls from the outside, which means that you will have to deal with facade plaster. If the choice fell on inside walls, this is interior plaster.
 Walls that have not been touched by the exterior finish absorb moisture that penetrates inside the house. It is unlikely that anyone would want to be a witness to how, in inclement weather, the warmth “escaping” from your home. Plasters for finishing the outer surface of the house are made on the basis of sand, lime and cement. The thickness of cement plaster, which is the most popular, should be at least 10 mm.
The process of external plastering takes place in 3 stages:
 splatter- the first layer necessary for a strong adhesion of the wall surface with plaster.
The thickness of the sprayed layer in accordance with building codes and regulations (SNiP) should not exceed 5 mm.
 Priming- the second layer with a thickness of 7-8 mm - is the base. If you need to apply a thick layer of soil, then it is divided into several layers, each of which should not be thicker than 7 mm.
 Nakryvka- the final leveling layer, up to 2 mm thick for conventional plasters.
The coating solution is applied to the still dry layer of soil.
Attention! Any work on applying coatings to the facade begins only after the walls have settled and have been cleaned of stains, dirt and building dust.
One of the types of exterior wall decoration is the so-called wet plaster. It is applied over two layers: heat-insulating and reinforcing. The thickness of the plaster layer on the insulation can be 3-4 mm (if it is a thick-layer facade) or 7-9 mm (thick-layer facade).
Interior plaster
 Performs two important functions:
- serves as the basis for further wall decoration (whether it be wallpapering, painting or tiling);
- stabilizes the humidity in the room (absorbs excess moisture from the air when it is in excess and returns when the humidity level drops).
Most often, gypsum mixture is used for plastering premises. It has gained popularity due to its environmental friendliness and ease of preparation (diluted with water). All the necessary information is indicated on the packaging. So, for example, the thickness of the Rotband gypsum plaster layer is 10 mm.
Make sure that while the gypsum plaster dries, drafts do not walk around the room. They can cause cracks.
If you or the designer wish to paint the walls, then the plaster must be of high quality. In the case of wallpapering - improved. Putty can be applied to a surface that has undergone a simple finish.
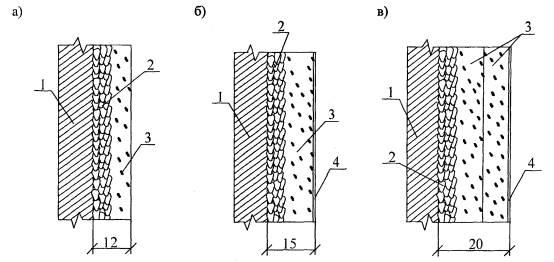
- The normative thickness of the basting of simple plaster (spray and soil) is 12 mm,
- improved - 15 mm
- high quality - 20 mm.
According to SNiP 3.04.01-87 BUILDING NORMS AND RULES:
“3.16. Improved and high-quality plaster should be carried out on beacons, the thickness of which should be equal to the thickness of the plaster coating without the covering layer.
Stucco, beacons and rule
Do you want to transform the walls of your house or apartment with your own hands, but at the same time you do not have a huge amount of plastering experience behind you? Then you can't do without beacons. You can not do it because they can significantly reduce the consumption of the solution. And all this without harm, but, on the contrary, for the benefit of the cause: the evenness of the walls will be ideal.
The best explanation would be a demonstration of this process.


