
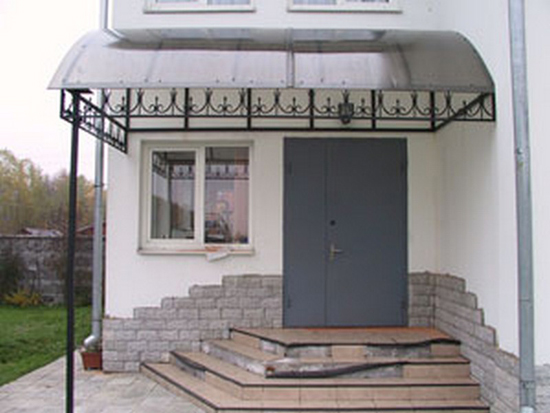
The porch visor of a private house is often made of polycarbonate
How to clad a porch yourself
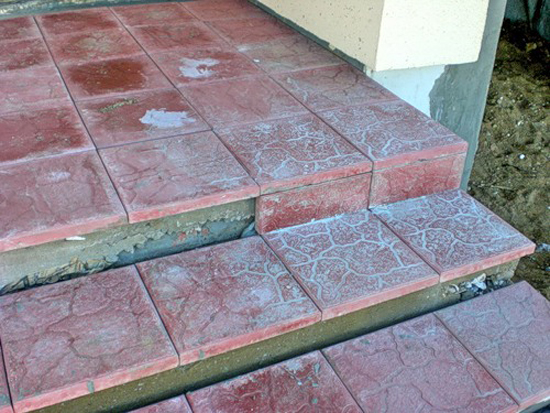
Next, consider how to tile the porch correctly. Since the street staircase is a place of increased mechanical stress and is constantly exposed to adverse natural factors, it is necessary to revet it, strictly observing all the required technologies.
Any unfavorable natural factors constantly act on the porch
Ceramic cladding
To get started, let's see how to overlay the stairs outside the house with ceramics. Finishing in this case is carried out in several stages:
- Puttying and grouting eliminates all surface defects;
- The porch is primed;
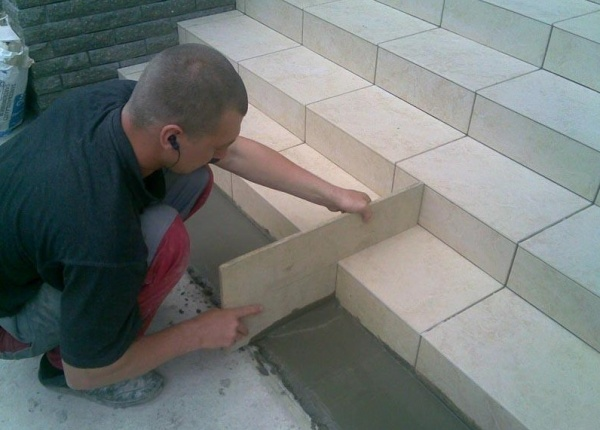
- Laying tiles start from the top platform;
- The layer of glue should not exceed 1 cm. It should be applied both on the finish and on the porch. First you need to cover the material. The cladding of both elements starts from the corners;
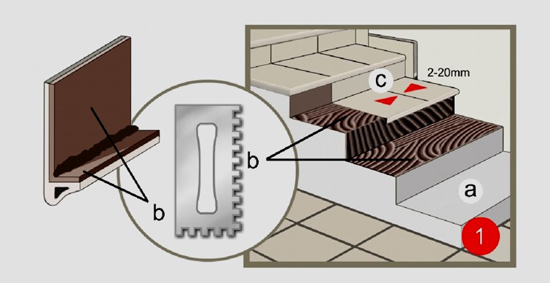
When laying, the adhesive is applied to the surface of the porch and the material with a notched trowel.
- The next step is facing the ends of the porch. If they are high, they should be pre-reinforced with a mesh;
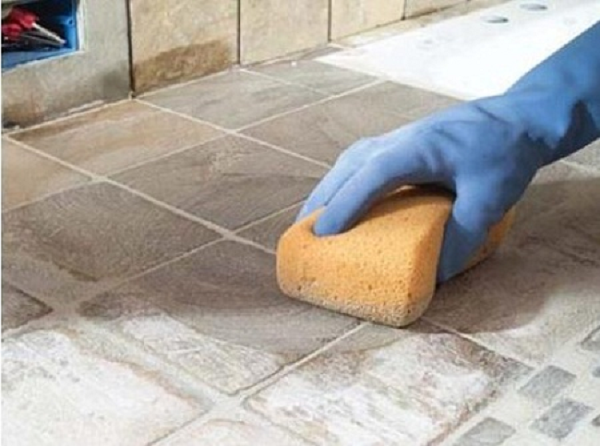
- Two days after the lining is done, grouting is done.
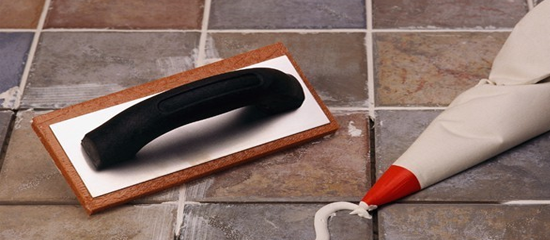
Grouting is carried out two or three days after laying the tiles
Advice: Before laying, it is worth laying out the tiles without glue in order to figure out in what order the elements should be placed.How to tile a porch (video):
Installation of paving slabs
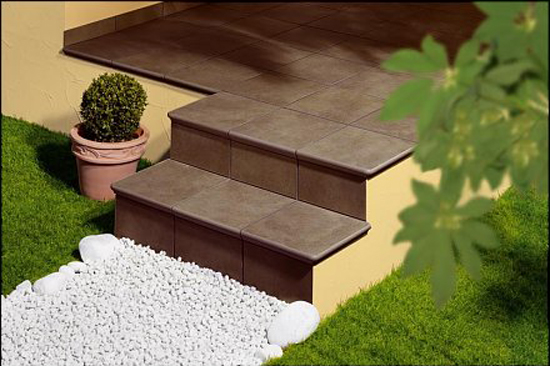
Paving slabs are attached to the porch with cement glue. First, the corner elements are mounted. Then the intermediate ones are attached. Finishing the porch with paving slabs starts from the bottom up - from the first step. The tread is lined first, then the riser is finished.
Porch tiling. Photo of facing steps
Important: When laying, you should ensure that the seams between the elements match perfectly. Otherwise, the finish will not turn out too beautiful.Finishing with porcelain stoneware
Facing the porch with porcelain stoneware is done in the same way as with clinker tiles. Only use in this case should be a special glue designed specifically for this material. Preliminary priming of the surface in this case is also required.
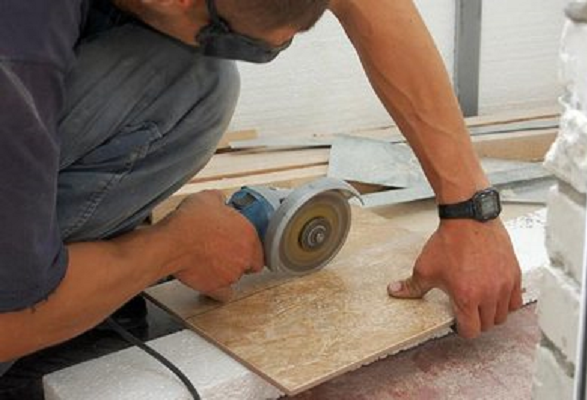
Porcelain tiles for the porch are cut by a grinder with a diamond blade or a tile cutter specially designed specifically for this material.

Porcelain stoneware is cut with a special tool - a tile cutter
Features of stone cladding
It is also similar to the ceramic veneer method. When using porous stone, the material of the porch surface is also primed. Pre stone finish stacked "dry" for cutting.
Sheathing in this case starts from the bottom step. First, the riser is lined, then the tread. When finishing, glue is applied to both the porch and the tile. After laying the element on the porch, it is trimmed and lightly upset with a rubber mallet.
Granite can be revetted only on the steps of the porch
Important: When finishing the porch with stone, you should carefully ensure that the glue does not get on its front surface. The fact is that this tool quickly freezes and it is very difficult to remove it.On the ends of the porch and the parapet, the stone is laid as follows:
- The surface of the facade is carefully leveled and primed beforehand;
- Further, a metal mesh is attached to it (by means of galvanized nails);
- Standard stone tiles 16*35*2 can be fixed to the end up to 2.5m high just with cement glue. When facing the facade with slabs bigger size additionally, metal hooks are used (to the grid) and pyrons connecting the elements together.

For facing the facade of the porch, a variety of stones can be used.
Important: Before facing natural stone or laid out should stand for at least 5-6 months. Otherwise, the lining may crack during the shrinkage process.Thus, we figured out how to tile the porch and natural stone. If you do the work, strictly adhering to the established technologies, the result will be a beautiful and durable finish.
Recommendations for the choice of facing materials and their installation
What is better to revet the porch: tile or paving slabs?
Porch paving slabs are a cheaper option. In terms of presentability, it is in no way inferior to tiles. The street porch can be finished with both very simple and patterned or embossed tiles made of concrete and other materials.
Paving slabs of the same type can be used for the path leading to the house and for the porch itself. This design is relevant and looks beautiful.
Laying stairs with tiles is somewhat more difficult. Thin material requires a perfectly flat surface and accurate grouting. The tile can be an excellent continuation of the hallway or hall.
Facing the porch with tiles requires a competent selection of materials. Special attention should be given to the surface of ceramic tiles. It should not be too smooth, as this is traumatic. 
What is the best way to finish the porch of a wooden house?
The decoration of the porch of the house, a photo of which can be found on the Internet, should be selected depending on the material from which the span and steps are made. wooden porch in a private house, it can be lined with special panels with overlays.
They are made from wood. For facing steps, it is better to choose its solid rocks, for example, beech, oak or hornbeam. The wood for the porch should be treated with an antiseptic that will prevent it from rotting. It should also be varnished for outdoor use.
Before you finish the porch of the house with wood, make sure that all steps are under a protective visor. This minimizes the ingress of moisture on them and keeps them in a presentable form longer. 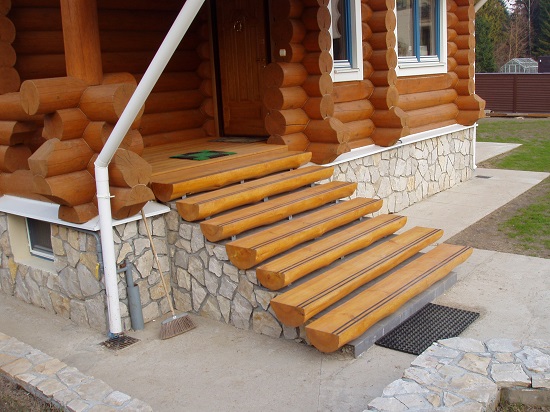
How to finish the porch with paving slabs?
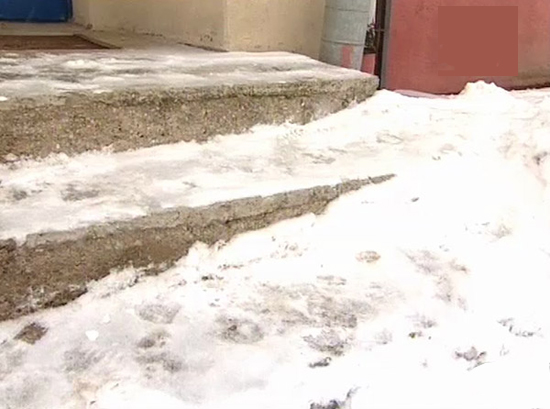
Finishing the porch with paving slabs is done from top to bottom. The first stage of this process is the removal of irregularities and roughness from the concrete surface of the steps. This is necessary in order to facing material lay down on them as evenly as possible.
Do-it-yourself styling technology is quite simple, but requires certain rules to be followed. To do this, you will need a building level, a small rubber mallet, a spatula and a container for mortar.
Paving slabs on the porch should be laid gradually, one after the other. It is attached to the surface on a cement-sand mortar. A small part of the concrete is applied to the step, tiles are laid on top of it. Its position is checked by a level and, if necessary, trimmed with a blow of a mallet.
The remains of the mortar should be removed from the surface before you lay a new tile on it. 
What to consider when choosing a material for facing the porch?
Before tiling your porch, you should know what it is important to pay attention to when choosing it. The cladding of the stairs should ideally match the exterior of the house. If the facade is finished with rusticated stone or clinker, then it is also better to finish the porch with clinker tiles. If a exterior finish the house is made with siding, then in combination with it, porcelain stoneware steps will look great.
The shape of the porch must also be taken into account when choosing materials for cladding. For a standard staircase, any material will do. A round porch is better to veneer with paving slabs. It is much easier to divide it into fragments of a certain shape.
Before tiling your porch, be sure to also take into account the maximum possible load on the steps. Not every wooden staircase can withstand cement-sand screed and tiles, while for a metal or reinforced concrete porch, this finishing option is not a problem. 
What are the advantages of facing steps with clinker tiles?
The first and main advantage of finishing the steps of the porch with clinker tiles is high quality of this material. The clinker is wear-resistant, resistant to mechanical damage and is not afraid of exposure to moisture and sudden changes in temperature.
With this material you can make a beautiful porch in country house. Clinker tiles are considered an environmentally friendly material, since they do not contain harmful impurities.
Laying clinker tiles on the steps of the porch is also safe, since the rough surface of the material prevents possible injury in slippery weather. 
What should be considered when finishing the porch with porcelain stoneware?
Porcelain stoneware for the porch on the street should be selected rough. It costs more than conventional material with a smooth surface. If you don’t have the funds to purchase special tiles for street decoration, but you still want to clad the porch with porcelain stoneware, you can apply large risks to its surface using an engraver.
You can also increase the safety of a porcelain stoneware porch with anti-slip rubber strips. They are screwed to the edges of the steps.
It is also important to know how to properly clad the porch with porcelain stoneware. It depends on this how long the facing material will last. Under it there should not be any voids and drops. 
How are tiles laid on a semicircular porch?
Before laying tiles on the porch in the form of a semicircle, it should be noted that according to SNiP, the angle of inclination of the march should be no more than 45-50 degrees. The ideal option would be steps with an angle of about 30-37 degrees.
Laying tiles on the porch with your own hands in this case should be done in stages. First you need to measure one row and cut off right amount material. Remember that it is advisable to soak the tiles in water for about an hour before cutting.
Each tile should be level checked. If the ends of the porch are high, they should first be reinforced with a reinforcing mesh for better adhesion of the material to the surface. 
Is it possible to overlay steps with natural stone
On sale today there is a facing material made of natural stone. Before laying tiles on the steps, you should carefully consider the choice of stone. For houses, granite is more suitable. A porch lined with such tiles will look great in combination with a brick or stone facade.
For houses with columns and other architectural elements, perfect to use marble tiles. It is expensive, but in terms of presentability it surpasses other materials.
Working with natural stone is very labor intensive. The video below demonstrates how to tile granite steps.
What are the benefits of granite for patio cladding?
Laying granite on the porch and railing has been practiced for a long time. A clear confirmation of this is St. Petersburg, where almost the entire Nevsky Prospekt is lined with this stone. Professional builders recommend using granite tiles due to its durability and strength.
Rarely are porch steps left with bare concrete, without any cladding. Most often, such steps are made for outbuildings and auxiliary premises, in places where it makes little sense to take care of the appearance of the stairs. The main entrance to the house, and especially the steps, must be tiled. Firstly, the appearance of the porch will change dramatically for the better. Secondly, it is relatively easy to do the work on laying tiles with your own hands. If, of course, time permits, and there is a necessary tool.
What you need for facing the steps of the porch
You can safely proceed with the laying of facing tiles with your own hands, if all of the following conditions are met:
- The concrete base of the porch stands at least a month after the completion of the last pouring work;
- The weather forecast promises at least three to four days of warm weather without rain or strong winds;
- Facing tiles, primer and tile adhesive, mounting crosses and insulating compound were selected and purchased;
- Assembled the necessary set of tools and fixtures;
If you have experience with tiles, then you can immediately start measuring entrance platform and a flight of stairs, if this is the first experience of facing the porch and steps with your own hands, it's worth watching the video, this will give a good idea of the progress of the work.
The most difficult thing about tiling steps is the correct marking and cutting of standard squares of material to the required size and shape.
Advice! In the first experiments, cutting tiles to size with your own hands, you can use templates from fiberboard or plywood
Sometimes it is useful to devote a couple of hours to acquiring the skills of cutting on manual fixture or on an electric machine.

By cutting a couple of tiles into ribbons, you will be much more confident in cutting off even thin beveled edges of a non-standard shape. Learning how to properly cut tiles to size is not difficult, but requires some practice on the tool, as in the video
A good cutting option is proposed on a semi-stationary device in the video
If the master who has taken up the work does not know how to properly cut off the edge of the tile, most likely there will be no sense from him.
Facing round steps is fundamentally no different from working with a straight march, except for the rather difficult process of cutting and laying rounded edges within the radius of the steps of the porch.

Properly clad the steps of the porch
The correct facing of the steps largely depends on the quality of the preparation of the concrete base for laying and sticking the tile material. We will perform the work in the following sequence:
- We measure the plane of the entrance platform and steps for the presence of a slope for water flow towards the descent. If the angle is negative or zero, you will have to cut off a part of the step threshold with a grinder so that a surface slope of at least 2 o is formed.
- We disassemble the purchased tile, lay it out on the surface of the steps, adjust it in size. Experts advise taking material from each pack in turn;
- We clean the surface of the steps from dust, prime with Cerezit or any similar deep penetration primer;
- We lay the facing of the steps on the glue. After the horizontal rows have dried, lay out the vertical surface on the riser.
- We clean the seams between the tiles and fill them with grout.
After a couple of days, the glue will gain strength, and you can proceed to laying the cladding on the top platform of the porch.
Subtleties of surface preparation for cladding
It rarely happens that casting a concrete base for laying facing stone will give the necessary slope and accurate surface geometry. Often, due to a violation of the technology of pouring concrete, a lot of defects form on the horizontal, and especially on the vertical surface of the steps. They do not interfere with walking on concrete steps, but are highly undesirable when gluing the cladding. In addition, the edge of the step cannot always boast of a perfectly even geometry.
Therefore, the first step in the preparation process is to restore the geometry of the steps using the laid reinforcing mesh with a small cell. The mesh is stretched as much as possible along the edges and fixed with dowels to concrete. Without rebar, any cement mortar repair layer will not hold up and will flake off the concrete. After filling the grid with a layer of mortar, its thickness above the reinforcement must be at least 10 mm. After 7-8 hours, it is necessary to perform a "binding on the ground" on still damp concrete. Using the level and the rule, we clean the edge so that the desired slope and the most even surface are provided in the transverse direction.
Cutting and trimming tiles
About how much you guessed with the size of the tiles for facing the steps, it will become clear only at the stage of dry laying out the material on concrete surface march. The most beautiful cladding is obtained when the size of the porch step, the width of its tread is clearly coordinated with the size of the future cladding.
But more often everything happens exactly the opposite - first a flight of stairs is cast, with approximately suitable sizes of steps, and then the size of the tile for facing is feverishly selected.
Important! At right choice the size of the cladding, the number of scraps is reduced by 70-80%.
When cutting and fitting tiles, two rules are taken into account:
- If the width of the step tread requires laying one whole tile and a piece of cladding, pieces should not be used less than a third of the width of the dimensions. You should not use pieces 5-10 cm wide. Firstly, they pretty much spoil the appearance of a beautiful cladding, and secondly, under load, small-sized fragments break off first.
- It is important to maintain gaps between facing tiles in size not less than 8-10 mm. In addition, at corner joints and at the junction of the cladding to the basement wall, it is recommended to fill the seams with polyurethane or silicone sealant.
How the cladding is laid on the step
In fact, laying cladding on a step is no different from sticking tiles on a wall. The facing material fitted in a dry layout is removed from the steps and laid out side by side in the same order. The concrete plane is primed with a roller or brush. If you are using a well-known brand of clinker cladding, you will probably be offered to buy branded primer and glue. It will be somewhat more expensive, but the grip and strength of the lining on "native" materials is usually better.
In this matter, it is difficult to give an objective assessment of the quality of a particular brand of glue, use the option that has been tested by practice. Many craftsmen individually, from their own experience, select their version of the cheapest and most durable glue for cladding.
In warm weather, after three to four hours, you can begin facing. Count on a row of ten tiles that will take you at least three hours of work. The adhesive mixture is applied with a comb spatula to the reverse side of the tile and laid on the concrete. Sometimes, to simplify work, at a distance of 20-25 mm from the riser, a nylon thread is pulled, along which the lining is pre-aligned in height and horizon. The laid stone is lightly pressed against the surface of the concrete and with the back of the hand is gently pushed on the adhesive layer, thereby leveling its position and improving adhesion.
Each tile laid is leveled twice. The first time immediately after laying with a small building level in two directions. The second time using a long meter level, after laying the cladding of four or five elements. In this case, the parallelism of the surface of the stacked elements is checked and the absence of distortions in the stacked row is checked.
When laying, the tile is installed with a minimum of 3-4 cm above the vertical surface of the riser. This is done to form an overhang of the edge of the step above the vertical, most often the cladding already has a thickened edge, or kapinos, formed at the factory, therefore, when orienting the material, it is important to correctly align the overhangs in one straight line.
In addition, when determining the size of the kapinos extension, it is necessary to take into account the thickness of the adhesive layer and the lining itself, installed on the risers. As a result, after gluing the entire step facing, the overhang of the kapinos should be at least 1.5-2 cm, which will ensure the normal flow of water drop by drop or stream, it doesn’t matter, the main thing is without flowing onto the surface of the riser.
Conclusion
The durability of any porch cladding depends primarily on the quality of the seams. Moreover, the more and more often the seams are overwritten, especially at the corner places, the less moisture will get under the horizontal facing of the steps. If water leaves vertical surfaces more often under the action of gravity, then moisture is removed extremely poorly under the horizontal surface of the cladding. The more it gets there, the higher the risk of separation in the first severe frost.
A porch with a height of more than 15-20 centimeters requires the creation of a porch with steps to avoid injury when entering the house. Nowadays, buildings with high foundations, with a basement or basement are being built more and more often, so the need to create a porch appears in almost every area with a house. We have already considered the issue, now let's talk about how to make a porch facing with steps using tiles.
The construction of a concrete porch or staircase always ends with them. These objects are constantly exposed to increased stress, as well as to moisture and other weather phenomena, so the facing material must be really durable.
Laying tiles on stairs is a common practice. This allows not only to give the structure an attractive appearance, but also to extend its service life. However, in order to achieve such a result, it is important not to make a mistake with the type of tile and to lay it in accordance with the technology.
Porch tiled
Tile selection
According to the characteristics of the tile is different: the material of manufacture, thickness, strength, size of each element matter. When finishing stairs, the following types of tiles are used:
- Ceramic. Practical and durable material, suitable for lining the platform and steps of the porch. The stores have a huge selection of colors and textures of such tiles, but for the porch it is better to choose neutral colors that are close to the natural colors of the stone.
- Sidewalk. Due to the high hygroscopicity paving slabs on the stairs is not the best option, especially if the areas for finishing are constantly exposed to moisture. Such a tile will quickly fail, especially if it is on the street, and not under a canopy.
- Clinker. Resistant to wear, UV and sub-zero temperatures. Along with ceramic tiles, it is a common facing material. However, there are disadvantages - fragility and high cost. Such tiles are made only at a few factories in Russia, which explains its high cost.
- Porcelain tile. It is versatile and suitable for interior and exterior decoration of buildings. Distinctive features- resistance to abrasion, strength, frost resistance and the ability to imitate other materials.
 Clinker tiles for steps
 A specific type of product is chosen not only by its appearance, but also based on the frequency of movement on the stairs. The higher this indicator, the stronger the coating should be. For example, in places with high traffic (hotels, shops), material with a 4th or 5th level of wear resistance is laid, and less stable options are suitable for stairs of a private house. It matters where the tile will be laid: indoors or outdoors, as the outdoor material has its own requirements.
Tiles for street stairs should have the following characteristics:
- resistance to aggressive environment, rain, wind or snow;
- resistance to sunlight and frost, to temperature changes;
- anti-slip rough surface;
- low water absorption coefficient.
The size of the tile is selected so that it does not have to be cut. This will simplify the creation of the drawing and eliminate unnecessary material residues.
However, if it becomes necessary to cut the facing material, two points must be taken into account:
- lay the cut tile in the place where it would be the least conspicuous;
- for cutting, use a tool suitable for the tile you have chosen, taking into account its thickness and material of manufacture, read more about this process in.
Advice! For a durable finish, choose ceramic tiles with rounded corners and edges. Such products evenly distribute the load acting on their surface.
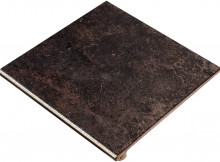
For steps, it is better to take material with a corrugated or matte surface, it is less slippery and will prevent possible injuries. It is desirable that the tile be two-component - it has a special cornice that covers the edge of the steps. The edges of the steps wear out faster than other surfaces of the stairs, and this design feature allows you to quickly make repairs by replacing the cornices separately from the rest of the coating. It will also save you money.
When choosing a tile in a store, ask the seller to open several packages to assess the quality and consistency of the color you chose initially in the entire array of purchased material. If a cracked tile is found on the spot, the seller can say that this happened due to improper transportation.
Styling nuances
Facing the steps is similar to installing the material on the walls and floor, but still laying tiles on the stairs has some peculiarities. The main mistake that should be avoided is the protrusion of the edge of the end tile above the edges of the material lying on the horizontal surface of the steps. To prevent chipping and falling off of the cladding, the tile is laid horizontally so that it covers the end of the step.
 Proper tiling
 Another nuance is the sequence of installation. The material is mounted, starting from the top of the stairs and, gradually, go down. At the same time, remember that ordinary glue is not suitable for external stairs, the tiles should be laid on an adhesive solution designed to work outside the building. After completion of the work, the seams are additionally treated with an elastic sealant, which increases the durability of the coating. It is also important to consider that work should be carried out at an air temperature above zero, otherwise there will be difficulties with premature solidification of the solution.
Important! Before starting laying, it is worth laying out the tiles on the surface of the stairs without mortar and assess how the material looks, whether there are empty spaces and uneven joints. When calculating the amount required material it is better to take a reserve of about 10% for a shortage or rejection.
Tiling steps
 Surface priming
 Laying ceramic (or any other) tiles on the stairs begins with surface preparation. If the steps are uneven, then for smoothing it will be necessary to apply a large amount of glue, and this is undesirable.
If noticeable flaws are identified, alignment should be carried out by beacons. They are recommended to be made from a mixture of sand and tile adhesive. Standard gypsum or metal beacons will not work here, because after the screed has hardened, they sometimes protrude above the surface.
Also, the steps need to be prepared for the screed. Putting the solution directly on the concrete is not worth it - this will not give high-quality adhesion of materials. Therefore, a wire frame is attached to the surface of the steps with the help of tin clamps and an adhesive mixture and a cement-sand mortar are laid on top of it in layers, having previously installed beacons for control.
The next day, the screed is checked and, if the beacons rise above the surface, they are “drowned” back. After the mortar has hardened, the screed is ground with a special grater, cleaned of debris and dust particles, then the steps are coated with a primer. Now you can proceed to laying the material.
We distribute the tile adhesive on the steps
In order for the tile to lay flat on the steps of the stairs, you need to properly distribute the glue. It is applied with a notched trowel, allowing the solution to be spread in a thin, even layer. Before this, the concrete surface is wiped with a sponge moistened with water to improve the adhesion of materials. The consistency of the adhesive is also important. For best results, follow the cooking instructions on the packaging.
 Adhesive distribution
 The finished adhesive mixture is taken with the corner of a spatula and applied to the steps with semicircular strokes, using the flat side of the trowel. The final touch is the “combing” of the adhesive layer with the teeth of the spatula.
Advice! To prevent the glue from drying out prematurely, the composition is applied to small sections of the stairs and immediately proceed to laying the tiles.
If the surface of the stair steps has been previously leveled, and the glue is mixed to the desired consistency and distributed in a thin layer, the cladding will not require significant effort, and the coating will turn out to be perfectly even. You can check the horizontal position using the building level.
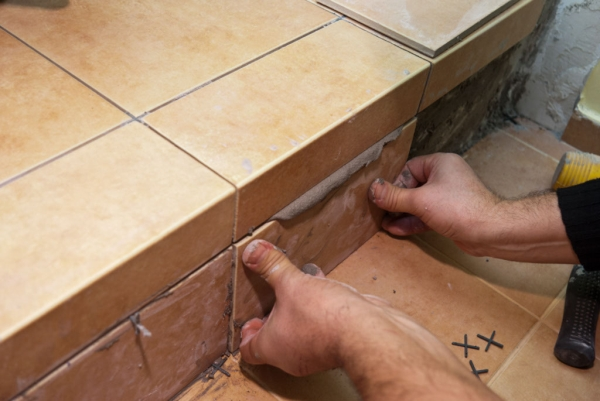
Installing tile dividers
After applying the adhesive composition, it is the turn of laying the cladding. To make its rows impeccably even, before laying the tiles on the steps, you will need to install separators - cruciform plastic or metal parts, which regulate the size and angle of the gaps between the tiles. You can buy them at any hardware store.
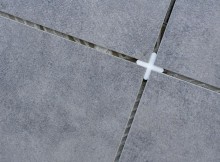 Tile divider
 After laying out the rows and installing separators between the tiles, remove excess glue with a damp sponge before it has time to harden, and then lightly tap the surface with a rubber mallet, fixing the material in the desired position. At the same time, the evenness of the masonry is checked with a building level, and the correct arrangement of the resulting rows is checked with the help of a square.
First, the horizontal surface of the steps is faced, starting with the corner tile, and then the vertical part - the riser. When working with a riser, the use of separators is also recommended.
The described steps are repeated until the entire coating is laid. So, to make a tile staircase neat, follow these rules:
- Regularly check the evenness of the masonry rows with a level.
- Do not use tiles with cracks or defects.
- Install separators in all rows.
In addition, on the second day after the completion of laying, the tiles for the stairs on the street must be processed at the joints. For this, between facing panels apply a grout that contrasts or matches the color of the material. Such treatment will increase the moisture and frost resistance of the coating.
Laying tiles on stairs
The last stage of work is the finishing of the landing. This process is similar to laying the material on the steps, the only difficulty may be the shape of the site. If you have this space has complex bends, you should lay it out with tiles without mortar in advance and outline the places where the material will have to be cut.
 Staircase of non-standard shape
 Important! For cutting tiles, it is permissible to use only a tool designed for this purpose - a tile cutter. If you don’t have one, you don’t have to buy it, it will be more profitable to borrow or rent.
Having finished facing, it remains only to wait until the coating securely grabs the surface of the steps. Usually solidification adhesive solution takes from one to three days, after which the ladder is suitable for use. As you can see, laying tiles on the stairs is not difficult, although it will require some effort and some effort, but the result is a durable and neat staircase, it's worth it.


